Trendy Tuesday – Retro People

Trendy Tuesday – Retro People
by Katherine Elliot

What is old is new again, how often that is the case for trends!   Today we”ll feature some oldies but goodies, retro people.  In reference to retro people, let”s clarify that I”m classifying these images as folks that appear to be from the stylish 1940″s, “50”s or “60”s.   Setting aside some likely differences of opinion on this categorization, images that look like they are from an older era seem more suitably considered “vintage.”  The terms retro and vintage may be used interchangeably, but there seems to be a different style to what is “retro.”  It”s also a good excuse to highlight older vintage images at a later time!   😉

Take a look at these very cool crafts and cards using some fantastic retro people…

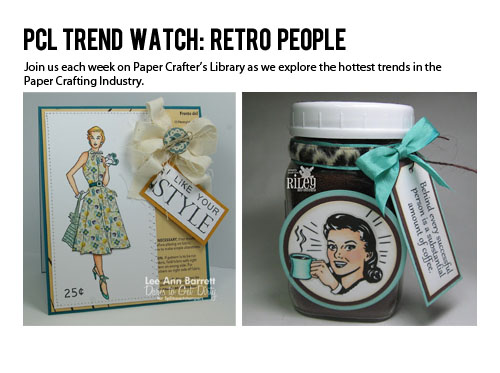
Card by Lee Ann Barrett, image source Splitcoast Stampers

Lee Ann”s card above used Style Girl from Pink Persimmon Stamps that is reminiscent of those lovely drawn models found on classic dress patterns.  Oh how I wish that I”d kept a few of those patterns that my great aunt and grandmother had in their mass of sewing supplies, if for no other reason but to re-purpose the packaging into a great card like Lee Ann”s!

Big Banner with Rosettes Clear Polymer Stamp Sets

Style Girl stamp set from Pink Persimmon Stamps

Card and tag by Denise January featuring Hello Vintage Girl, image source Pink Persimmon Stamps

Another top retro people pick are graphic stamps from Riley & Company. Riley & Co. came out with a complete line of .  Riley”s retro people stamps look great paired with some of the hilarious sentiment stamps also offered by their company.  Here are just a few of examples I found from some of the talented Riley & Company designers…

marriageCard by Cindy Haffner, image source Cindy Haffner”s Corner

Riley-Judge-wmTrue Friends card by Frances Byrne, image source Stamp Owl”s Studio

Coffee gift project by Laurie Clout, image source On the Bright Side

 Keep on smiling with a few more images and witty sentiments to match offered on these fun retro people stamp sets from Unity Stamp Company.  Card by Angie Blom featuring stamp set Gossip, Hot Flashes & Crazy, image source Unity Stamp Company

Tenia Nelson”s card below featuring a trendy retro guy from a Unity Stamp set had me grinning instantly.  I swear someone from my office must have modeled for this stamp!
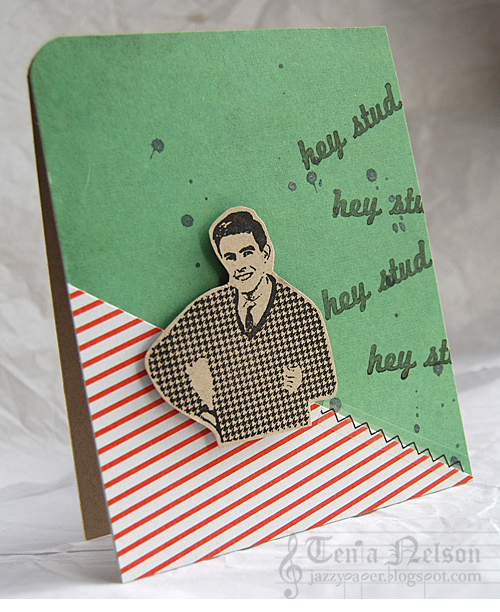
Card by Tenia Nelson featuring Hey Stud stamp from Unity Stamp Company, image source Jazzy Paper Designs

 Bombshell Stamps also offers some classic pin up style images that you can dress up (or down) to custom fit for your project. 
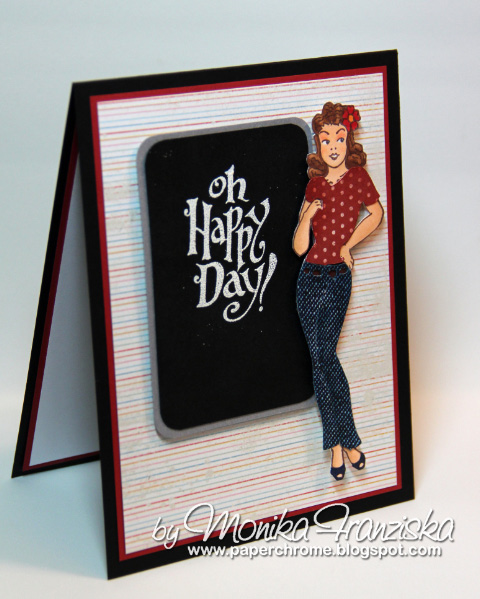
Card by Monika Franziska featuring Bombshell Angel, image source Bombshell Stamps blog

Send yourself back to the future to the golden age of the space race or to the era of classic tv sci-fi with this fun image from Hero Arts…

Card by Noelle McAdams, image source Paper & Ice

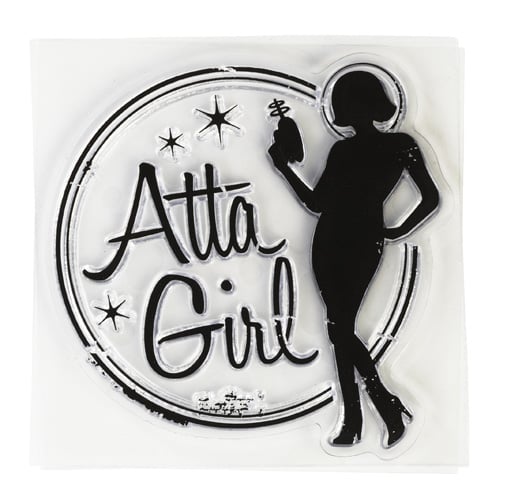
Hero Arts Atta Girl stamp, image source Scrapbook.com

Find ready to cut or paste images with retro people elements, patterned paper, and stickers in designs from October Afternoon and Melissa Frances.Product # DC-148October Afternoon Sidewalks Miscellany We Have a Winner! CardCard by Vivian Masket featuring Midway Collection paper, image source October Afternoon blog

October Afternoon Photo Booth paper, from Midway Collection, image source Two Peas in a Bucket

Digital images with a retro vibe can also be found to be used on your projects.  Check out the amazing library of images from sources like the Graphics Fairy and other digital scrapbook design on-line stores.

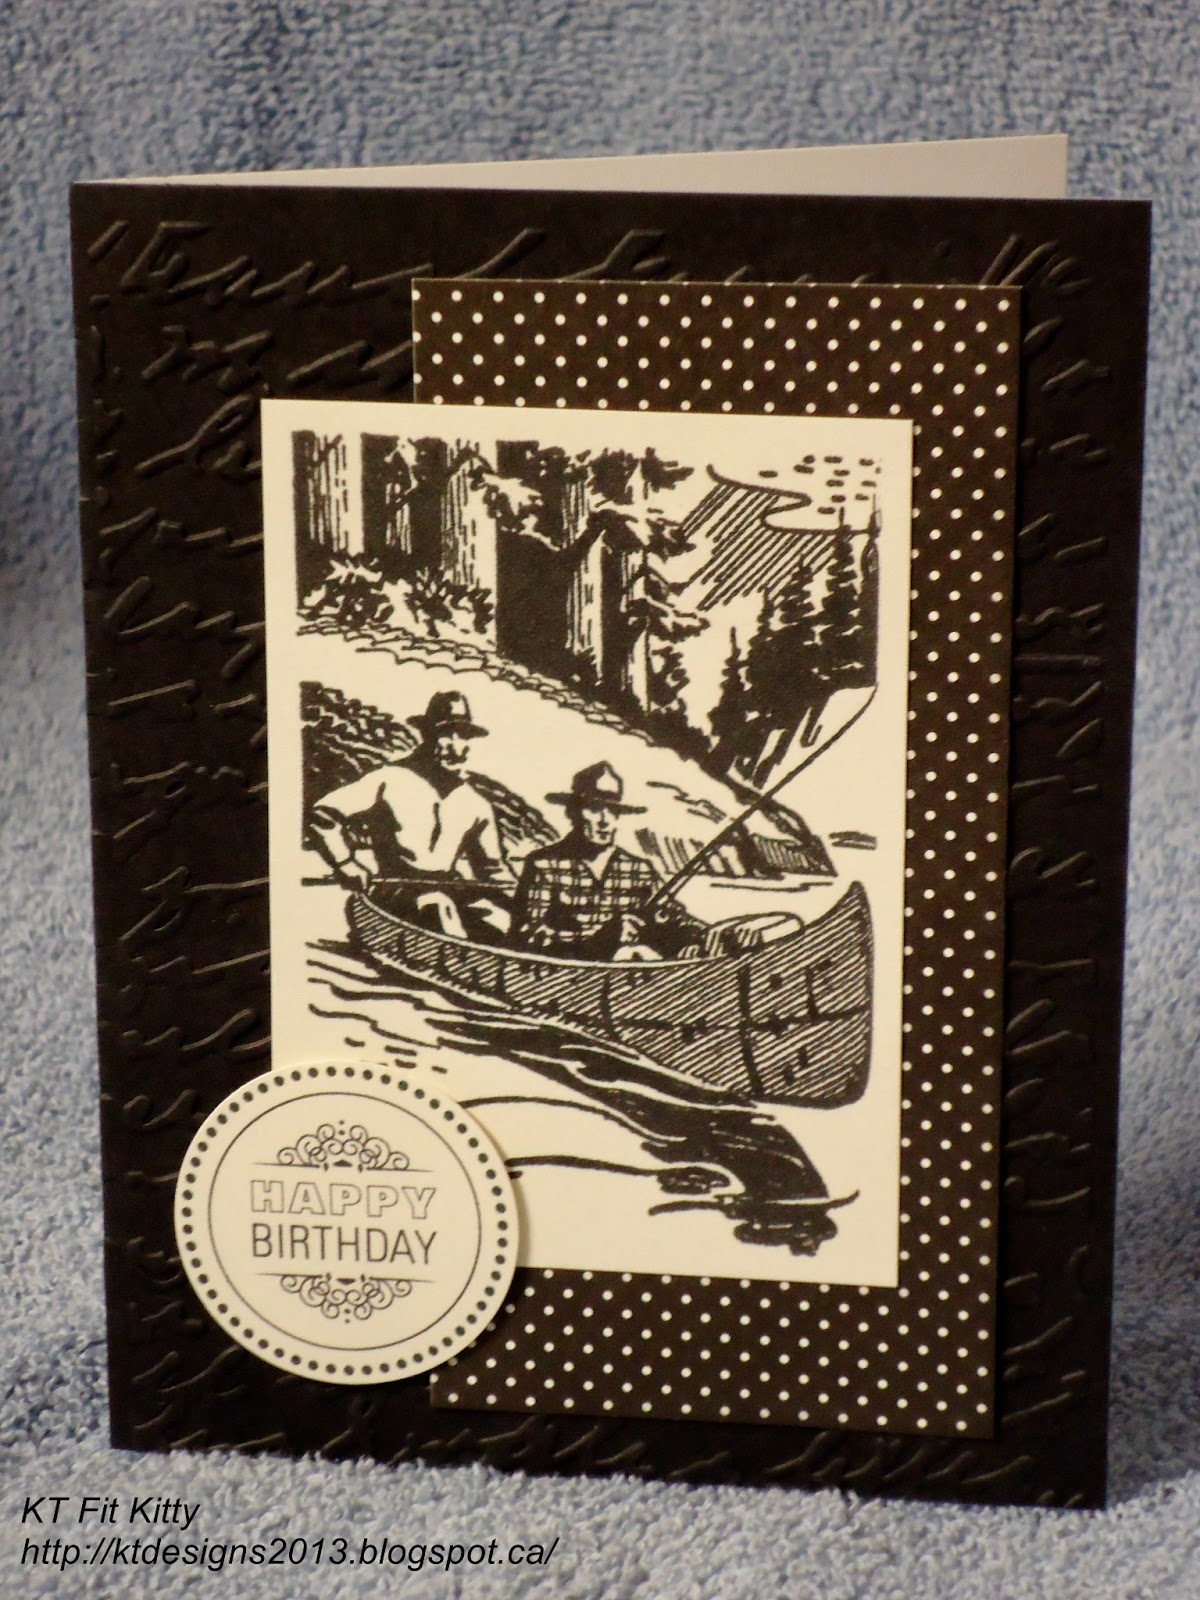
Card by Fit Kitty featuring image from the Graphics Fairy, image source KT Designs

 Retro Summer Images Beach
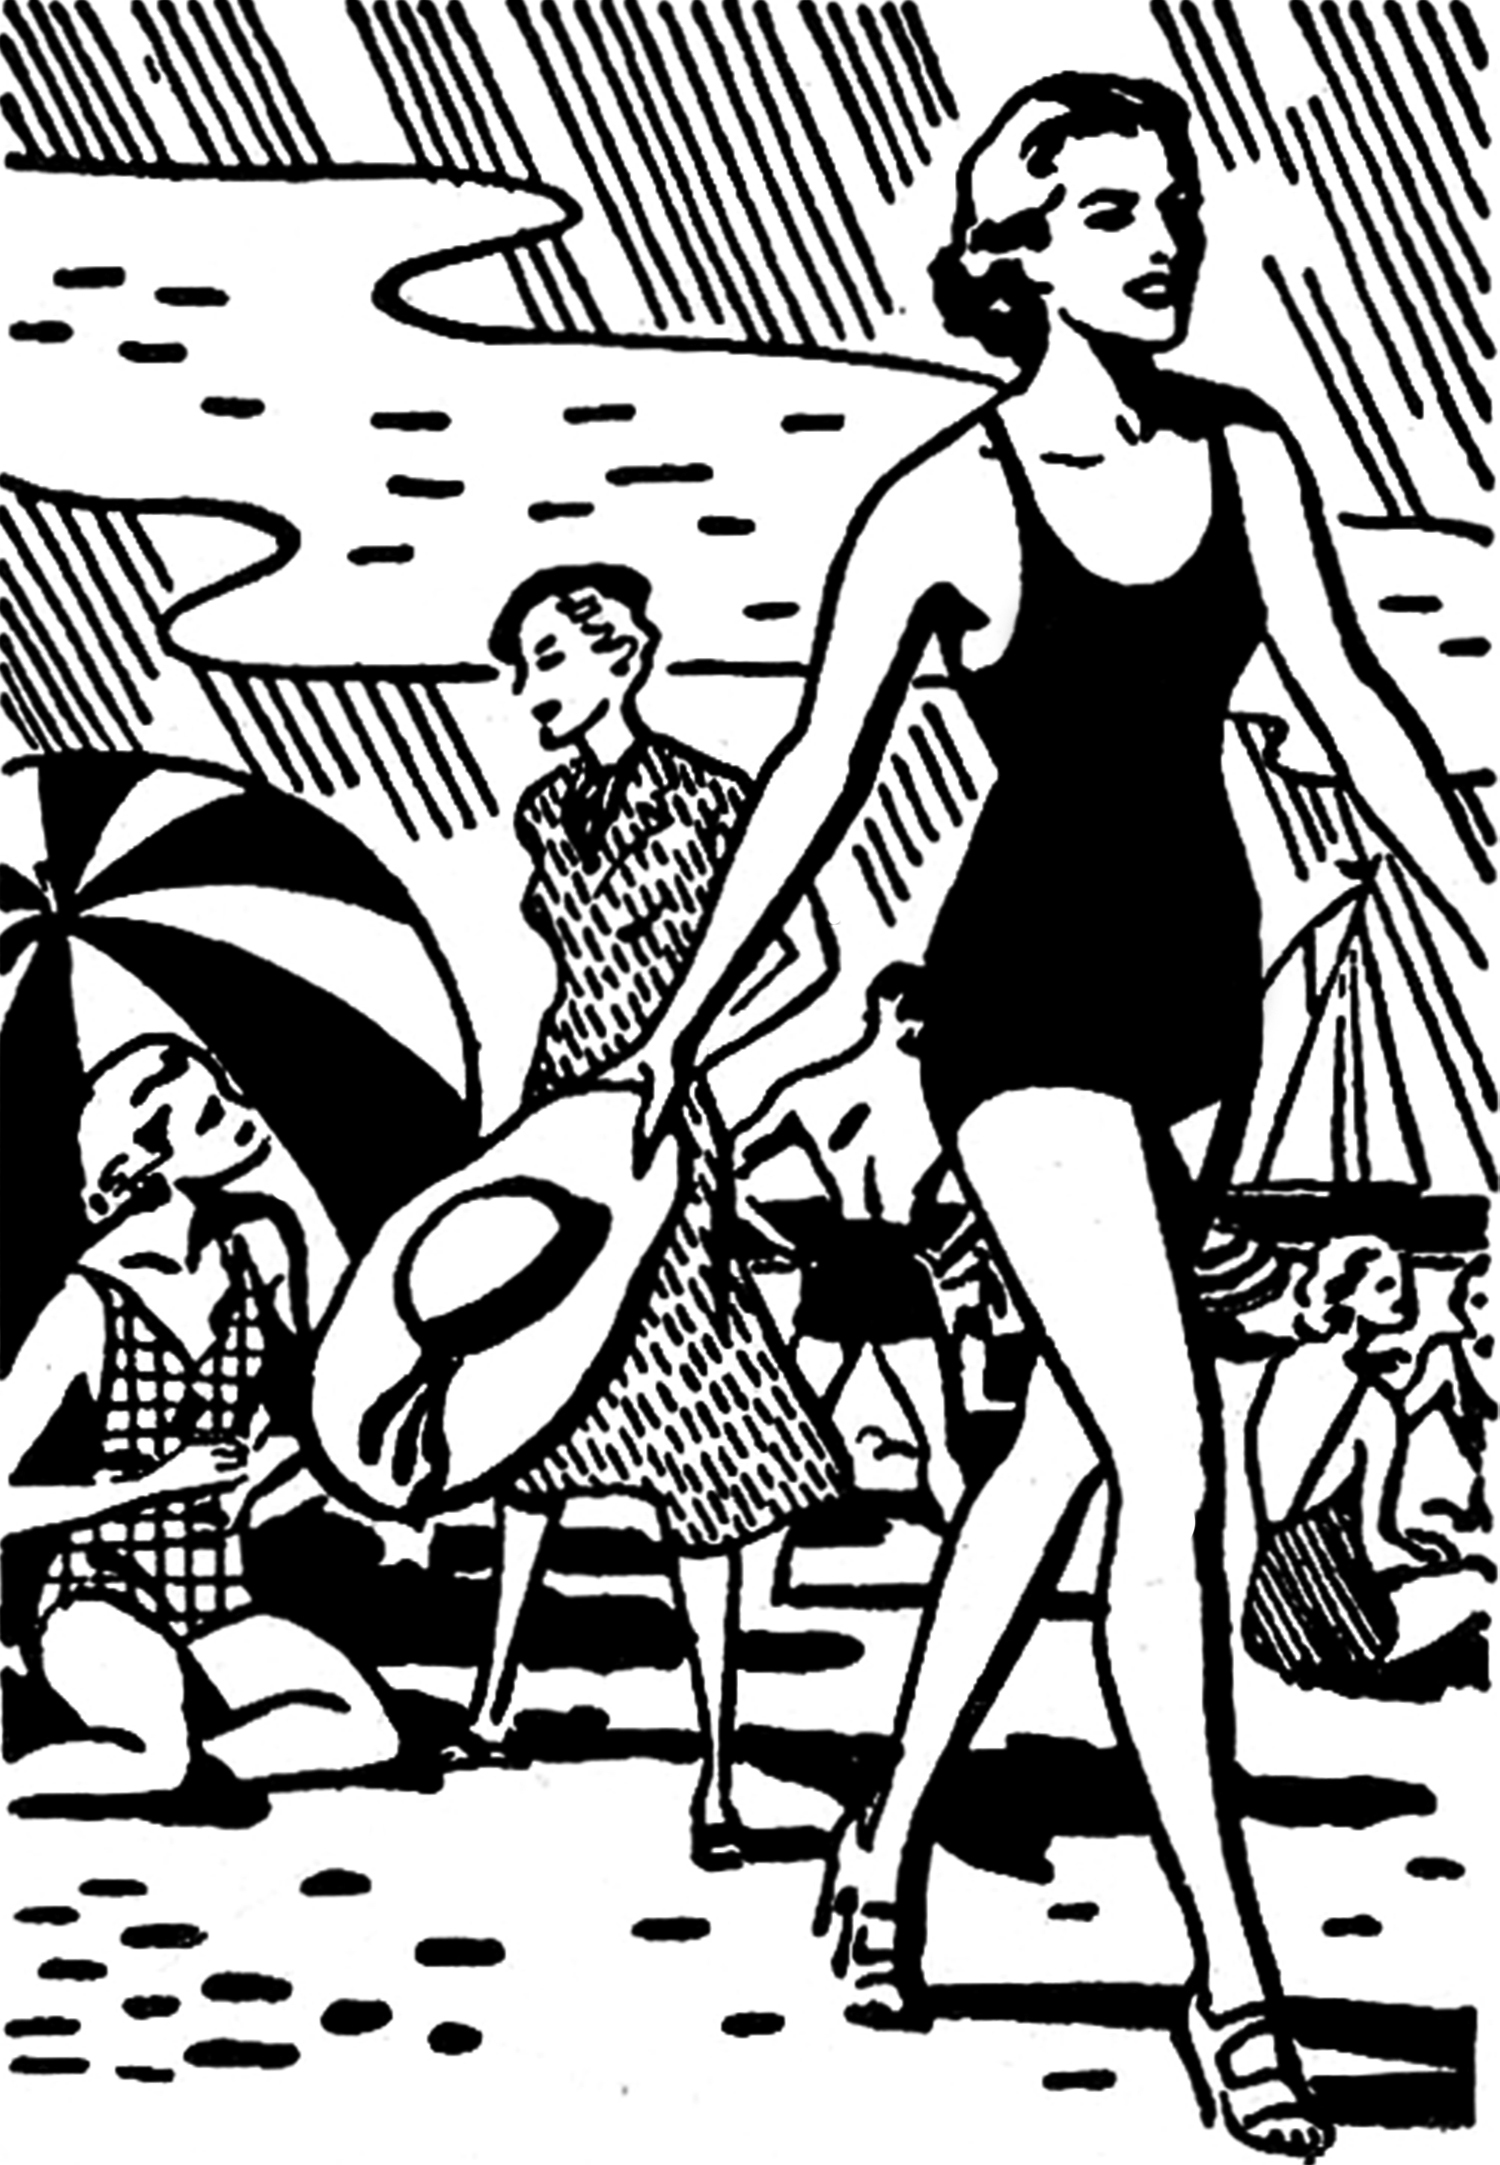
Retro image from the Graphics Fairy

Digital kits combine the best of both worlds, old images you can use with the latest computer graphics and combine with some of the latest crafty designs and trends.

Digital art journal page by Susan McCarley, image source Two Peas in a Bucket Gallery

Burnt Effects
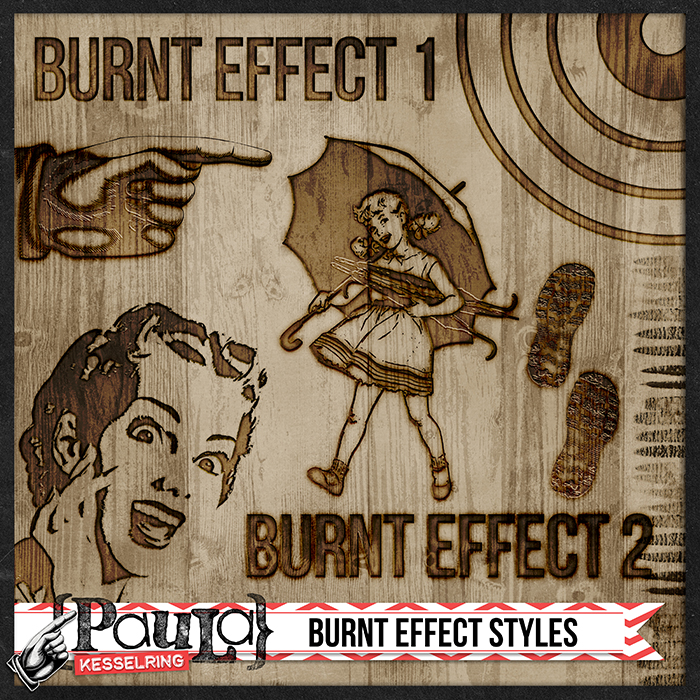
Paula Kesselring Burnt Effect Styles Digital Kit

Fluent in Sarcasm [Elements & Ephemera]Fluent in Sarcasm Digital Kit from Captivated Visions, image source Studio Girls Scrapbook Graphics

Digital scrapbook page featuring Captivated Visions” Fluent in Sarcasm kit, image Studio Girls Scrapbook Graphics

The combination of old and new images lets your project take on a timeless quality.  Go classy and elegant or bold and modern using these images and you”re sure to have one very trendy creation.  Hope you smiled your way through reading this post featuring all the talented designs and witticisms.  Keep smiling and happy crafting, everyone!

Free Project of the Week: “Walk in the Rain” Art Journal Page – 08 30 2013

This week for the Paper Crafter’s Library free video tutorial we decided to do something a little different.  Instead of our usual card tutorials Andrea decided to create an art journal page featuring the Trickling Water stamp by Designs by Ryn – our Featured Company this week.

You can read about the story behind this art journal page HERE & follow Andrea and see more of her mixed media work on her blog: www.andreawalford.com.

WalkInTheRain-09062013-550W

Download the pdf supply list here

If you enjoyed today’s project, you enjoy our style of teaching and would like to learn even more we encourage you to check out the benefits of becoming a Paper Crafter’s Library member.

Have a great weekend!

Featured Artist: Iwona Palamountain

Today on the Paper Crafter’s Library blog, we’re continuing our weekly featured artist spotlight whereby each week we spotlight a different artist/designer in the paper crafting & mixed media world and introduce you to their fabulous work.

Today we’re thrilled to welcome back a past featured artist – Iwona Palamountain.  We are so happy to be featuring her again.

Before we show you Iwona’s fabulous projects she has to share with us today, let’s get to know her a little bit more…

palamountainheadshot

Hello, my name is Iwona Palamountain, but I’m also known in the blogland by my nickname Chupa. I live near Melbourne, Australia but I’m a born & bred Pole. I’ve got a loving and supportive husband, and two amazing daughters.

I’ve been paper crafting actively since I was pregnant with my first girl and although my hobby keeps me busy, I never looked back since. I love experimenting with many styles, and enjoy the versatility that both stamps and patterned papers give me. I dabble mostly in card-making, with an occasional 3-D project or scrapbooking layout. I aim to continuously learn and evolve as a paper crafter, and bring my readers a constant reason  to keep coming back for more 🙂

I’m thrilled to be the Featured Designer here in Paper Crafters Library, and I hope you’ll enjoy what I prepared for you today.

Featured Projects

Hello! I’m happy to be back with more inspiration today, thanks for having me again 🙂

If you’re an avid card maker and stamper like myself, you’ve probably got in your stash quite a few stamp sets with coordinating dies. It seems to be a to-do thing these days, with the companies doing their very best not to force us to fussy cut any more. I don’t mind fussy cutting but I do LOVE my dies!

The trouble is, with the convenience come additional costs and being a budget-conscious crafter I like my dies to be versatile. I enjoy discovering the many ways I can combine them with stamps or use separately. Today I’d like to show you some of the simple tricks for making the most of a single stamp + die set, and my choice fell on Lovely Layers from Papertrey Ink.

829iwaonaintro photo

Let’s start with the traditional approach. Cut and stamp, assemble. Boring? Not at all. Think of all the colour combinations, have you tried them all? Think about using different media for cutting: felt, cork, fabric. How about some vellum?

829iwonatraditional die cutting

On the photo above, the card on the left is what we’d normally do with this set. For the card on the right, I decided to make a flower by cutting many shapes from vellum and stacking them together. I added dimension to both, using foam tape to attach the layers in the first example, and gently curling the ‘petals’ upwards on the other card.

829iwonaclose up 1 829iwonaclose up 2

Now, let’s talk negative space. That’s what’s left when you take your die cut out of the piece of paper.

829Iwonanegative die cutting

On the card to the left, I firstly cut the shape in white cardstock and disposed of the inside, then cut again from a piece of patterned paper and saved the shape only. Then I pieced them together and secured at the back so that they fit snugly. This technique is often addressed as “inset”.

829iwonaclose up 3

The card to the right emphasizes the negative space, by raising the panel from the card’s surface and giving the focal point dimension. To achieve such effect, you need to stick the panel with the negative cut to the card front, using removable adhesive, and stamp right through it. Then you’re free to mount it up and add extra touches like an additional die cut shapes.

829iwonaclose up 4

Lastly, let’s not forget that the stamps alone can give stunning results. I love creating backgrounds with smaller stamps and try out different colour combos while doing so.

829iwonastamping 829iwonaclose up 5

Thanks for joining me today! I hope I encouraged you to try and make the most of your stash 🙂

Supply list:

Traditional Die Cutting / Thank You card
Cardstock: textured white
Paper: Presh “Noted” Record & Adorbs “Loved” Devoted paper from Cut & Paste collection (My Mind’s Eye)
Stamps: Lovely Layers (with matching dies), Think Big Favorites #5 (Papertrey Ink)
Ink: Memento Elderberry, Lilac Posies (Tsukineko), Bubble Gum, Tide Pool (Hero Arts)
Tools: foam squares, double-sided tape, Grand Calibur die cutting machine

Vellum / Thanks card
Cardstock: textured white, light grey, vellum (Papertrey Ink)
Paper: Flair “Forever” Always paper from Cut & Paste collection (My Mind’s Eye)
Sstamps: Lovely Layers (with matching dies) (Papertrey Ink)
I
nk: Memento Gray Flannel (Tsukineko)
E
mbellishments: brad (Stampin’ Up!), lace trim
Tools: double-sided tape, glue dots, Grand Calibur die cutting machine

Inset / A Big Thank You card
C
ardstock: textured white
Paper: Flair “Forever” Splendor paper from Cut & Paste collection (My Mind’s Eye)
Stamps: Lovely Layers (with matching dies), A Big Thank You (Papertrey Ink)
Ink: Memento Elderberry (Tsukineko)
Embellishments: twine, flair button
Tools: double-sided tape, glue dots, mounting tape, Grand Calibur die cutting machine

Negative Die Cutting / So Grateful For You card
Cardstock: textured white
Paper: Flair “Small” Point, Charm “Carefree” Mellow paper from Cut & Paste collection (My Mind’s Eye)
Stamps: Lovely Layers (with matching dies) (Papertrey Ink)
Ink: Memento Elderberry, Lilac Posies (Tsukineko), Bubble Gum, Tide Pool (Hero Arts)
Embellishments: baker’s twine
Tools: double-sided tape, glue dots, mounting tape, Grand Calibur die cutting machine

Stamping / I’m So Grateful For You card
Cardstock: textured white
Stamps: Lovely Layers, Signature Greetings (Papertrey Ink)
Ink: Plum Pudding, Lavender Moon (Papertrey Ink), Lake House (WPlus9)

We hope you have enjoyed today’s projects courtesy of Iwona Palamountain. Also, be sure to stop by Iwona’s blog to see even more of her beautiful work (and let her know we sent you).


Featured Company: Designs by Ryn

DesignsByRyn-250pxToday we are excited to welcome back this week’s Featured Company, Designs by Ryn and to share some beautiful creations using her products.  

Here at Paper Crafter’s Library we love to create and share products from many different companies from around the globe.  Designs by Ryn offers some fabulous exclusive designs with an array of styles.  So no matter what your taste, you are sure to find something you love within her images.

And, we also have a give-a-way for you!! Two lucky winners will receive the prize package below consisting of three of her images. More information on the give-away is at the end of the post.
828Ryngiveaway

Before we show you a selection of Ryn’s projects, here is a little more about Ryn:

Designs by Ryn is the manifestation of a dream that began a long time ago for me. I have always wanted to create a lifestyle that fits me and what I want out of my life. One that would allow me to create during working hours and give me the flexibility in my schedule to travel. For the longest time I wondered if something was wrong with me for not fitting into the multitude of ready made jobs that I tried. It wasn’t until around three years ago when I attended a seminar at the Small Business Centre in London, Ontario that I realized that many of those misfit traits of mine were what they called entrepreneurial.

I was hooked by that idea but had absolutely no working knowledge of business. The next few months I laboured over a business plan and submitted it to a program offered at the Centre – the Self Employment Benefit Program. To my absolute joy I was accepted!

I was given a foundation of business related workshops and an advisor – Gord Evans- who went over and above to help me with my project – a business that offered high quality rubber stamp designs based on my artwork. The beginnings of Designs by Ryn.

In order to have the flexibility of location that I wanted my store would need to be online. Never mind that I was almost completely technologically challenged and didn’t own a computer! The library computers just wouldn’t cut it so I walked into Staples and many questions later walked out with a laptop, printer and… A boyfriend?! Lol. That’s another story all together 😉

He became my “tech department” helping with the many issues that came with designing, printing and cutting my catalogues and product cards from home. I also bought a scroll saw – another foreign piece of machinery to me – determined to hand cut the stamps once mounted on cling cushion. The first day I was in tears having destroyed at least half of my attempts but in time I learned.

More About Designs by Ryn
The website went through several transformations which took a lot of time (and patience) and forced me to focus on marketing to stores and at festivals. It wasn’t until this year that at long last it became a fully functioning store.

Since it’s release I am thrilled to see my stamps getting international exposure. I have built a Design Team of three wonderfully kind and talented ladies who consistently do great samples with the stamps. Shirley Deatcher – Canada, Eileen Godwin – UK and Miranda Dagenaars – Netherlands. I also encourage customers to share their work and find myself constantly delighted by what people make. The most inspiring part is that this business is allowing me to connect in a meaningful way to other creative individuals around the world.

That dream of mine is slowly getting there. I am endlessly thankful to all of the people along the way who have purchased my stamps and supported me on this journey.

I am now taking my business for a “walkabout” and am off traveling in South America with a backpack of art supplies. I’ve left my inventory and shipping with a wonderful and trusted lady – Phylis – back home who will handle orders while I am away. I hope to focus my energy on creating new and inspiring stamp designs. My next challenge is blogging about my creations. More to come 😉

Below you can see a sample of projects created by a variety of designers using Ryn’s Designs.
828ryndesigns1 828ryndesigns2 828ryndesigns3 828ryndesigns4 828ryndesigns5 828ryndesigns6 828ryndesigns7 828ryndesigns8 828ryndesigns9 828ryndesigns10 828ryndesigns11 828ryndesigns12

 Here are some of the members of the Designs by Ryn design team who have supplied the images above:

Eileen: www.eileenscraftyzone.blogspot.co.uk
Anja: www.artefaktotum.blogspot.de
Wendy: www.wendyscardcraft.blogspot.co.uk
Shirley: www.papercreationsbyshirley.blogspot.com
Karin: www.karins-cardsandthings.blogspot.com
Miranda: www.miracleartinspirations.blogspot.com

Once again, to enter to win leave a comment here on our blog but make sure you take a minute to stop by Ryn’s blog because she is also giving away a fantastic prize pack. The winners will be announced next week on each blog. You can visit her blog here: http://www.designsbyryn.blogspot.com/

We hope you have enjoyed today’s projects. We want to extend a sincere thank you to Ryn Tanaka for sharing her beautiful images and inspiration with us. And don’t forget to enter to win one of the great prize packs from Designs by Ryn. Leave a comment on this post about one of the projects Ryn showcased and don’t forget to visit her blog or her Facebook page here and leave a comment there as well. Be sure to tell her Paper Crafter’s Library sent you. Winners will be announced next week!


Trendy Tuesday – Black & White

Trendy Tuesday – Black & White
by Katherine Elliot

 Ever find yourself in a color slump, or looking for something different to get your crafty mojo running?   You may find today’s projects a great way to recharge your creative batteries. Today’s post features the simplicity and elegance of black and white paper craft projects.   Black and white cards are classy and elegant when used for weddings, anniversaries and other serious occasions.  Take a look at some of these talented artists’ beautiful creations…

Card by Vanessa Menhorn,  featuring stamp from Hero Arts, image source Wings of a Butterfly

An addition of bling pulls it all together to make a stand out black and white card for a happy couple.  Andrea Ewen is the queen of elegant cards in my book and shows off how well just a few well placed baubles amp up the elegance factor in her b/w card shown here…

Card by Andrea Ewen, image source Ewen Style

No bling on hand?  Layered patterns and some subtle embossing can also add some dimension and style to your project.

Wedding card sizedCard by Linda Auclair, image source Ruby Rock-It

Weddings and anniversaries are not the only occasions suited to a classy black and white design.  A black and white color scheme is completely seasonless and appropriate for every day occasions, too.

Card by Andrea Ewen, image source Ewen Style

Keep things clean and simple with a repeated pattern or use a bold, large image as shown in the next projects featuring stamps from Stampin’ Up!

Thank You card by Maureen Merritt, featuring Mosaic Madness stamp from Stampin’ Up!, image source Mama Mo Stamps

Stampin Up Swallowtail ButterflySwallowtail Butterflycard by Brandy Cox, featuring stamps from Stampin’ Up!, image source Brandy’s Cards

A black and white design can also be used in combination with hot trends using sketch patterns,  geometric designs, and chalkboard styles.  These styles are appropriate for a wide variety of occasions, too.  I love how these next cards show off some modern, trendy patterns with more images from Stampin’ Up!  Check ’em out…

Gorgeous Grunge, Lots of Thanks, Stampin' Up!, Brian KingThank You card by Brian King, featuring Gorgeous Grunge stamp set from Stampin’ Up!, image source Stamp with Brian

 Stampin’ Up! Thinlits swing card by Laurie Zoellmer, image source Laurie’s Stamping Spot

Chalkboard styles are still hot and what could be better for a totally on trend black and white project.  Throw on a few enamel dots and you have one amazing project, as the talented Debby Hughes displays in her projects shown here…

limedoodleSSScardkit5Card by Debby Hughes, image source Lime Doodle Design

Chalkboard sentiment and embellishments combined with trendy arrows and patterns look terrific with a timeless black and white photo, perfect for your next scrapbook layout.  Tarrah McLean shows off her talented design on her page shared here…

Scrapbook page by Tarrah McLean, image source Live to Scrap Scrap to Live

A little splash of color on your project can enhance your design without a lot of fuss or difficult color combo decision making.  It would also be a great way to use a color that can be outside of your comfort zone.  See what just a hint of color adds to these next projects that still have roots in a basic black and white design…

Card by Penny Ward, image source Penny Ward Ink

Halloween card by Jessica Witty, image source Witticisms

limedoodleSSSCschoolCard by Debby Hughes, image source Lime Doodle Design

Card by Annette Allen, featuring stamps from Mama Elephant, image source My Clever Creations

Combine a neutral color with black and white for another option to keep your color scheme neutral and not at all fussy.  The options are endless with this color combination as well, be it elegant or casual and modern.

Card by Teresa Kline, image source Paperie Blooms

Oh yeah, and chalkboard style, it looks great with this color combo, too!

Good DayCard by Linda McClain, featuring stamps from My Favorite Things, image source Catered Crop

Black and White Stamping techniques from Hero Arts

I loved discovering the projects for today’s post as it reminds me that this is a fantastic way to get back to basics, and perfect for any beginning paper crafter.  Grab some crisp, white cardstock, your favorite basic black ink and see how simple it can be to make a card that is perfect for any occasion.  Keep it simple and have fun.  Happy crafting, everyone!

Free Project of the Week: Joy Ride – 08 23 2013

Welcome to this week’s Free Project of the Week.

Today’s project is this Joy Ride card, featuring Stampin’ Up!’s Rev Up The Fun stamp set. Rather than ink up the car image using two markers, Andrea used the paper piecing technique to achieve the two different colors.  This would make a great anytime male card!

JoyRide-08232013-550W

Download the pdf handout here

If you enjoyed today’s project, you enjoy our style of teaching and would like to learn even more I encourage you to check out the benefits of becoming a Paper Crafter’s Library member.

Have a great weekend!

Featured Artist: Carmi Cimicata

Today on the Paper Crafter’s Library blog, we’re continuing our weekly featured artist spotlight whereby each week we spotlight a different artist/designer in the paper crafting & mixed media world and introduce you to their fabulous work.

Today we’re thrilled to welcome – Carmi Cimicata

Before we show you Carmi’s fabulous project, let’s get to know her a little bit more…

822carmibeltheadshotCarmi Cimicata is a full time artist who specializes in resin crafts, sewing, jewelry-making and wearable art pieces.  Her personal posts can be seen on www.carmi.ca.

She is the author and designer of Resin Crafts Blog where you can learn how to use resin in numerous ways. Tips and techniques are posted daily here:  http://www.resincrafts.blogspot.ca

She is a social media designer who writes several on-line posts a day demonstrating different craft and jewelry making techniques for her clients.  She is also creating and appearing in how-to videos for one of these companies.

Carmi is also a regular craft presenter on the Shopping Channel in Canada.  Carmi has a degree in Fashion from Ryerson University.

Permanent Photo Memories With Resin

 822carmibeltcompleted

This belt features a western themed buckle I created myself with a little digital scanning, Jewelry Resin and some rhinestone chain.  It has been a great year for western themed fashion and turquoise.  While it never really goes out of style in the country music world, it was nice to see it cross over into mainstream fashion.  So, I knew I wanted a western themed belt buckle and I had in my own photo album a picture that was just perfect for me to work with.
822carmibelt1This is me at the Grand Canyon.  I am certain that this picture was taken before I descended the canyon on a mule….the after picture would have shown a completely different person.  Even though this was many years ago, I can still remember thinking “how am I going to stay on a mule for six hours….the Brady Bunch didn’t mention that when they did this trip…..”  The photo was starting to fade so I scanned it into my computer and printed a clean black and while copy on my laser printer.

822carmibelt2Laser copies are toner based, so they are almost waterproof, which is ideal for this type of resin project work.  As you can see here I glued my paper copy into my belt buckle blank and applied decoupage medium over the surface to seal my paper image in place.  The best way to seal paper is by applying three separate coats of a clear drying medium to it, allowing each layer to completely dry before applying the next.

822carmibelt3I used mod-podge as my sealer and since it is also glue I used it to make sure my rhinestones were set in place as well.

822carmibelt4

Then I mixed a batch of Envirotex Jewelry Resin following the manufacturer’s instructions.  When you pour resin into a bezel you will see some bubbles.  Many dissipate on their own or you can pass a flame over the surface to pop the bubbles quicker.

822carmibelt5

My buckle has an attachment on the back so I needed to prop it up so my resin would cure completely flat.  As you can see in this picture there are no bubbles, but I usually watch my project for 30 minutes because air can get trapped around the rhinestone chain and little bubbles can be released later.  I like to pop those tiny bubbles as I see them.
822carmibelt6a

Forty eight hours of cure time later and my belt buckle is ready to wear.  My photo is now permanently encased in resin and my memory of this day is guaranteed when I take one look at this image.

We hope you have enjoyed today’s projects courtesy of Carmi Camicata. Also, be sure to stop by Carmi’s blog to see even more of her beautiful work (and let her know we sent you).


Winner of Dina Wakely Book Give-Away

I’d like to extend a HUGE thank you to Dina Wakely and her generous offer to sponsor a give-away for her book: Art Journal Freedom….. 

815dinawakelybook

And now, the moment you’ve all been waiting for…….the winner is……Barbara Moore!

822dinawakelywinner

Congratulations Barbara!! Be sure to email us at customerservice@papercrafterslibrary.com to claim your prize. Please be sure to put “Dina Wakely Winner” in the subject line of the email, and then in the email itself, be sure to include your full mailing address and phone number.

For those of you that didn’t win, and would like to get a copy of her book, click here to order.  Also, each week on PCL we feature a different company, and each of those companies generously sponsors a prize. Join us next week when we feature another great artist and company.

andreasiggypcl

Featured Company: Graphic 45


We are happy to bring you this week’s Featured Company: Graphic 45. We are so excited to be featuring them regularly on Paper Crafter’s Library. And this week we have a Bohemian Bazaar prize package give-away.
821PapercraftersG45prize
Get more details on this prize package at the end of the post.

For those of you unfamiliar with Graphic 45 , we’d like to take a minute to re-introduce them to you.

Graphic 45 is an award-winning scrapbook and paper crafting company­— owned and operated by a mother and her two daughters.

Diane Schultz—Designer and CEO (aka mother)

“I’m passionate about being creative and eager to make it possible for others to find their creative voice. My background includes stints as a designer for, McCalls, Simplicity, Vogue/ Butterick, Mattel Toy Company and a host of other jobs that each, in some way, led me to what I do now. At 45 I went back to school and got my degree in graphic design— I named the company to celebrate that achievement.”

Aimee Filimoehala —Director of Operations

“I wear a lot of hats and love it that way. Business, marketing, operations, etc. have made me a pro at multitasking (aka juggling‑figuratively and literally). When we launched Graphic 45 just three years ago we had no idea what was in store, working together as a family has been an amazing journey that we all feel so grateful to be apart of.”

Charee Filimoehala —Director of Customer Service and Design Team Coordinator

“I joined the team a little over three years ago and haven’t looked back…what a life-changing experience this has been. I love working with and around creative people and products (not to mention I like my co-workers quite a bit). I spend my days working with our friendly stores and talented design team…the occasional trip to a workshop or tradeshow pretty nice too.”

Together we create vintage inspired crafting products that capture the flamboyant style of the 1920’s and 30’s – with vibrant color, irresistible texture and imaginative design to create products with decades-old appeal that’s both fresh and familiar. Let our products inspire your next scrapbook layout, card, album or home decor project.

Graphic 45 Designer Miranda Edney

Our Graphic 45 Guest Designer for this week is Miranda Edney who is part of the 2013 Graphic 45 Design Team.

You can see Miranda’s fabulous project below as well as a video, but first, here is a little more about Miranda:

821mirandaheadshotMy name is Miranda, and I’m from the gorgeous state of Florida. Beach girl at heart! I started scrapbooking about 3 years ago. It started with wanting to make an album to show my honey how much he meant to me, and just blossomed from there. I have spent lots of time searching for my style and what I like the best. I definitely lean to OTP projects and love all things grunge and distressed. But I never like to stay in one area , I like to push myself and try all different styles and types of crafts. I strive to think outside of the box and use techniques that allow me to express myself. I love to share my ideas and create tutorials, in hopes that maybe I can inspire someone else the way I get inspired from others.

It is my absolute honor to be on the Graphic 45 design team, no words convey the level of affection I have for all their products! Being a part of this team is definitely a dream come true for me!

Happy Crafting!

Grahpic 45 Designer Project Steampunk Spells Altered Printers Tray

821alternatemiranda1

Hey everyone, I am so excited to share this Steampunk Spells printers tray that I have altered! These trays are one of my favorite things to create with, and this line just made it super fun and easy! I spent a lot of time on the “shell” of the tray. Painting , masking, spraying, stamping.

821alternatemiranda2
821alternatemiranda5
821alternatemiranda11
821alternatemiranda7

All those fun messy mixed media techinques. All of the cubbies are covered with various sheets of the patterned papers. I did tons of fussy cutting. The imagery in this line just begs to be cut! I also used lots of the coordinating chipboards too, as well as tons of Graphic 45 Metal Staples!

821alternatemiranda8

821alternatemiranda4

821alternatemiranda6821alternatemiranda12It has quite a few interactive elements, which I think just adds to the fun! The frame at the top with “Doctor Dreadful” swivels around to view the cubbie inside. The fence to the left opens up to view the inside as well.

821alternatemiranda3
821alternatemiranda9
821alternatemiranda10

Then the bottom drawer ( made out of wooden rulers) opens up and houses various bones/skull of Mr. Seymour Bones wife. Hehe!

821alternatemiranda13
Hope you like it! Hugs!
Materials Used: 
Graphic 45 Papers:
Steampunk Spells-Steampunk Spells-
Steampunk Spells-Fanciful Floral
Steampunk Spells-Vintage Voyage
Steampunk Spells-Mechanical Marvels
Steampunk Spells-Tick Tock
Steampunk Spells-Pumpkin Power
Steampunk Spells-Totally Wicked
Steampunk Spells-Beware
Steampunk Spells-Witching Hour
Steampunk Spells Flowers
Steampunk Spells Chipboard 1 and 2
 
Graphic 45 Metal Staples:
Ornate Metal Key Holes
Ornate Metal Keys
Geometric Door Plate and Knob
Metal Butterflies
Regular Tag Album ( the binder rings)
Graphic 45 Stamps:
A Ladies Diary ( Script Stamp)
 
Chipboards from Imaginarium Designs
Tim Holtz Clock, Plaquettes, Gears, Metal Corners
Prima/Ingvild Bolme Resins, Metal Gate,
Metal Frame, Zippers, Gears
Shimmerz Paints Sprays, Metal Leafing Mediums,
Distress Inks, Staz On Inks
May Arts Ribbon
Skeleton from Dollar Tree
Assorted Embellishments from my stash

We hope you have enjoyed this fun creation from Miranda. I would also like to extend a warm thank you to Miranda for sharing her fabulous project with us! Please take a minute to stop by Miranda’s Blog and of course the Graphic 45 blog to check out all their amazing creations! And don’t forget to leave a comment below to enter to win the Graphic 45 collection listed above.

Winner of May Arts Give-Away

mayartslogoI’d like to extend a HUGE thank you to May Arts and their guest designer Virginia Fynes for sharing such a wonderful project and for their generous give-away of 2 rolls of ribbon from their collection shown below.

SAMSUNG DIGITAL CAMERA

And now, the moment you’ve all been waiting for…….the winner is……Taunya Butler!

821winner

Congratulations Taunya!! Be sure to email us at customerservice@papercrafterslibrary.com to claim your prize. Please be sure to put “May Arts Winner” in the subject line of the email, and then in the email itself, be sure to include your full mailing address and phone number.

For those of you that didn’t win, each week on PCL we feature a different company, and each of those companies generously sponsors a prize. Join us next week when we feature another great company.

andreasiggypcl