Trendy Tuesday – Going Digital

Trendy Tuesday – Going Digital
by Katherine Elliot

Caution – addiction alert!  Today we’re going to focus on a growing trend and easily addictive craft – digital scrapbooking and designs.  Digital scrapbooks are increasingly popular.  They can easily be shared via electronic media and conveniently preserved on your computer hard drive, removable storage device or disc.  Many paper craft fans recognize this digital crafting outlet  is not a replacement of traditional hardbound scrapbooks or paper craft projects, but used as an extension of the craft and as a tool to expand your design capabilities.  If you’re not familiar with this trend, then sit back and take a look…

You can create digital scrapbook pages using various tools and different computer software, like Adobe Photoshop or other companies’ downloads and on-line tools.  PCL’s very own, Andrea Walford, recently showed off one of her digital scrapbook creations on her blog.  Check the link to Andrea’s blog to read all the tools she used to create this page.  Andrea also plans to offer some digital crafting tutorials, so be sure to bookmark her blog to check for those soon!

Digital Scrapbook Layout: Best Friends

Digital scrapbook page, image source Andrea Walford blog

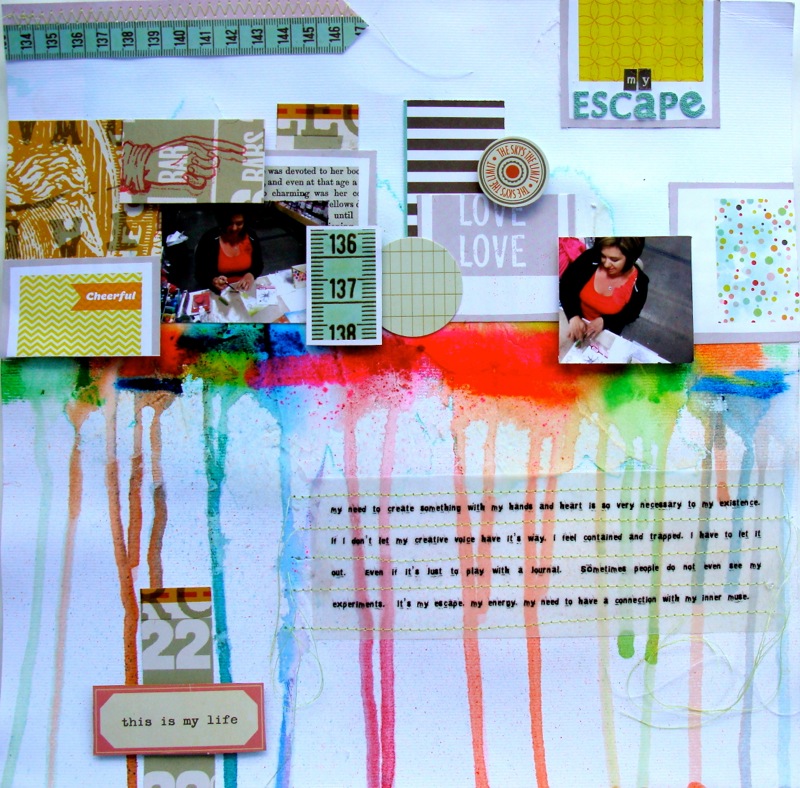
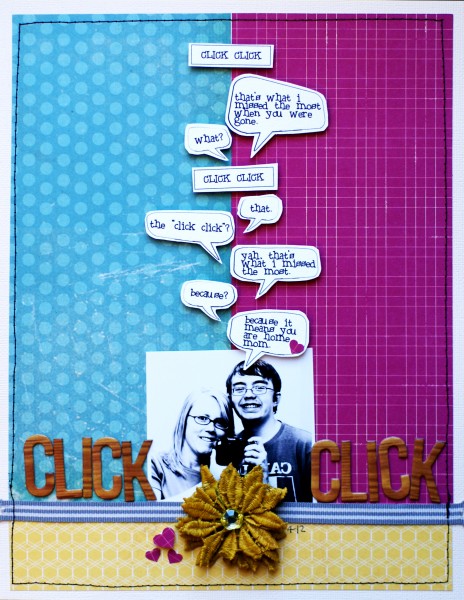
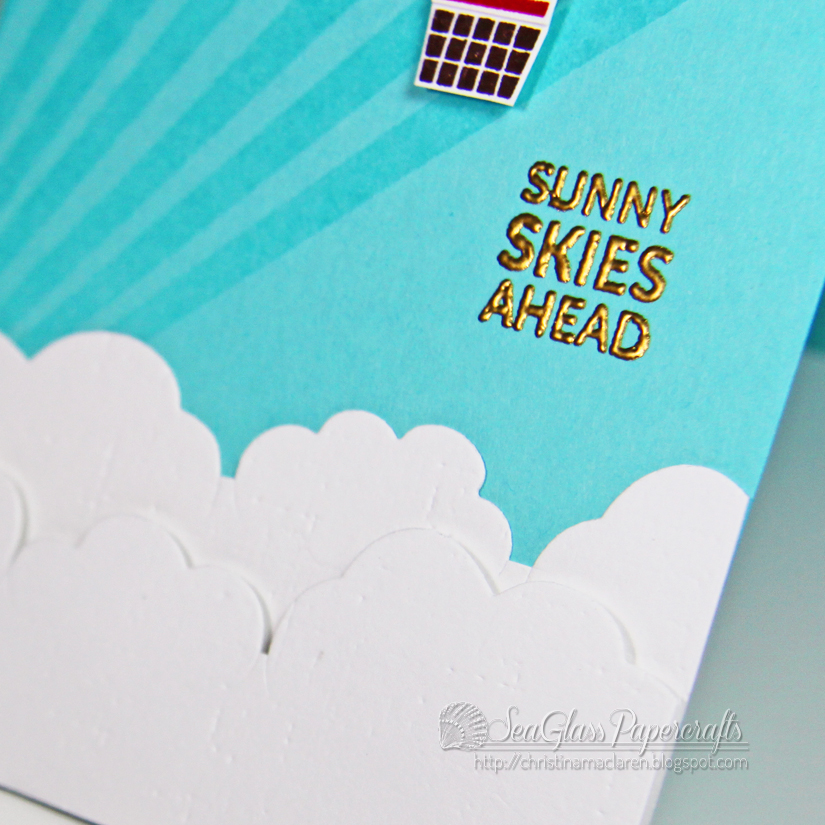
Browse project galleries at sources like Two Peas in a Bucket to view many talented digital crafters’ creations.   Layers of digital papers, borders, embellishments and your own digital photos combine to create beautiful layouts for pages to treasure for years.  You may choose to print your design to add to a traditional bound album or simply post and share digitally on your favorite social networking site.  Kelly Middlebrooks shares a cheerful design with lots of trendy digital touches on her page shown here…

Be True digital scrapbook page by Kelly Middlebrooks, image source Two Peas in a Bucket gallery

A quick internet search for “digital scrapbooking” will show you many sources offer downloads to use in digital design and crafting.   There are stamp brush sets (or digital stamps), digital papers, embellishments, borders, and fonts.  Digital kits offer coordinating items to take the guess work out of combinations, but you’ll probably find it easy to mix and match items to create your own digital style.

Super Ava scrapbook page featuring digital designs by Megan Turnidge, image source Scrap Orchard

Incredible You

Incredible You digital scrapbook kit designed by Megan Turnidge, image source Scrap Orchard


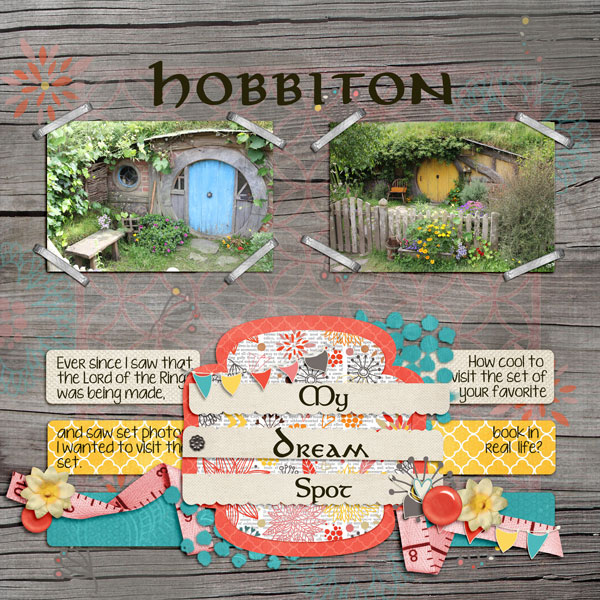
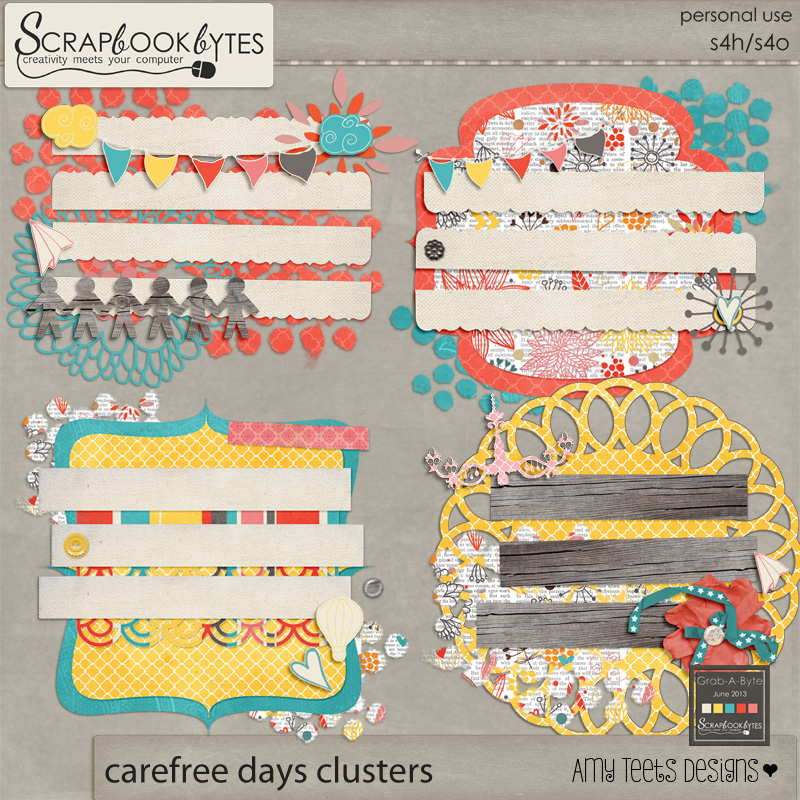
Hobbiton scrapbook page and Carefree Days digital kit, image source Amy Teets Designs blog

Downloads are available for relatively small fees for your private, personal use and some downloads are available for FREE,  just use common sense to download items from sites you trust.

Enhance your digital options even further by expanding your collection of unique fonts.  Check out sites like Kevin & Amanda.com or  Dafont.com to expand your font library.  For more papers, stamps and embellishments, check out A Cherry on Top and Graphics Fairy for some fun, free digital graphics to use in your crafts, too.

Font selections from Kevin&Amanda

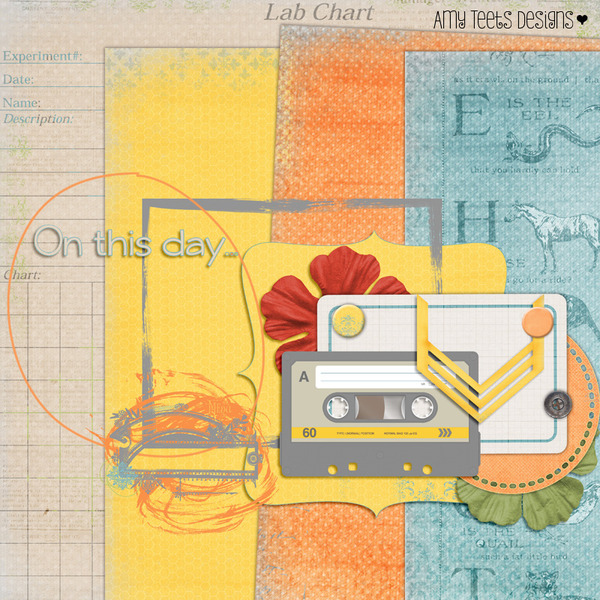
On This Day, mini digital collection, image source A Cherry on Top

You will easily find a variety of sources for “how to” instructions to get started and kits that include templates to help you with your creations.    Check out information from a source like Designer Digitals, or the specific instructions intended for the software or download you plan to use.  For most digital applications, you’ll find no shortage of on-line help to get you started and improve your skills.

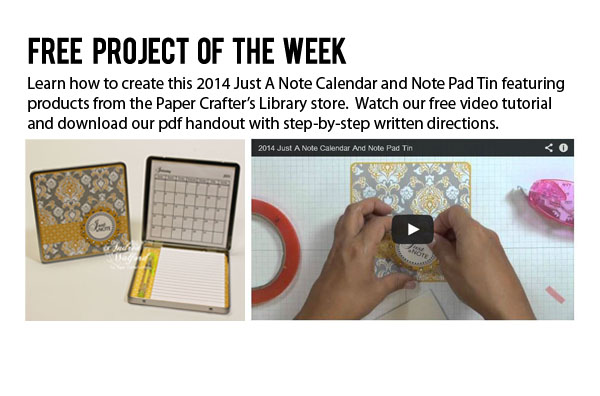
Digital Project Life, lessons and image source from Jessica Sprague.com

Several companies offer software to create custom digital scrapbooks and ready to print projects.    Creative Memories’  Storybook Creator can be used for digital and printed photobooks.

Product Image

Story Book Creator software, image source Creative Memories 

Vintage 5x7 Softcover Digital StoryBook Cover

Photo book cover, image source Project Center Creative Memories

Designs created with these digital tools can be used in a variety of projects such as home decor, calendars, gift tags, cards, recipe books, and more.  My Digital Studio from Stampin’ Up! offers downloads to create designs that coordinate with their company’s line of products.  They, too, offer professional printing services if you wish to have your creation published to  be used as a keepsake for friends and family.  You can also simply download digital stamps and designs to use with any other compatible design tools installed on your computer.  Even My Digital Studio has some freebies!

My Digital Studio scrapbook page, image source My Digital Studio

Bound recipe book using My Digital Studio & professional printing service, image source My Digital Studio.net

Several photo print or photo sharing sites also offer easy click and go options to create custom photobooks, cards and projects.  Check out places like Smilebox and Shutterfly for some pre-designed projects just waiting for your personal touch.

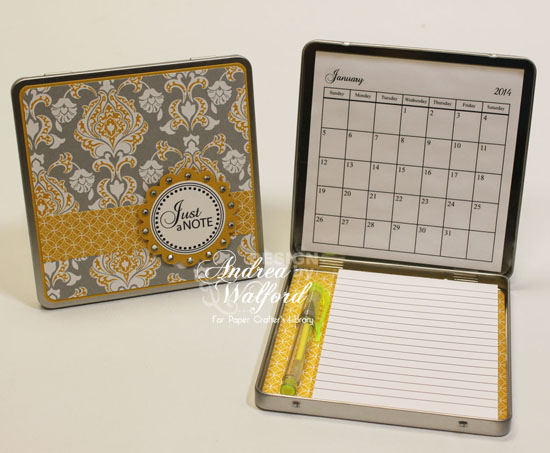
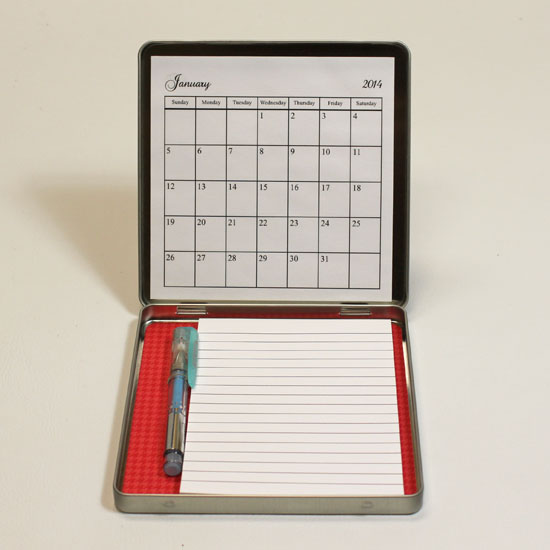
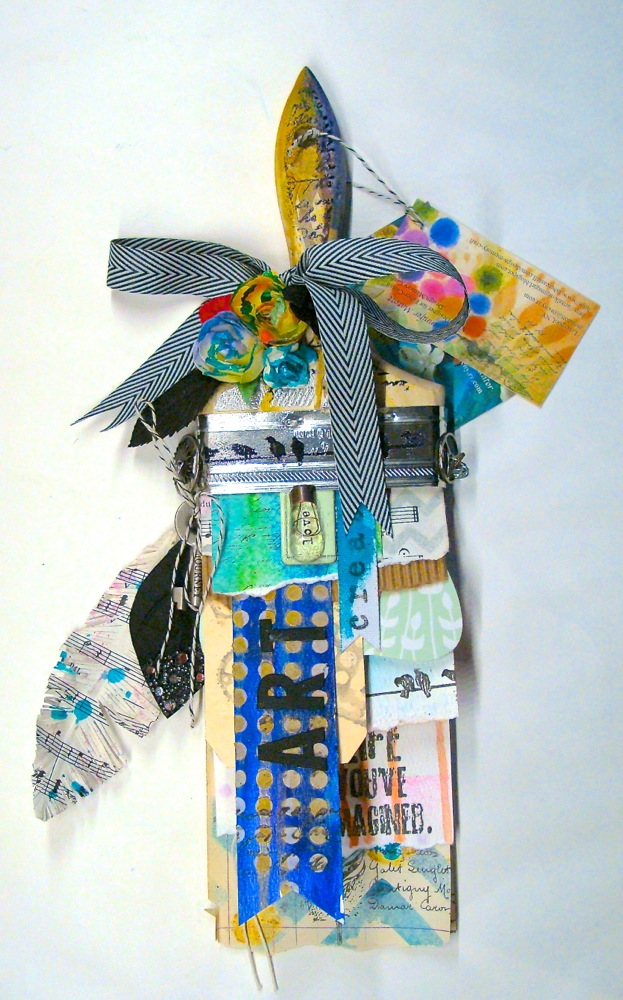
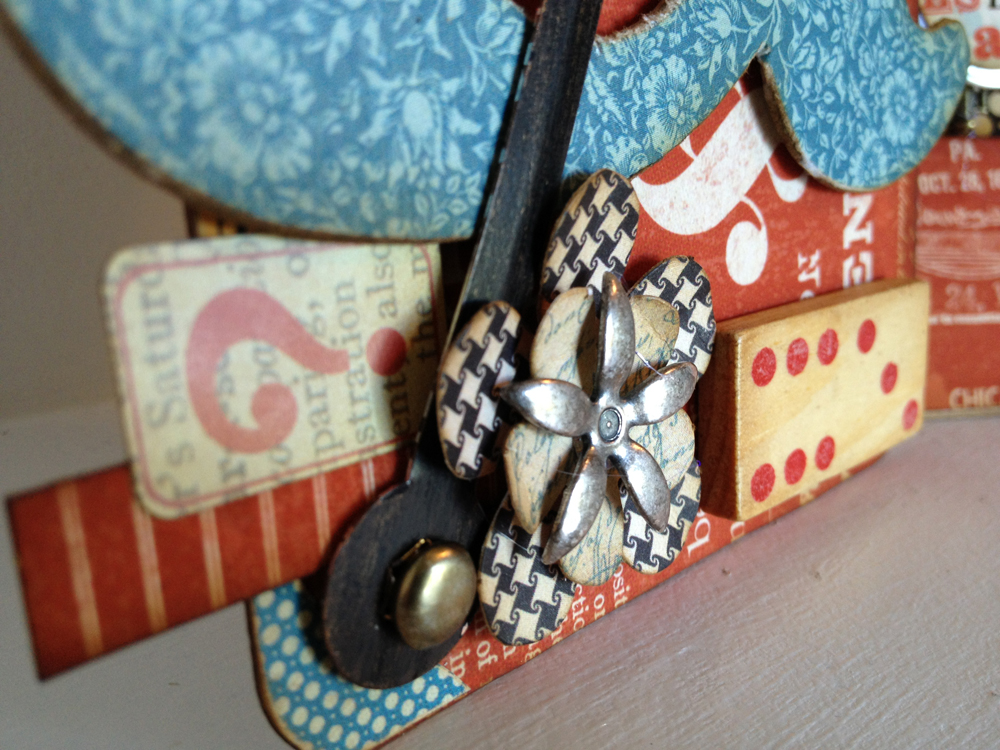
Beyond digital creations and printed projects, you can use digital designs for “hybrid projects.”   Hybrid projects combine digital designs you print to use with your traditional paper craft projects.  Check out this beautiful, vintage style altered box that was created using traditional crafting tools and printed items from a Scrap Girls Digital design kit.

DIY-printable-altered-box-1

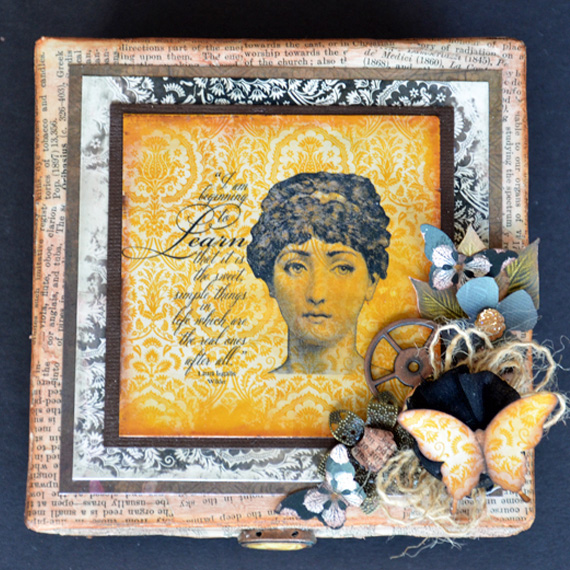
DIY altered box image and tutorial from Scrap Girls blog

Brookside Manor Collection Mini

Brookside Manor Collection, digital collection from Scrap Girls Digital Scrapbooking

Once you start playing with some of the software and design elements for digital crafting, you may find the hours go by very quickly.   As you play quietly on your computer, friends and family may politely ask you “what have you been up to for hours on end?”  With a wide range of digital scrapbooks, photobooks, cards and other projects, you’ll have fun things to show off in no time.  I personally enjoyed creating my own digital album to share with my husband on our anniversary.  I didn’t print the album, I just popped in the SD card where I copied it into the slot on our digital television and showed it off as a slide show on the big screen. Inspired?  I hope so!  Happy digital crafting everyone!

Featured Artist/Designer: Dina Wakely

Today on the Paper Crafter’s Library blog, we’re continuing our weekly featured artist spotlight whereby each week we spotlight a different artist/designer in the paper crafting & mixed media world and introduce you to their fabulous work.

Today we’re thrilled to welcome – Dina Wakely.  Dina is also sponsoring a give-away of her book, Art Journal Freedom.  Read more about the give-away below.

Before we show you Dina’s fabulous project, let’s get to know her a little bit more…

815dinawakelyHi, I’m Dina Wakley. I am a mixed-media artist living in the sunny desert of Glendale, Arizona. I’m going to share with you a bit about my book, Art Journal Freedom.

Why did I write Art Journal Freedom? I wrote it because I want you to feel good about your art. I want you to have the freedom to express yourself confidently and strongly. If you make something you’re not thrilled with, I want you to be able to figure out what’s wrong. I want you to grow as an artist. I want you to make your mark on the world.

815dinawakelybook

In Art Journal Freedom, I explain some of my favorite composition and color principles that apply to art journaling and mixed-media. Take a look at this journal page:

815dinawakely2

The orange and blue colors on this page are complementary. That simply means they’re opposite each other on the color wheel. When you use complements together, you get a lot of contrast and visual POP. The line from the orange bubble to the woman is a continuance line. Continuance is a principle that helps draw the eye around an artwork. Our eyes follow lines that are there. In this case, we follow the line and it leads us right to the drawing of the woman.

815dinawakely1

If you want to make art that is really striking, try using complementary colors. And, if you find your subject is getting lost on your page, try using flowing lines to draw the eye to what’s most important. Easy as pie, right?

Continuance and complementary colors are just two of the many principles I cover in the book. There are lots of page challenges in the book, too, to help you practice the principles. The challenges also help you break the rules!

You can visit me at http://www.dinawakley.com. There you’ll find links to my blog, online classes, stamp line, stencils, and more.

We hope you have enjoyed today’s project courtesy of Dina Wakely.  You can get a copy of her book here.  Be sure to leave a comment here under this blog post for your chance to win a signed copy of Dina’s book, Art Journal Freedom.   Also, be sure to stop by Dina’s blog to see even more of her beautiful work (and let her know we sent you).


Featured Company: May Arts

mayartslogo

Today we are excited to welcome back this week’s Featured Company May Arts and to share a beautiful creation from one of their designers using some gorgeous May Arts Ribbon.

Here at Paper Crafter’s Library we’re ribbon lovers – you’ll find ribbon on almost all of our projects – which is why we’re so thrilled to bring you another fabulous May Arts project. You haven’t seen ribbon until you’ve seen May Arts Ribbon – they offer a multitude of different colors and styles of ribbon to suit any preference and taste – and all of it, top quality!

And, we also have a give-a-way for you!! Two lucky winners will receive a “winners choice” of 2 spools of Ribbon from May Arts. One winner will be drawn from all the comments left here on the Paper Crafter’s Library blog to win AND one winner will be drawn from all the comments left on the May Arts Blog to win. You certainly have a lot to choose from:

May Arts Ribbon

Remember, each comment you leave is one entry, so be sure to visit today not only for the great project idea, but also to enter your name into our give-away.

About May Arts

May Arts Ribbon was founded in the early 1980’s in Riverside, Connecticut. The original products were high-end silk flowers imported from Taiwan, which were decorated using quality ribbons. The decorative ribbons proved so popular among customers that the business gradually evolved into a dedicated ribbon wholesaler.

As a family-owned and operated business, May Arts began a long-standing tradition of quality, affordability and exceptional customer service. We are dedicated to carrying on this same tradition by offering high quality products at competitive prices. Our friendly, knowledgeable staff is always happy to answer your questions or to assist you in placing your order.

May Arts carries a wide selection of quality ribbons to choose from; such as grosgrain, silk, satin, burlap and a variety of prints and patterns. All inventory is held in stock, so we can ship orders out right away—typically the same day.

Where to Buy May Arts Ribbons

The May Arts website is their wholesale site for online and brink and mortar retailers. We’ve linked to it so that you can easily view their entire product line in one place. There are numerous places where you can purchase May Arts Ribbons including many local scrapbook stores as well as online stores. Two of the online stores that carry the biggest selections that we are aware of include Amazon, who carry the complete May Arts Ribbon Line (plus you can qualify for free shipping). Click on the link we provided and it will take you to our May Arts Ribbon Search Results. To find a particular ribbon, go to the May Arts website, find the name of the ribbon and color and then enter that into your Amazon search results. Please note that through Amazon you’re buying by the roll. Most other online and local scrapbook stores sell May Arts Ribbon by the yard. One of the online stores that carries a great selection is Stamp Simply Ribbon Store.

Special May Arts Guest Designer
814Virginia-PCLToday we a special project for you created by May Arts Guest Designer Virginia Fynes. You can see Virginia’s fabulous project below, but first, here is a little more about Virginia:
Hi I’m Virginia Fynes, Creative Maven, Mommy, Blogger, Caterer, and Baby of the family. I live in Rural Nova Scotia, Canada with my 2 wee ones and my fab hubby. I’ve been crafting since I can remember. Creating seeps into everything going on around me- paper-crafts, sewing, knitting, painting, decorating, jewelry, party decorating, cooking and baking.
I’ve been paper crafting since college; I love collecting and trying new supplies but try to be as frugal as possible. I like clean lines and symmetry, but have lately been ‘living on the edge’ trying new things. I try to get creative everyday, and enjoy sharing my projects on Fynes Designs and the May Arts Blog.


May Arts Designer Project
814PCL-virginia-card

Today I wanted to share one of my frugal ideas. I hate to throw out scraps of my favorite ribbons so I like to use them along with the negative of a cutout to create cute cards such as these ones. I first created a sheet of cutout starbursts using my silhouette, sized to fit the front of the card. I then found scraps that were wide enough to cover the entire negative. Here I used 1.5” wide ribbon.

On the reverse I used adhesive around the edges of the starburst and glued the ribbon to cover the hole. I then stamped the sentiment on to a positive starburst and pop dotted it to the card. A simple, quick card for when you’re in a rush!

Supplies:
– May Arts 1.5” Green and Yellow Chevron ribbon
– May Arts 1.5” Polka Dot Red, Yellow, Green Grosgrain ribbon
– Stampin Up Markers
– Stampin Up More Mustard, Real Red cardstock
– Hero Arts ‘Just For You’ sentiment 

814PCL_virginia-tag

For the tag I used the same technique just ran a strip of smaller ribbon trough the center to give a different look, and added a coordinating bow to the top.

Tag:
– Stampin Up Happy Birthday
– May Arts ¾” Yellow chevron ribbon
– May Arts Red Bakers Twine
– May Arts 5/8” Red Twill
– Core’dinations yellow tag

We hope you have enjoyed today’s feature. We want to extend a sincere thank you to Virginia Fynes for her fabulous projects and May Arts for sharing their company with us. Be sure to visit May Arts to see more of their great products and to enter the fabulous give-away.

In order to enter the give-away to win the ribbon rolls, please leave us a comment in the comments section of this post and visit May Arts to leave a comment on their blog as well. If you do not check the blog regularly, please leave an email address to contact you. Winners will be announced next week on the Paper Crafter’s Library blog!

Trendy Tuesday – Ikat Patterns

Trendy Tuesday – Ikat Patterns
by Katherine Elliot

Ikat patterns have been trendy in home décor and fashion for some time, so it’s no surprise the style has carried over into the creative paper crafting world.  Most ikat patterns are designed to look like the colorful, woven styles of traditional textiles from Southeast Asia or other exotic parts of the world.   The patterns can be varied and designed in any color scheme so this trend easily becomes enticing for any craft enthusiast.

Zoe Ikat Pillow CoverIkat design on throw pillow, image source

While most people simply see these patterns while shopping for clothes and home furnishings, I found several brands that offer options for you to ink up some stamps to create your very own fashionable ikat patterns on your paper craft projects.   Companies that stand out with impressive stamp collections to share today include Avery Elle, Papertrey Ink, Unity Stamp Company and WPlus9.

Card featuring Avery Elle Ikat stamps, image source Avery Elle.com

Card by Heather Campbell, image source Avery Elle blog

 Avery Elle Ikat Clear Stamp Set

Ikat Additions, Avery Elle.com

 Using a variety of colors when you use ikat pattern stamps allows you to coordinate your project with any of your favorite color inks and cardstock.

DSC_0320.1Card by Dawn McVey featuring Irresistibly Ikat stamp set from Papertrey Ink, image source Raspberry Suite

Irresistibly Ikat Stamp Set

Papertrey Ink Irresistably Ikat Stamp Set

My Dear Friend CardCard by Nichole Heady, image source Capture the Moment  featuring Irresistably Ikat

An ikat background can be easy to create with a single color as well.  You may also find it easier to complete your project with a larger background stamp. Unity Stamp Company has several choices if ikat style stamps including a smaller stamp included in the Unity Stamp S.M.A.K. Kit from April 2013, and larger background stamps from collections designed by Liz Hicks and Christy Tomlinson.

Card by Angie Vandenbogaard featuring stamp from Unity Stamp SMAK Kit from April 2013, image source Part Time Creative

Card by Jimmi Mayo featuring Ikat Background stamp designed by Liz Hicks, Unity Stamp Company

CT-1044-I-KAT-LOVEI Kat Love stamp from Unity Stamp Company

Relatively new to the stamping scene (to me at least), are the stamps and products offered by WPlus9 Design Studio.  WPlus9 started in 2010 and they offer some delightful stamps including, of course, an ikat pattern, mix and match, background set.


Check out the lovely designs some of the WPlus9 artists created with this stamp set…

Card by Sarah Martina Parker, image source W Plus 9 Design Studio

Card featuring ikat background using WPlus9 stamps, image source WPlus9.com

Ashley Cannon Newell consistently has a fresh approach to any trend.  Her lovely neutral based card, using stamps included in a recent Studio Calico kit, shows off a simple ikat pattern with a dark, neutral color ink.

Card by Ashley Cannon Newell, image source Studio Calico Gallery

Not ready to add too many additional stamps to your supplies for this trend?  A small kit may be right up your alley. A Studio Calico kit is a great way to order a variety of trendy products in just one click.  Besides the small ikat stamps, this SC kit has some fun and trendy wood veneer diecuts, buttons and sequins.  These kits are great for cardmakers and scrapbookers!

Studio Calico Jennifer Add-on Scrapbook Kit

Scrapbook page by Nicole Samuels featuring ikat stamped accents from Studio Calico kit, image source Two Peas in a Bucket Gallery

Can you find other scrapbook options for this trend?  Yes, you can, although it seems easier to find digital ikat patterns than the paper versions.   Bazzill Basics patterned paper and digital patterns from Nan Scott Design Studio offer some options to consider.

Bazzill Basics Ambrosia Feather Berry/Ikat Scrapbook paper

Digital scrapbook paper, image source Nann Scott Design Studio

 If you are loving the bold designs and patterns you see, you may get so attracted to the style you’ll want to combine your crafting skills with some DIY home décor…

10 - Decorative Wrapping Paper Clock Tutorial

Mod Podge Ikat Clock, image source and instructions from Mod Podge Rocks

Thanks for reading today’s post.  Hope it was as inspiring as it was colorful to assemble for your reading pleasure. Happy crafting, everyone!

2014 Calendar and Note Pad Tins

2014CalendarAndNotePad-08092013-550W

Over the last several months I’ve been getting a lot of emails asking when the 2014 Calendar and Note Pad Tins and the refills will be back.  We are excited to announce that we are running a pre-order from August 9/13 – August 23/13.

Please note that we have a free video tutorial on how to create the tins shown above,  a pdf handout and download of the “Just a Note” Labels on Andrea’s blog which you can access HERE.  She is also offering a give-away of the two finished tins shown above (two winners will be chosen and each will receive on of the tins).  The winners will be announced on Monday, August 26th on Andrea’s blog.

The calendar that you see on the inside front cover of the tin (also shown below) was custom-made so that it perfectly fit the inside of the tin. The calendars are 4 7/8″ x 4 7/8″. The font used for the months and the date match the font used for the “just a note” on the front of the tin.

Calendars2014-550W

As you can see from the picture of the tin at the beginning of this post, and the picture below, I also had some note-pads custom designed to fit inside the tin. The notepads are 3 3/4″ x 4 3/4″. There’s 50 sheets on the notepad and the lines are black so they match with any color scheme.

BundleOfNotePads-550W

As we did last year, we offering this in several options.  Please note that these are ALL pre-orders. Orders will start to ship the week of September 9, 2013, in the order in which they were received. Because everything is custom-designed and manufactured, I don’t want to order too many and end up with hoards left over, or too little, and then run out. So make sure you have your order in by Friday August 23, 2013.

There is a lot of info in this post, so please be sure you read it all!

One of the things I do have to give you a heads up about is shipping. As we are located in Canada, the most “cost-effective” option for shipping is Canada Post. I use that term loosely because it’s still not cheap. The only methods of shipping we offer are small packet air (which I don’t really recommend because it is not trackable) and expedited – which is trackable, and the fastest method. We used to offer a small packet surface option, but ran into too many problems with it being waaaaaaay too slow (as in at least 4 weeks to the US), and not trackable.

I do want to assure you that we only charge you what we are charged. We do not mark up shipping. Because we are a small company with small volumes of shipping we don’t qualify for some of those great shipping volume discounts that bigger stores get. If perchance you are overcharged (which we will only know when we start shipping the packages out), we will reimburse you the difference. Shipping in Canada is based on weight and package size. Because of the weight in particular, for most of you, shipping is probably going to start at about $12 – $15. What I have found though is that the more you get, the better the deal. So if you only want one of’s I would recommend ordering as a group (with a friend or a few friends). So please be prepared.

So, here’s what we have:

Calendar Bundle Pre-order – $7.50 + shipping (each bundle has 5 calendars) 

**SOLD OUT**

Calendars2014-550W


Note Pad Bundle Pre-order – $7.50 + shipping (each bundle has 5 note pads)

**SOLD OUT**

BundleOfNotePads-550W


Bundle of Hinged CD Tins Pre-order – $25.00 + shipping (each bundle includes five 5 1/4″ x 5 1/4″ tins)

**SOLD OUT**

BundleOfTins-550W


2014 Calendar and Note Pad Tin Kits Pre-Order – $17.95 per kit + shipping  (These kits includes a pdf handout as well all the supplies needed to make the project shown in the picture below, other than adhesive.  You will need to supply red liner tape, double sided adhesive and dimensional foam.  Color of the pencil/pen in your kit will vary.

**SOLD OUT**

2014JustANoteCalendarAndNotePadTinKitFront-550W

2014JustANoteCalendarAndNotePadTinKitInside-550W

Once again, just a reminder, these are ALL pre-orders.  The orders will start to ship the week of September 9, 2013, in the order in which they were received.

Have a great weekend!


Featured Artist/Designer: Jennifer Matott

Today on the Paper Crafter’s Library blog, we’re continuing our weekly featured artist spotlight whereby each week we spotlight a different artist/designer in the paper crafting & mixed media world and introduce you to their fabulous work.

Today we’re thrilled to welcome – Jennifer Matott

Before we show you Jennifer’s fabulous project, let’s get to know her a little bit more…

808jennifermatottheadshotJennifer Matott is a mixed media artist and scrapbooker from outside of Syracuse, NY.  Jennifer has a BFA in Sculpture and Painting for which elements cross into the realm of her current artwork. She has been scrapbooking and creating mixed media art for over 20 years. Mixed media allows her to get creative with imagery and still create a 3D effect using a variety of media. Her pages lean towards the dramatic and she loves experimenting with papers and pushing the limits of what is traditionally done. Distressing, inking, media, and textures are a constant in her work. Jennifer’s love of texture shows by using a variety of materials in exciting ways. While she loves creating, Jennifer is even more passionate about teaching others to create!  Being an art educator in a public school has laid the foundation for teaching all age and skill levels. She believes anyone can create meaningful Art!

Currently, Jennifer designs for WOW Embossing powders, Prima Marketing, and Faber-Castell Design Memory Craft. She has been published in several paper and online magazines, including Scrap N’ Art, Scrapbooking and Beyond, Scrapbook Trends, and others. She is working on some exciting online classes with Scrapbook News & Review.
Jennifer’s blog: http://arttalk-sigmagirl.blogspot.com/


Projects and Instructions

808Jen0812MyEscape

“My Escape”

I started with a layer of Fiber Paste, applied with an old credit card, across the center and allowed it to dry.  I colored with Gelatos® in a rainbow of colors and added water spray to create the drips.  The color is so vibrant on the paste and white card stock!

The scraps of papers were added with some popped up to create depth.

I printed my journaling out on vellum and stitched it onto the page!  I wanted to see the colors through the text so I used the see-through vellum.  I left the threads hanging loose for more texture.

This page is about my need to create and my love of teaching art… it provides my escape. I can create anything and escape into a world of possibilities!

Materials List:
Scrapbooking From The Inside Out “Escape” kit
– American Crafts Dear Lizzy Neapolitan
– Cosmo Cricket Twenty Three
Faber-Castell Design Memory Craft Gelatos®
Golden Paints Fiber Paste
Bazzill Cardstock
Vellum
Helmar Zap Dots & 450 Quick Dry Adhesive


808JenM_DDBrush14

“Art Brush”

This brush was so fun to alter!  I took all the bristles out with a screwdriver and punched holes through the metal with a Crop-a-Dile on each end for the wire to go through.  This will hold the papers in.   I altered papers with Faber-Castell Design Memory Craft Gelatos®  and created mists with the new Gelatos® Mist Maker kit and sprayed through stencils.  I also added some texture with modeling paste through stencils.  I stamped using the Stamper’s Big Brush pens over the backgrounds. 
Once dry, I cut up the papers and layered them.  They are double the desired length so that I could fold them in half for the wire to hold in place. This gives me double the pages!  I altered both front and backs of the papers!  I added in some tags, embellishments and letter stickers to finish it off.  The handle was altered with stamps and embossing powder and then colored with Faber-Castell Design Memory Craft Gelatos®.   I created a paper feather using wire and music paper and attached to the handle.  I also added ribbon and flowers before hanging to display! 
You can see a video of this process through this link: http://www.ustream.tv/recorded/29414972


Materials List:

4″ paint brush from Lowe’s
Faber-Castell Design Memory Craft Gelatos® & Stamper’s Big Brush Pen in Black
Assorted Mixed Media papers, sheet music, ledger paper, shipping tag, packaging.
Prima Marketing leaves, embellishments, flowers, letter stickers, Stencils and gears.
Tim Holtz key
Wire
Stamps (Tim Holtz, Penny Black, Prima and other)
Golden Paint Modeling paste
May Arts Ribbon
WOW Embossing powder
Amuse twine
Helmar 450 Quick Dry Adhesive


We hope you have enjoyed today’s projects courtesy of Jennifer Matott. Also, be sure to stop by Jennifer’s blog to see even more of her beautiful work (and let her know we sent you).


Featured Company: Graphic 45

We are happy to bring you this week’s Featured Company: Graphic 45. We are so excited to be featuring them regularly on Paper Crafter’s Library. For those of you unfamiliar with Graphic 45 , we’d like to take a minute to re-introduce them to you.

Graphic 45 is an award-winning scrapbook and paper crafting company­— owned and operated by a mother and her two daughters.

Diane Schultz—Designer and CEO (aka mother)

“I’m passionate about being creative and eager to make it possible for others to find their creative voice. My background includes stints as a designer for, McCalls, Simplicity, Vogue/ Butterick, Mattel Toy Company and a host of other jobs that each, in some way, led me to what I do now. At 45 I went back to school and got my degree in graphic design— I named the company to celebrate that achievement.”

Aimee Filimoehala —Director of Operations

“I wear a lot of hats and love it that way. Business, marketing, operations, etc. have made me a pro at multitasking (aka juggling‑figuratively and literally). When we launched Graphic 45 just three years ago we had no idea what was in store, working together as a family has been an amazing journey that we all feel so grateful to be apart of.”

Charee Filimoehala —Director of Customer Service and Design Team Coordinator

“I joined the team a little over three years ago and haven’t looked back…what a life-changing experience this has been. I love working with and around creative people and products (not to mention I like my co-workers quite a bit). I spend my days working with our friendly stores and talented design team…the occasional trip to a workshop or tradeshow pretty nice too.”

Together we create vintage inspired crafting products that capture the flamboyant style of the 1920’s and 30’s – with vibrant color, irresistible texture and imaginative design to create products with decades-old appeal that’s both fresh and familiar. Let our products inspire your next scrapbook layout, card, album or home decor project.

Graphic 45 Designer Denise Johnson

Our Graphic 45 Guest Designer for this week is Denise Johnson who is part of the 2013 Graphic 45 Design Team. 

You can see Denise’s fabulous project below as well as a video, but first, here is a little more about Denise:

807denisejohnsonheadshotI’m Denise Johnson, mixed media artist and upcycler from the beautiful Pacific NW.  I love using gorgeous paper goods, discarded, thrift store treasure, leftover office supplies and vintage ephemera to create something totally unexpected and new.

I’m thrilled to be designing for Graphic 45, as my creative aesthetic marries perfectly with G45’s eclectic, nostalgic and vintage inspired offerings.  Along with designing for Graphic 45, I teach papercrafting and mixed media art workshops, design custom party and wedding paper goods and I am a member of the Craft Warehouse design team.

When not immersed in paper, you can find me immersed in junk, (my other favorite medium)!  I hunt, dig and pick for rusty and dusty antique cache, repair & renew, then share in my redesign/staging business.

Thanks for checking out my mixed media project today on the Papercrafter’s Library.  For more creative chaos, please stop by my blog: http://junquesoiree.blogspot.com/

Happy Crafting!

Grahpic 45 Designer Project

Altered Art Tag Banner featuring the new Graphic 45 Typography Collection

807Typography-Altered-Tag-Banner-Graphic45-Denise-Johnson-1

I am SO in love with this new collection!! The colors, the artful theme, the vintage imagery…seriously, what’s not to LOVE!?

807Typography-Altered-Tag-Banner-Graphic45-Denise-Johnson-4

807Typography-Altered-Tag-Banner-Graphic45-Denise-Johnson-5

807Typography-Altered-Tag-Banner-Graphic45-Denise-Johnson-6

I decided to create an “ART” banner so I could hang it in my studio and enjoy this fabulous collection everyday.
 807Typography-Altered-Tag-Banner-Graphic45-Denise-Johnson-11


Description:

Layers of Graphic 45 artsy goodness come together on this Altered Tag Banner. Use large tags from the Staples Collection for the base, then collage and layer Typography paper, stickers and bits for this fun & funky art piece.

807Typography-Altered-Tag-Banner-Graphic45-Denise-Johnson-9

A Graphic 45 added bonus…mostly ALL the collections can be mixed and matched together! So for this project I added in the 6 x 6 Patterns and Solids from the French Country Collection (a go-to fav of mine!!)  Such a great way to use what you have  and stretch your supplies!!

807Typography-Altered-Tag-Banner-Graphic45-Denise-Johnson-10

This creation is perfect to adorn your studio/craftroom or gift to a {lucky} fellow paper artist.

807Typography-Altered-Tag-Banner-Graphic45-Denise-Johnson-8

807Typography-Altered-Tag-Banner-Graphic45-Denise-Johnson-7


Supply List:

Graphic 45- Typography 12 x 12 Papercrafting Paper
Graphic 45- Typography Cardstock Stickers
Graphic 45- French Country 6 x 6 Patterns and Solids Paper Pad
Graphic 45- French Country Cardstock Flowers
Graphic 45- French Country Cardstock Banners
Graphic 45- Staples Large Tag Album (use 3 tags from album)
Graphic 45- Staples Metal Keys, Tags, Escutcheon, Ornate Book Label
May Arts Ribbon
Misc. sprocket gears, chain, key tag,opticians glass, mini brads, bingo game piece, domino game piece, clock hand, metal flowers, vintage “this way” stamp image
Distress Ink and Tool (Vintage Photo)
StayzOn Ink (Black)
3D Adhesive Tape

807Typography-Altered-Tag-Banner-Graphic45-Denise-Johnson-12

We hope you have enjoyed this fun creation from Denise. I would also like to extend a warm thank you to Denise for sharing her fabulous gift idea with us! Please take a minute to stop by Denise’s Blog and of course the Graphic 45 blog to check out all their amazing creations!

Winner of Hero Arts Give-Away

I’d like to extend a HUGE thank you to Hero Arts and their guest designer Denise Hahn for sharing such a wonderful project and for their generous give-away of their collection shown below.

And now, the moment you’ve all been waiting for…….the winner is……Jean Marmo!

winner807

Congratulations Jean!! Be sure to email us at customerservice@papercrafterslibrary.com to claim your prize. Please be sure to put “Hero Arts Winner” in the subject line of the email, and then in the email itself, be sure to include your full mailing address and phone number.

For those of you that didn’t win, each week on PCL we feature a different company, and each of those companies generously sponsors a prize. Join us next week when we feature another great company.

andreasiggypcl

Trendy Tuesday – Speech Bubbles


Trendy Tuesday – Speech Bubbles
By Colleen Harshaw

Instagram, anyone?  What about FaceBook, Twitter or Pinterest?  Social media has reached epidemic levels, to the point that many of us have panic attacks if we leave the house without our mobile phones or devices.  As a society, we seem to be connected 24/7.  This trend of using technology for just about everything has segued into the use of speech bubbles and thought bubbles in paper crafting, in décor and in life.  I was surprised at the plethora of images, projects and ideas that are available in keeping with this theme.  It was super fun to poke around and see all of the ideas!

I am going to begin today by sharing with you some of the supplies that are available which incorporate speech bubbles and thought bubbles.  This first image is from Spellbinders Shapeabilities Collection.  Spellbinders has an extensive line of Shapeabilities available, but I had no idea (until recently) that they have speech/thought bubbles available as die cuts!  These templates can be used for both cutting and embossing and the set is called ‘Say What’.

TT13-17
Image credit to www.scrapbook.com

This next image is of speech bubble rub-ons from Jenni Bowlin Studios.  It’s cute how the speech bubbles have been combined with another theme that we have talked about here at Trendy Tuesday….the arrow.  Stars are also popular right now and it seems that Jenni Bowlin is staying on trend!

Cursive
Image credit to www.scrapbook.com

This next product is by Studio Calico.  They are Speech Bubble Chipboard Sticker Shapes.  This product seems to be fairly widely available, as I was able to find it listed on several websites via a Google search.

TT13-1Image credit to www.google.com

Next up are some wood veneer speech bubbles sold by American Crafts.

TT13-2Image credit to www.google.com

The next product that I have to share with you is from My Favorite Things.  It is a Die-namics die speech bubble frame called ‘Insert It’.  My Favorite Things has a website through which you can order directly.  This is what I have always done however, I was surprised to see that this die is quite widely available through other websites as well.  I guess My Favorite Things has expanded their distribution!

TT13-3Image credit to www.officesupersavers.com

This next product is a 12 x 12 sheet of speech bubble stickers called Mister Huey’s from Studio Calico.

TT13-4Image credit to www.overstock.com

Now, we can’t have a product list without any paper, can we?!  This image depicts 12 x 12 paper from Imaginisce.  It is called Chalk Talk from the Geek Is Chic Collection.  It also is available through many websites.

TT13-5Image credit to www.createforless.com 

With the popularity of digital scrapbooking these days, we have to have a digital speech/thought bubble product too!  I found these super cute Clipart digital speech bubble embellishments on Etsy.  They actually have a glossy or reflective appearance to make them look 3D!  They are available for instant download through The Digital Candy Shop on Etsy.TT13-6Image credit to www.etsy.com

This last product that I have to share with you today is also from Etsy.  They are neon coloured speech bubbles made from photo safe cardstock.  They are advertised for use as customizable cupcake toppers, smash book/scrapbook embellishments, table confetti or lunch box notes.  The possibilities are many!  This product is available from Elves In The Attic via www.etsy.com

TT13-7Image credit to www.etsy.com

OK, now onto the projects.  There really were some super cute projects using speech/thought bubbles!  I could have gotten lost online (can you say, Pinterest?) for hours!

I found a sketch (I love sketches!) that incorporates a speech bubble into the design.  It is a basic sketch, but you can feel free to dress it up however you like.

TT13-14
Image credit to www.moxiefabworld.com

Now I have a card to share with you that uses the sketch recipe from above.  This would be a great card for a teen/tween!

TT13-15
Image credit to www.moxiefabworld.com

This next card uses both a speech bubble and another trend…the fishtail flag.  It is a really colourful, cute card with lots of layers and a great use of pattern mixing.

TT13-8Image credit to www.blog.perfectpapercrafting.com

This Happy Birthday Dad card shows how you can use speech/thought bubbles on a masculine card.  Masculine cards always seem to be the hardest for me, so I always appreciate seeing examples from other crafters.  Personally, I love the ledger paper background!  Ledger paper and notebook papers are very popular right now too.

TT13-9Image credit to www.2.bp.blogspot.com

Next I have some scrapbook pages to share with you.  This first one by Jennifer Matott, really makes good use of speech bubbles, with several of them placed over a background paper of text.  I love this layout as it does such a good job of capturing the frustration of hearing ‘mom’ hundreds of times per day!  You could probably superimpose any mother’s photo onto this layout and have it be accurate! 🙂

TT13-10Image credit to www.debbiehodge.com

There were so many great scrapbook layouts to choose from within the framework of this trend!  This next layout once again uses journal/ledger type lined paper as the background (love it!).  Leah Farquharson also manages to use banners as well as speech bubbles on her trendy layout.

TT13-11Image credit to www.debbiehodge.com

My favourite thing about this next layout by Michelle Houghton is that she actually hand drew all of her speech bubbles!  This illustrates how easy it can be to incorporate this trend without spending a lot of money on new supplies.  All you need is a pen, some scissors and (hopefully) a few drawing skills!

TT13-12Image credit to www.debbiehodge.com

In this next layout, Emily Pitts cleverly uses speech bubbles to depict a conversation that took place.  All of Emily’s journaling is worked into these speech bubbles.  Her use of patterned papers in contrasting colours divides her page, helping the viewer to see which person is saying which words.

TT13-13Image credit to www.debbiehodge.com

When putting together these articles for you, it is always my goal to show you a variety of projects.  It is nice to see cards and scrapbook layouts but I get extra excited when I can find other complimentary projects to include!  Today I found this mini album.  Mini albums are very popular right now, with many classes being offered at events like CKC, for mini album projects.  The nice thing about them is that they make great gifts and they don’t take a ridiculous amount of time to complete.  You can complete one and feel like you have accomplished something, instead of having another unfinished project to return to.  (You should see my pile of unfinished projects!)  This Love You To Pieces mini album was completed from a kit.  Check out that fun cover!

TT13-18Image credit to www.alissafast.typepad.com

This next photo has nothing to do with paper crafting, but instead it comes from a party planning website.  This creative lady used speech bubbles to personalize place settings for a party.  How cute is that?!

TT13-19Image credit to www.youaremyfav.com

This last project is so cute.  Once again, it isn’t paper crafting related, but it is a very creative use of speech/thought bubbles.  These DIY chalkboard speech bubbles can be made at home by following the tutorial provided at the link below.  This would be great for a shower or birthday party.  I think it would be fun to hang one of these on each of my children’s bedroom doors to share thoughts and messages.

http://ohhappyday.com/2010/08/diy-chalkboard-talk-bubbles/

TT13-20Image credit to www.ohhappyday.com

 Well, that was a bit of a marathon, wasn’t it!  Phew!  I am finally coming to my conclusion.  I am sure those of you who have stuck with me this far are thankful.  🙂

I hope you have fun poking around online to find even more inspiration.  Be careful of Pinterest….once you get on that website time ceases to exist!  Until next time, happy crafting!


Featured Artist/Designer: Christina Maclaren

Today on the Paper Crafter’s Library blog, we’re continuing our weekly featured artist spotlight whereby each week we spotlight a different artist/designer in the paper crafting & mixed media world and introduce you to their fabulous work.

Today we’re thrilled to welcome – Christina Maclaren

Before we show you Christina’s fabulous projects, let’s get to know her a little bit more…

801christinamaclarenI’m a biology lab instructor and research assistant at a small college near Boston, but I’m originally from Indiana.  My husband and I have two wonderful kids, ages 7 and 5, who keep us busy with sports and activities.

I’ve dabbled in various crafts since I was a young girl, from crochet to sewing and quilting, but my passion for the last 3 years has been stamping and card making.  I’ve been fortunate to have several cards published in Paper Crafts magazine, and I have served on a number of design teams, including my current position with the Curtain Call Inspiration Challenge.

It’s an honor to be featured at Paper Crafter’s Library, and I hope you’ll visit me at my blog, Sea Glass Papercrafts, or follow me on Facebook for more stamping inspiration.


Projects and Instructions

801christinamaclarenphoto1

I’m a stamper at heart, but when I want to add texture and dimension to my clean and simple cards, I turn to my well-loved die cut machine and collection of basic dies.  Die cutting allows you to add embellishments in any color of cardstock or patterned paper to perfectly coordinate with your designs, and many stamp companies now offer inexpensive metal dies in a huge variety of shapes and styles.

Today I’m sharing 3 cards using variations of the basic die cutting technique and a simple set of cloud dies.  The first uses the die cut clouds inset into a negative space.  This simple technique adds a fun detail, but keeps your card flat for mailing.

801christinamaclarenphoto2

First, I die cut the clouds from white cardstock and set them aside.  Next, I cut the same shapes from a turquoise cardstock panel and discarded the clouds, leaving the negative spaces.  For my design, I placed the cloud dies off the edge of the turquoise cardstock for added interest.

To assemble the card, I placed the white clouds into the negative spaces like puzzle pieces, popping up the clouds and turquoise panel with foam tape for added dimension.


My next card shows how you can use just the negative space from a die cut as a design element.  This is a technique that has become very popular, and it is one of my favorite ways to add dimension to a simple card design.

801christinamaclarenphoto3

On this card, I went a step further and created a shaker card, filling the clouds with gold sequins.  To do this, I die cut the clouds from a turquoise cardstock panel and attached clear acetate to the back.  Next, I placed strips of foam tape all around the outside of each cloud, sprinkled gold sequins in the middle, and attached the entire panel to a white card base to encase the sequins.  You could use patterned paper or any color of cardstock as a backing for a fun twist.

801christinamaclarenphoto4


My final card shows how you can use partial die cutting to get even more use out of simple die shapes.  I used the same pair of cloud dies to cut decorative borders, which I layered to create a cloudy sky.

801christinamaclarenphoto5


This technique is actually very simple.  The trick is to line up the cardstock and die so that part of the die lies outside of the die cut “sandwich”.  When you crank the sandwich through the machine, only the portion of cardstock that is between the plates will be cut.  You can then trim any small strips that remain attached to create a border.

801christinamaclarenphoto6


I ran the dies through several times to create two borders, which were trimmed and layered with foam tape at the bottom of the card.  I also like to add texture to the cut border with an embossing folder or impression plate to disguise the small lines left by the dies along the cut edge.

801christinamaclarenphoto7

I hope these projects will inspire you to use your dies in new and creative ways!


We hope you have enjoyed today’s projects courtesy of Christina Maclaren. Also, be sure to stop by Christina’s blog to see even more of her beautiful work (and let her know we sent you).