Featured Artist/Designer: Kelly Griglione

Today on the Paper Crafter’s Library blog, we’re continuing our weekly featured artist spotlight whereby each week we spotlight a different artist/designer in the paper crafting & mixed media world and introduce you to their fabulous work.

Today we’re thrilled to welcome Kelly Griglione.  Before we show you Kelly’s project, let’s get to know her a little bit more…

KellyGriglione-250WHi! I’m Kelly, and like many of us, crafting has always been a large part of my life. I have such fond memories of time spent with my Grandma at her kitchen table learning every type of craft imaginable. My passion is for paper: collecting it (19th century valentines/postcards/scrapbooks) and making things with it (cards/home decor/party decorations/scrapbooks). I currently love pushing the boundaries in card making, and I get such a thrill figuring out how to make something work the way I want it to. Find me at www.notablenest.blogspot.com. I’d absolutely love to see you there!

I am absolutely thrilled to be guest posting today. I can’t wait to show you some fun projects using the 3D folding technique, most commonly used to turn a flat star into a barn star.

KellyGriglione1-550W

There are many instructions on the internet, but these are the basic steps.

KellyGriglione2-550W

You can now use your dimensional barn star on a card, gift tag, or home decor item like this framed Field of Stars I made for Christmas.

KellyGriglione3-550W

No doubt you have seen many other fabulous projects with these fun barn stars. Well, what if we applied that same folding technique of scoring down middle, then alternating mountain and valley folds, to other shapes besides a five-pointed star?

Let’s take a look!

Here’s a 3D Star of Bethlehem hanging from my ceiling with invisible fishing line. It was simple to find clip art online, trace/cut with the Silhouette, and then fold into a dimensional star. On a side note, I also added deer silhouettes to dress up my year-round canvas for Christmas.

KellyGriglione4-550W

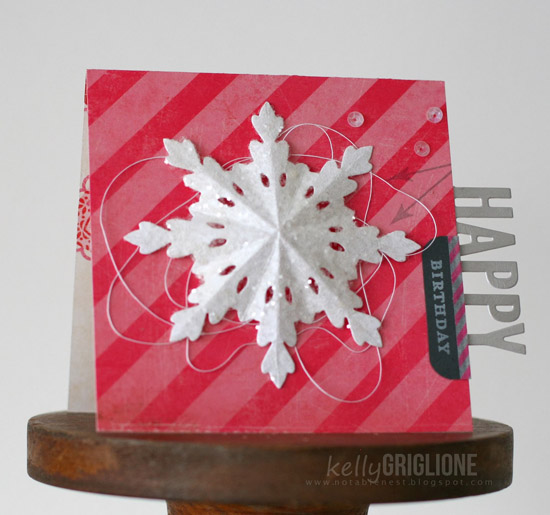
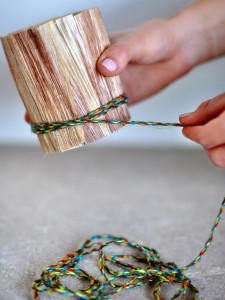
Don’t have any star shapes?  No problem!  You can also use this folding technique with large snowflakes. As you see, this snowflake has an even number of points (unlike the 5-pointed star) but it works just as well. Just score down the middle from point to point, and valley to valley, and then alternate folds. Chunky glitter makes the dimensional snowflake even more of a focal point. (I also tried the “pile of thread” technique perfected by Laura Bassen to layer behind the snowflake … super fun!)

KellyGriglione5-550W

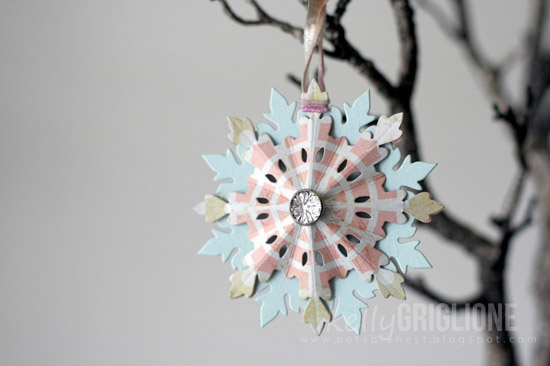
Take it a step further and make a second dimensional snowflake. Glue the two snowflakes back-to-back and you have a sweet ornament.

KellyGriglione6-550W

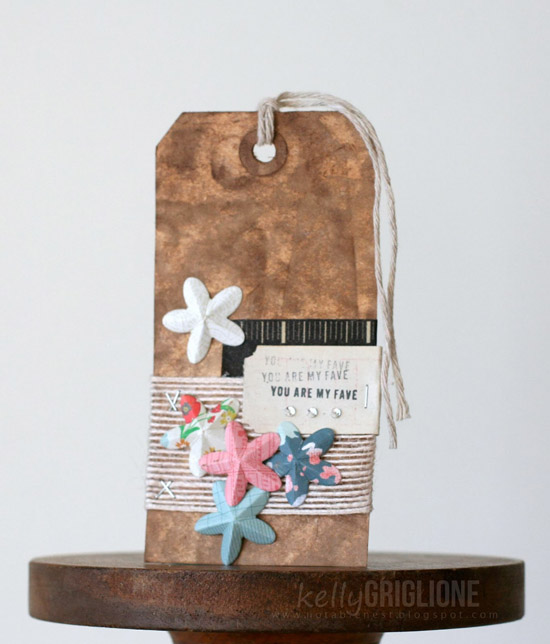
Use the dimensional folding technique on small flower punches or dies, and then cluster them together on a gift tag. You can even overlap them slightly. I love using dimensional items on tags because you don’t have to worry about envelopes or mail. These flowers would look so different if they were layered flat on the tag.

KellyGriglione7-550W

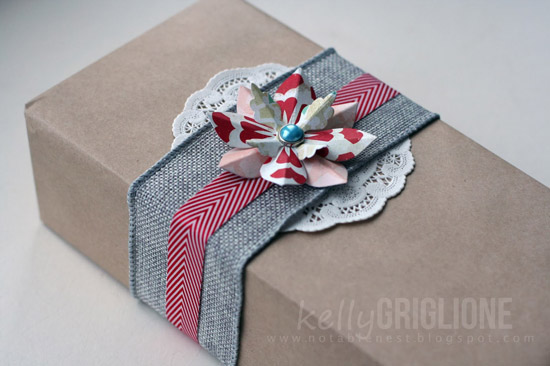
After making the small flowers, I was anxious to see what this folding technique would do for a layered flower. So excited when I saw the results! This dimensional flower makes such a cute present topper. You may notice that the middle of this flower is down and the ends are high, which is opposite from the earlier examples where the center juts out and the ends lie flat on the project.

KellyGriglione8-550W

Going along with the idea of pushing the dimension inward, I wanted to find out what would happen if just the middle of the shape went inward. After cutting out the large star, I scored a small star in the middle. This was done by replacing one cutting plate from the Big Shot with a thinner shim and running it through with the smaller star die. The outside margin of the star is folded as normal, and then you reverse folding on the inside. Big impact!

KellyGriglione9-550W

Thank you very much, Paper Crafter’s Library, for having me today. I hope you get a chance to look at your punches, dies, and/or electronic images and see which ones you could make dimensional with this folding technique. If you do make something, I’d love to hear about it. Stop by my blog anytime and let me know!

Supplies:

Bethlehem Star
Paper (Georgia Pacific)

Happy Birthday Card
Paper (Crate Paper, Fourteen)
Dies (Papertrey Ink, Damask Snowflake; MFT Die Namics, Accent It Celebrate)
Stamps (Papertrey Ink, Happy Hexagons)
Other (Washi Tape, Target; glitter; thread; sequins)

Snowflake Ornament
Paper (Crate Paper, Peppermint; The Paper Company, Ice Blue Metallic Cover)
Dies (Papertrey Ink, Damask Snowflake)
Embellishments (American Crafts, Large Diamond Brads)
Other (ribbon)

You are My Fave Tag
Paper (Crate Paper, 6×6 Storyteller)
Dies (Papertrey Ink Flower Fusion #3)
Stamps (Dear Lizzy Roller Stamp)
Other (washi tape, Target; tag, 7 Gypsies; Me & My Big Ideas, gems; ticket; Tiny Attacher; ribbon)

Flower Gift Topper
Paper (Crate Papper, Peppermint)
Dies (Papertrey Ink, Limitless Layers)
Embellishments (American Crafts, pearl beads)

Inverted White Star Card
Paper (American Crafts, Lucky Charm; Crate Paper, Peppermint)
Dies (Papertrey Ink, Seeing Stars and Wonderful Words; MFT Die Namics, High Rise Alphabet Uppercase)
Other (washi tape, Target)

We hope you have enjoyed today’s projects courtesy of Kelly Griglione. Also, be sure to stop by Kelly’s blog to see even more of her beautiful work (and let her know we sent you).

pcandreasiggy

Trendy Tuesday – Year In Review

Trendy Tuesday – Year In Review

by Katherine Elliot

Wow!  Time flies more quickly every year and 2013 was no exception.  Looking back at the past year of trends makes me realize how many of these styles I still have yet to create a project for.  I have every intention of creating something of my own for each post I write,  but sadly time just gets away from me.  I am going to try and resolve to do that more in the coming year.  Thank you again to all the talented crafters that have allowed us to share their inspiring creations here on Trendy Tuesdays.  Here’s a quick look at some of the projects we have featured in 2013…

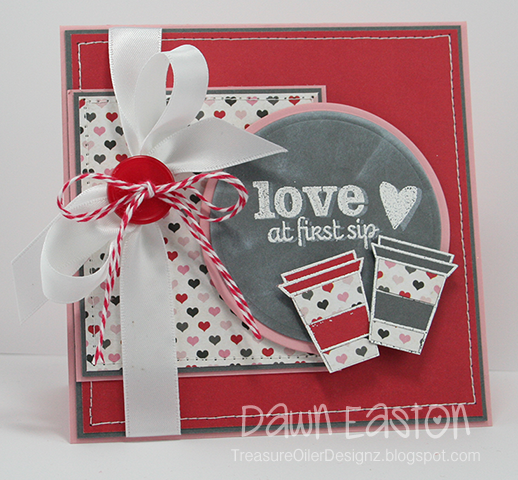
Chalkboard style is still very popular.  There are even more stamps and products available for this style now which makes this technique hard to resist.  We first shared some projects using the smeared white ink technique back in January 2013, including Dawn Easton’s coffee themed Valentine…

Love at First Sip card by Dawn Easton, image source Treasure Oiler Designz

Have we seen the last of feathers on projects?  I don’t think so, at least from browsing the various brands offering feather themed products. This fun, feather filled frame was included in a post from last spring.  This reminds me that many of my favorite paper craft projects are not just cards or scrapbook layouts, but trendy home decor.

Feather Frame by Robyn Werlich, image source Two Peas in a Bucket Gallery

From feathers to our feathered friend, the owl, there is always a favorite woodland creature to celebrate in paper crafts.   Foxes, toads, and deer made frequent appearances on cards in 2013, but the wise and witty owl is a real hoot to see on many projects.

Card by Korin Sutherland featuring stamps from Sweet ‘n Sassy Stamps, image source Splitcoast Stampers

While the weather kept making headlines through the year, we found many different stamp sets and dies that featured some great ways to deal with a tough climate.  No matter the weather, there’s a project to suit your mood and bring a little sunshine to your day…

Card by Lee Murphy featuring Weather or Not stamp set from Gina K Designs, image source My Reality

Speech bubbles made their way off the newspaper comic strips and into our creative, paper crafting tool bag.  Projects pairing a quote bubble with other trendy features have been easy to find. The next projects feature images from Lawn Fawn and Mama Elephant from our previous posts featuring flair embellishments and cityscapes.  The speech bubbles ramp up the trend-factor on these cards, don’t you think?

into the woods adhesive flair

Hello Card featuring Into the Woods Flair from Lawn Fawn

Card by Cheiron Brandon, featuring stamps from Mama Elephant, image source Cheiron’s Crafty Life

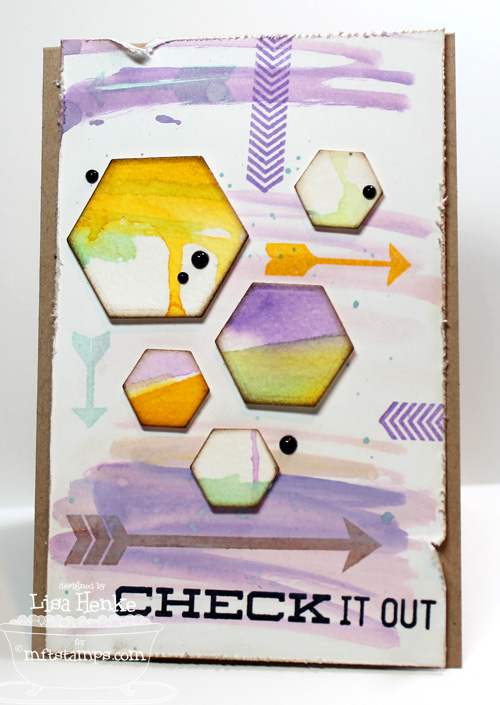
The use of brushstrokes and paint effects allowed many crafters to show off even more artistic expression on their cards and scrapbook pages in 2013.  I expect to see more freehand and stamped versions of paint effects in the future as well.   I must give another shout out to Lisa Henke for her truly trendy card shown next.  Besides the paint effects, she wins extra points by including trendy hexagons, arrows and enamel dots in her creative design…

Card by Lisa Henke, image source My Little Creative Escape

Geometric shapes take their turn in trends, and while circles and hexagons have had their day, triangles made big headway in 2013.  Check out the trendy triangles and enamel dots in the next clean and simple card by Debby Hughes.  This was featured in our post about enamel dots, but could have stood out as a trendsetting design of its own…

Card by Debby Hughes, image source Lime Doodle Design

The next projects are ones that have not been featured on Trendy Tuesday before, but I think send off the past year in terrific trendy fashion. Sequins, felt, and twine, continue to win me over every time I see them used, and that is quite often.   We have featured the embellishments’ individual appeal before, but this card I discovered after my snowflake post was published early in December, deserves a trendy tip of the hat for the wonderful combined use of these very pretty embellishments…

Card  by Julie Stainton, image source Belle Papier 

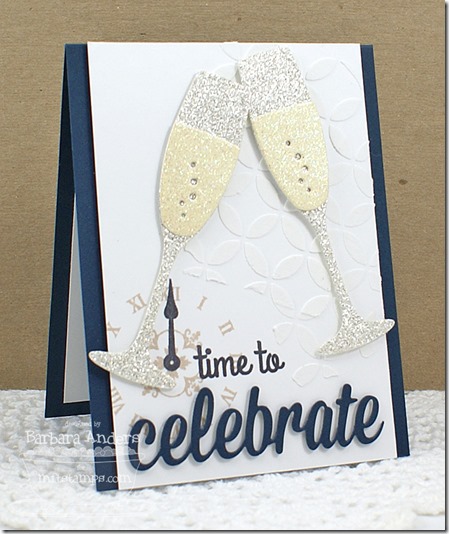
We welcome Aliya White as a new trend reporter this year and she did a terrific job on her first post featuring expression die cuts.   These die cut words are so fun to work with!  You know you cannot just have one… Like all good things, our crafting tools can be so addictive.   I found this fun card from the very talented, Barbara Anders, featuring brand new die cuts from My Favorite Things.  Let this send you off to a very Happy New Year…

teaser7_2013dec10Card by Barbara Anders, featuring My Favorite Things Die-namics, image source Paper Pursuits

What crafty resolutions do you have for the new year?  Join me in picking up the paper, stamps and ink a little more often!  Now, I’m off for some holiday merriment and will be searching for more trendy projects for the new year.  Happy crafting, everyone.

Winner of Graphic 45 Give-Away

I’d like to extend a HUGE thank you to Graphic 45 and their guest designer Susan Lui for sharing such a wonderful project and for their generous give-away of their collection shown below.

SweetSentiments-550W

And now, the moment you’ve all been waiting for…….the winner is……Diane!

G45Winner

Congratulations Diane! Be sure to email us at customerservice@papercrafterslibrary.com to claim your prize. Please be sure to put “Graphic 45 Winner” in the subject line of the email, and then in the email itself, be sure to include your full mailing address and phone number.

Join us next week when we feature another great company.

andreasiggypcl

Trendy Tuesday – DIY Last Minute Christmas

Trendy Tuesday – DIY Last Minute Christmas

by Katherine Elliot

So it’s here, Christmas Eve.  If you are reading this post, I could guess…one, you have a little free time from work or holiday preparations and could squeeze in another project… or two, you really need some last minute inspiration for the one or two things left to make.  Does either apply to you?  If so, I found a few things created by some very talented people to help you add a little trendy flair for your last minute Christmas crafts.  Grab a few things you have on hand, or download a digital project, to make some quick, last minute Christmas projects.

Banners are still trendy of course, and a short banner can be an easy last minute decoration for your home or to create for a gift.  Choose a short word, like “JOY,” add some trendy embellishments, and your banner is done in a jiffy!

Joy Banner by Jennifer Sootkoos, image source Sootywing Studios

Do you have a Christmas wreath that could use a little refreshing?  Check your stash of supplies, or download some digital trendy images, like these little birds, owls and feathers from Pretty Little Studio, and cut them out to add a fresh look to last year’s holiday decoration.

LSpiegel-12-2Decorated wreath by Lisa Speigel, featuring Woodland Christmas Collection, image source Pretty Little Studio

 Digital downloads are terrific, instant gratification crafting tools.  If you are up for something a little more ambitious, check out these really cool 3-D shapes you can create from Silhouette and the Cutting Cafe.

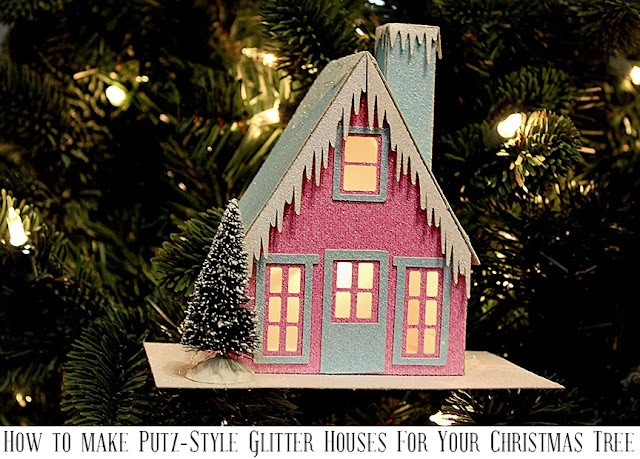
Silhouette 3-D Little Pink House by Samantha Walker, assembly instructions and image source Samantha Walker.com

Sewing Machine gift box by Sean Covert,  featuring The Cutting Cafe Sewing Machine Set, image source Scrappy Boy

Handcrafted decorations on your tags or packages can also be a quick way to personalize your gifts and use up a few leftover scraps.  Got a few brown paper packages tied up with string?  These are some of my favorite things!  No cutting needed if you are willing to tear some of your unused patterned paper to wrap around a simple, plain paper package.

Paper craft packaging, more DIY packaging ideas and image source from Apartment Guide.com

Adding a few trendy decorations to a plain kraft box also makes gifting super simple.  Some stamping, a chalkboard label, ribbon and embellishments make a plain box look so festive!

Decorated Kraft Box by Kristi Schurr, image The Kraft Journal

 Package a few candies or home made goodies and decorate the bags or jars using your papers, die cuts, and tools.  These are great stocking stuffers and last minute gifts, too.

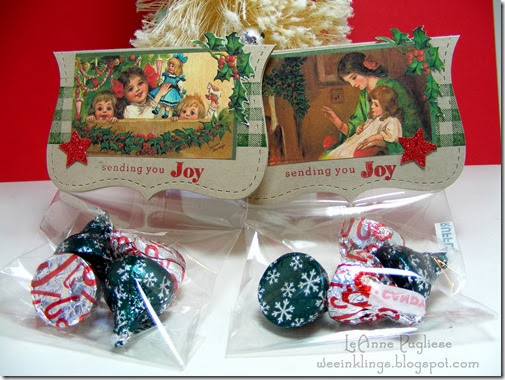
DSCF9700Treat bags with die cut topper by LeAnne Pugliese, image source WeeInklings Decorated mason jar by Kathy Martin, image source Two Peas in a Bucket Gallery

Mini muslin bags, like those available from Stampin’ Up!, are simple and chic, too.   These are fun to decorate and easy to stash with a little bitty surprise or two… Stampin up stampinup muslin bag mini buy order stamp it pretty holiday love & joy gold encore inkMini Muslin bag by Mary Fish, image source Stampin Pretty

A decorated mug filled with some cocoa mix or candy is an easy treat to prepare as well.  A doily tied around a mug, embellished with your favorite stamps or diecuts, can look very pretty for gifting. Decorated mug, image source Stampin’ Up! blog

…or grab some crafting felt to shape around your favorite to go cup, and embellish for a reusable coffee sleeve that is as useful as it is pretty.  Hot Cocoa kit by Aly Dosdall, image source WeRMemory Keepers blog

Prepare an easy hostess gift by decorating a favorite bottle of wine or other gift beverage with a handmade topper and matching card.  Dies from Taylored Expressions make a bottle topper easy to recreate quickly, or grab your punches and scissors to make your own version and you’ll be ready for that last minute invitation.

Wine topper and matching card by Shannon White, featuring Wine stamp sets and  Bottled Up die from Taylored Expressions, image source Enchanted Ladybug Creations

While the adults enjoy that bottle of wine, give the kids something fun to do at a holiday party.  Giggles are sure to start when you bring out empty toilet paper rolls with your scrap papers and show them how to make these cute little reindeer, designed by Izzy Anderson.

Toilet roll reindeer by Izzy Anderson, image source Write Snap Scrap

Ready?  Set? Celebrate!  Enjoy making a few last minute crafts, or bookmark this for next year’s holiday.  From everyone at Paper Crafter’s Library, have a very Merry Christmas!

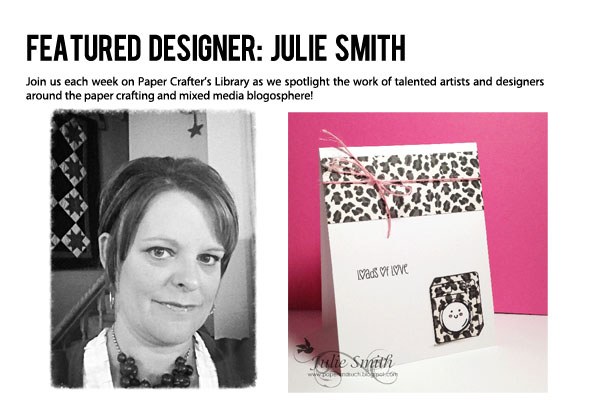
Featured Artist/Designer: Julie Smith

Today on the Paper Crafter’s Library blog, we’re continuing our weekly featured artist spotlight whereby each week we spotlight a different artist/designer in the paper crafting & mixed media world and introduce you to their fabulous work.

Today we’re thrilled to welcome Julie Smith.

Before we show you Julie’s project, let’s get to know her a little bit more…

julie pic-250W

Hi, My name is Julie and I’m from a small town near Gettysburg, Pennsylvania.  During the day, I work full time selling insurance, and in the evenings you can find me in my stamp room.  I am married to a wonderful man, we have two fabulous sons – a 16 year old who is a junior in high school, and a 19 year old currently serving in the US Marine Corps.  I also can’t forget our precious yellow lab named Patriot either.

I’ve been stamping for many years and absolutely love it.  My style and tastes have definitely changed over the years.  I do believe that my go to style right now is Clean and Simple.  I don’t have a ton of time to spend on my hobby, so I tend to keep my embellishments to a minimum.  Although, sequins or twine normally find their way onto my projects. 

I have had the pleasure of serving on many design teams over the years and have had a few cards published.  My absolute favorite part of the stamping industry is the friends you can make.  I’ve made friends all over the world thru my hobby. 

I am so very honored to be a Featured Artist/Designer at Paper Crafter’s Library.  Thank you so much for the opportunity.  Please stop by my blog, Paper and Such, or my Facebook page and say hello.

papercraftersblog2jes-550W 

A quick simple way to add “pop” to your card or project is by paper piecing.  You can either go elegant with it and add a few items, or keep it completely CAS.  When paper piecing, it’s important to have the right scissors.  I love my Cutter Bee scissors….they make all that fussy cutting a breeze.

papercraftersblogjes-550W 

The best pointer I can give anyone about paper piecing is having a good pair of scissors.  It will make the difference in whether or not you paper piece often or not. 

Supplies:

Papertrey Ink white cardstock, stamps from Sweet Stamp Shop called Press it Wash it, Versafine black ink, sequins, twine, Stampin’ Up! designer paper, Echo Park Love Story designer paper, and rhinestones. 

We hope you have enjoyed today’s projects courtesy of Julie Smith. Be sure to stop by Julie’s blog to see even more of her beautiful work (and let her know we sent you). You can also check out her Facebook page.


Featured Company: Graphic 45


We are happy to bring you this week’s Featured Company: Graphic 45. We are so excited to be featuring them regularly on Paper Crafter’s Library! For those of you unfamiliar with Graphic 45 , we’d like to take a minute to re-introduce them to you.

Graphic 45 is an award-winning scrapbook and paper crafting company­— owned and operated by a mother and her two daughters.

Diane Schultz—Designer and CEO (aka mother)

“I’m passionate about being creative and eager to make it possible for others to find their creative voice. My background includes stints as a designer for, McCalls, Simplicity, Vogue/ Butterick, Mattel Toy Company and a host of other jobs that each, in some way, led me to what I do now. At 45 I went back to school and got my degree in graphic design— I named the company to celebrate that achievement.”

Aimee Filimoehala —Director of Operations

“I wear a lot of hats and love it that way. Business, marketing, operations, etc. have made me a pro at multitasking (aka juggling‑figuratively and literally). When we launched Graphic 45 just three years ago we had no idea what was in store, working together as a family has been an amazing journey that we all feel so grateful to be apart of.”

Charee Filimoehala —Director of Customer Service and Design Team Coordinator

“I joined the team a little over three years ago and haven’t looked back…what a life-changing experience this has been. I love working with and around creative people and products (not to mention I like my co-workers quite a bit). I spend my days working with our friendly stores and talented design team…the occasional trip to a workshop or tradeshow pretty nice too.”
Together we create vintage inspired crafting products that capture the flamboyant style of the 1920’s and 30’s – with vibrant color, irresistible texture and imaginative design to create products with decades-old appeal that’s both fresh and familiar. Let our products inspire your next scrapbook layout, card, album or home decor project.

Graphic 45 Designer Susan Lui

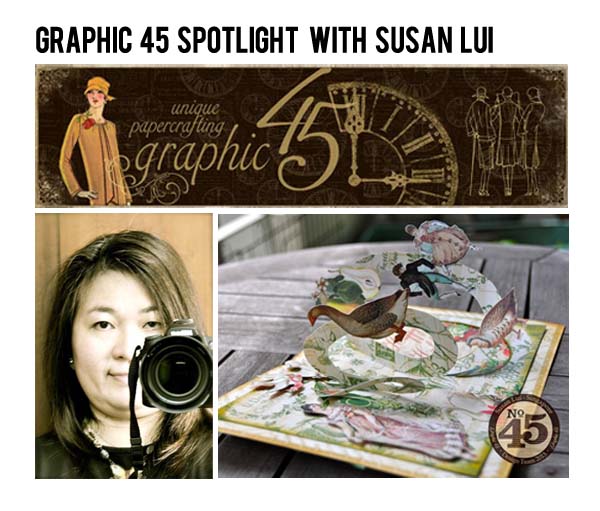
Our Graphic 45 Guest Designer for this week is Susan Lui who is part of the 2013 Graphic 45 Design Team. You can see Susan’s fabulous project below, but first, here is a little more about Susan:

SusanLui-250W

Hi there! My name is Susan Lui and I’m from Singapore. I started scrapping a few years ago and fell in love with papercrafting because it allows me to record and preserve memories for my family in a manner that appeals to the creative side of me. I have a fondness for shabby-chic designs with a vintage touch but will frequently venture over to the dark side for a distressed grungy adventure with mediums. I like my projects to have lots of texture and dimension and my layouts frequently end up very three-dimensional because of the mediums and embellishments I use. Aside from papercrafting, I enjoy travelling and photography. 

I was on the Graphic 45 design team in 2009/2010, 2012 and 2013 and have to say it’s my favourite manufacturer. I am also designing for and teaching at my local scrapbook store, PaperMarket. If you’d like to see more of my creations, please visit my blogThank you and happy scrapping!

Graphic 45 Designer Project

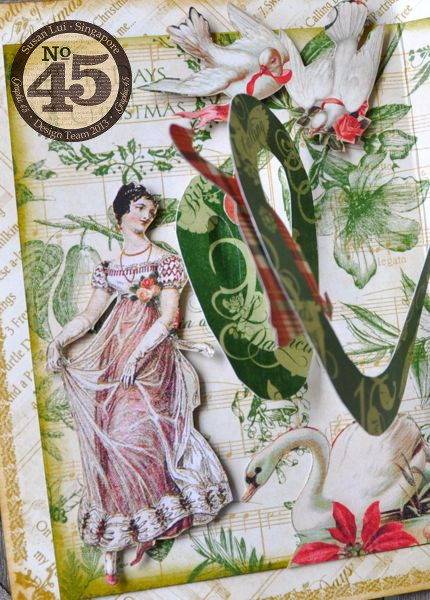
Christmas will be upon us soon so I’ve created a 3D pop-up Christmas Card, using Graphic 45’s Twelve Days of Christmas collection. The cover of the card has the lyrics for Twelve Days of Christmas.   

Twelve-Days-Of-Christmas-Christmas-Card-Graphic-45-Susan-Lui-1of4

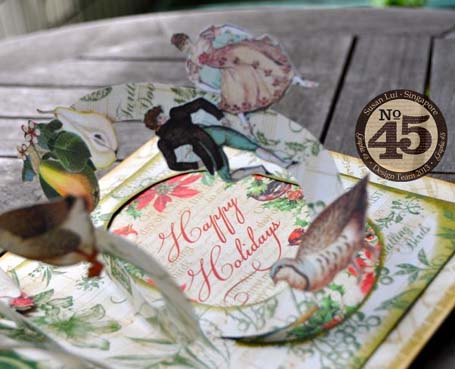
The inside of the card depicts that scene with images of the Twelve Days of Christmas popping up in 3D when the card is open. A holiday greeting also greets the recipient on the inside page.

Twelve-Days-Of-Christmas-Christmas-Card-Graphic-45-Susan-Lui-2of4

Below are a couple close up photos of the images of the Twelve Days of Christmas popping up from the card.

Twelve-Days-Of-Christmas-Christmas-Card-Graphic-45-Susan-Lui-3of4


Twelve-Days-Of-Christmas-Christmas-Card-Graphic-45-Susan-Lui-4of4


Twelve-Days-Of-Christmas-Christmas-Card-Graphic-45-Susan-Lui-5of5

Supplies:

Graphic 45 Twelve Days of Christmas – Twelve Days of Christmas, Holly & Ivy, Pear Tree, My True Love
Ribbon – May Arts

Graphic 45 Give Away

And now, Graphic 45 is giving away this Sweet Sentiments collection (shown below) to one lucky reader.  To enter the draw for the Sweet Sentiments collection, simply leave a comment on this blog post by Wednesday December 25/13.  The winner will be posted next week.

SweetSentiments-550W

We hope you have enjoyed this fun creation from Susan. I would also like to extend a warm thank you to Susan for sharing her fabulous project with us! Please take a minute to stop by Susan’s blog and of course the Graphic 45 blog to check out all their amazing creations! And don’t forget to leave a comment below to enter to win the Graphic 45 collection shown above.

It’s Beginning to Look a lot like Kwanzaa

By Aliya White

Have you ever heard of Kwanzaa?  More and more people are celebrating every year and kids are having ceremonies at school and community centers.  I have attended and hosted several gatherings over the years and while I am not an expert, I do a pretty good job of the  karamu (the feast) 😉 Here is a link to a site that does a good job of explaining the holiday.   But as a quick summary, Kwanzaa is a nonreligious holiday created to celebrate and honor African American history.   It is a time of endings and beginnings and is celebrated from a day after Christmas through the first day of the new year.  Plus there are some really great symbols and principles of the holiday that just beg to be crafted and shared.  I have found some cool projects that I would love to share with you and a few products as well that can help you get ready for this colorful holiday.

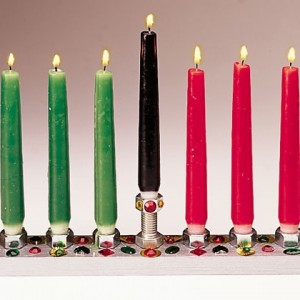
One of the first symbols you often see surrounding this holiday is the candle holder.  It is called the kinara.  It holds the seven candles to be lit each day that represent the seven principles of Kwanzaa.

The kinara below is made of wood and jewels and bolts.  It is very creative and can be made to size based on where you plan to display it.  I think the metallic paint and the addition of the bolts makes this one unique.

kwanzaa-kinara-craft-photo

  Image courtesy of Spoonfuls.com

The black candle represents the first principle – Umoja (oo-MOH-jah)Unity

The red candle on the far left represents the 2nd principle of Kwanzaa – Kujichagulia (koo-jee-chah-goo-LEE-ah)Self-Determination

The farthest right green candle represents the 3rd principle of Kwanzaa – Ujima (oo-JEE-mah)Collective work and responsibility

The second red candle on the left represents the 4th principle of Kwanzaa – Ujamaa (oo-jah-MAH)Collective economics

The second green candle on the right represents the 5th principle of Kwanzaa – Nia (NEE-ah)Purpose

The last red candle on the left  represents the 6th principle of Kwanzaa – Kuumba (koo-OOM-bah)Creativity

The final green candle on the right represents  the 7th principle of Kwanzaa –Imani (ee-MAH-nee)Faith


Keeping all of these principles in mind each day is easier with beautiful reminders around.  Look at this lovely garland that uses tags  and materials that you can use to dress up a mantel or doorway.

garland

  Garland by Vanessa Cole photo courtesy of Stashbooks

I also found these wonderful tags by Kathy Cano-Murillo that represent each principle.  She used ribbon and paint to create these lovelies.

craftychicaarttags

Tags by Kathy Cano-Murillo photo courtesy of CraftyChica.com

These next tags come in their own book to tell the full story.  It is so lovely it can be displayed too.  Here are a few pictures of the book and the tags inside.

Kwanzaa Tag Book  Kwanzaa Tag Book Close up 2  Kwanzaa Tags

Tag album by Kami Shalom photos courtesy of Kami’s Paper Trail

You can create your own stand up art with Sizzix Frames.  Beth created a lovely reminder of the principles that can sit on a bookcase or table.

Kwanzaa fame

Frame by Beth Reames courtesy of Sizzix

This next project is more of a sewing project but you might be able to use some of your painting supplies and stamps to recreate this border.  And really, I just loved it.

Kwanzaa wall hanging

Photo courtesy of Better Homes and Gardens

And check out this modern take on a wreath to really get festive!  The corn is also symbol for Kwanzaa.  In the ceremony the corn represents the children and the continuing legacy.

corn husk wreath

 Wreath by Layla Palmer of The Lettered Cottage photo courtesy of HGTV

While you are decorating, don’t forget to add a little banner across the fireplace or a wall with bright colors celebrating the season.  You can easily recreate this with papers and ribbon or string you have.  The mini size also adds flexibility if you have a smaller space you’d like to decorate.

Spoonful garland

Image courtesy of Spoonful.com

Now onto your table.  There are really clever things to do to decorate for the holiday.  I love the use of the baker’s twine and corn husk in this candle holder idea.  So clever.  I learned that you can find the husks year round in the ethnic section of most grocery stores.

Original_Camille-Styles-Kwanzaa-Corn-Husk-Vase

  Vase by Camille Styles image courtesy of HGTV

And look at these cute place settings that use the Post Office Kwanzaa stamps.

place settings

Photo Courtesy of Better Homes and Gardens

These symbolic unity cups would also look cute with before or after dinner treats in them.

unitycupwithribbon

Photo courtesy of Better Homes and Gardens

I am amazed at some of the cool art people create with Sharpie pens.  Elena created this cutie using an upcycled jar and a sharpie pen.  This could also be used on the table to hold treats, as a place holder or you could use it as an ethnic symbol in your Kwanzaa ceremony.

Tribal Print Glass Canister2

Jar by Elena Sullivan courtesy of Acasarella.net

Outside of the kinara, one of the most important symbols in your ceremony will be the unity cup.   It is used several times in the ceremony.  Traditionally, they are made of wood but symbol of the cup is the most important.  This cup goes way beyond a simple wooden vessel.  The bead work is so lovely.

Unitycup

Cup by Camille Styles photo courtesy of HGTV

And then, of course, you have to send out cards to celebrate and grace everyone’s mailbox you know.  I love how Cynthia  incorporated the colors in this stamp almost to look like a quilt and how all of the symbols are present right on the front.  Raffia gives the card some texture and dimension.


Cynthia Card

 Card by Cynthia Avent photo courtesy of Scraps of Color

Take a look at some of the products I found online that you can use in your creating.

Kwanzaa kinara stamp kwanzaa stamp

Rubber stamps photo courtesy of Dandee images

Digital stamp by Robert Jackson

Kwanzaa digi RJ

Robert Jackson Gallery

Digital Scrapbook paper

digi kente paper

Teachers pay Teachers

Digital kente paper etsy

Striped Elephants

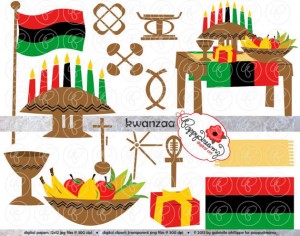
Digital clip art

Poppydreamz

Another cool digital image – from Paper Crafts magazine.

Unity-Kwanzaa digi image

Digital image from Paper Crafts and Scrapbooking

Kente ribbon

kente ribbon

Tambo Collection

Go ahead…make something pretty!


Mixed Media Monday: “Have Faith” Video Tutorial

ArtJournalExpressLogoHappy Monday everyone! Welcome to another edition of Art Journal Express brought to you by Andrea from her personal blog The Art of Simple.

Art Journal Express is a weekly video tutorial series she created for her personal blog The Art of Simple. Each week on Monday she posts a video tutorial on how she created one of her art journal pages from start to finish. Because a typical art journal page takes between 20 minutes to an hour for her to create – which makes for a super long video to upload to You Tube, and for you to watch – the video clips are sped up, rather than having you watch what she’s doing in real time – hence the word “express” in Art Journal Express. However, what makes these video tutorials different from most of the “sped up” art journaling video tutorials out there is that Andrea narrated for you exactly what she’s doing and what she’s using – that way, even though you’re watching a “fast forward” version, you don’t miss a single detail.

The videos are hosted on a You Tube Channel that is separate from the Paper Crafter’s Library You Tube Channel, so if you don’t want to miss a single edition of Art Journal Express please subscribe to that You Tube Channel (you can do so from the video tutorial page from today’s post).

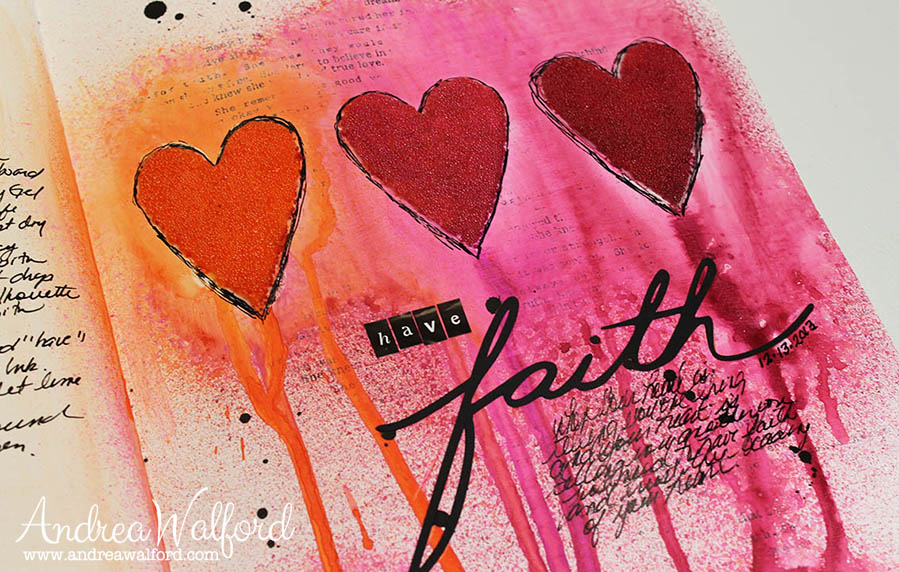
Today’s page is called “Have Faith” – shown below. You can watch a video tutorial HERE.

HaveFaithCloseUpBlog