Featured Artist/Designer: Brandi Hall

Today on the Paper Crafter’s Library blog, we’re continuing our weekly featured artist spotlight whereby each week we spotlight a different artist/designer in the paper crafting & mixed media world and introduce you to their fabulous work.

Today we’re thrilled to welcome Brandi Hall.

Before we show you Brandi’s project, let’s get to know her a little bit more…

BrandiHall-250WHi, my name is Brandi Hall and I live in upstate New York with my husband and two adorable westies. I started making cards over 5 years ago when I was introduced to Stampin’ Up!. From that point on, I started a blog and have played in various online card challenges. My favorite are sketch challenges, which are great when you need to jumpstart your mojo. I would consider my style to be clean and simple. I love searching various blogs, card magazines and Pinterest for the latest trends and inspiration. When I’m not in my studio crafting you can usually find me reading a good book or on the golf course. Thank you so much for having me as a featured designer on Paper Crafter’s Library!

Here’s the card that Brandi made for you today. 

Brandi used the Believe in Magic stamp set by Mama Elephant for her card.  This stamp set makes it really easy to create beautiful snow globe images with all it’s different elements.  There’s no need to try and color in a single stamp using various colors of markers.

Brandi_121213-550W


Instructions:

1. Cut cardstock to 4 1/4″ x 11″, score and fold for card base.
2. Stamp image and sentiment on cardstock.
3. Adhere sequins to cardstock.

Supplies:

Paper: Kraft cardstock
Stamps: Believe In Magic (Mama Elephant)
Ink: Tempting Turquoise, Crushed Curry, Soft Suede, Kiwi Kiss (Stampin’ Up!)
Accents: Citrus Blend Sequins (Avery Elle)

We hope you have enjoyed today’s projects courtesy of Brandi Hall. Also, be sure to stop by Brandi’s blog to see even more of her beautiful work (and let her know we sent you).


Trendy Tuesday – Snowflakes

Trendy Tuesday – Snowflakes

by Katherine Elliot

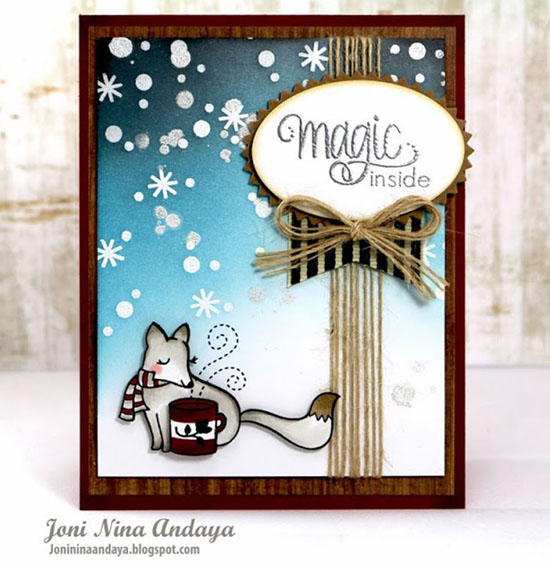
Beautiful snowflakes are adorning many projects crafted by folks living in the northern hemisphere preparing for the holidays and upcoming winter season.  A wide variety of unique, ornate or simple patterns make it easy to add multiple snowflake shapes to your stash of paper craft supplies.   Check out these lovely projects featuring die cuts, punches, stamps and more with this frosty favorite…  limedoodlesoftsnowflakeweb1Clean and simple snowflake card by Debby Hughes, image source Limedoodle Design blog

Debby Hughes’ projects are always a treat to see.  A crisp, clean and simple design makes a beautiful die cut snowflake stand out from the crowd.  You can find many different die cut shapes and sizes from many companies like Simon Says Stamp, Hero Arts, Paper Smooches, and My Favorite Things, just to name a few…

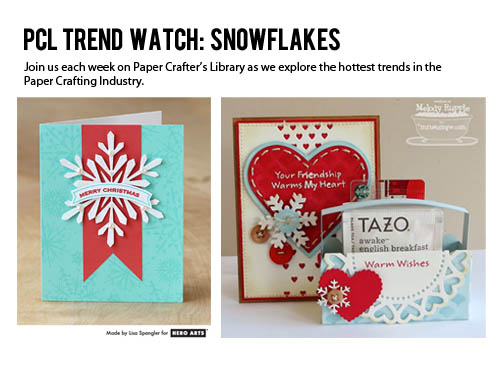
   Card by Lisa Spangler, featuring Hero Arts snowflake die, image source Hero Arts.com

Happy Christmas card by Karen Dunbrook, image source Snippets

_MG_1201xNatural Snow card by Lisa Johnson, image source Poppy Paperie 

Die-namics Let It Snowflake

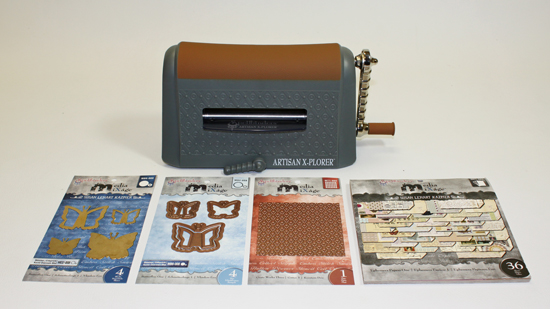
My Favorite Things snowflake dies

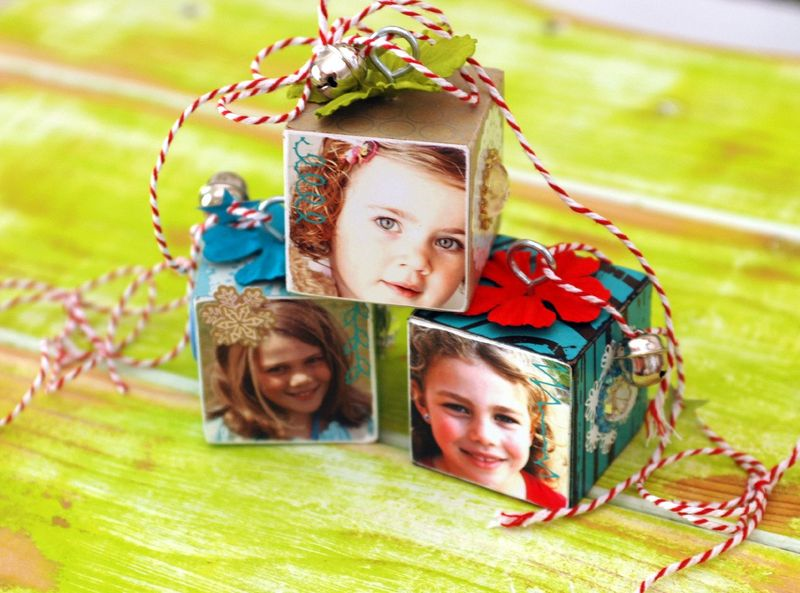
Combine snowflake shapes with other die cuts to create a seasonally inspired project with a lot of interest.  Check out the amazing details and layers on Melody Rupple’s project below…  Twine and button centers on the snowflakes add to the homespun charm.
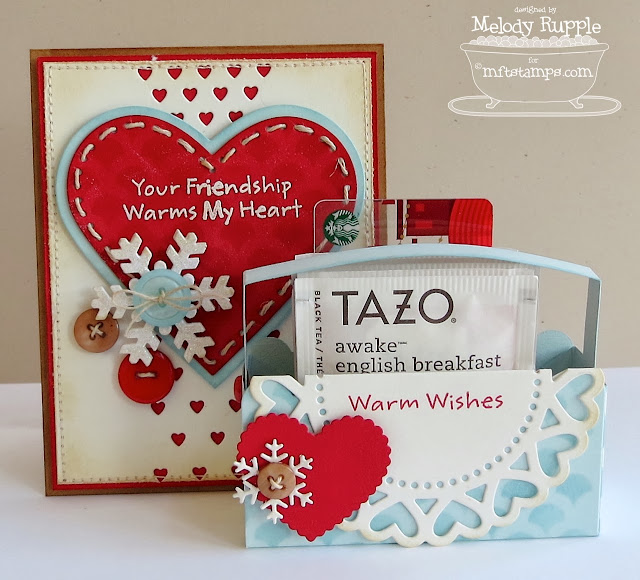
Card and mini gift basket by Melody Rupple, featuring stamps and dies from My Favorite Things, image source A Paper Melody

No steel rule dies or other die cutting tools on hand?  Small snowflake punches make it easy to create a flurry of shapes for any project.  And oh yeah, punches! What a great stocking stuffer!

Martha Stewart Scandinavian Snowflake Paper Punch

 Martha Stewart snowflake punch, image source Paper Crave

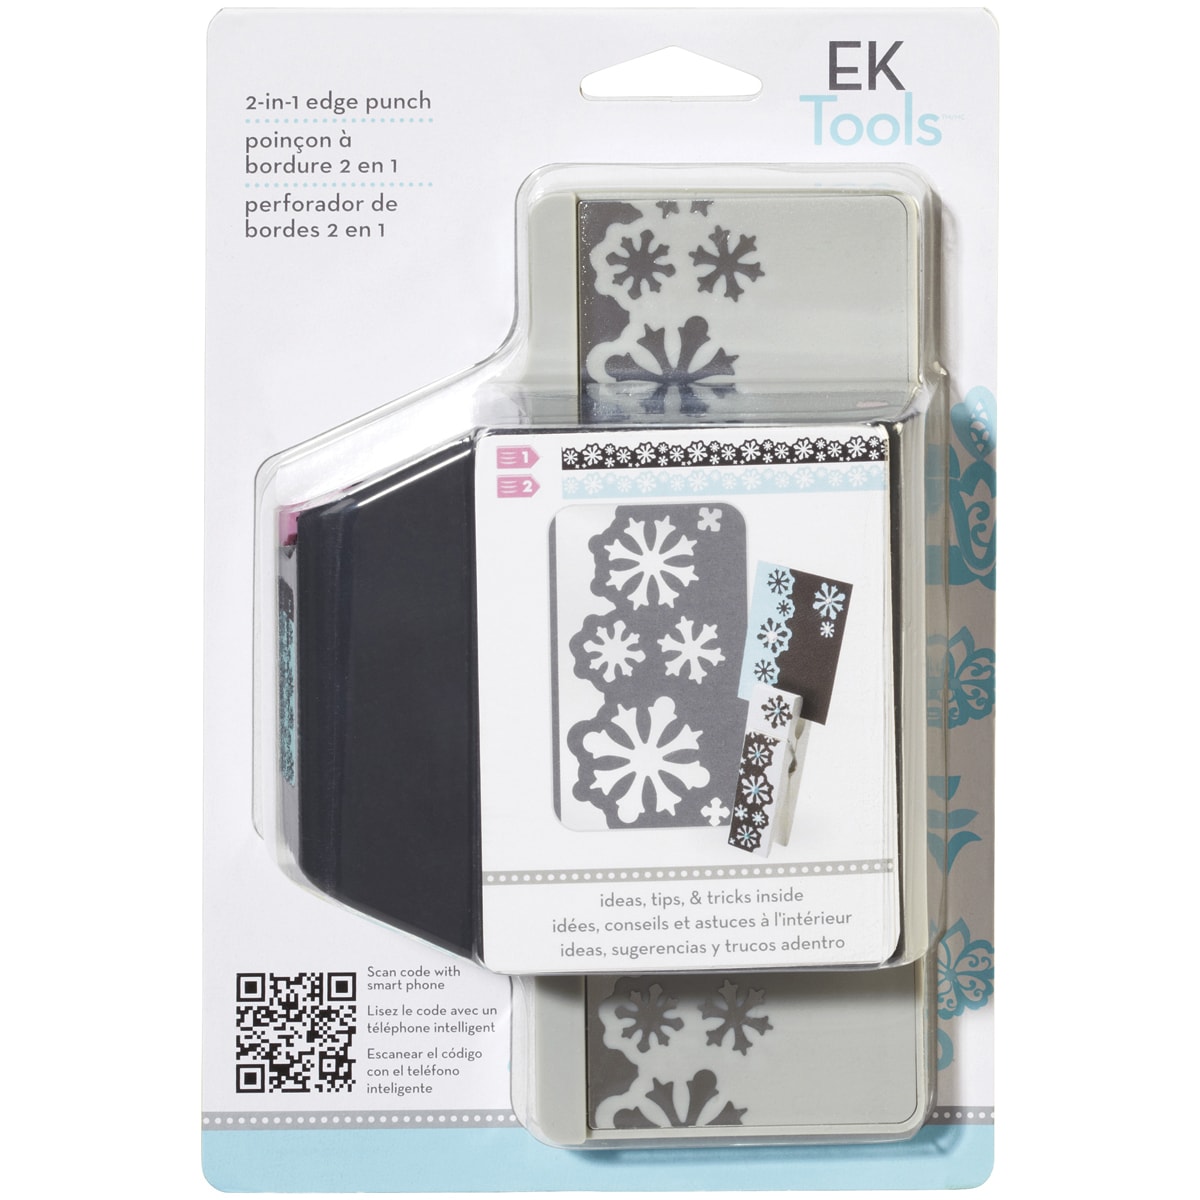
Snow Flurries edger punch from EK Success, image source Overstock.com

 Several brands offer combinations of stamp sets and dies to match providing even more creative options for your projects.  Sweet n’ Sassy Stamps and Stampin’ Up! have a couple choices that will keep you busy crafting when you may be stuck inside the house on a cold, wintry day…

Snowy Hello card by Korin Sutherland, image source Splitcoast Stampers 

Sweet n’ Sassy Stamps Spectacular Snowflakes stamps and dies

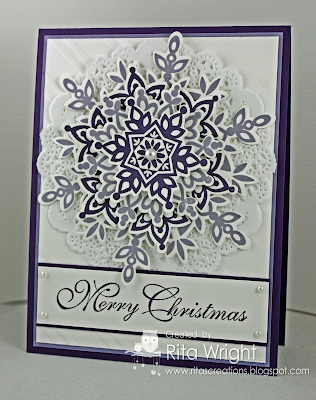
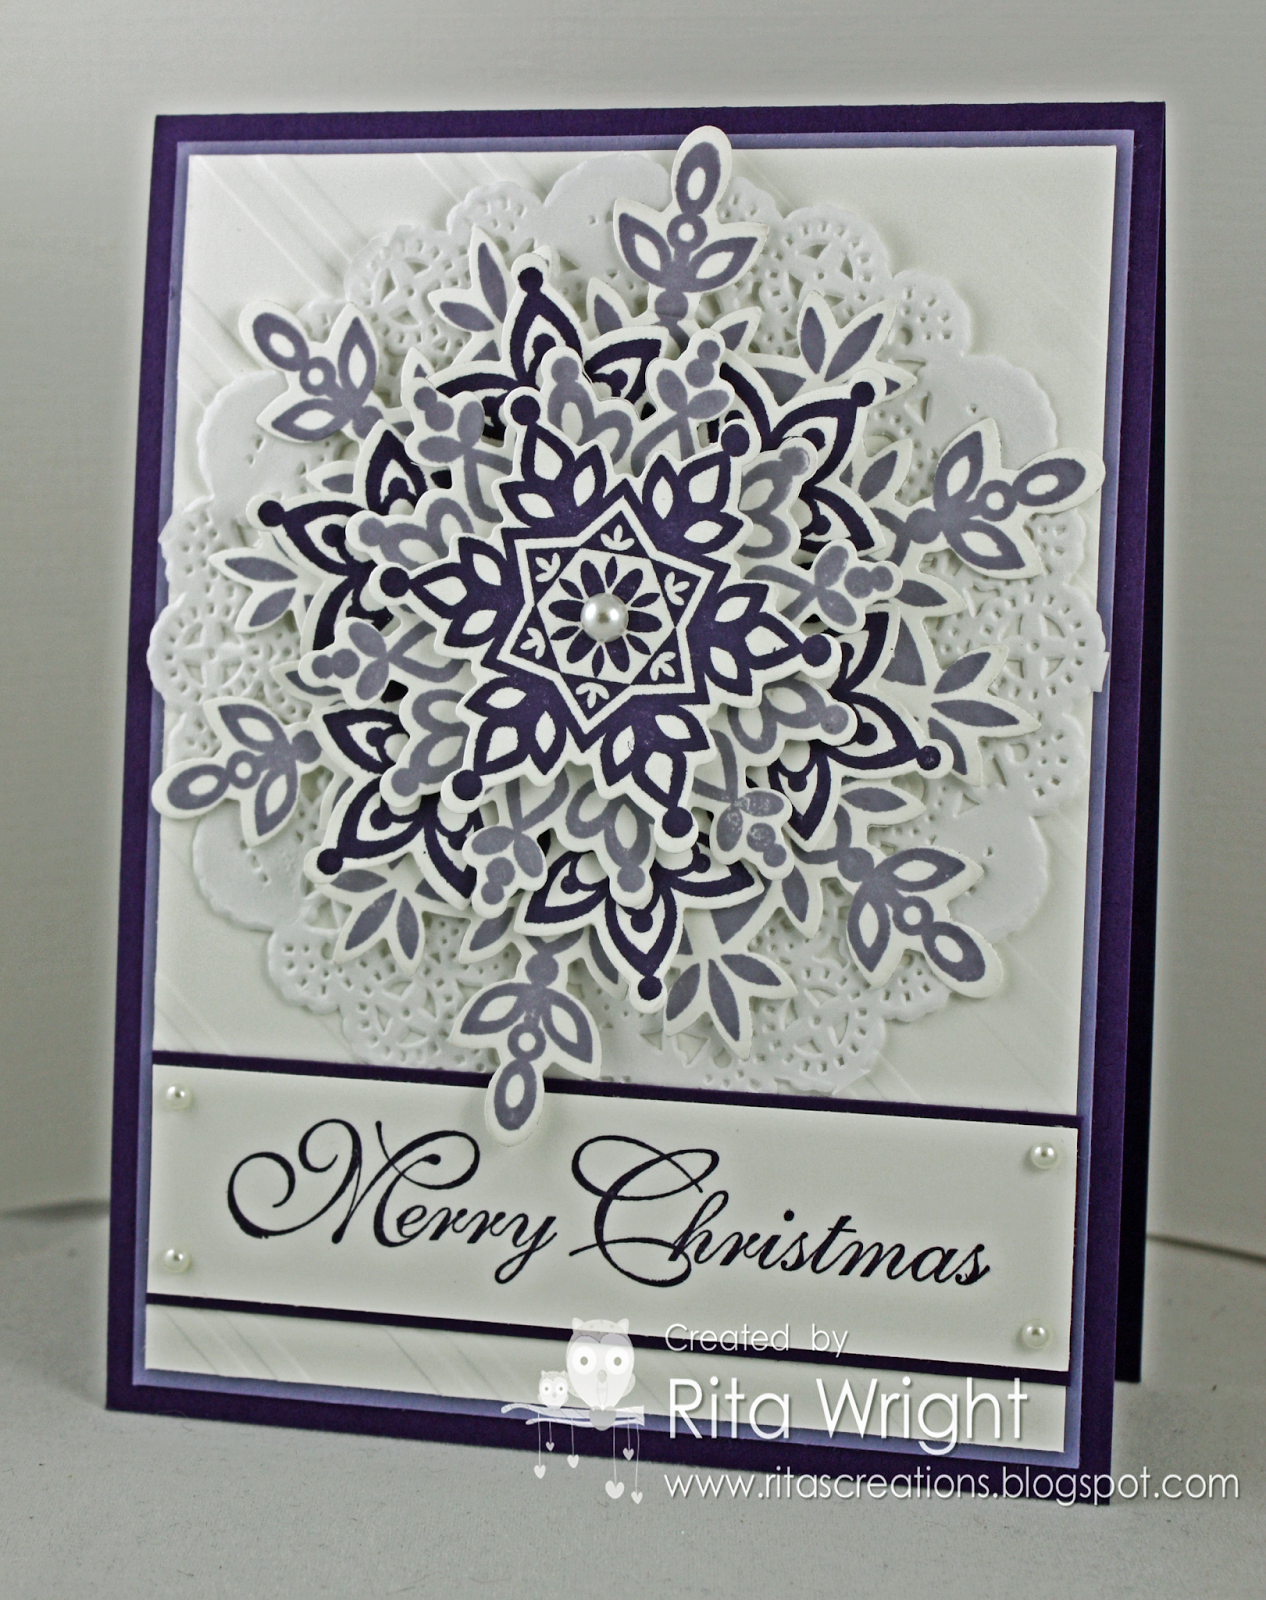
Festive Flurry card by Rita Wright, featuring stamps and dies from Stampin’ Up!, image source Rita’s Creations


Festive Flurry stamp set & dies bundle from Stampin’ Up!

 No snowflake is alike, so a stamp set with many different shapes of flakes can also help you stamp a blizzard, or simply create a fresh  winter greeting, like Kay Miller’s card here…

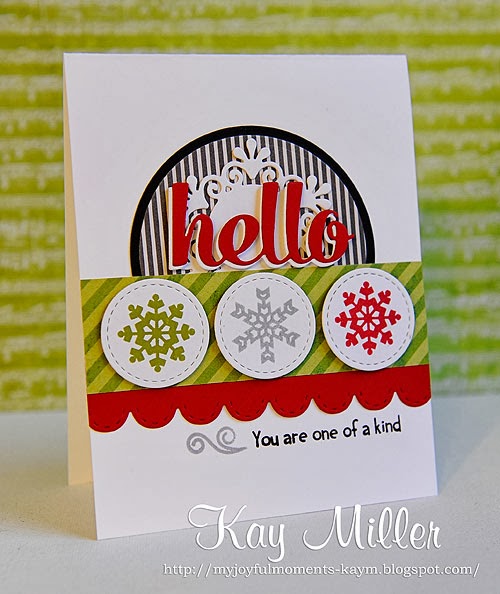
Card by Kay Miller featuring Paper Smooches Fresh Snow stamps, image source My Joyful Moments

Paper Smooches Clear Stamps, Fresh Snow

Paper Smooches Fresh Snow stamp set, image source Ellen Hutson

 Love to layer?  Create a wonderful snowflake shape ornament with your favorite cardstock, dies, and stamps.   Kay Miller wins my unofficial “Snowflake Queen” designation with more than one of her projects shared today including this adorable penguin ornament.  Multiple layers of Spellbinders snowflake cut outs and super cute stamp from Purple Onion Designs make this an instant favorite.
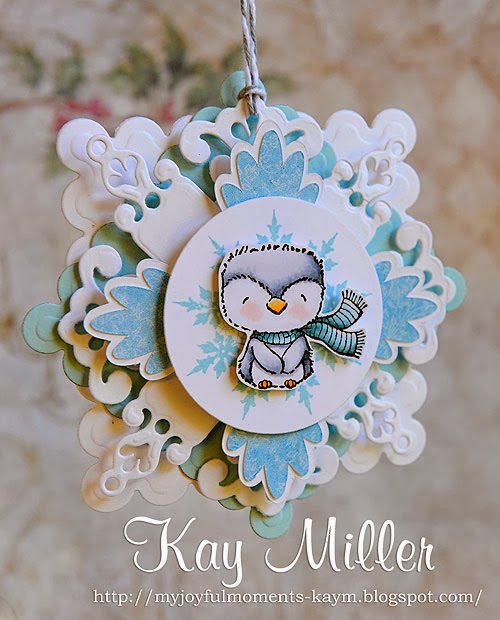
Snowflake ornament by Kay Miller, image source My Joyful Moments Spellbinders Shapeabilities Snowflake Pendant dies, image source Scrapbook.com

A dimensional snowflake makes a stunning element to add to a project whether it is layered or popped up off the page.  Ready to fold dimensional dies are popular, and the snowflake is a great shape to see created in this fashion.   The Sizzix, Tim Holtz design rosette shape looks great adhered on a project or all alone, ready to decorate your home.

Retro Snowflake Greetings card by Natalia Harandon, featuring Sizzix die cut, image source Two Peas in a Bucket Gallery

Sizzix, Tim Holtz Snowflake Rosette, image source Scrapbook.com

 Last, but not least, embossing folders are great way to add dimension on a single layer of your project.

  Sizzix Hero Arts, Textured Impressions Embossing Folders, Big Snowflakes, 2 pk

Hero Arts Big Snowflake embossing folders, image source Ellen Hutson.com

The Big Snowflake folders from Hero Arts were a new find for me.  I love how the oversized, textured impression turns out so delicate on Shari Carroll’s creation below…

Embossed Snowflake card by Shari Carroll featuring Hero Arts embossing folder, image source Hero Arts.com

Embrace this season’s weather by pulling out a few of your favorite tools and begin a flurry of activity. Keep it simple, or layer your way into something beautiful to share with someone you love.  Is it snowing yet where you live?  If so, bundle up and craft awhile.  Happy crafting, everyone!
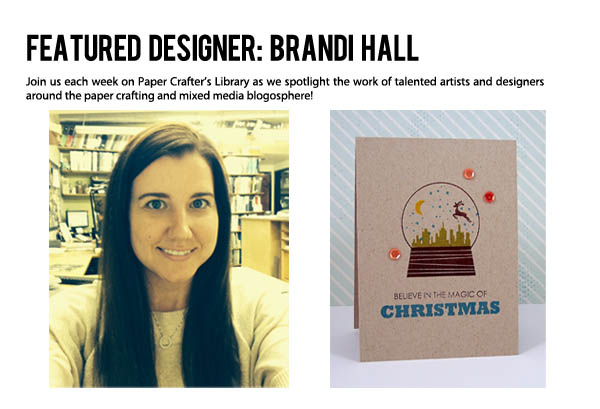
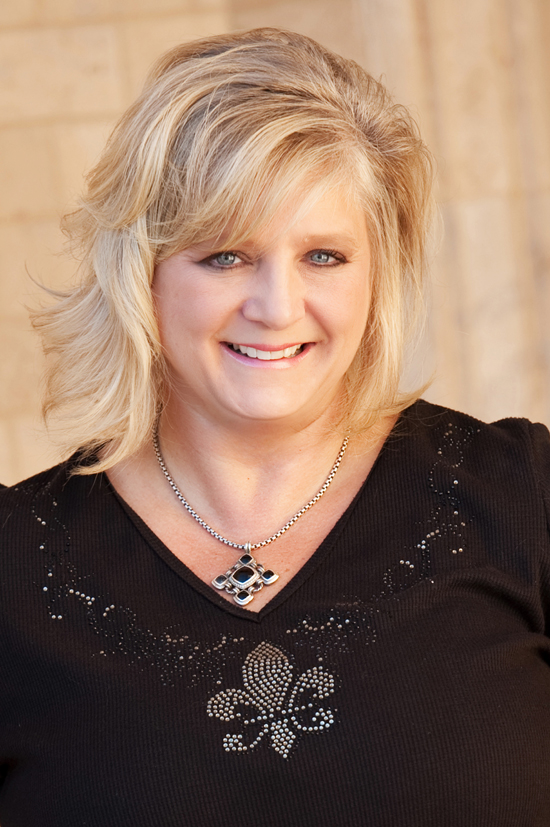
Mixed Media Monday: “What Direction Should I Take?” Video Tutorial

ArtJournalExpressLogoHappy Monday everyone! Welcome to another edition of Art Journal Express brought to you by Andrea from her personal blog The Art of Simple.

Art Journal Express is a weekly video tutorial series she created for her personal blog The Art of Simple. Each week on Monday she posts a video tutorial on how she created one of her art journal pages from start to finish. Because a typical art journal page takes between 20 minutes to an hour for her to create – which makes for a super long video to upload to You Tube, and for you to watch – the video clips are sped up, rather than having you watch what she’s doing in real time – hence the word “express” in Art Journal Express. However, what makes these video tutorials different from most of the “sped up” art journaling video tutorials out there is that Andrea narrated for you exactly what she’s doing and what she’s using – that way, even though you’re watching a “fast forward” version, you don’t miss a single detail.

The videos are hosted on a You Tube Channel that is separate from the Paper Crafter’s Library You Tube Channel, so if you don’t want to miss a single edition of Art Journal Express please subscribe to that You Tube Channel (you can do so from the video tutorial page from today’s post).

Today’s page is called “What Direction Should I Take?” – shown below. You can watch a video tutorial HERE.

DirectionCloseUpBlog-550W

Featured Artist/Designer: Joni Andaya

Today on the Paper Crafter’s Library blog, we’re continuing our weekly featured artist spotlight whereby each week we spotlight a different artist/designer in the paper crafting & mixed media world and introduce you to their fabulous work.

Today we’re thrilled to welcome Joni Andaya.

Before we show you Joni’s project, let’s get to know her a little bit more…

Joni-225WHi, My Name is Joni Andaya, I live in Jacksonville, in the sunny state of Florida.  My passion has always been to design and create things. You will usually find me stamping and creating when I am not in school getting a degree in Software Engineering – I only have one subject left before my graduation this coming February 2014. 

I started stamping when my daughter was born in 2004 to create some invitations for her first birthday party and I’ve been hooked ever since.  I created my blog in 2012 and really got serious on creating mostly cards. I tend to create mostly cards because of the requests of families and friends. I am also honored to be part of some of the design teams the Runway Inspired Challenge & CAS(E) this Sketch.

My style usually focuses on dimensions and colors. I love to play with inks and mists that are out there, I also love to create my own backgrounds for my cards. I get lots of inspiration from Pinterest. I am also so fortunate to have been published in Paper Crafts Magazines and included as one of the Stamping Royalty for this year. I am so honored to be a Featured Designer here at Paper Crafter’s Library and so very grateful for having me! Thank You!

JoniProject-550W

The idea of this card is that the images and sentiments can easily be interchange with other images and sentiments to use for multiple holiday cards.

Directions

1. Create a card base from a cardstock.
2. Adhere the woodgrain panel to the card.
3. Create another panel using white cardstock, and emboss it with the snowflakes and dots images.
4. After embossing, distress the panel with different colors of distress inks, using the lightest to darkest, starting at the top of the panel.
5. After distressing, add the shine mists and let it dry.
6. Stamp the fox image on a separate piece of white cardstock.  Color it with copic markers and cut it out.
7. Next, die-cut the oval shapes.  Emboss the sentiment with a silver embossing powder.
8. Assemble the images – attach the fox at the bottom of the card, tie some natural twine on the other side of the panel, attach the oval pieces, attach the ribbon piece, and make a bow from the natural twine.
9.
Adhere the panel to the card.

Supplies

Cardstock: Scarlet Jewel and Simply White (Papertrey Ink) Patterned Paper: Woodgrain (October Afternoon) Stamps: Lots of Dots (Simon Says Stamps), Winter Fox (Lawn Fawn), Yeti Set Go, and Santa’s Tags (Neat and Tangled) Dies: Limitless Layers Oval (Papertrey Ink) Inks: Versamark, Black Onyx (VersaFine), Black Soot, Broken China, and Pumice Stone (Ranger Distress Inks) Copics: W1, W3, W5, E17, and R20 Others: Natural Twine and Striped Ribbon (May Arts), Silver Filligree Embossing Powder (Papertrey Ink), and Mr. Huey’s Calico Shine (Studio Calico)

We hope you have enjoyed today’s projects courtesy of Joni Andaya. Also, be sure to stop by Joni’s blog to see even more of her beautiful work (and let her know we sent you). You can also follow her on Pinterest.


Featured Company: Graphic 45


We are happy to bring you this week’s Featured Company: Graphic 45. We are so excited to be featuring them regularly on Paper Crafter’s Library.  For those of you unfamiliar with Graphic 45 , we’d like to take a minute to re-introduce them to you.

Graphic 45 is an award-winning scrapbook and paper crafting company­— owned and operated by a mother and her two daughters.

Diane Schultz—Designer and CEO (aka mother)

“I’m passionate about being creative and eager to make it possible for others to find their creative voice. My background includes stints as a designer for, McCalls, Simplicity, Vogue/ Butterick, Mattel Toy Company and a host of other jobs that each, in some way, led me to what I do now. At 45 I went back to school and got my degree in graphic design— I named the company to celebrate that achievement.”

Aimee Filimoehala —Director of Operations

“I wear a lot of hats and love it that way. Business, marketing, operations, etc. have made me a pro at multitasking (aka juggling‑figuratively and literally). When we launched Graphic 45 just three years ago we had no idea what was in store, working together as a family has been an amazing journey that we all feel so grateful to be apart of.”

Charee Filimoehala —Director of Customer Service and Design Team Coordinator

“I joined the team a little over three years ago and haven’t looked back…what a life-changing experience this has been. I love working with and around creative people and products (not to mention I like my co-workers quite a bit). I spend my days working with our friendly stores and talented design team…the occasional trip to a workshop or tradeshow pretty nice too.”

Together we create vintage inspired crafting products that capture the flamboyant style of the 1920’s and 30’s – with vibrant color, irresistible texture and imaginative design to create products with decades-old appeal that’s both fresh and familiar. Let our products inspire your next scrapbook layout, card, album or home decor project.

Graphic 45 Designer Romy Veul

Our Graphic 45 Guest Designer for this week is Romy Veul who is part of the 2013 Graphic 45 Design Team. You can see Romy’s fabulous project below, but first, here is a little more about Romy:

Romy-250WHello everyone and welcome to the Paper Crafter’s Library blog today!  My name is Romy and I’m a 20-year old girl from the Netherlands. I study Dutch Language & Linguistics at University in Amsterdam and when I’m not studying or spending time with my boyfriend, friends and family, I love to make lay-outs and cards. I started scrapbooking approximately 8 years ago and haven’t looked back since! I love everything about this hobby! I consider myself a scrapbooker and a cardmaker, as I love to make both kinds of projects a lot! My style could be best described as romantic, layered and detailed. I always love to work with lots of layers and incorporate many details in my work.

I’m really excited to be sharing a lay-out, which I made as a DT member for Graphic 45, with you on this blog today. I made it with one of Graphic 45’s newest releases: the “Couture” collection. I fell in love with these papers the first moment I saw them. It’s a feminine, elegant and romantic collection with a beautiful colour combination…what more could I have wished for! These papers are also very versatile, as I hope to be able to show you with my lay-out.

This fall photo of me was taken a few weeks ago and I found that it actually matched really well with the “Couture” collection because of the warm reds in these papers. I also tried to stick to the couture/fashion theme a little bit. I really am a dresses and skirts kind of person, so you won’t often see me wearing jeans. But since my boyfriends loves jeans, I’m trying to slowly but surely get used to wearing trousers. That’s also where I journalled about on this lay-out.

Graphic 45 Designer Project

Romy1-550W

I like to add lots of layers to my projects and with that I do not only mean layers of paper, but also layers of embellishments. For example, I stapled a few chipboard pieces in the corner of my lay-out.

Romy2-550W

The elegant lady in the right below corner was cut out from one of the papers. I attached it to my lay-out with foam tape to make it stand out a little more.

Romy3-550W

Thank you so much for stopping by the Paper Crafter’s Library blog today. I hope you enjoyed my post!

Supplies:

Couture patterned papers: Couture, Fashion, Beautiful, Chic, Fabulous
Couture 8×8 Pad
Mother Goose 8×8 Pad
Couture Chipboard 1
Couture Stickers Ornate Metal Keys
Petaloo Darjeeling Flowers

We hope you have enjoyed this fun creation from Romy. I would also like to extend a warm thank you to Romy for sharing her fabulous project with us! Please take a minute to stop by Romy’s blog and of course the Graphic 45 blog to check out all their amazing creations!

Winner of Spellbinders Media Mixage Give-Away

Spellbinders-logo-300-dpi

I’d like to extend a thank you to Spellbinders for their prize package give-away shown below.

SpellbindersPrizePack

And now, the moment you’ve all been waiting for…….the winner is……Sarah W!

SpellbindersWinner

Congratulations Sarah!! Be sure to email us at customerservice@papercrafterslibrary.com to claim your prize. Please be sure to put “Media Mixage Winner” in the subject line of the email, and then in the email itself, be sure to include your full mailing address and phone number.

For those of you that didn’t win, each week on PCL we feature a different company, and each of those companies generously sponsors a prize. Join us next week when we feature another great company.

andreasiggypcl

Trendy Tuesday: Incorporating Photos

More Photos Please
by Aliya White

It’s Christmas time and I can’t seem to get enough of the photo Christmas cards coming in from my friends and family.  I make my own Christmas cards by hand each year (even though the list keeps shrinking 🙂 ) but I still like to show off all of my pictures.  With two adorable nephews, a beautiful niece, my husband’s wonderful dimples and a few random selfies, I have plenty of choices in pictures and am always looking for new ways to display them.  I am thrilled to share with you some of the fun ideas I have found for you to use your pictures too.  When making your own photo projects you should always make copies of your pictures rather than using the originals.

I adore this earthy colored toned wreath by Birgit at My Scrappin’ Life.  She used mini canvases and transferred pictures on them in sepia tones to create this lovely wreath.  It is sweet and personalized and a great centerpiece for your home or a great gift for relatives to show off the family.

Canvas photo wreathWreath by Birgit Koopsen image source My Scrappin’ Life


For those of us who got hot and heavy into the mason jar trend and are looking around for things to do with all of the lids, I have a great photo idea for you courtesy of the Crafting Chicks.  Jamie created coaster like images of her family and put them in this color pop red wreath.

Wreath by Jamie image courtesy of The Crafting Chicks

Another great mantel gift that can be used during the holidays and throughout the year is a clock.  Simple punches were used with scrapbook paper to create this one of a kind center stager.   I love the idea of having the photos represent some of the fun times (I have been hanging out with a punster so forgive the occasional pun) the family had during the year.  You can also use old photos and show the aging process of one person or a family lineage, even puppy to dog photo montages.

instagramclockClock from Julee Dyer image courtesy of Land of Nog

I love the versatility in this piece.  You can clip photos to it or put them on tags, spell out names, Christmas wishes or even hang special cards your received from loved ones on this window.  And of course, there is plenty of room for embellishments and flair. 

Christmas windownWindow by Corrie Jones image courtesy of Shimelle

If you are looking for something a bit smaller and less time intensive, I have a few cute ideas for you too.  Sarah created a garland out of copies of photos of her children and wooden pieces she decoupaged.  She jazzed them up with ribbon and scrapbook paper and hung them from her banister.

year by year photo ornamentsOrnament by Sarah photo courtesy of Memories on Clover Lane

A nice treatment to a inexpensive frame can include the frame and the picture mat as well.  In this example scrapbook paper was used along with a common office supply so you can change out pictures as frequently as you’d like.


photo with scrap paperFrames by Whitney photo courtesy of Shanty2chic

If you have many pictures and not as much space, consider using a wooden block where you can include several pictures and lovely flowers too as Leeann did here.

phot craft block ornamentsOrnaments by Leann Pearce photo courtesy of Allison Kreft Designs

These adorable hand sewn felt Polaroids are too cute.  I could see how neat that would be to embroider the year or a note about the picture on the bottom as well.

felt polaroid ornamentOrnament by Katie image courtesy of Katie Cupcake

Super popular right now are customized wooden clothespins.  You can make your own with photos you have taken over the years or a scene and hang Christmas cards with them on the fridge.  This one uses a cool landscape.

Instagram Photo Prints Clothespins DIY 1 Photo courtesy of Postalpix

The vintage flair of these bell jars is just irresistible especially when I tell you they are made of upside down plastic wine glasses you can find at your local dollar store.  The magic of these ornaments is about the close up shot fussy cut and the embellishments and glitter surrounding them.

vintagebelljarsOrnament by Ashelee image courtesy of My So Called Crafty Life

The name of this last project just got me.  They are called Comfort Boxes.  They are made of empty match boxes and have little surprise photos and words of encouragement in them.  They are sweet and kitschy at the same time.

matchbox picsBox by Kimmy photo courtesy of Making Mondays

Most photo projects use some sort of Mod Podge which is awesome and comes in so many great varieties that it can work on any surface you are interested in.  I also found that these projects are a great way to use your stash of embellishments to decorate them as well as a good use of scrap paper you have; or a great excuse to shop for holiday or theme specific scrap paper.

mod podge

There are, of course, the surfaces, which are endless. Below are just a few that I found at Canvas Corp and Paper Smooches that have possibility written all over them.

Canvas-Mini-Shapes-Triangles-Red-3 Canvas corp Canvas-Stocking-Jester-Large- Canvas corp  Chunky-Stretched-Nat_-Canvas Corpframe dies

There are a lot of beautiful, whimsical, traditional, bright, neutral and every other style of holiday paper available.  Here are few that I liked from October Afternoon, Glitz Design and BoBunny

BoBunny paper packGlitz design hello december paper padSilent Night 1220 - PP 12x12 - White Christmas (BACK) - _Music v Silent Night 1230 - PP 12x12 - Auld Lang Syne (BACK) - _Candy v4

And of course you need embellishments like flairs, buttons, stickers and ribbon.  Prima always has lovely flowers and I like their die cuts as well!

BoBunny stickersBoBunny buttonsPetaloo Flora DoodlesPetaloo Vintage Dazzlers

Glitz design hello december stickers titles and accentsGlitz hello whatnot december

So enjoy your photos for the holidays, year round, create special one of a kind gifts and definitely take more selfies: you are only limited by your imagination.

Go ahead… make something pretty.

Mixed Media Monday: “Age Is Just A Number” Video Tutorial

ArtJournalExpressLogoHappy Monday everyone! Welcome to another edition of Art Journal Express brought to you by Andrea from her personal blog The Art of Simple.

Art Journal Express is a weekly video tutorial series she created for her personal blog The Art of Simple. Each week on Monday she posts a video tutorial on how she created one of her art journal pages from start to finish. Because a typical art journal page takes between 20 minutes to an hour for her to create – which makes for a super long video to upload to You Tube, and for you to watch – the video clips are sped up, rather than having you watch what she’s doing in real time – hence the word “express” in Art Journal Express. However, what makes these video tutorials different from most of the “sped up” art journaling video tutorials out there is that Andrea narrated for you exactly what she’s doing and what she’s using – that way, even though you’re watching a “fast forward” version, you don’t miss a single detail.

The videos are hosted on a You Tube Channel that is separate from the Paper Crafter’s Library You Tube Channel, so if you don’t want to miss a single edition of Art Journal Express please subscribe to that You Tube Channel (you can do so from the video tutorial page from today’s post).

Today’s page is called “Age Is Just A Number” – shown below. You can watch a video tutorial HERE.

AgeIsJustANumberCloseUpBlog

Featured Artist/Designer: Julie Day

Today on the Paper Crafter’s Library blog, we’re continuing our weekly featured artist spotlight whereby each week we spotlight a different artist/designer in the paper crafting & mixed media world and introduce you to their fabulous work.

Today we’re thrilled to welcome Julie Day.

Before we show you Julie’s fabulous project, let’s get to know her a little bit more…

JulieDayProfilePic-225W

Hi, my name is Julie Day and I live in beautiful rural Nova Scotia with my husband, teenage daughter and three cats. By day I work at our local pharmacy as a pharmacy technician and by night you will find me wherever I have my current stash of art supplies. I’ve pretty much dabbled in everything artistic and was a hard core scrapbooker for some time and then switched over to cardmaking. My true passion is stamping and I find there are endless possibilities for one stamp, which makes this hobby so interesting! Now my creative time is torn between my love of cardmaking and more recently my love of jewelry design.

My style is definitely clean and simple and I tend to gravitate to designs that are graphic, although I will admit I like to break out my brayer once and awhile and create a whole stamping scene. I love one layer cards, especially cards made using primarily stamping techniques. I find I can never keep up with trends with cardmaking, as I tend to hold onto supplies forever. My favorite way to make a card is to dig out the oldest supplies I have or something that has been long forgotten and go from there with the design.

I am currently on the design team CAS(E) this Sketch and have been a designer for CAS-ual Fridays, The Play Date Cafe and Market Street Stamps where I also had a brief stint of designing my own stamp line called J. Day Designs. Thanks for having me as a featured designer on Paper Crafter’s Library, I hope you enjoy my simple card 🙂

JulieDayThanksAMillionCard-550W

Supplies:

Cardstock: (whisper white) Stampin’ Up!
Stamps: (tape it, word play) Stampin’ Up!
Ink: (strawberry slush, pistachio pudding, baked brown sugar, crisp cantaloupe, coastal cabana) Stampin’ Up!

Directions:

1. Cut and fold white cardstock for base.
2. Stamp sentiment and stamp tape strips up the right hand side.

We hope you have enjoyed today’s projects courtesy of Julie Day.  Also, be sure to stop by Julie’s blog to see even more of her beautiful work (and let her know we sent you). 


Featured Company: Spellbinders

Screen Shot 2013-11-05 at 2.08.27 PM

Today we’re thrilled to be able to welcome back one of our favourite companies…….Spellbinders! In today’s spotlight you’ll learn more about Spellbinders, and we’re going to talk about an exciting line they released earlier this year in collaboration with renowned artist, jeweller and metalworker Susan Lenart Kazmer – called Media Mixage. We’ll have a few videos demonstrating how to use a number of their products in this line and finally, we’ll be giving away the prize pack shown below.

SpellbindersPrizePack

ABOUT SPELLBINDERS

Spellbinders entered the craft and hobby market in 2003 with the introduction of the Spellbinders Wizard™ Universal Craft Tool and a unique, patented collection of dies unlike any introduced before – or since. Always on the cutting edge in introducing innovative tools to the market, the Spellbinders Artisan X-plorer™ machine and Media Mixáge line are the company’s latest offering for crafters, jewelry artists and mixed media creators.  In addition, the Spellbinders Grand Calibur® machine is perfect for large format die cutting and embossing.  Known worldwide for its game changing products, the company brings revolutionary technology with its Imperial Gold die templates that cut, emboss, deboss and stencil.  Spellbinders product lines allow crafters, hobbyists, artists and teachers to create one-of-a-kind, beautiful projects across a different variety of craft genres.

Wood Family Portrait

Stacey Caron – co-founder of Spellbinders –  was honored with an award as a finalist in the Ernst & Young Entrepreneur Of The Year® 2013 program in the Desert Mountain region which encompasses Colorado, Arizona and New Mexico. The awards program recognizes high-growth entrepreneurs who demonstrate excellence and extraordinary success in such areas as innovation, financial performance and personal commitment to their businesses and communities.

In 2012, Stacey Caron received an Enterprising Women Award.  The annual Enterprising Women of the Year Awards recognize the finest women entrepreneurs in North America and beyond, and is considered one of the most distinguished recognition programs for women business owners.

The company received the Craft & Hobby Association (CHA) 2012 Summer Innovations Award for the Spellbinders Nestabilities® Majestic Elements line.  The award represents the industry’s most respected recognition for product innovation.

For three consecutive years, Spellbinders Paper Arts has been included in the Inc. 500|5000, an exclusive ranking of entrepreneurs nationwide. Visit http://spellbinderscreativearts.com/ or e-mail info@spellbinders.us for more information.

So now that you’ve had a chance to learn more about Spellbinders, let’s talk a closer look at the Media Mixage Line.

Introduction To Spellbinders Media Mixage

In this video we give you an overview of the Media Mixage line so that you can get a sense of all the amazing products that make up this line.

IntroToMediaMixage-550W

Introduction To Spellbinders Artisan Explorer

In this video I’m going to introduce you to the Spellbinder’s Artisan Explorer – a multi-purpose, high pressure roller press machine that is designed to cut, emboss and press with a multitude of different types of materials including papers, metals, plastic, cork board, leather, wool felt, canvas and other fabrics.

IntroToArtisanExplorer-550W copy

Using Ice Resin With Spellbinders Media Mixage Bezels and Coordinating Dies

In this video I’m going to show you how to use the Media Mixage Bezels, matching dies and Ice Resin.

UsingIceResinFree-550W

In the video I demonstrate how I created the bezel that’s part of the ornament shown below.

SpellbindersIceResinOrnament-550W

Using Spellbinders Blanks, Dies and Texture Plates

Our final video today is going to demonstrate how to use the Spellbinders blanks, dies and texture plates. I’ll be creating a butterfly embellishment using these products and will share with you several ideas to step it up using the Spellbinders foils as well as Ice Resin.

BlanksTextures-550W

We really hope you have enjoyed today’s feature. We also want to extend a sincere thank you Spellbinders for sharing their company with us. Be sure to visit Spellbinders to see more of their great products.

So once again, here’s a look at this week’s prize package.  It includes a syringe package of Ice Resin, Squares 1 Hobnail bezels in the bronze finish, coordinating Squares 1 die and 6″ x 6″ pad of Ephemera Papers 1.

SpellbindersPrizePack

In order to enter the give-away to win the prize package show above, please leave us a comment in the comments section of this post. The winner will be announced next Wednesday on the Paper Crafter’s Library blog!