Please Welcome New Trend Reporter Aliya White

AliyaNEWREPORTER
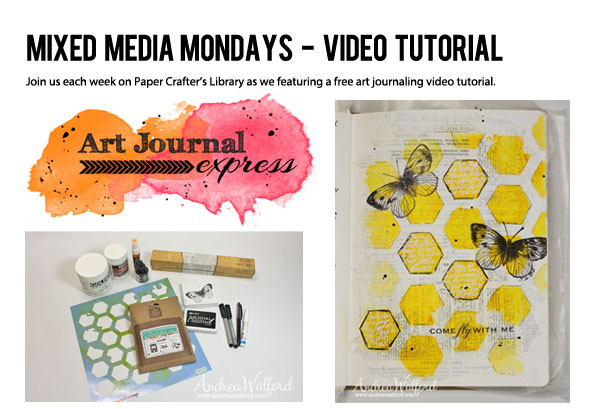
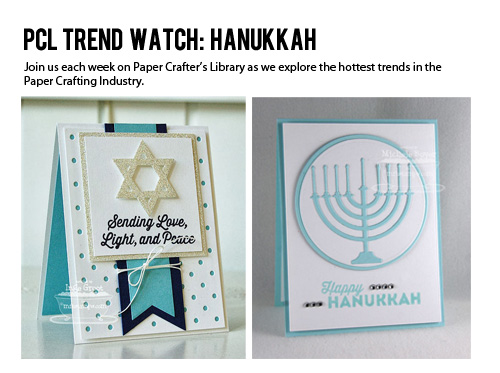
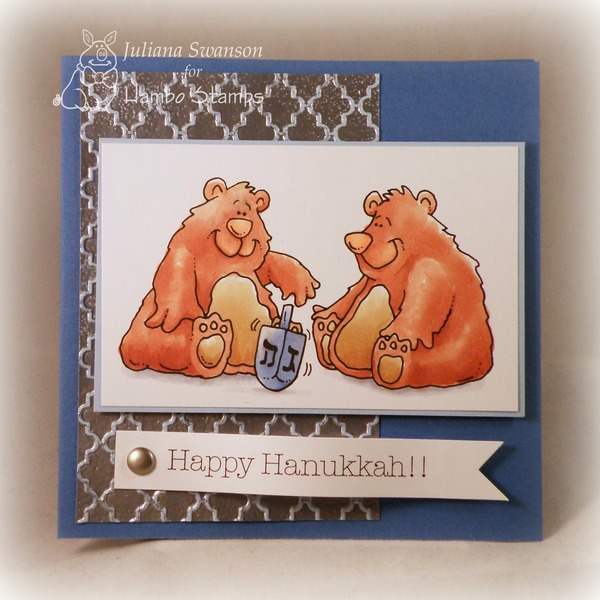
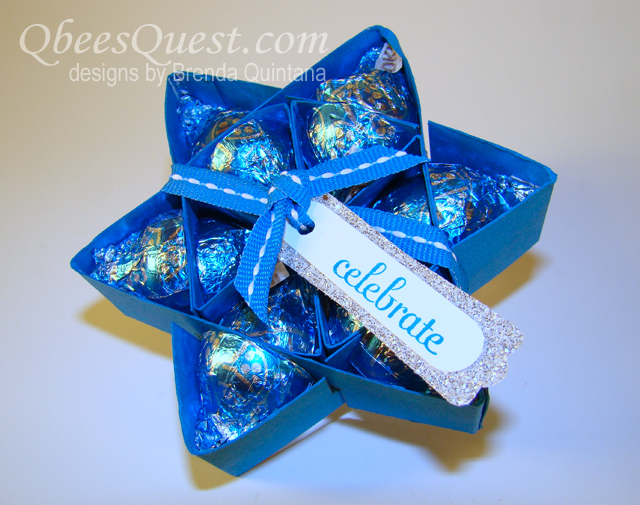
Keeping up with the latest trends in paper crafting can be hard and even more time consuming. With that in mind, we have added another Paper Crafter’s Library Trend Reporter to our group. Each week we have a new trend article for you chock full of ideas and samples taken from different companies and websites on line to bring them all together in one place for you. We know you love this weekly feature and want to continue to keep you up to date and “in the know” for the latest in the paper crafting world. 

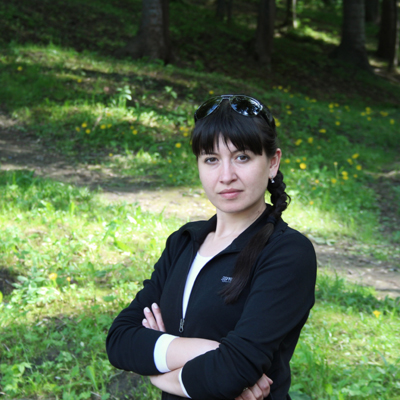
Aliya White will join current Trend Reporter Katherine Elliot in bringing you these fabulous articles.  She is very excited to get started and continue to explore all the avenues of the paper crafting world.

You will see her first article next week. In the meantime, you can visit her blog here http://playsnicelywithpaper.tumblr.com/ and see some of her own work.  

Learn more about Aliya:

Although I have always had a creative outlet in one form or another, I got hooked on paper crafting when a good friend of mine taught me how to wet emboss.  I was thrilled with the alchemy of changing  a blank piece of paper into golden communication.  I have been paper crafting for over 10 years now. 

I do some mixed media projects and have made a few scrapbook pages.   My true love is making  greeting cards because they are meant to be shared.   I personally love getting mail and I share that mailbox thrill with others.  I sell my greeting cards on Etsy under the store name Plays Nicely with Paper.  When I am not crafting or on Pinterest,  I work in marketing research and love talking to people to figure out what is important to them.   My husband Richard and I are working on creating new additions to our family.  In the meantime, he happily lets me buy all the crafts I want.  As long as they stay in my craft room. 

I look forward to sharing it all on Paper Crafter’s Library.

Mixed Media Monday: “Come Fly With Me” Video Tutorial

ArtJournalExpressLogoHappy Monday everyone! Welcome to another edition of Art Journal Express brought to you by me (Andrea) from my personal blog  The Art of Simple.

Art Journal Express is a weekly video tutorial series I’ve created for my personal blog The Art of Simple.  Each week on Monday I post a video tutorial on how I created one of my art journal pages from start to finish.  Because a typical art journal page takes between 20 minutes to an hour for me to create – which makes for a super long video to upload to You Tube, and for you to watch – the video clips are sped up. .  So the video clips are sped up, rather than having you watch what I’m doing in real time – hence the word “express” in Art Journal Express. However, what makes these video tutorials different from most of the “sped up” art journaling video tutorials out there is that I narrated for you exactly what I’m doing and what I’m using – that way, even though you’re watching a “fast forward” version, you don’t miss a single detail.

The videos are hosted on a You Tube Channel that is separate from the Paper Crafter’s Library You Tube Channel, so if you don’t want to miss a single edition of Art Journal Express please subscribe to that You Tube Channel (you can do so from the video tutorial page from today’s post).

Today’s page is called “Come Fly With Me” – shown below. You can watch a video tutorial HERE.

ComeFlyWithMeCloseUpBlog

Featured Artist: Jennifer Matott

Today on the Paper Crafter’s Library blog, we’re continuing our weekly featured artist spotlight whereby each week we spotlight a different artist/designer in the paper crafting & mixed media world and introduce you to their fabulous work.

Today we’re thrilled to welcome back Jennifer Matott

Before we show you Jennifer’s fabulous project, let’s get to know her a little bit more…

808jennifermatottheadshotJennifer Matott is a mixed media artist and scrapbooker from outside of  Syracuse, NY.  Jennifer has a BFA in Sculpture and Painting for which  elements cross into the realm of her current artwork. She has been  scrapbooking and creating mixed media art for over 20 years.

Mixed media allows her to get creative with imagery and still create a 3D effect  using a variety of media. Her pages lean towards the dramatic and she  loves experimenting with papers and pushing the limits of what is  traditionally done. Distressing, inking, media, and textures are a  constant in her work. Jennifer’s love of texture shows by using a  variety of materials in exciting ways.

While she loves creating,  Jennifer is even more passionate about teaching others to create!  Being an art educator in a public school has laid the foundation for teaching all age and skill levels. She believes anyone can create meaningful  Art!

Currently, Jennifer designs for WOW Embossing powders and  Faber-Castell Design Memory Craft. She has been published in several  paper and online magazines, including Scrap N’ Art, Scrapbooking and  Beyond, Scrapbook Trends, and others.

Website and online gallery links for Jennifer:

Blog- Art Talk:   http://arttalk-sigmagirl.blogspot.com/
Online Gallery:  https://www.twopeasinabucket.com/mycontent/myprojects/
Pinterest:  http://www.pinterest.com/jmatott/


Project and Instructions

“ART” letters
1107jennifermatottARTproject
I used large, store-bought chipboard letters and altered them with papers, art media, and masking tape.  I wanted a mixed media piece to hang in my Art Studio.

My first layer was pieces of papers (book pages, tissue paper, etc..) that was adhered with Faber-Castell Design Memory Craft’s Gel Medium. It’s great as an adhesive! 

Next, I colored the letters with Gelatos (Banana, Tangerine, Lemon,  Blood Orange and Margarita) and spread or dripped using a spray bottle  of water. 

1107jennifermatottart3

When that dried, I stamped and heat embossed powders (WOW Embossing Powders in black) over the background.

I added masking tape crinkled and stuck on with it’s own adhesive or  added a bit of the Gel Medium to hold stubborn areas.  Watered down Textural Accents Gesso was added over the tape and papers.
 
Once the Gesso was dry, I mixed Gelatos with Gel Medium and painted it over the tape and some areas of the letters.

To pick up the texture of the tape more, I sprayed some watered down  Black Licorice Gelato using the Faber- Castell Design Memory Craft Mist Maker Kit. I allowed the drips to puddle in the crevices. When it dried, it left  speckles where the spray landed and puddles that intensify in the  creases.

1107jennifermatottart2

Finally, I added some Gesso and a modeling paste through a stencil to create texture and spots of  white.  I love how these came out and can’t wait to hang them in my  artroom!

1107jennifermatottart


We hope you have enjoyed today’s projects courtesy of Jennifer Matott. Also, be sure to stop by Jennifer’s blog to see even more of her beautiful work (and let her know we sent you).


Featured Company: Graphic 45


We are happy to bring you this week’s Featured Company: Graphic 45. We are so excited to be featuring them regularly on Paper Crafter’s Library.

For those of you unfamiliar with Graphic 45 , we’d like to take a minute to re-introduce them to you.

Graphic 45 is an award-winning scrapbook and paper crafting company­— owned and operated by a mother and her two daughters.

Diane Schultz—Designer and CEO (aka mother)

“I’m passionate about being creative and eager to make it possible for others to find their creative voice. My background includes stints as a designer for, McCalls, Simplicity, Vogue/ Butterick, Mattel Toy Company and a host of other jobs that each, in some way, led me to what I do now. At 45 I went back to school and got my degree in graphic design— I named the company to celebrate that achievement.”

Aimee Filimoehala —Director of Operations

“I wear a lot of hats and love it that way. Business, marketing, operations, etc. have made me a pro at multitasking (aka juggling‑figuratively and literally). When we launched Graphic 45 just three years ago we had no idea what was in store, working together as a family has been an amazing journey that we all feel so grateful to be apart of.”

Charee Filimoehala —Director of Customer Service and Design Team Coordinator

“I joined the team a little over three years ago and haven’t looked back…what a life-changing experience this has been. I love working with and around creative people and products (not to mention I like my co-workers quite a bit). I spend my days working with our friendly stores and talented design team…the occasional trip to a workshop or tradeshow pretty nice too.”

Together we create vintage inspired crafting products that capture the flamboyant style of the 1920’s and 30’s – with vibrant color, irresistible texture and imaginative design to create products with decades-old appeal that’s both fresh and familiar. Let our products inspire your next scrapbook layout, card, album or home decor project.

Graphic 45 Designer Olga Struk

Our Graphic 45 Guest Designer for this week is Olga Struk who is part of the 2013 Graphic 45 Design Team. You can see Olga’s fabulous project below, but first, here is a little more about Olga:

1106CHAOlgaStruk

Hello!

My name is Olga Struk, I am from Ukraine.  Scrapbooking is my lifestyle!  I try to introduce something new and unique into this hobby. I develop my own ideas, challenge myself and design exceptional and out-of-the box projects.


I hope you enjoy the project I have for you today.

Graphic 45 Designer Project

1106CHA-Twelve-houses-in-a-box-1

Twelve houses in a box. Christmas tree decoration.
1106CHA-Twelve-houses-in-a-box-4

I measured 12×12 Matchbook Box and divided it into 12 parts. Then I created a house template.

1106CHA-Twelve-houses-in-a-box-5
You can see that 12×12 Matchbook Box may accommodate 12 small Christmas houses.
Each Christmas house contains some faux spruce branches, snowflakes made using mold and faux fruits (pears, apples, berries).

1106CHA-Twelve-houses-in-a-box-13

I enjoyed working with 12 Days of Christmas paper. It has so many beautiful elements for hand-cutting. You should try it!  I am impatiently waiting for Christmas to hang my houses on my Christmas tree.

1106CHA-Twelve-houses-in-a-box-17

You can view my video below to see the boxes up close and personal.
I hope you have enjoyed my project.

<

Supplies:
• 12 Days of Christmas Set (all set)
• 12×12 Matchbook Box
• Regular Tag Album
• Ornate Metal Keys
• Scor-Pal


We hope you have enjoyed this fun creation from Olga. I would also like to extend a warm thank you to Olga for sharing her fabulous project with us! Please take a minute to stop by Olga’s Blog and of course the Graphic 45 blog to check out all their amazing creations!

Winner of Pink Paislee Give-Away

pinkpaisleelogo
I’d like to extend a HUGE thank you to Pink Paislee and their guest designer Karola Witczak  for sharing such a wonderful project and for their generous prize package give-away shown below.

1030luxecollectiongiveaway

And now, the moment you’ve all been waiting for…….the winner is……Olesya K!

1106pinkpaisleewinner

Congratulations Olesya!! Be sure to email us at customerservice@papercrafterslibrary.com to claim your prize. Please be sure to put “Pink Paislee Winner” in the subject line of the email, and then in the email itself, be sure to include your full mailing address and phone number.

For those of you that didn’t win, each week on PCL we feature a different company, and each of those companies generously sponsors a prize. Join us next week when we feature another great company.

andreasiggypcl

Trendy Tuesday – Hanukkah

Trendy Tuesday – Hanukkah
by Katherine Elliot

 Can you believe it is November already?  Time flies quickly over the next two months, especially in crafty households.  So many opportunities to craft, and so little time!  To jump start some holiday ideas, check out these fun tools you can use for quick and beautiful Hanukkah projects.  The skilled designers and brands featured today have some great cards and projects.  Hanukkah begins at the end of the month (falling on the same day as the United States’ Thanksgiving holiday), so you better get started soon!

Card by Inge Groot featuring stamps and products from My Favorite Things, image source Patterned Paper

My Favorite Things offers stamps and dies to make a coordinated project easy to create in a flash.  Clean and simple cards with a classic blue and white color scheme may also help speed up your design. Card by Michele Boyer, image source Paper Cuts

Happy Hanukkah

Happy Hanukkah stamp set from My Favorite ThingsDie-namics Hanukkah Light and Love

Hanukkah Die-namics

Find more Hanukkah theme stamp sets from companies like Lawn Fawn, CAS-ual Fridays, and Stampin’ Up!

happy hanukkahCard by Mariana Grigsby, image source Lawn Fawn.com

happy hanukkahHappy Hanukkah stamp set from Lawn Fawn

8 Happy Nights stamp set from CAS-ual Fridays Stamps

Card and gift box by Lorena Canto, featuring 8 Happy Nights, image source CAS-ual Fridays Blog


 Jewish Celebrations stamp set from Stampin’ Up!

 Use other trendy tools to make your project stand out, like Yapha Mason did with her Stampin’ Up! Circle Thinlits card.


Hanukkah Circle Thinlet Card by Yapha Mason

Card by Yapha Mason, image source Rubber Stamping and Card Making by Yapha

  Betty Traciak’s elegant, dark blue design featuring the Jewish Celebrations stamp set adds sophistication to her coordinated card and gift box.

Card and box by Betty Traciak, image source Kitty Stamp

Quickly download a digital stamp to get instant crafting satisfaction.  The young and young at heart may enjoy the cute Dreidel Bears digital stamp from Hambo Stamps.  Juliana Swanson colored her digital image to perfection in her joyful greeting card shown below. Card by Juliana Swanson featuring Dreidel Bears digital stamp from Hambo Stamps, image source Splitcoast Stampers

  If you discover your holiday budget is tight or you cannot find a Hanukkah theme stamp you like, make an attractive greeting card by re-purposing some fall stamps, stamping leaf designs in traditional holiday colors.

9301917614 b5c136fd9c Groovin with the Go to Gals: Welcome Heather!Card by Heather Campbell, image source Paper Crafts Connection

Shaped tags and die cut candles may come in handy for the eight nights of festivities.  Tags are also fun and quick to create. Candle tags by Terri Moore, image source Life with Terri

Tags by Gaby Charlton, featuring cut shapes from  Dreidel Set from Silhoutte On-line Store for digital cutters,  image source Made by Mamaleh

Handmade, small gifts are enjoyable to create for any occasion or holiday.  Chocolate coins will be fun to give away during Hanukkah in a pretty, little hand stamped muslin bag.  Lori Tecler’s project below also features a stamp from The Cats Pajamas that uses the more traditional spelling of the holiday name for the traditional, little gift bag.


Gelt bag featuring stamps from The Cats Pajamas, by Lori Tecler, image source Inking Aloud

Oh, did we say chocolate?  Yum.  What is a holiday without chocolate?  Brenda Quitman’s star shaped packaging looks very festive and fun to make.

 Star candy package by Brenda Quintana, tutorial and image source QBee’s Quest

 Thanks for taking the time to check out today’s post.  But time is a’wasting, so get crafting everyone!


Mixed Media Monday: “Life Is A Journey” Video Tutorial

ArtJournalExpressLogoHappy Monday everyone! Welcome to another edition of Art Journal Express brought to you by me (Andrea) from my personal blog  The Art of Simple.

Art Journal Express is a brand *NEW* free weekly video tutorial series I’ve created for my personal blog The Art of Simple.  Each week I’ll be posting a video tutorial on how I created one of my art journal pages from start to finish.  Now for me a typical art journal page takes between 20 minutes to an hour to create – which makes for a super long video to upload to You Tube, and for you to watch.  That’s why what I’ve done is to actually speed up the video clips, rather than having you watch what I’m doing in real time – hence the word “express” in Art Journal Express. However, what makes these video tutorials different from most of the “sped up” art journaling video tutorials out there is that I narrated for you exactly what I’m doing and what I’m using – that way, even though you’re watching a “fast forward” version, you don’t miss a single detail.

The videos are hosted on a You Tube Channel that is separate from the Paper Crafter’s Library You Tube Channel, so if you don’t want to miss a single edition of Art Journal Express please subscribe to that You Tube Channel (you can do so from the video tutorial page from today’s post).

Today’s page is called “Life is a Journey” – shown below. You can watch a video tutorial HERE.

LifeIsAJourneyCloseUp

Featured Artist: Claudine Hellmuth & Give-Away

Today on the Paper Crafter’s Library blog, we’re continuing our all new weekly featured artist whereby each week we spotlight a different artist/designer in the paper crafting & mixed media world and introducing you to their fabulous work.

Today we’re thrilled to welcome back – Claudine Hellmuth.  She not only has some awesome projects, she also has another give-away of the stamp sheet used on her projects.  View the stamp sheet below and read more about the give-away at the end of the post. 1031claudinechristmas_stampsgiveaway

Claudine was here last month to share some Halloween projects with us, today (on Halloween), she brings us some Christmas projects.  Before we show you her fabulous projects, let’s get to know her a little bit more..

hellmuthclaudine_CHA_croppedHello! I am an artist & illustrator. I enjoy combining my drawings with happy patterns to create quirky, retro-whimsical artworks that I license to the gift, home and craft markets.

In my 12 years as a full time illustrator, I have been featured in The New York Times, appeared on The Martha Stewart Show, HGTV and The DIY Network. My client list includes projects with major companies like Smart Car, Capitol Records and national publications such as The Saturday Evening Post.

I recently launched an exclusive paper crafting line with The Home Shopping Network and I continue to make live appearances on air with each new product release. In 2008, I developed a product line with Ranger Industries called Claudine Hellmuth Studio, of high-quality craft paints, mediums and canvas. I have also written three books and produced three DVDs, all centering on art and collage techniques that I teach in my workshops.

Originally from Orlando Florida, I now live in Washington, DC with my husband Paul and our very spoiled pets.

Featured Projects

1031claudine_christmas1 1031claudine_christmas2 1031claudine_christmas3

SUPPLY LIST
• Claudine Hellmuth Studio Clear Stamps Christmas Set
• Claudine Hellmuth Studio Clear Stamps Neighborhood Set
• Claudine Hellmuth Studio Clear Stamps Words and Frames set
• Claudine Hellmuth Studio Mini Paints – blank canvas
• Claudine Hellmuth Studio Mini Multi-Medium – Matte
• Claudine Hellmuth Studio Mini Black Gesso
• Ranger Acrhival ink in Jet Black
• Inkssentials™ White Pen
• Inkssentials™ Non-Stick Craft Sheet™
• Inkssentials™  Glue Stick
• Crafter’s Companion Rock A Blocks for stamping clear stamps
• 4.5”x6” cardstock card pre folded
• Assorted scrapbook papers, in reds, greens and pinks
• Music paper

DIRECTIONS FOR ALL THREE CARDS

  1. Choose pre folded colored cardstock cards in the colors you would like. Here I am using a pink a soft  blue and a red.

  2. Using Jet Black Archival ink by Ranger Stamp the following images:  a house from the Claudine  Hellmuth Studio Neighborhood Stamp set, the car and the trees and the star from the Christmas stamp set onto colored & patterned papers. At this time also stamp the works so merry and a few frames from the Words and Frames stamp set!

  3. Cut out around all the elements. For the car I trimmed off the gifts that come as part of the car stamp and then folded one of the small trees that I stamped earlier and placed that on top so it looks like the car is carrying the tree.

  4. Cut various papers to about 2.5” x 4.5”  so that you will use to divide up the space on the cards. I used music paper and then a red dot scrapbook paper and a green dot scrapbook paper.

  5. Glue these papers down to the bottom 2/3 of your cards and then place the trees, the car and the house on top each on their own cards. Use Claudine Hellmuth Studio multi medium as your glue. Or if you are in a hurry, use the Ranger Inkssentials™  Glue Stick!

  6. In your stash find some extra papers that coordinate and glue little strips down. Then glue down the frames that you stamped earlier as well as the words.

  7. As a finishing touch I added snow by making tiny dimensional dots using the tip of the Claudine Hellmuth Studio mini paints in Blank Canvas.

We hope you have enjoyed today’s projects courtesy of Claudine Hellmuth. To enter for a chance to win the stamp sheet give-away shown above, simply leave a comment at the end of this post about her projects.  Winner will be posted on Paper Crafter’s Library next week.  Also, be sure to stop by Claudine’s blog to see even more of her beautiful work (and let her know we sent you).


Winner of Art of Layers Book by Ronda Palazzari

1024Ronda Palazzari head shot

I’d like to extend a HUGE thank you to Ronda Palazzari for sharing her beautiful project with us as well as for her generous give-away shown below. You can read all about Ronda on this blog post: https://blog.papercrafterslibrary.com/featured-artistdesigner-ronda-palazzari/

Ronda Palazzari Art of Layers

And now, the moment you’ve all been waiting for…….the winner is………..Leslie McNil.

1031rondabookwinner

Congratulations Leslie. Please email us at customerservice@papercrafterslibrary.com to claim your prize. Please be sure to put “Art of Layers Book Winner” in the subject line of the email, and then in the email itself, be sure to include your full mailing address and phone number.

For those of you that didn’t win and would still like to pick up a copy of her book. You can visit Amazon here.


andreasiggypcl

Featured Company: Pink Paislee

pinkpaisleelogo

I’m so excited to bring you to this week’s Featured Company: Pink Paislee.

In today’s spotlight you’ll learn more about Pink Paislee, see a fantastic project created by one of their designers and have the opportunity to win the Luxe Collection prize package of their products shown below (details at the end of this post).

1030luxecollectiongiveaway

About Pink Paislee

We are passionate. authentic. unique. We believe in the power of “archiving” and story telling for future generations. We believe in “art” and the creative process; but most of all we understand your desire to “decorate” and embellish your photos.  Everyday we encourage others to create art and tell their story.

Who We Are:

Our products aren’t manufactured….they are crafted.  Every product begins with original design, carefully selected color palettes, and finely tuned specifications.  Since January of 2008 we have designed, manufactured and distributed over 1200 + fabulous products.  Our passion and vision for producing desirable paper crafting products has led to our continued growth and success in the craft and hobby industry!  The first time you put our products to use you will enjoy the excitement and satisfaction of preserving memories for a lifetime.

1030pinkpaisleeCEORebecca_headshot1Rebecca Cross CEO & Creative Director
 
‘LIVE PINK’ is our company “motto” and we will continue to develop products that inspire you to enjoy a “creative lifestyle.”  See more at Pink Paislee


Special Pink Paislee Guest Designer

Today we also have a special Pink Paislee guest designer. Karola Witczak is part of the 2013 Pink Paislee Design Team. You can leave a comment below the post telling us what you like about her project for a chance to win the prize package pictured above.

You can see Karola’s fabulous project below, but first, here is a little more about Karola:

1030pinkpaisleeKarolaWitczak_headshotMy name is Karola Witczak, and I live in Poland, Europe. For more than eight years, my passion has been scrapbooking, which has become a hobby and later my professional activity in the broad sense of the word. I love to create layouts, cards, mini books, and sometimes create altered art and digital pages. I design products for the scrapbooking industry and teach scrapbooking workshops.  I love the shabby chic style with a modern twist: the white media, flowers, layers and lots of details. Privately, I am a  full time creative manager for one of the Polish craft brands, lover of strong coffee, forensics and acid jazz, mom of an almost 9-year-old wonderful daughter, and partner of 10 years to my very supportive and fantastic Marcin. Friend of one dog, one cat and one rabbit.


Designer Projects

Halloween Altered Clock

1030pinkpaisleeproject

Supplies used:
Pink Paislee – Luxe 12 x 12 Paper Pack – Black & Copper
Pink Paislee – Luxe – Glitter Alphabet – Black
Pink Paislee – Luxe Placemat – Circles
Pink Paislee – Luxe Confetti Rub ons – Copper & Black
Pink Paislee – Artisan Resist-Able Chipboard Arrows
Pink Paislee – Phantom 12 x 12 paper: Haunted
Mediums: gesso, gold embossing powder, structural paste, black pigment ink pad, black liquid pearls, Color Shine – Georgia Peach mist
The Halloween altered clock was a very spontaneous project, just an experiment, and is a project completely beyond my creative safety zone. In daily creating, it does not occur to me to create such dark designs, but every year I have the opportunity and pleasure to create Halloween inspiration for the Pink Paislee fans. It is also proof that it is worth sometimes to create something completely different than usual, while having lots of fun and trying new techniques and colors.


Instructions:
 
  1. Prepare old alarm clock. I used the one I found on the flea market, it was a big, retro black clock. Carefully remove the glass and the whole mechanism, leaving only the metal clock body. I have kept a cardboard clock face and clock hands.
  2. Degrease the clock body inside and outside, to make sure the mediums better adhere to the surface. You can use nail polish remover or a professional solution for degreasing surfaces before painting.
  3. Using a spatula, structural paste and gesso, coat the clock body irregularly, adding texture on the outside and inside of the clock. Leave to completely dry or use the heat tool to speed up the drying.
  4. Spray the the whole clock using Color Shine – Georgia Peach mist by Heidi Swapp. Leave to dry.
  5. Cover some parts of the clock with embossing ink and gold or copper embossing powder and then using the heat tool, add shine and more texture to the project. Add some black ink here and there to make a darker, scarier look.
  6. After preparing the clock, you can start decorating. Cut a circle from copper chevron paper, ink the edges and adhere as a background inside the clock body.
  7. If you kept the clock face and clock hands, you can reattach them. The skull motif is cut out of paper from the Phantom collection. Adhere Artisan chipboard arrow (color it using Color Shine – Georgia Peach). Adhere the clock face on the chevron circle using 3D cubes.
  8. Cut a row of three circles from Luxe Placemet – Circles. Adhere it on the front of the clock face.
  9. Cut irregular fragment of a few circles from Luxe Placemet – Circles and adhere it to the left side of the clock body, mimic something like a trellis, which should overlap slightly to the front of the clock body.
  10. Cut a 2 pieces from Luxe copper chevron 12 x 12 paper to 6 inches. One of these should have 1 chevron row and the second – 2 chevron rows. Ink the chevron pieces. Adhere first (2 rows) piece on the left side of the clock and the second piece (1 row) on the right side of the clock, using strong glue dots or heat glue gun.
  11. Create the “#BOO!” title onto the left chevron element.
  12. Cut a few of copper and black stars from the Luxe 12 x 12 papers. Ink the edges using black ink pad. Add some Luxe Confetti Rub ons to the stars. Adhere the stars to a few places on the clock body and the chevron rows, using 3D cubes.
  13. Color Artisan Chipboard arrows on the black and orange (I used black ink pad and Color Shine – Georgia Peach mist). Adhere the black star on the left, next to “#BOO!” title and the orange star at the top of the clock.
  14. Tie a bow using black tulle on the clock handle. You can add a few black flowers or other small embellishments.
  15. At the end, you can add a few black dots using liquid pearls on the clock face and around the circle front of the clock body.

We really hope you have enjoyed today’s feature. We also want to extend a sincere thank you to Karola Witczak for her fabulous project and Pink Paislee for sharing their company with us. Be sure to visit Pink Paislee to see more of their great products.

In order to enter the give-away to win the prize package show above, please leave us a comment in the comments section of this post. Winner will be announced next Wednesday on the Paper Crafter’s Library blog!