Project Ideas Newsletter Challenge: Grateful Greetings

Welcome to the Project Ideas Newsletter Challenge. Every Monday, we will design a card, scrapbook page or 3D item. Your challenge – is to use our piece as inspiration and make it into a card, scrapbook page, or other project. You can use the layout, the colors, an element you like…it can look like our piece, or nothing at all like our piece. We want to see where YOU take this. This challenge is strictly a “work from your stash” challenge. This week, Sophia designed this Grateful Greetings card.

As a newsletter subscriber you will have received a link to a private web page, from which you can watch the video tutorial. Please note that the video tutorial will be available for general viewing for one week only – and then will be moved into our library for our members only. In order to ensure you don’t miss any more of our Project Ideas Newsletter Challenge video tutorials, please be sure you sign up for our FREE email newsletter from the top right sidebar of this blog. If you didn’t receive the newsletter then please be sure to email us to confirm your subscription.

Every Monday, here on the blog, we’re going to post a picture of our project. You will have ONE week to upload your challenge piece. Instead of a weekly prize though, we’re going to award a prize monthly. So for each week you participate and each project you submit – you will get one entry into our monthly draw. On the first Monday of each month – we will announce one challenge winner, who will be featured as a guest designer on the Paper Crafter’s Library blog as well as our Facebook page. As a guest designer, we’ll feature your biography, some of your favorite paper crafting projects and we’ll link to your blog.

Here are the details on how you can participate in the Project Ideas Newsletter Challenge:

A new Project Ideas Newsletter video tutorial will be emailed out to newsletter subscribers every Monday (so make sure you are signed up). Then, here on the blog, we will post a picture of our project along with an Inlinkz button for you to enter your project. Here are the details:

•Work from your own stash to create a project based on the inspiration project provided – you can use any products you would like, and make any type of project you like – card, scrapbook page, album, 3D item etc.
•Post your project on your blog, in your gallery or on any other photo-hosting site (such as photobucket or flickr).
•Click on our inLinkz button below to add a link to your project for our challenge
•You will have until 7am, Monday, October 15th to add your link to the list to be eligible to win. You can enter as many times as you like.
•For each project you submit, your name will be entered into our monthly draw. The winner will be announced on Monday, November 5th.

Good luck to everyone and we look forward to seeing your projects!


Tiny Treats Halloween Card Video Tutorial

We are getting into the halloween spirit here in the stamping studio!  This week we have created a variety of Halloween projects.  This weekend is Thanksgiving here in Canada and that means that Halloween is just around the corner.  I hope that you enjoiy all of the weeks projects and have a Wonderful Thanksgiving!


Tiny Treats Halloween Card

Andrea was inspired to create this simple Halloween card by the pumpkin image. She has had some fun lately coloring with her Copic markers and the pumpkin image just made her smile. What a cute card!   

Download the pdf handout here

Supplies:

Stamps: Tiny Treats – Halloween

Ink: Jet Black Archival ink (Ranger); Tuxedo Black Memento ink (Tsukineko); YR12, YR15, YR18, Y11, Y19, YG11, YG13 and YG17 Copic markers (Copic)

Paper: True Black CS, Orange Zest CS, White CS, Textile Halloween Prints DP (papertrey ink)

Accessories: bone folder, 1 3/4″ Circle punch, paper snips, Stampin’ Dimensionals (Stampin’ Up!); Tin Types impression plate, Mat Stack 5 die (papertrey ink); Big Shot (Sizzix); Tape Runner XL, 3D Foam (thermo-web); Standard Circles Large Nestabilities dies, Grand Calibur (Spellbinders)


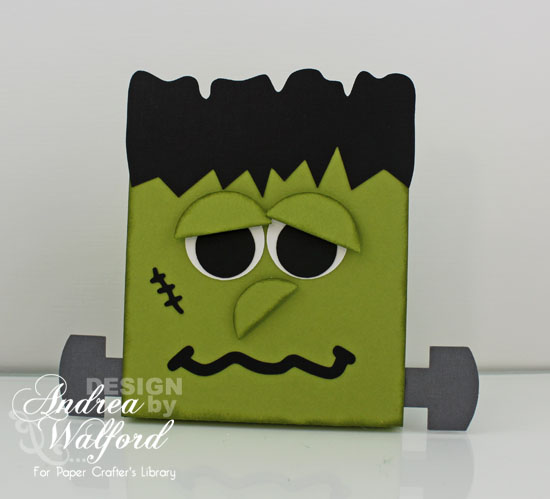
Frankie Treat Pouch

Andrea has also created some really great Frankenstein treat holders for our members this week.  These two projects include exclusive printable templates as well as svg files for  the pouch bases and all of the face elements.  The Frankie Treat Pouch is designed to hold a 4″ x 6″ cello bag filled with treats and would make a great gift for teachers or neighbours!

We have a video tutorial and pdf for our members here. (You must be logged in to view the page)

Supplies:

Ink: Old Olive Classic ink (Stampin’ Up!)

Paper: Lucky Limeade CS, Basic Black CS, Whisper White CS, Basic Gray CS (Stampin’ Up!); Copy paper (Office Supply Store)

Accessories: 3/4″ Circle punch (optional), 1″ Circle punch (optional), 1 1/4″ Circle punch (optional), bone folder, paper snips, sponge dauber, Stampin’ Dimensionals, Sticky Strip, Signo White Gel pen (Stampin’ Up!); Tombow multi-purpose liquid glue (Tombow); ruler, small cello bag, craft knife, self healing craft mat (Craft Store); Dotto Repositionable adhesive (optional)(EK Success); stapler (Office Supply Store)

Frankie Candy Wrapper Pouch

Andrea loved the Frankie Treat Pouch so much that she decided to create a smaller version of the pouch, ending up with this Frankie Candy Wrapper Pouch, so that her children could share treats with their classmates!


We have a video tutorial and pdf for our members here. (You must be logged in to view the page)

Supplies:

Ink: Old Olive Classic ink (Stampin’ Up!)

Paper: Basic Gray CS, Old Olive CS, Basic Black CS, Whisper White CS, Designer Series Paper Stacks Brights Collection (Stampin’ Up!)

Accessories: 3/4″ Circle punch (optional), 1/2″ Circle punch (optional), 1/4″ Circle punch (optional), bone folder, sponge dauber, paper snips, Basic Gray3/8″ Taffeta ribbon, Craft scissors, Stampin’ Dimensionals, Signo White Gel pen (Stampin’ Up!); craft knife, self healing craft mat, ruler (Craft Store); Tombow multi-purpose liquid glue (Tombow)


Have a great weekend!

Technique Thursday: Open If You Dare

I had so much fun creating this halloween card.  I was playing around with the canning jar die and thought wouldn’t it be really creepy filled with gooey eyeballs!  I created the jar then just layered some coordinating CS and DP to complete the card. For all yoy Paper Crafter’s Library members out there, I hope that you enjoy this video!

We have a video and pdf handout available for our members here. (You must be logged in to view the page)

Supplies:

Stamps: 2009 Halloween Tags (papertrey ink)

Ink: Basic Black Classic ink, Cherry Cobbler Stampin’ Write marker, Always Artichoke Classic ink re-inker (Stampin’ Up!); Jet Black StazOn ink (Tsukineko)

Paper: Ebony CS (Bazzill); Elegant Eggplant CS, Lucky Limeade CS, River Rock CS, Whisper White CS, Brushed Silver CS (Stampin’ Up!); The Magic Of Oz DP (Graphic 45); Acetate (Office Supply Store)

Accessories: bone folder, Stampin’ Dimensionals, sponge dauber, Small Oval punch (Stampin’ Up!); Black 1/8″ Ric Rac ribbon (May Arts); Tape Runner XL (thermo-web); Jar and Lid die, Jar Label die (papertrey ink); Big Shot (Sizzix); 5/8″ Circle punch (EK Success); 1/4″ Circle punch (Office Supply Store); Tombow multi-purpose liquid glue (Tombow); paint pallet (Dollar Store); Glossy Accents (Ranger); Glitter Spider stickers (Jolee’s Boutique)


Graphic 45 Spotlight With Designer Kristin Wilson

Here is the latest installment of our Grahpi 45 Guest Designers. Many of you may remember that back in April we hosted a Graphic 45 Week on the Paper Crafter’s Library Blog. It was week filled with projects and inspiration using Graphic 45’s Tropical Travelogue Collection. We had such a great experience partnering with Graphic 45 and their design team, and such a great response from you, that we’ve decided to partner with them on an ongoing basis. The first and third week of every month one of the Graphic 45 Designers will share a project they’ve created here on the PCL Blog. We started with our monthly designers in June and before I introduce you to our latest Designer, I just wanted to take a minute to re-introduce Graphic 45 for those of you that may not be familiar with the company.

Graphic 45 is an award-winning scrapbook and paper crafting company­— owned and operated by a mother and her two daughters.

Diane Schultz (pictured center)—Designer and CEO (aka mother)

“I’m passionate about being creative and eager to make it possible for others to find their creative voice. My background includes stints as a designer for, McCalls, Simplicity, Vogue/ Butterick, Mattel Toy Company and a host of other jobs that each, in some way, led me to what I do now. At 45 I went back to school and got my degree in graphic design— I named the company to celebrate that achievement.”

Aimee Filimoehala (pictured left) —Director of Operations

“I wear a lot of hats and love it that way. Business, marketing, operations, etc. have made me a pro at multitasking (aka juggling‑figuratively and literally). When we launched Graphic 45 just three years ago we had no idea what was in store, working together as a family has been an amazing journey that we all feel so grateful to be apart of.”

Charee Filimoehala (pictured right)—Director of Customer Service and Design Team Coordinator

“I joined the team a little over three years ago and haven’t looked back…what a life-changing experience this has been. I love working with and around creative people and products (not to mention I like my co-workers quite a bit). I spend my days working with our friendly stores and talented design team…the occasional trip to a workshop or tradeshow pretty nice too.”

Together we create vintage inspired crafting products that capture the flamboyant style of the 1920’s and 30’s – with vibrant color, irresistible texture and imaginative design to create products with decades-old appeal that’s both fresh and familiar. Let our products inspire your next scrapbook layout, card, album or home decor project.

***********

Here’s a picture of their booth at the CHA show which absolutely blows us away every year! The artwork inside is absolutely stunning and totally unique. At the last show as we were speaking with Diane she told us that many of the altered pieces were vintage finds which she and her team transformed with their gorgeous Graphic 45 products. We can’t wait to stop by their booth at the Chicago CHA and see what they’ve got in store this year!

Here’s a picture of the Graphic 45 team – they’re always dressed in period costumes to complement the themes in their collections – every day of the show brings a new set of costumes. The ones shown below were for their Little Darlings collection.

Graphic 45 Designer Kristin Wilson

Our next Graphic 45 Guest Designer for this month is Kristin Wilsom who is part of the 2012 Graphic 45 Design Team. You may recognize her name as she has also been a member of our Design Team here at Paper Crafter’s Library.   She is a talented designer and we are so happy to continue to showcase her work.

You can see Kristin’s fabulous project below, but first, here is a little more about Kristin:

Hi, I’m Kristin, I live in the Chicagoland area with my husband of 15 years and our son who is 12. I adore making cards and altering items.  I began this very addicting hobby 4 years ago and I can’t seem to stop!

I love working with a smaller space and pulling off an impossible amount of embellishments.  My style is mainly shabby chic, but I do break out from that time to time.  I hope you enjoy the project.


Altered Tin Project

Hello everyone! I hope October finds you all doing well and ready for fall.  Speaking of fall that means it’s time for us all to get    our craft on as we have so many holidays coming up.  I hope my project today will give you some ideas for gifts.

Supplies:
Graphic 45: Bird Song Collection Papers, Alpha Stickers, Chipboard Pieces. Metal Brad
Spellbinders: Foliage Dies
Martha Stewart: Doily
May Arts: Ribbon


The project I have to share with you all today is an altered tin.    This tin could be used for so many things. Try placing an alpha letter on the front and fill it with monogrammed note cards as a gift.  Another idea could be to decorate the tin with a Christmas theme and fill with 25 index cards ready to capture that annual holiday photo. The sky is the limit with these tins.  This tin is decorated with Graphic 45’s Bird Song Collection. I hope you enjoyed my project today!

To see more of my projects just visit my blog:  http://www.kristinwilsonhandmade.com/

We hope you have enjoyed this Halloween creation from Jim. I would also like to extend a warm thank you to Gloria for sharing yet another fabulous project with us! Please take a minute to stop by Kristin’s blog and of course the Graphic 45 blog to check out all their amazing creations!

Trendy Tuesday – Ruffles

Trendy Tuesday – Ruffles
by Katherine Elliot

Gather it, scrunch it, sew or bunch it up… anyway you try it, adding ribbon ruffles is one sure fire way to “doll” up your project.  It”s probably the most feminine touch I can think of to add to a paper craft.  Ruffles can be made in many ways.  Some ruffles are wavy ribbons, some materials are scrunched, and some materials look pleated.   Here are some examples of beautiful creations with ruffles of all kinds, using some of the most popular & trendiest materials out there today.

WMSC#115Card by Helen Berry, image source Helen Berry Design

Selecting what type of ribbon and how much ruffle you want on your project may be the hardest part of adding this embellishment. Of course a ruffle combines very nicely with other trends, too, like the hexagon craze that Colleen shared last week.

Hooked on Hexagon card with ruffled ribbon by Sherrie Siemens, image source sherie-cardcreme.blogspot

Stitched ribbon can be used to easily create gathered ruffles by tugging on the threads of the stitching.  On double stitched ribbon, pull the stitching from both the top and bottom, or just one side.  Check out these examples from talented artist, Lisa Johnson, and click the link to her blog to read about how she created the stitched ribbon ruffles shown.

Picture or Video 114

Scrunched, ruffled ribbon instructions found at Poppy Paperie

Eek card Lisa Johnson

Eek! Ruffled card by Lisa Johnson, image source Poppy Paperie

Stitched ribbon ruffled card by Lisa Johnson, image source Poppy Paperie

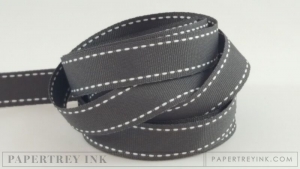
Available in many colors and sizes, find Saddle Stitch ribbon like the ones shown above at Paper Trey Ink , or your local craft store.

 The tulle fabric shown on these next projects is a fine mesh that can be layered for more opaque additions, or leave it sheer to show off a little of what may be hidden behind the fabric.

Owl Occasions card by Meg Loven, image source

Instructions for how to create the tulle ribbon ruffle at

Tulle is certainly a trendy product right now, so here are a couple more examples using the material.  Tulle ribbon gathered or scrunched together can also give a bow some added dimension.

Kimberly Van Diepen Stampin

Crumb Cake tulle ribbon card by Kimberly VanDiepen, image source Stampin by the Sea

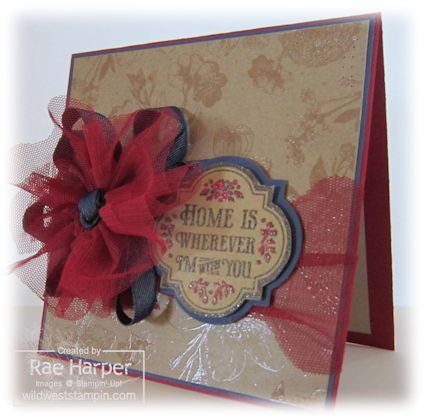
Gathered tulle embellishment by Rae Harper, image source Splitcoast Stampers

Cherry Cobbler Tulle Ribbon, image source Stampin” Up!  Find Tulle Scallop ribbon from a Stampin” Up! demonstrator in your area.

 Seam binding is another favorite type of material to ruffle.  Seam binding can be gathered, wrinkled, scrunched in so many ways.  A delicate ruffle on this lightweight ribbon makes it easy to add to cards as this type of ribbon often is a bit easier to put on a card that may be sent through the mail.

Seam binding ruffle card by Amanda Mertz, image source Did You Stamp Today?

Gather the seam binding by pulling one or two of the threads from the center of your strip of binding to create this ruffled look.

Instructions for how to pull thread to create ruffled ribbon shown on Did You Stamp Today?

Seam binding image from Heather Bullard, Lifestyle
Seam binding ribbon available in many colors from several companies including Stampin” Up! and Flourishes.

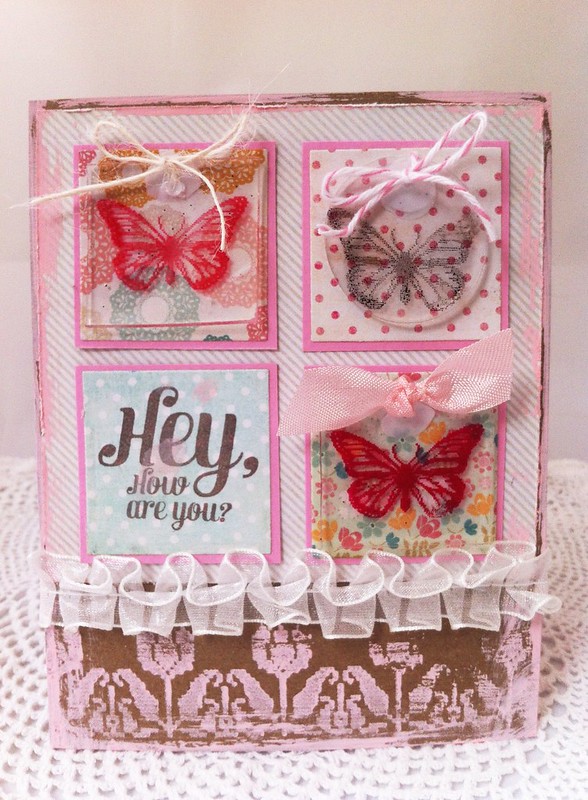
There”s an even easier method to create very simple waves of ribbon on your project.  You can create ruffles using any type of ribbon on hand by simply gathering ribbon along a strip of strong adhesive, as shown in this example:

Ribbon Ruffles, examples and instructions by Tereza Crump, image source Operation Write Home Stars & Stamps Blog

Tereza Crump demonstrates ruffled ribbon on line of adhesive, image source owhstarsandstamps.org

Ribbon is most commonly used to make ruffles, but fabric and paper can be used to add this trendy girlie-touch, too.  Using a similar adhesive line ruffle technique, creative artist, Cathy Weber, chose to ruffle some patterned paper, adding a beautiful feminine touch, like a lovely, layered skirt on this thank you card…

Paper ruffles shown on card by Cathy Weber, image source The Empty Nest Crafter

 Oh, and let”s not forget cotton fabric ruffles!  Are you handy with a sewing machine?  You can cut strips of fabric and sew and gather the fabric in ruffles in order to fit to adhere to a card or scrapbook page.  Or if you”ve really got your crafty mojo running, then you may want to try one of these up-cycled ruffled bag projects.

IMG_1291

Ruffled fabric bag image and instructions by Carrie Hoades from CarrieStamps.com

Sewing a line down the center of a strip of gathered fabric or ribbon is a way to sew your material into a perfect ruffle.

Sewn ribbon ruffle and bag shown from Little Birdie Secrets

 Scraps of ribbon and your sewing machine could also come in handy to create some pretty ruffled embellishments, like this ruffled ribbon tree by Tricia Jones…

Ruffled ribbon tree applique instructions and images by Tricia Jones, image source Made By Me, Shared With You

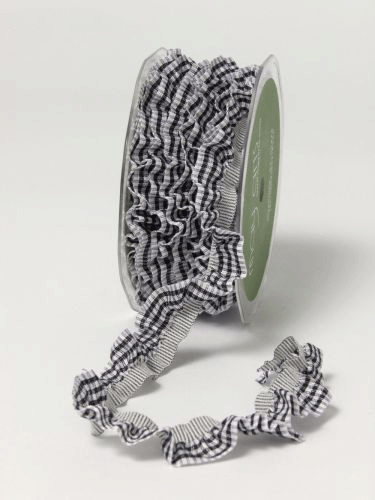
 Like the look of ruffled ribbon, but don”t think you have the time to alter what you have?  Pre-ruffled ribbon like the May Arts ruffled edge ribbon shown below can be found at many on-line retailers.  Find various ruffled ribbons at your local craft store or at on-line retailers, Really Reasonable RibbonSimon Says Stamp , Stamp and Create, and Flourishes.

Plaid Ruffle Black
May Arts ruffled ribbon, image source Really Reasonable Ribbon

   A little ruffled May Arts ribbon on the card below is so delicate and adds a beautiful, understated feminine touch.

  Change For No One card using May Arts ruffled edged ribbon, card and image source from The Handmade Card Blog

 I hope you enjoyed the beautiful cards and ruffles shown here today.  Happy crafting everyone!

Win a One Year Membership to Paper Crafter’s Library & the September and October 1st Winners!

This past January Paper Crafter’s Library celebrated our first year anniversary – and in that time we have established ourselves as the THE all-in-one learning solution for paper crafters with the largest {and best} online library of video tutorials on the internet. From beginner through to advanced, covering product instruction, techniques and project ideas for stamping, card making, scrapbooking and altered art – we have something for everyone! We’re proud of how far we have come, and we’re hoping you can help us spread the word!

That’s why as part of our first anniversary celebrations we have an exciting new contest which we are running for a total of 9 months – where we will be giving away a total of 18 ONE YEAR MEMBERSHIPS to the Paper Crafter’s Library – each valued at $200! We will announce 2 winners at the beginning of EACH MONTH – we started in April, and we’ll be ending in January of 2013.

There’s several ways to enter, and each way gives you 1 entry into our draw – so the more ways you participate the greater your chances of winning:

1. Put our Fan Badge on the sidebar of your blog or website. In the right hand sidebar of our blog, under the heading “Grab Our Fan Badge” you’ll find a box with the html code which you just need to copy and paste into the sidebar of your blog.

2. Create a post on your blog letting everyone know they can win a One Year Subscription to Paper Crafter’s Library and linking back to this post for instructions on how to win.

3. Post about our give-away on your Facebook Page linking back to this post.

Once you have done any or all of these things, leave us a comment here on this post letting us know, with a link back to your blog or FB page and we’ll pop by for a visit. When you leave your name, make sure that if you don’t put your full last name, at the very least you put your last initial.

So how do you enter if you don’t have a blog or FB page? Simple, leave us comments on our daily blog posts. We love hearing back from you, we love your feedback and we read each and every comment. For every comment you leave on one of our blog posts* you get one entry into that month’s draw. * Please note Freebie Friday is separate from this contest – comments left for our Freebie Friday give-aways do NOT count as entries in this contest.

Remember, we’ll be running this contest for the next 5 months, so you will have LOTS of opportunities to win. The next two winners will be announced at the beginning of August. Please note this contest is open to current Paper Crafter’s Library members – if you are a current member and you win, that time will be added on to the end of your subscription.

Now, before I announce October’s winners, I realized that September’s winners did not get posted. I apologize for not realizing it sooner. So let me start with September’s winners…..


and


 And now on to our winners for October…


and


Congratulations to all of you! Please email us at customerservice@papercrafterslibrary.com and put “PCL One Year Subscription Winner” in the subject line. We’ll need you to email us all your info – first and last name, your choice of a username and password, your mailing address and phone number.

We’ll be picking two more winners in November – so if you’ve entered already but weren’t picked, there are still plenty of opportunities to win! Make sure the badge is still there on your blog, put up another post or tweet or FB letting people know about our contest and then leave a comment here in this post linking back, or simply keep visiting and leaving us comments.

Project Ideas Newsletter Challenge: Boo Bag

Welcome to the Project Ideas Newsletter Challenge. Every Monday, we will design a card, scrapbook page or 3D item. Your challenge – is to use our piece as inspiration and make it into a card, scrapbook page, or other project. You can use the layout, the colors, an element you like…it can look like our piece, or nothing at all like our piece. We want to see where YOU take this. This challenge is strictly a “work from your stash” challenge. This week, Andrea designed this Boo Trick or Treat bag.

As a newsletter subscriber you will have received a link to a private web page, from which you can watch the video tutorial. Please note that the video tutorial will be available for general viewing for one week only – and then will be moved into our library for our members only. In order to ensure you don’t miss any more of our Project Ideas Newsletter Challenge video tutorials, please be sure you sign up for our FREE email newsletter from the top right sidebar of this blog. If you didn’t receive the newsletter then please be sure to email us to confirm your subscription.

Every Monday, here on the blog, we’re going to post a picture of our project. You will have ONE week to upload your challenge piece. Instead of a weekly prize though, we’re going to award a prize monthly. So for each week you participate and each project you submit – you will get one entry into our monthly draw. On the first Monday of each month – we will announce one challenge winner, who will be featured as a guest designer on the Paper Crafter’s Library blog as well as our Facebook page. As a guest designer, we’ll feature your biography, some of your favorite paper crafting projects and we’ll link to your blog.

Here are the details on how you can participate in the Project Ideas Newsletter Challenge:

A new Project Ideas Newsletter video tutorial will be emailed out to newsletter subscribers every Monday (so make sure you are signed up). Then, here on the blog, we will post a picture of our project along with an Inlinkz button for you to enter your project. Here are the details:

•Work from your own stash to create a project based on the inspiration project provided – you can use any products you would like, and make any type of project you like – card, scrapbook page, album, 3D item etc.
•Post your project on your blog, in your gallery or on any other photo-hosting site (such as photobucket or flickr).
•Click on our inLinkz button below to add a link to your project for our challenge
•You will have until 7am, Monday, October 8th to add your link to the list to be eligible to win. You can enter as many times as you like.
•For each project you submit, your name will be entered into our monthly draw. The winner will be announced on Monday, November 5th.

Good luck to everyone and we look forward to seeing your projects!

Before I announce the Makeover Monday winner for September, I would encourage you to check out all this months entries. You can click on the links below to be taken to the direct posts.

Makeover Monday September 3

Makeover Monday September 10

Makeover Monday September 17

Makeover Monday September 24

And now it’s time to announce our Makeover Monday winner… 


Congratulations Nicole. Please email us at customerservice@papercrafterslibrary.com and put “Makeover Monday Winner” in the subject line.


So Very Grateful For You Video Tutorial

Things are getting back to normal here at the stamping studio!  Hurray!  Karen is back and we have had a flurry of creating activity here.  It is so nice to have a regular routine for a week.  With Fall being here and all the trees changing colors, we have been inspired to create with natures color palette!  What beautiful colors they are!  I hope that you enjoy all that we have shared this week. Make sure to come back next week for some spooky Halloween projects!


So Very Grateful For You

As I stated above, I was inspired this week by natures color palette as you can see.  I took a solid image and inked it up with three different Stampin’ Write markers, to create this So Grateful For You card.  I just love the simplicity of the card and am having a lot of fun creating with some old techniques! 

Download the pdf handout here

 Supplies:

Stamps: Botanical Arts (Wendy Vecchi); Gratitude Journal (papertrey ink)

Ink: Cajun Craze, Old Olive and Daffodil Delight Stampin’ Write markers, Early Espresso Classic ink (Stampin’ Up!)

Paper: Crumb Cake CS, Cajun Craze CS, Early Espresso CS, Very Vanilla CS, Regals Designer Series Stack (Stampin’ Up!)

Accessories: bone folder, Top Note die, Early Espresso Satin ribbon, paper trimmer, Craft scissors, Stampin’ Dimensionals (Stampin’ Up!); Big Shot (Sizzix); Tape Runner XL (thermo-web)


Mouthwatering Note Of Thanks

Sophia used the same technique this week as I did above, just taking it to the next level. The cherries on this card are a solid image stamp.  To create dimension to the cherries, she colored directly on the stamp using various colors of Stampin’ Write markers.  She then went over the stamped image using various colors of colored pencils, in order to add in the highlights. She is amazing to me with how she can add so much dimension to her work with shading!   

We have a video tutorial and pdf for our members here. (You must be logged in to view the page)

Supplies:

Stamps: Mouthwatering (Stampin’ Up!)

Ink: Crumb Cake, Soft Suede and Cherry Cobbler Classic inks, Summer Sun, Poppy Parade, Cherry Cobbler, Not Quite Navy, Pear Pizzazz and Wild Wasabi Stampin’ Write markers (Stampin’ Up!); Jet Black StazOn ink (Tsukineko); Chartreuse, Light Aqua, Electric Blue, Indigo Blue, Dark Purple, Crimson Lake Prismacolor pencils (Prismacolor)

Paper: Very Vanilla CS, Cherry Cobbler CS, Unknown DP (Stampin’ Up!)

Accessories: bone folder, stamping sponges, mat pack, Stampin’ Spritzer, Cherry Cobbler Quilted Satin ribbon, paper snips, Stampin’ Dimensionals, Dazzling Diamonds glitter (Stampin’ Up!); pencil, 1/4″ hole punch (Office Supply Store); tape (Scotch); Glossy Accents (Ranger); Tombow multi-purpose liquid glue (Tombow)


Have a great weekend!

Technique Thursday: Fall Place Card Treat Holder

I think that this little Thanksgiving or Fall Place Card/Treat Holder would be a lovely accent to anyone’s table!  Filled with after dinner mints, this little holder adds the finishing touch to any dinner. Your family and friends will love it!

We have a video and pdf handout available for our members here. (You must be logged in to view the page)

Supplies:

Stamps: Antique Flower (Hero Arts); Leaf Prints (papertrey ink); Day of Gratitude (Stampin’ Up!)

Ink: Early Espresso, Cherry Cobbler and More Mustard Classic inks, Early Espresso and Soft Suede Stampin’ Write markers (Stampin’ Up!)

Paper: Crumb Cake CS, Very Vanilla CS (Stampin’ Up!); Java CS (Bazzill)

Accessories: #1 brown paper bag (Package Store); paper trimmer and scoring blade, Scallop Edge Border punch, bone folder, stamping sponges, paper snips, Stampin’ Dimensionals (Stampin’ Up!); red liner tape (Simon Says Stamp); Labels Four Nestabilities dies, Grand Calibur (Spellbinders); Removable Tape Matte (Scotch); Tape Runner XL (thermo-web)


Fall Fun Pumpkin Mini Album 

Do you remember this Fall Fun Pumpkin Mini Album we showed you last week?  I’m so happy to announce that this album has now been made available for purchase from the Sunny Stampin’ Store.

This super cute Fall Fun Pumpkin mini album features an exclusive printable pumpkin template and has been designed to hold up to 15 photos and several journaling pieces. What a great way to preserve your memories from any fall activities: apple picking, corn mazes, wagon rides, thanksgiving and halloween just to name a few. Just a reminder that this project is free for Paper Crafter’s Library members.


Guest Designer: Monday Makeover Winner Joyce Lau

Today we are excited to bring to you a special Guest Designer, Joyce Lau.  Joyce was a Makeover Monday winner in August. Would you like a chance to be featured on Paper Crafter’s Library? Here’s how:

At the end of each month, we will draw one name from all our Makeover Monday participants and the winner will be featured as a guest designer on the Paper Crafter’s Library blog as well as our Facebook page. As a guest designer, we’ll feature your biography, some of your favourite paper crafting projects and we’ll link to your blog.

This month we bring you Joyce Lau.  You can check out Joyce’s blog here.  Below, you can see Joyce’s projects, but first, here is a little more about Joyce:

Since I was a child I have enjoyed paper crafts. My favorite was origami with making different kinds of boxes a close second.  Now I focus more on scrapbooking and cardmaking.  Some people believe that it is a hobby for moms and moms only.  I disagree.  It is a hobby for anyone who likes to preserve memories and celebrate relationships.  I like to make pages for my family after our gatherings and I like to send hand-made cards for the special people in my life.

I became a Close to My Heart Consultant in late 2009 and have been enjoying its products and the friendship I have made with other people who share the same passion. I started my blog in early 2012 and am so glad that I did! Before entering the blogging world, I basically had no way to keep track of how a card was made. Now that I have could use my blog as a repository. In addition, I love participating in the challenges. They are such a great source of inspiration and I realize that by playing along my creativity is enhanced. My style is clean and simple.

Yet I am  stepping outside my comfort zone to try different things. I am interested in learning new techniques and using new products.  I hope that one day I could master a lot of techniques and use a handful of them to finish a complicated project. Apart from paper crafting, I also enjoy cleaning up my craft area, travelling, watching movies with friends and girls’ night out.


Projects

I’m sharing three cards with Paper Crafter’s Library:

1.  For you card


a. This card measures 5” x 7”.  This card uses the Avonlea paper packet and the Slate Satin Polka-Dot Ribbon flower as an accent.  It was super fun to make the flower!  The flower is actually made of two flowers – a small one layered on the big one.  For the big one, I just ran a thin thread along the seam of the ribbon with running stitches and pulled it tight to form the flower.  Then for the smaller one, I folded the ribbon into half and did the same.  To finish it off, I added some Sparkles Flourishes that appear to extend from it and a Rhinestone Designer Brad to the center.  The flower looks very elegant and I think I’m going to make one as a brooch for myself!

2. Thanks card


a. The card measures 3.5” x 8”.  I covered the card base with Clementine patterned paper as the background.  The word “thanks” was cut with the Close to My Heart Artiste Cricut cartridge.  I added some sparkles to make it pop.  Then to give it some interest to the stamped image, I added a Shimmer Designer Brad in the center and added some Almond Glitz Glitter Gel. 

3. Thank you from the bottom of my heart card


a. Finally, I’m sharing a card that I “cased” myself.  This card measures 4.25” x 5.5”.  I used random stamping to create my own patterned paper, added some rhinestones and stamped a sentiment.  To finish it up I accordion-folded the Color-Ready Seam Binding Ribbon to put it next to the sentiment.  I truly enjoy using clear stamps because it gives me the ability to see exactly where I stamp and thus random stamping can be easily achieved. 

We hope you have enjoyed Joyce’s projects.  Be sure to check out her blog here.  We look forward to next month’s Makeover Monday Guest Designer.  Could it be you?