Project Ideas Newsletter: Merry Christmas to You and Yours

I wanted to create a clean and simple card, allowing for May Arts gorgeous ribbon to be the main focus.  Adding in the holly for a splash of color and the greeting to balance off the card, kept May Arts ribbon as the focal point of this holiday card.

Newsletter subscribers will have received a link to a private web page, from which they can watch the video tutorial for this Merry Christmas to You and Yours card. Please note that the video tutorial will be available for general viewing for one week only – and then will be moved into our library for our members only. In order to ensure you don’t miss any more of our Project Ideas Newsletter video tutorials, please be sure you sign up for our FREE email newsletter from the top right sidebar of this blog. If you didn’t receive the newsletter then please be sure to email us to confirm your subscription.

Featured Company: Designs by Ryn and a Give-a-Way

We are pleased to bring you a special guest today and feature her wonderful company. Please welcome Ryn Tanaka from Designs by Ryn.  I’m so pleased to share her work with you as well as a chance to win some of her images.  To be eligible, to win the prize, simply leave a comment below this post  telling us what you like about any of the projects listed showcasing Ryn’s designs (you can see them all below).  You will be entered for a chance to win a package of one of Ryn’s designs.  Here is what the prize pack includes:

Before we show you a selection of Ryn’s projects, here is a little more about Ryn:

Designs by Ryn is the manifestation of a dream that began a long time ago for me. I have always wanted to create a lifestyle that fits me and what I want out of my life. One that would allow me to create during working hours and give me the flexibility in my schedule to travel. For the longest time I wondered if something was wrong with me for not fitting into the multitude of ready made jobs that I tried.  It wasn’t until around three years ago when I attended a seminar at the Small Business Centre in London, Ontario that I realized that many of those misfit traits of mine were what they called entrepreneurial.

I was hooked by that idea but had absolutely no working knowledge of business.  The next few months I laboured over a business plan and submitted it to a program offered at the Centre – the Self Employment Benefit Program.  To my absolute joy I was accepted!

I was given a foundation of business related workshops and an advisor – Gord Evans- who went over and above to help me with my project – a business that offered high quality rubber stamp designs based on my artwork. The beginnings of Designs by Ryn.

In order to have the flexibility of location that I wanted my store would need to be online. Never mind that I was almost completely technologically challenged and didn’t own a computer! The library computers just wouldn’t cut it so I walked into Staples and many questions later walked out with a laptop, printer and… A boyfriend?! Lol. That’s another story all together 😉

He became my “tech department” helping with the many issues that came with designing, printing and cutting my catalogues and product cards from home. I also bought a scroll saw – another foreign piece of machinery to me – determined to hand cut the stamps once mounted on cling cushion. The first day I was in tears having destroyed at least half of my attempts but in time I learned.

The website went through several transformations which took a lot of time (and patience) and forced me to focus on marketing to stores and at festivals.  It wasn’t until this year that at long last it became a fully functioning store.

Since it’s release I am thrilled to see my stamps getting international exposure. I have built a Design Team of three wonderfully kind and talented ladies who consistently do great samples with the stamps. Shirley Deatcher – Canada, Eileen Godwin – UK and Miranda Dagenaars – Netherlands. I also encourage customers to share their work and find myself constantly delighted by what people make. The most inspiring part is that this business is allowing me to connect in a meaningful way to other creative individuals around the world.

That dream of mine is slowly getting there. I am endlessly thankful to all of the people along the way who have purchased my stamps and supported me on this journey.

I am now taking my business for a “walkabout” and am off traveling in South America with a backpack of art supplies. I’ve left my inventory and shipping with a wonderful and trusted lady – Phylis – back home who will handle orders while I am away. I hope to focus my energy on creating new and inspiring stamp designs. My next challenge is blogging about my creations. More to come 😉

Below you can see a sample of projects created by a variety of designers using Ryn’s Designs.


 Once again, to enter to win leave a comment here on our blog but make sure you take a minute to stop by Ryn’s blog because she is also giving away a fantastic prize pack.  The winners will be announced next week on each blog.  You can visit her blog here: http://www.designsbyryn.blogspot.com/

We hope you have enjoyed today’s projects. We want to extend a sincere thank you to Ryn Tanaka for sharing her beautiful images and inspiration with us.  And don’t forget to enter to win one of the great prize packs from Designs by Ryn.  Leave a comment on this post about one of the projects Ryn showcased and don’t forget to visit her blog and leave a comment there as well.  Be sure to tell her Paper Crafter’s Library sent you.  Winners will be announced next week!


Christmas Memories Mini Album Digital Tutorial

We are so exctied to be releasing a new mini album, just in time for you to scrapbook all your special Christmas memories.  This mini album makes a great gift for that someone special in your life this holiday season! 

The completed album is 6″ x 6″ and allows you to scrap up to sixteen 4″ x 4″ photos housed in a fun and unique binding system that is a Paper Crafter’s Library orignal design.  The album is secured closed by tying the two satin ribbon pieces into a bow. Incorporating subtle page embellishments, this album was designed to allow your Christmas photos to be the main focus of each page allowing your Christmas memories come to life before your eyes! 

We are making this tutorial available as a Bonus gift for our Paper Crafter’s Library members (see access link below) OR if you are not a member, you can purchase the tutorial – which includes a pdf handout with step-by-step photo directions, as well as a video tutorial – all for only $19.95  (see full details below).

We have a video and pdf handout available for our members here. (You must be logged in to view the page)

To purchase the Christmas Memories Mini Album Digital Tutorial, click on the Add To Cart button below.

Christmas Memories Mini Album Digital Tutorial – $19.95

This digital tutorial includes:

  • a step by step photo tutorial pdf handout on how to create the base of the album
  • close-up photos of each page including supplies and dimensions so you can re-create the pages exactly, or use them as a guideline and embellish as desired.
  • a link to a private web page where you can view the video tutorial on how to create the album base and embellish your album
  • NO supplies included


Joy Christmas Card

We have been sharing a lot of Christmas projects in Paper Crafter’s Library and today was no exception – we had three fabulous projects for our members!  One of those projects was this Joy Christmas card which was created by Sophia. This card features this cute snail image that has been colored in using watercolors and a water brush.  In this project, Sophia also shows you how to get the beautiful shimmery look on the dry embossed snowflake background.

We have a video for our members here. (You must be logged in to view the video)

Supplies:

Stamps: Snail image (Lelo Designs); Small Typewriter Alphabet (Stampendous)

Ink: Peacock Feather, Crushed Olive, Mowed Lawn, Fired Brick, Vintage Photo, Walnut Stain and Chipped Sapphire Distress inks (Ranger); Jet Black Archival ink (Ranger); 850 and 912 Tombow markers (Tombow); watercolor paints (art supply store)

Paper: Soft Sky CS (retired), Lucky Limeade CS, Poppy Parade CS, Sahara Sand CS, Whisper White CS (Stampin’ Up!); Mistletoe DP 6” x 6” pad (Bo Bunny); Watercolor paper (Arches)

Accessories: bone folder, stamping sponges, Riding Hood Red Corduroy buttons (retired), Craft scissors (Stampin’ Up!); Tombow multi-purpose liquid glue (Tombow); paint brush, water brush (craft store); Snowflakes embossing folder (Cuttlebug); Big Shot (Sizzix); Inka-Gold (Viva Décor); paper towel (Dollar Store); Red Velvet ribbon VRB2010(Maya Road); red liner tape (Sunny Stampin’ Store); 3D Foam (thermo-web); Deckled Edge Classic Ovals Nestabilities (Spellbinders); Scrap Dots (Helmar); Maraschino baker’s twine (May Arts); hot glue (Martha Stewart)


Trendy Tuesday – Ornaments

Trendy Tuesday – Dimensional Ornaments
by Katherine Elliot

“Tis the season… if you haven”t already started your Christmas crafts, then often this is the time of year you”ll be in full swing making holiday cards, tags, and maybe your very own Christmas ornaments!  Ornaments are a fun way to personalize your tree, and are also fun to make as handmade gifts.  There are many different shapes and sizes, and they can be as detailed or as simple as you want.  Check out these great examples of some of the latest trends and some time honored styles of paper crafted ornaments…

Paper Angel ornaments by Kay Kaltoff, image source Stamping to Share

Layered ornament by Kay Kaltoff, Stamping to Share

You can use a variety of cardstock, patterned papers, ribbons, punches and dies to layer, fold, and embellish your way into some amazing creations.

Honeycomb ornament and tutorial by Becca Feeken, image source & instructions found at Splitcoast Stampers

Ornament shape punches and dies help you create simple or multi-layered dimensional ornaments.  Spellbinders, My Favorite Things, and Stampin” Up!, just to name a few brands, have dies of various sizes and shapes you can use to create ornaments like these…

Ornament by Michelle Woerner

 3-D Heirloom Ornament by Michelle Woerner, image source Spellbinders Paper Arts

Stampin” Up! dimensional ornament, image source and instructions from Elaine Uhl at Create n” Stamp with Elaine

2011 Heirloom Ornaments

Steel rule ornament dies from Spellbinders Paper Arts

Die-namics Christmas Ornaments DIE ONLY

Die-namics Ornament dies from My Favorite Things

 Ornate layers of any unique cut shapes with additional beaded accents combine to be elegant and festive decorations. Check out this elaborate dangling ornament using several different shapes…

Ornaments by Diana Nguyen image source Splitcoast Stampers

For something a little more simple, but just as elegant, a few folded shapes of solid and glittered cardstock adhered together make a beautiful snowflake ornament…

ornament3kgill

 Stampin” Up! Framelits and snowflake die ornament by Kirsteen Gill image source Creatin” with Kirsteen

Quilling, the fine art of coiling and shaping strips of paper, used by some very skilled artisans creates beautiful paper snowflakes.  These are perfect for hanging on a tree or can be used in other long lasting winter decorations.  I”ve even noticed these kind of beautiful quilled snowflakes decorating the pages of holiday catalogs that are now flooding my mailbox…

Paper Quilled Snowflake Ornament in White and Blue with a Touch of  Gold

Quilled ornament by Navanka Creations

Perhaps simpler paper folding techniques are more practical for some of us DIY”s… This example of a beautifully folded paper heart could be great heading into Valentine season as well.  It”s also a great design to use up some patterned paper scraps…

Heart ornament and image source from Reese Dixon

Leftover patterned paper scraps come in handy when making an ornament like this creation, too…

Dannie Graves ornament and other handmade examples, image source Holy Jeans and My Favorite Things

If cutting and preparing scraps by hand may take more time than you think you have this season, Sizzix also makes a die that can help create a dimensional ornament like this one…

                                          655146      Large_655146

Sizzix 3-D Circle ornament die, image source Sizzix.com

While paper can create lovely lightweight ornaments, other dimensional decorations are fun to personalize with your own embellishments and paper accents, too.  A decorated miniature frame was re-purposed as a very pretty ornament in the example below…

Handmade Holiday decorated frame ornament by Ivana Camdzic, image source Paper Girl Crafts 

Three dimensional, ornate ornaments are stunning creations, no doubt…but there”s also nothing wrong with the perfectly practical 2-D type ornaments you can make with your stamps and punches as well…

Sledding Ornament

Sledding Ornament from Flourishes

 Ah, sometimes simple is better (and do-able in a jiffy!)…

Simple, rhinestone studded tree ornament,  image source Interior Design Room 2012-2013

Of course for those that may not have time to create a tree filled with handmade ornaments (yeah, I had that dream one year, it”s still a work in progress…), decorating a card with a dimensional ornament may offer you a chance to wow someone special.  This style of card has been very popular lately, and it”s easy to see why… this is a beautiful Christmas card!

Card with dimensional ornament by Mel Sharp, image source A Stamp Addiction

Hope you enjoyed seeing some cheerful holiday ornaments this week.  Happy crafting everyone!

Project Ideas Newsletter: Noel Traditions

When I was looking at this piece of DP from the Home for Christmas collection by Fancy Pants, I noticed a bird element on this particular pattern of paper.  I decided to embellish my card using one of Maya Road’s bird chipboard pieces, which I colored using ColorBox Pigment inks.

Newsletter subscribers will have received a link to a private web page, from which they can watch the video tutorial for this Noel Traditions card. Please note that the video tutorial will be available for general viewing for one week only – and then will be moved into our library for our members only. In order to ensure you don’t miss any more of our Project Ideas Newsletter video tutorials, please be sure you sign up for our FREE email newsletter from the top right sidebar of this blog. If you didn’t receive the newsletter then please be sure to email us to confirm your subscription.

Silhouette Black Friday Specials 2012 & A Give – Away

It’s Black Friday and I am thrilled to be able to hook you up with discounts from Silhouette America exclusively for Paper Crafter’s Library  readers!   Here’s how it works: when you visit Silhouette America by clicking on this link, you’ll be able to get the discounts listed below.  All you have to do is use the code ANDREA when you check out – easy peasy!

Here are the juicy details:

1 Silhouette CAMEO® (pictured below) plus 1 copy of Silhouette Studio® Designer Edition (MSRP $349.98) for $229.99!  If you’ve never used the Silhouette Cameo before you can read about it and watch a comprehensive video tutorial HERE.


1 Silhouette Portrait™ for $179.99.  The Silhouette Portrait is Cameo’s little sister.  It has the same motor and cutting mechanism as the company’s hit Cameo machine, but the more portable Portrait machine weighs only 3.5 lbs and cuts materials up to 8″ wide (versus 12″ for the Cameo). Like its bigger sister, the Portrait works with Silhouette Studio software and has the ability to register and cut printed materials.

40% off at silhouetteamerica.com.(Offer only valid at silhouetteamerica.comExpires November 30, 2012. Rain checks not available.  ** Please note that the 40% discount excludes Silhouette CAMEO®, Silhouette Portrait™, downloads, download cards, subscriptions, and gift cards **

So, to cash in on these discounts, click this link, and use the code “ANDREA” at checkout!

Please note that the promo codes are only valid within the US, and the promo codes end on November 30th.

Wondering how to use and what you can make with a Silhouette?  The possibilities are limitless, but to get you started, check out some of our complimentary video tutorials in Paper Crafter’s Library!

Give-Away Details

In addition to all the great deals with Silhouette, I am excited to be able to give away 1 copy of Silhouette Studio® Designer Edition compliments of Silhouette America.  Here is some info about the software:

Here is some info on Designer Edition:

All you have to do to enter this Give-Away is to leave a comment in the comments section of this post.  I’d love to hear about whether or not you took advantage of any of the specials and whether you currently own a Silhouette Portrait or Cameo.

Wishing You Peace, Love and Joy Video Tutorial

We have been working very hard to bring you the Christmas designs showcased this week.  I hope that you enjoyed all of our creations and can draw some inspiration for what we have brought to you!


Wishing You Peace, Love and Joy

To create this card I started by simply die cutting a tree shape from this beautiful piece of DP from Studio Calico’s Wonderland Collection.  I then sponged the tree to add some dimension, embellished it using various sizes and shades of green rhinestones and voila…a beautiful focal point for my card!  I also added a piece of chevron DP from the same collection to the card.  But, rather than just adding a rectangular piece of DP to the card, I cut along the chevron pattern on the top and bottom of the DP using my paper snips and I found that this anchored the card! 

Download the pdf handout here

Supplies:

Stamps: Tree Trimming Trio (papertrey ink)

Ink: Dark Chocolate Dye ink, Ripe Avocado Dye ink (papertrey ink); Old Olive Classic ink (Stampin’ Up!)

Paper: Crumb Cake CS (Stampin’ Up!); Wonderland 6” x 6” Paper Pad (Studio Calico)

Accessories: bone folder, paper snips, Stampin’ Dimensionals, stamping sponges (Stampin’ Up!); Tape Runner XL (thermo-web); In The Meadow die (papertrey ink); Big Shot (Sizzix); Lost & Found Christmas rhinestones (My Mind’s Eye)


Peace Vellum Holiday Photo Card

I also wanted to share with you a project I created for our members this week – this beautiful Peace Vellum Holiday Photo Card.  Every year we have family photos taken and I thought this would be a great way to send the photo to friends and family this Christmas.

We have a video for our members here.  (You must be logged in to view the video)

Supplies:

Ink: Vermillion Archival ink (optional) (Ranger); R27 Copic marker (optional)(Copic)

Paper: Kraft CS (papertrey ink); Whisper White CS, Cherry Cobbler CS, Vellum CS (Stampin’ Up!)

Accessories: bone folder, paper-piercing tool, Stampin’ Pierce Mat, paper snips, sponge daubers (optional) (Stampin’ Up!); repositionable adhesive (Dotto); Classic Rectangles Large Nestabilities dies, Grand Calibur (Spellbinders); Tape Runner XL (thermo-web); Snowflakes embossing folder (Cuttlebug); Big Shot (Sizzix); Tombow multi-purpose liquid glue (Tombow); ribbon threading needle (Craft Store); tape (Scotch); Maraschino baker’s twine (The Twinery); Portfolio alphabet stickers (Pink Paislee); Air Brush (optional)(Copic)

Have a great weekend!

Wish Big Tag

Happy Thanksgiving to all our American readers.  I hope you all have a great holiday with friends and family!

Sophia created this Wish Big tag for our Paper Crafter’s Library members today.  This tag would make a great embellishment to the outside of a gift bag or attached to a wrapped gift.  As this project uses several chipboard elements, Sophia shows you how you can alter chipboard elements by using chalk ink.

We have a video for our members here.  (You must be logged in to view the video)

Supplies:

Ink: Aquatic Splash, Turquoise Gem and Eggplant Chalk inks (VersaMagic); Toffee, Gray Whale, Ocean and Pumpkin Spice Chalk inks (ColorBox); Coffee Bean Brilliance ink (Tsukineko); Vintage Photo and Stormy Sky Distress inks (Ranger); Red Pan Pastel (Colorfin); Black and Brown Pitt pens (Faber-Castell)

Paper:  Jovial Collection DP, Cappella Collection DP (Basic Grey), Soft Sky DP(retired)(Stampin’ Up!); Mat Board (Craft Store)

Accessories: stamping sponges, 2-way glue pen, Stampin’ Distress Tool, paper snips (Stampin’ Up!); Tombow multi-purpose liquid glue (Tombow); Sofft tool (Colorfin); Lullaby Thickers (American Crafts); Liquid Applique (Marvy Uchida); Tiny Type Brown alphabet stickers (Cosmo Cricket); Craft Bond Spray Adhesive (Elmers); Big Shot, 2” Square Movers and Shapers die (Sizzix); Tag and Bookplate die (Tim Holtz Alterations); craft knife, self-healing cutting mat (Craft Store); Home Tweet Home Mini chipboard, Windows chipboard (Maya Road); ink blending tool, Glossy Accents, Heat It! tool (Ranger); 3D Foam (thermo-web)


Graphic 45 Spotlight With Designer Nicole Eccles

Here is the latest installment of our Graphic 45 Guest Designers. Many of you may remember that back in April we hosted a Graphic 45 Week on the Paper Crafter’s Library Blog. It was week filled with projects and inspiration using Graphic 45’s Tropical Travelogue Collection. We had such a great experience partnering with Graphic 45 and their design team, and such a great response from you, that we’ve decided to partner with them on an ongoing basis. The first and third week of every month one of the Graphic 45 Designers will share a project they’ve created here on the PCL Blog. We started with our monthly designers in June and before I introduce you to our latest Designer, I just wanted to take a minute to re-introduce Graphic 45 for those of you that may not be familiar with the company.

Graphic 45 is an award-winning scrapbook and paper crafting company­— owned and operated by a mother and her two daughters.

Diane Schultz (pictured center)—Designer and CEO (aka mother)

“I’m passionate about being creative and eager to make it possible for others to find their creative voice. My background includes stints as a designer for, McCalls, Simplicity, Vogue/ Butterick, Mattel Toy Company and a host of other jobs that each, in some way, led me to what I do now. At 45 I went back to school and got my degree in graphic design— I named the company to celebrate that achievement.”

Aimee Filimoehala (pictured left) —Director of Operations

“I wear a lot of hats and love it that way. Business, marketing, operations, etc. have made me a pro at multitasking (aka juggling‑figuratively and literally). When we launched Graphic 45 just three years ago we had no idea what was in store, working together as a family has been an amazing journey that we all feel so grateful to be apart of.”

Charee Filimoehala (pictured right)—Director of Customer Service and Design Team Coordinator

“I joined the team a little over three years ago and haven’t looked back…what a life-changing experience this has been. I love working with and around creative people and products (not to mention I like my co-workers quite a bit). I spend my days working with our friendly stores and talented design team…the occasional trip to a workshop or tradeshow pretty nice too.”

Together we create vintage inspired crafting products that capture the flamboyant style of the 1920’s and 30’s – with vibrant color, irresistible texture and imaginative design to create products with decades-old appeal that’s both fresh and familiar. Let our products inspire your next scrapbook layout, card, album or home decor project.

***********

Here’s a picture of their booth at the CHA show which absolutely blows us away every year! The artwork inside is absolutely stunning and totally unique. At the last show as we were speaking with Diane she told us that many of the altered pieces were vintage finds which she and her team transformed with their gorgeous Graphic 45 products. We can’t wait to stop by their booth at the Chicago CHA and see what they’ve got in store this year!

Here’s a picture of the Graphic 45 team – they’re always dressed in period costumes to complement the themes in their collections – every day of the show brings a new set of costumes. The ones shown below were for their Little Darlings collection.

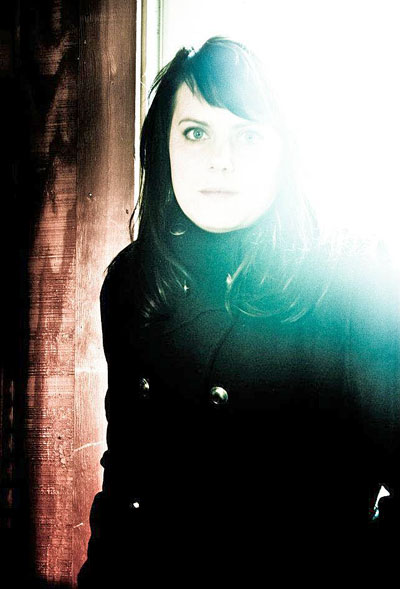
Graphic 45 Designer Nicole Eccles

Our next Graphic 45 Guest Designer for this month is Nicole Eccles who is part of the 2012 Graphic 45 Design Team. We are very excited to share Nicole’s project with you.  She has an amazing project.

You can see Nicole’s fabulous project below, but first, here is a little more about Nicole:

Art for me is a daily part of life.  It is my release, my strength,  and my inspiration.  It has taught me patience, how to let go, and most important, who I really  am.  I feel as an artist, the world around you is seen in a different hue.   Not always marching to the same beat as everyone else.  Maybe you are a  dreamer, or hopeless romantic.  As artists We live in a reality based  world, that is often visited by fairies, strange creatures and all things  magical.  Where pigs really can fly, and anything is possible!
For me, the creative process is something that just happens.  I never  really have a set plan to create anything specific in mind.  Maybe I know  it is a canvas, or a shadowbox, but otherwise I let the papers and images guide  my imagination. Once an idea sparks, it becomes a mad dash to make the vision  come to life, as dust bunnies build up and dinner becomes something just quick  and convenient.  Searching for images, or staining my fingers with inks,  clothes covered in paint and staying up past the witching hour driving to just  get a little more done.  And once I finally do hit the bed, dreams of my creation keep me working  all night long, sometimes to where I don’t feel I have slept at all.  Wake  up, send the kiddo off to school and do it all again, until it has come to  life!


With a deep interest for Halloween, and the more bazaar. I have been  inspired by artists like Edward Gorey and Tim Burton. Add a love for science,  architecture and anything mechanical, it was only natural for me to be drawn to  the style of steampunk.


These collages are the perfect example of my love for steampunk and all  things funky.  Each one is created on stretched canvas, with a unique hand painted  background by using a mix of Acrylic paints, and adding a touch of shine and  wonder with Twinkling H20s.  Bright colors and imagery pull you into an almost surreal world, where  giant octopus battle with big fish.  Elephants perform in top hats, and  ravens rest about.  This is my fantasy world come to life!


Toy Truck Gift Box


I’m happy to bring you this Toy Truck Gift Box using Graphic 45’s Small Matchbook Box and A Nutcracker  Sweet.  This fun little project not only makes the perfect little gift box for  all ages, but it also makes a fun little toy! Designed to actually roll, this  tiny truck was created using Graphic 45’s small matchbook box and a little  imagination!
So if you are looking for a truly unique gift/box idea this  year, this project is for you.


Supplies Needed to create toy truck:
Graphic 45 Staples: 1 Small Matchbook box
                                 1 Ornate Metal Key Holes
                                 1 Metal Brad
                                 1 Sm. Metal Tag Staple


G45 A Nutcracker Sweet : 1 Endearing Sentiments
                                           1 Holiday Magic
                                           1 Land of Sweets
                                           1 A Nutcracker Sweet Sticker Sheet


G45 Christmas Emporium: 1 All I Want for Christmas
Ranger: Glossy Accents( for adhesive), Xmas Red Stickles, Lime green  stickles
May Arts Red Ribbon
Fine tip black sharpie marker
Paper trimmer
Black acrylic paint
Paint brush
1/4”Scor Tape
3D foam Squares
3 – 1/4” Wooden blocks found at any craft store
6 – Wooden wheels measuring at 1’”x 1/2” w/ 1/4” hole, found at any craft store
1- 1/4” Dowel Rod
Step 1: Using your paper trimmer, cut Endearing Sentiments to 8 1/2” x  5”.
Step 2: Wrap and adhere the cut strip of Endearing Sentiments around the  outside of the small Matchbook box,starting and finishing on the short side(this  will become the bottom of the box)
Step 3:To uncover the front opening on the box, carefully use scissors or  an Exacto knife to cut an X, working from corner to corner. (To make it easier  remove the sliding tray, and watch where you are cutting from the open  side)
Step 4: Fold the cut flaps into the box, cut away an excess paper, and  adhere flaps down using Glossy Accents.
Step 5: Next, using your paper trimmer, just cut Endearing Sentiments into two small  strips measuring 1 1/4” x 2 3/4”.
Step 6: Adhere the cut strips to the ends of the matchbook box.
Step 7: Adhere a Sm. tag to the underneath side of the matchbook box.   Leave approx. half of the tag hanging off.
Step 8: Cut All I Want for Christmas into 6 squares measuring 1 1/4” x 1  1/4”, and adhere on all the sides of one wooden block.

Step 9: Adhere 2 wooden blocks together using Glossy Accents.
Step 10: Cut All I Want For Christmas into
4 -2 1/2” x 1 1/4” rectangles
2 – 1 1/4” x 1 1/4” squares
Adhere to all the sides of the glued blocks together
Step 11: Adhere the single covered block on top of the double covered  blocks.
Step 12: Adhere the stacked covered blocks on top of the metal tag.
Step 13: Remove the slide out tray by pushing just above the cab of the  truck.
Using your paper trimmer cut Holiday Magic to 4 3/4” x  2 1/2”, and  adhere to the inside back of the slide out tray.
Step 14: Cut 1/4” Dowel rod into lengths of
2 – 2 1/2” Pieces
1 – 2 1/8” piece
Step 15: Using 6 Wooden wheels, slide them onto to each end of the cut  dowel rod pieces.  Paint black using acrylic paint
Step 16: To attach the wheels, use your paper trimmer to create the  attachments.
Cut 3 pieces of patterned paper to  1” x 1 1/4”
Step 17: Using your scoring board and tool, score at 1 /16”, 1/2” and  1”.  Fold in half, then fold the ends to create a fancy V shape.

Step 18: Attach the wheels w/ the dowel rods by placing the dowel rods into  the V shape, and adhering the small flaps to the bottom of the truck using  Glossy Accents.
(Please note my wheels are not painted yet in the picture, but to make  things easier your should already be painted)
Step 19: Using 1/4” Scor Tape, adhere the red May arts ribbon directly to  the center of the truck.  Starting at the top of the opening, and wrapping  around to finish off at the bottom of the opening.
Step 20: Peel and stick the Nutcracker Sweet sticker and adhere to a piece  of scrap paper.  Cut out the sticker, and adhere to the back of the truck  using 3D foam squares.
Step 21: Using your paper trimmer cut a strip of Land of Sweets to 3/4” x  12”.
Step 22: Lay the cut strip onto your scoring tool and score every 1/2”, or  for a tighter rosette every 1/8”
Step 23: Once the complete strip has been scored, begin to accordian fold  each score line, back and forth until the entire strip has been folded
Step 24: Now you can can glue the ends together and flatten the ring to  create your rosette.
To keep the rosette flat, adhere a small piece of paper to the back.
Step 25: Peel and stick the circular Nutcracker sweet sticker, and adhere  to the front of the rosette.  Decorate using stickles.
Step 26: Adhere completed rosette to the front center opening of the  truck
Step 27: Adhere the Metal Keyhole and Metal brad to the side of the truck  using Glossy accents
Step 28: To complete the truck, add hand drawn details to the doors and  windows of the cab using a fine tip sharpie marker.


We hope you have enjoyed this fun creation from Nicole. I would also like to extend a warm thank you to Nicole for sharing her lovely project with us! Please take a minute to stop by Nicole’s Blog and of course the Graphic 45 blog to check out all their amazing creations!