Winner of Bella Blvd Giveaway

BELLA_BLVD_TAGLINE
I’d like to extend a HUGE thank you to Bella Blvd and their guest designer Brook Stewart  for sharing such a wonderful project and for their generous prize package give-away shown below.

1023BellaCOLLECTIONKITTRICKORTREAT

And now, the moment you’ve all been waiting for…….the winner is……Denise Foor!

1030winnerdenisefoor

Congratulations Denise!! Be sure to email us at customerservice@papercrafterslibrary.com to claim your prize. Please be sure to put “Bella Blvd Winner” in the subject line of the email, and then in the email itself, be sure to include your full mailing address and phone number.

For those of you that didn’t win, each week on PCL we feature a different company, and each of those companies generously sponsors a prize. Join us next week when we feature another great company.

andreasiggypcl

Trendy Tuesday – Paper Craft Pumpkins

Trendy Tuesday – Paper Craft Pumpkins
by Katherine Elliot

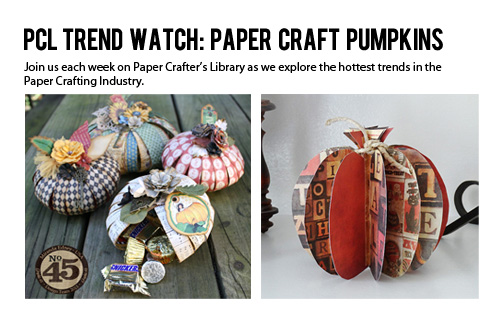
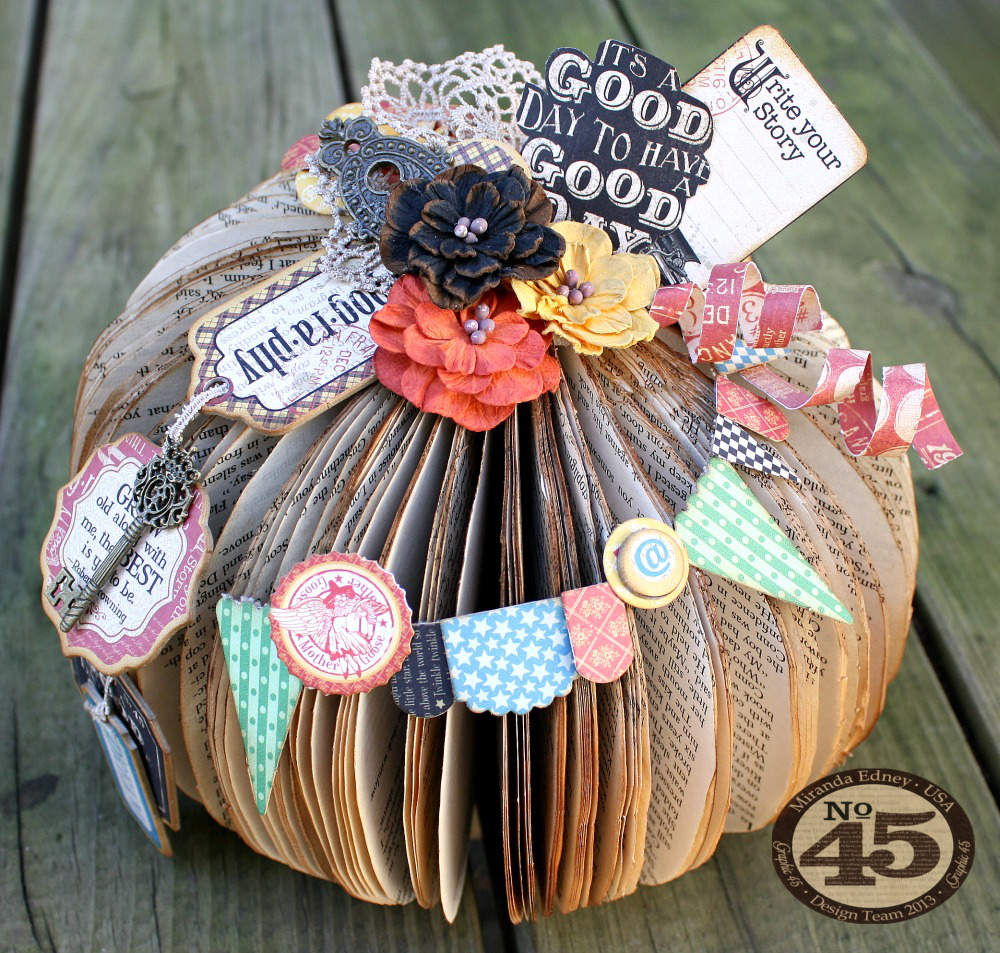
It’s pumpkin time!  Even if you will not be putting out a jack-o-lantern for Halloween this week, this seasonal decoration is a great project for fall home décor.   If you had a chance to visit the Library’s blog earlier this month and see featured artist, Miranda Edney,  then you may have had the opportunity to see her beautiful creations including these amazing pumpkins. Miranda’s sturdy, honeycomb pumpkins look great for any season.  The details on all her pumpkins are amazing.

Paper craft pumpkins featuring Graphic45 papers by Miranda Edney, image source Ms Liberty Creations

Paper craft pumpkins with surprise inside, by Miranda Edney, image source Ms Liberty Creations

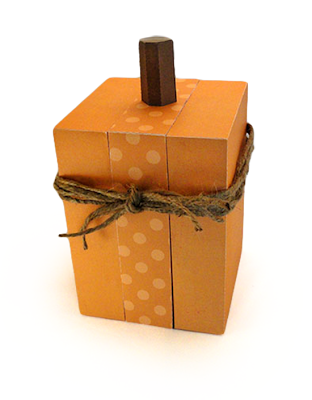
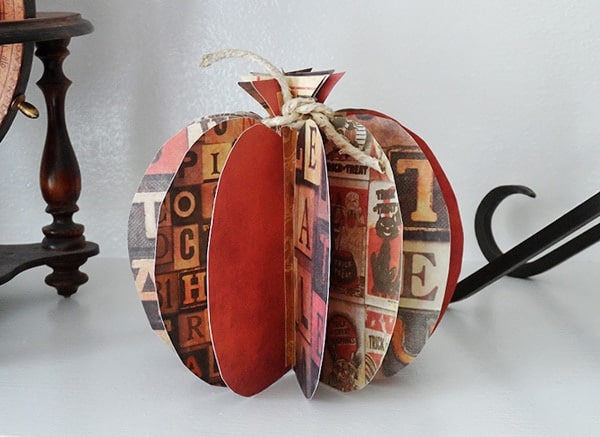
Another crafter, Amanda Formaro, created a simpler version of a standing 3-D pumpkin.  She has a quick tutorial for her small project that makes great use for any of your leftover scrapbook papers.

3D Paper Pumpkin @amandaformaro Crafts by Amanda 3-D Pumpkin by Amanda Formaro, tutorial and image source at Crafts by Amanda

Any color of paper scraps may come in handy to make quick, last minute autumn decorations.  Look at these paper pumpkins that transform thin strips of paper into a colorful pumpkin display.

Halloween Paper PumpkinsColorful paper pumpkins, image source Better Homes and Gardens

Kids may enjoy assembling a few small paper strip pumpkins, too.  The simple assembly of mini paper pumpkins could be a fun craft for a party. 
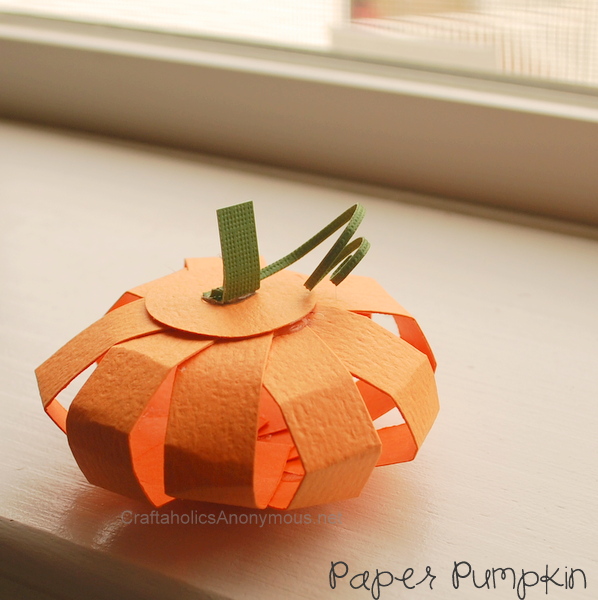
Mini paper pumpkin, tutorial and image source Craftaholics Anonymous

 Make something special and decorate some candy worthy of a paper crafter to hand out this week.  Check out Jill Coleman’s creative Tootsie Roll Pop pumpkin decorations…

Stampin' Up! Tootsie Pop Stand Up PumpkinPumpkin Tootsie Roll Pop Treats by Jill Coleman, tutorial and image source Jill Stamps

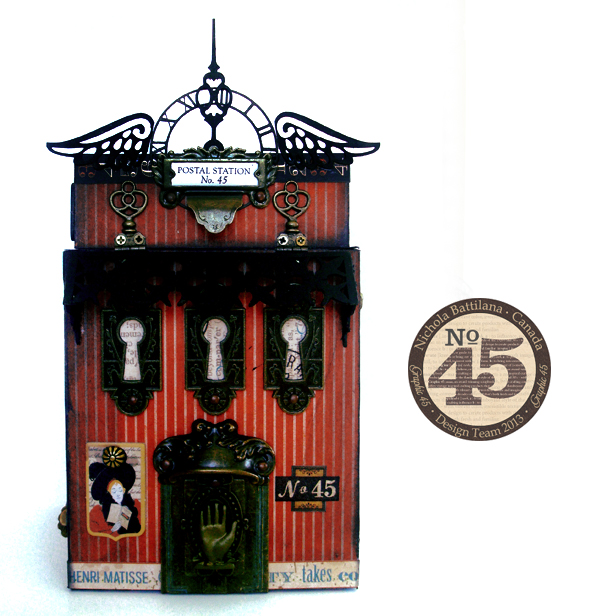
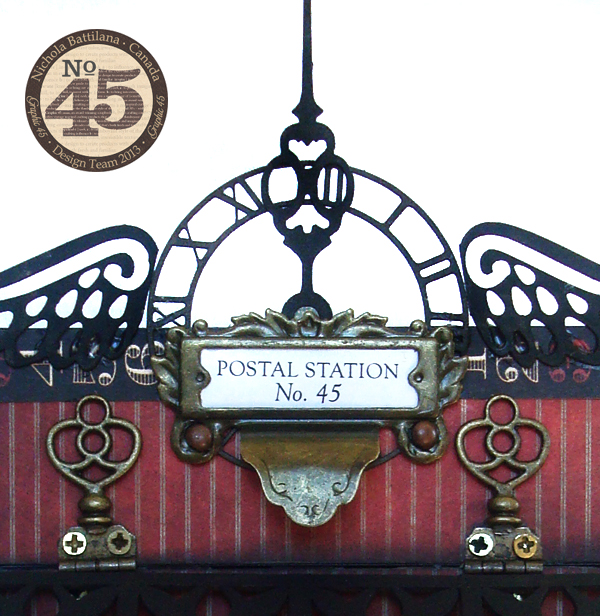
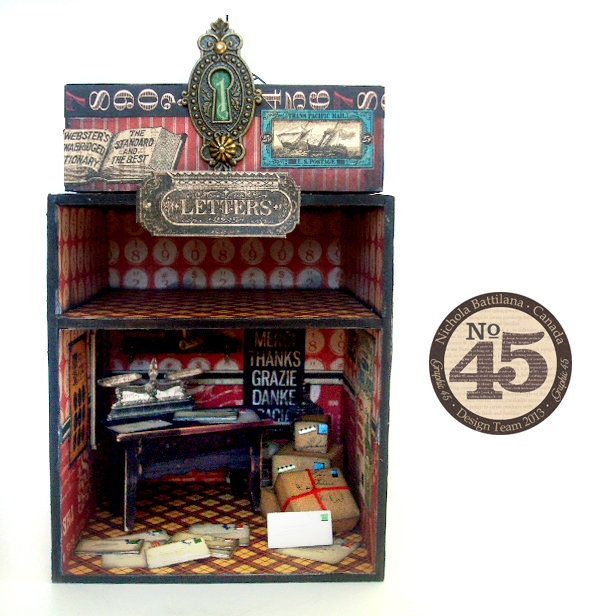
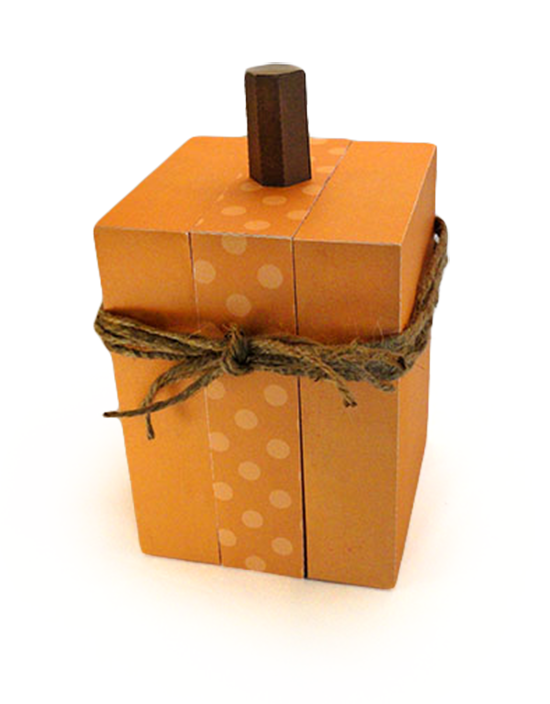
  Maybe one piece of candy is not enough?  Treat anyone special with a fun surprise or two hidden inside a pretty pumpkin box.  Sue Kment and Jody Warner created these boxes using a stylish Snapdragon Snippets design for Silhouette, cubic 3-D pumpkin kit.

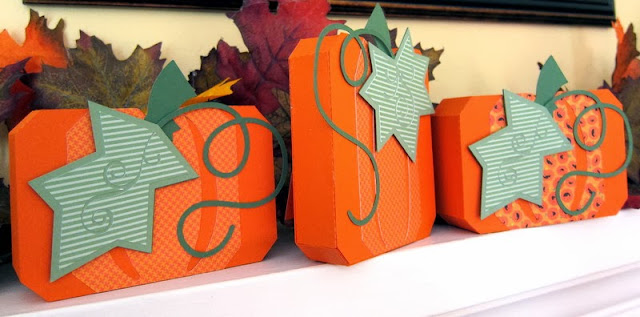
 Pumpkin boxes by Sue Kment, image source Sue’s Stamping Stuff

Geometric 3-D pumpkin by Jodi Warner, tutorial and image source Needles n’ Knowledge 

 Make use of the supplies you have on hand to decorate a real pumpkin.  You can use pre-made or roll machine type die cuts, or hand cut some paper to transform real pumpkins into a paper craft enhanced decorations. There’s no carving necessary for the cut and paste decorations Ellen Taylor created for her Halloween projects.

Paper die-cut decorated mini-pumpkins by Ellen Taylor, image source The Serendipitous Stamper

Any of your other trendy craft supplies make great decorations for a pumpkin, too.  There’s plenty of decorative washi tape to choose from to make quick work of adding colorful stripes to a craft pumpkin.
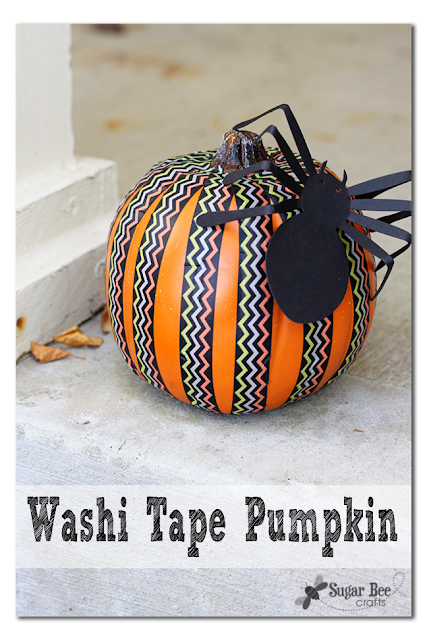
Washi Tape Pumpkin, image source Sugar Bee Crafts

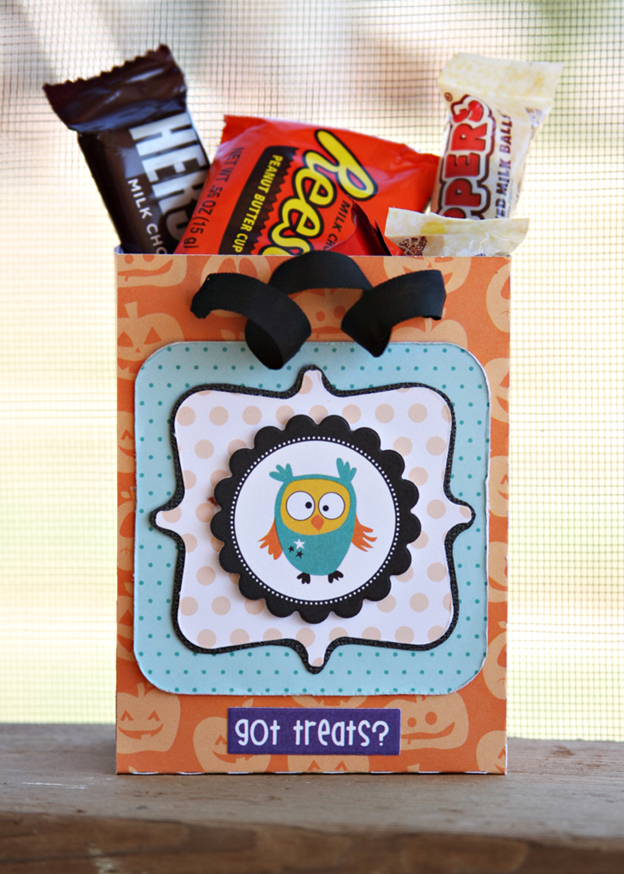
Need some last minute party favors?  Find some small orange paper bags, get some trendy colored duct tape and some pipe cleaners and start stuffing handfuls of candy into these fun paper bag pumpkins Lea Sanders created…

Pumpkin bags by Lea Sanders, image source Lea’s Papercrafting and Photo Blog

  Pumpkin decorations can last well into the later months of fall, so you still have time to create some decor for around the home.  The unique style and handmade quality of a paper quilled pumpkin could certainly impress a few guests.Curled Paper PumpkinQuilling pumpkin decoration, image source Spoonful.com

 If you’ve realized you missed your chance to pick out any pumpkins at the store, then there’s one thing everyone’s sure to have on hand…toilet paper!  Some scrap fabric makes simple decorations out of this item I’m guessing everyone has at home.Toilett Paper Pumpkin Rolls Halloween DecorationsToilet paper pumpkins, image source Spoonful

Ah yes, the paper crafting aspect of this last project is hidden inside… but what a great way to spoof any would-be Halloween tricksters and hide the toilet paper in a decorative fashion!  🙂 Have a safe, fun Halloween.  Happy crafting, everyone.

Mixed Media Monday: “Sometimes My Life is A Tangled Mess” Video Tutorial

Happy Monday everyone! I’m super excited to announce the addition of a brand new regular & FREE feature we’ll be hosting here on PCL which we’re calling Mixed Media Monday.  With Mixed Media and art journaling being a super hot trend that’s crossed over into the paper crafting world and taken it by storm over  last few years now, we’ve decided that it’s time that we gave it it’s own spotlight. So every Monday we’re going to bring you a mixed media/art journaling related post.

Initially most of these posts will be tied to a brand new feature I (Andrea) am offering on my personal blog  The Art of Simple called Art Journal Express. However it is my hope to also spotlight the work and video tutorials of other mixed media/art journaling artists (if you are one and would like your work to be featured, please email us at customerservice@papercrafterslibrary.com).

ArtJournalExpressLogo

Today I want to tell you more about Art Journal Express.

Art Journal Express is a brand *NEW* free weekly video tutorial series I’ve created for my personal blog The Art of Simple.  Each week (the plan is for it to be on Mondays) I will post a video tutorial on how I created one of my art journal pages from start to finish.  Now for me a typical art journal page takes between 20 minutes to an hour to create – which makes for a super long video to upload to You Tube, and for you to watch.  That’s why what I’ve done is to actually speed up the video clips, rather than having you watch what I’m doing in real time – hence the word “express” in Art Journal Express. However, what makes these video tutorials different from most of the “sped up” art journaling video tutorials out there is that I narrated for you exactly what I’m doing and what I’m using – that way, even though you’re watching a “fast forward” version, you don’t miss a single detail.

The videos are hosted on a You Tube Channel that is separate from the Paper Crafter’s Library You Tube Channel, so if you don’t want to miss a single edition of Art Journal Express please subscribe to that You Tube Channel (you can do so from the video tutorial page from today’s post).

Today’s page is called “Sometimes My World Feels Like a Tangled Mess”  or simple “Tangled Mess” for short. Here’s a close-up snapshot.

For a full supply list and to watch the video tutorial please click HERE.

TangledMessCloseUp1

Featured Artist/Designer: Ronda Palazzari

Today on the Paper Crafter’s Library blog, we’re continuing our weekly featured artist spotlight whereby each week we spotlight a different artist/designer in the paper crafting & mixed media world and introduce you to their fabulous work.

Today we’re thrilled to welcome back – Ronda Palazzari.  To add to the excitement, Ronda is sponsoring a give-away of her book Art of Layers – I own it, and LOVE it – as well as a copy of her stencil, both shown below.  Read more on how to enter to win these great items at the end of the post.


1024Ronda Palazzari Art of Layers
StencilOct2413

Before we show you Ronda’s fabulous projects, let’s get to know her a little bit more…

1024Ronda Palazzari head shotRonda Palazzari is a Mixed Media Artist, Author, Scrapbook Designer, and an Instructor living in the burbs of Denver.  She has been into art since early childhood.  One of her most memorable Christmas presents was a Crayola Caddy that inspired her to create.  She took many art classes throughout her secondary and college schooling.  She continues her art education and exploring her world through art, as well as helping others feel creative.

In 2009, Ronda became a Memory Maker Master for Memory Makers Magazine.  She started doing contract design for many manufactures including Sizzix, Ranger Ink, Maya Road, Fancy Pants Designs, Lily Bee Designs, Crate Paper, Purple Onion Designs, as well as Guest Designing for many other leading manufactures.  Her first book Art of Layers with North Light Publishing/F&W Media was released in March 2012. She is published in several magazines and idea books including Artful Blogging, Cloth Paper Scissors Studios, Creating Keepsakes, Somerset Memories, Haute Bags, Memory Makers, and Scrapbook Trends. 

Ronda is currently a license designer for The Crafter’s Workshop with 26 stencil designs and does designs work for My Mind’s Eye.  An avid blogger, Ronda shares her inspiration daily.  She’s best known for combining her mixed-media techniques with bold bright colors.  Ronda is one to follow because you never know if she will be art journaling, scrapbooking, sewing or getting messy with paints; her art changes day-to-day.  She continues to teach worldwide as well as providing inspiration and telling her dorky stories on her blog HelpMeRonda.

Featured Designer Project

1024Ronda Palazzari Awake my soul


Step 1
I am starting with a 4×6 clayboard.  It’s a great multi-medium surface.  Begin by collaging paper onto the background using gel medium.  I used an old street map and tore it into pieces.

1024Ronda Palazzari Awake Step 1


Step 2
Next scratch into the clayboard using a paper piercer or any like tool.  Remember to scratch away from you so you don’t slip and hurt yourself.

1024Ronda Palazzari Awake Step 2


Step 3
Paint your background with acrylic paints.  I am using Distress paints because I can water them down easily to create some transparent colors.  Layer paint on top of paint to create some depth.  Push it into the scratch marks to give them texture.
1024Ronda Palazzari Awake Step 3


Step 4
Once you have a good base layer of paint, stamp some words/images on the background using permanent ink.  Be random in your stamping even turning your stamp on its side or upside down.
1024Ronda Palazzari Awake Step 4


Step 5
To create more depth, add a layer of light gesso over the top leaving one area free of gesso.  On my piece it’s the orange/yellow cirle on the left side.  Make some areas of the gesso heavier and some lighter.
1024Ronda Palazzari Awake Step 5


Step 6
Add black paint to the outside edge of the canvas and a few painty layers.  On my piece I added some aqua areas back in around the edges.
1024Ronda Palazzari Awake Step 6


Step 7
With a cosmetic sponge and black paint, sponge through the stencil to create some small patterns around the edges.  Here I am using my dots & dashes stencil.
1024Ronda Palazzari Awake Step 7


Step 8
Finish you piece off with a word or two and some tiny black splatters.  Since this piece reminds me of a sunrise, I added the phrase “awake my soul.”
1024Ronda Palazzari Awake my soul

We hope you have enjoyed the fun creations from Ronda and we would also like to extend a warm thank you her for sharing this fabulous project with us! Please take a minute to stop by Ronda’s Blog and see more of her beautiful work (and let her know we sent you).  And don’t forget to leave a comment below to enter to win the drawing for a copy of her book and the stencil shown above.


Featured Company: Bella Blvd

BELLA_BLVD_TAGLINE

I’m so excited to bring you to this week’s Featured Company: Bella Blvd. In today’s spotlight you’ll learn more about Bella Blvd, see some fantastic projects by one of their designers and have the opportunity to win a Trick or Treat collection kit with coordinating embellishments.  The collection is shown below (details at the end of this post).

1023BellaCOLLECTIONKITTRICKORTREAT

About Bella Blvd

Bella Blvd began its journey back when owner and founder, Stephanie Hunt, was in high school, she just didn’t know it. When her passion for scrapbooking was born so were her dreams. After completing her very first scrapbook album, she realized that designing such paper products would be a dream come true.

When trying to decide on a company name, Stephanie wanted it to resemble some of her other passions: family and travel. Her Italian family heritage has shaped her life and traditions, and traveling was always encouraged to learn new cultures and gain experience. While studying abroad in Italy during college, the phrase “ Ciao Bella!” echoed the cobblestone streets. That was it! Literally meaning, hello beautiful, ciao bella was the perfect combination of her Italian family roots and her dreams for the products. Beautiful designs, beautiful colors, beautiful brand. Bella Blvd was born in June 2008.

Bella’s product pride is its versatility, quality, and affordability. Paper and stickers are the essentials in creating a single scrapbooking layout or card. Consumers can now find and purchase Bella Blvd worldwide. Our product line and embellishments continue to expand with leading industry and fashion trends, all the while creating excitement daily through our social media outlets and daily Studio Blog.

http://www.bellablvd.typepad.com/
http://www.bellablvd.net/


Special Bella Blvd Guest Designer

Today we also have a special Bella Blvd guest designer. Brook Stewart is part of the 2013 Bella Blvd Design Team. You can leave a comment below the post telling us what you like about her project for a chance to win a set of their beautiful Feathers pictured above.

1023brookestewartbioYou can see Brook’s fabulous project below, but first, here is a little more about Brook:

My name is Brook and I live on a small pig farm in Southeast Kansas with my husband and 3 kiddos – 2 boys, 8 and 3 and our daughter, 15 months.
I work part time at a local feterinary clinic and love it! I’ve been scrapbooking and taking lots of photos for over 15 years. I have a pretty clean, linear style and I just love the bright, graphic patterns that Bella Blvd. is so well known for. 
I am thrilled to get to work with such an amazing company again this year!


Designer Projects

Trick or Treat Layout
1023brookestewarttrickortreatlayout1
For this layout I started with some black cardstock and the grey graph paper (one of my favorites because I can see using it for so many things!) I kept with mostly the black, orange and grey colors to keep it more “boyish.”
1023brookestewarttrickortreatlayout2
I layered a few papers and included some 3×4 cards from the awesome journaling card sheet that comes with the collection.
1023brookestewarttrickortreatlayout4

I also cut out a second speech bubble from the trick or treat card and layered it on top of the first one to give it some extra dimension.

1023brookestewarttrickortreatlayout3
The die cut pack, stickers and some blue washi from the Designer Tape series finished it off!
Supplies:
675 Paper Pieces
667 Leaf Storm
669 No Brainer
666 Pick a Punkin’
670 Borders
467 Designer Tape – Gulf Dot
671 Daily Details
672 Alpha + Bits


Clown Cutie Layout

1023brookestewartclowncutie1

I wanted this layout to be a little girly, so I focused on the purples and blues mixed with the orange and a little black.
1023brookestewartclowncutie3
I used several pieces from the die cut pack and a journaling card to add a few extra layers.
1023brookestewartclowncutie2
The yellow diagonal striped washi from the Designer Tape series matches beautifully. I tied off the tag with some purple baker’s twine and added a few stickers to complete the layout.
Supplies:
664 Spooky Town
672 Alpha + Bits
665 All Webbed Up
670 Borders
667 Leaf Storm
675 Paper Pieces
671 Daily Details
571 Chipboard Alpha Sienna Uppercase
673 Captions
376 12MM Combo

Halloween Card

1023brookestewarthalloweencard1

For my card, I started by layering some papers along with a border sticker and yellow diagonal striped Designer Tape (the tape paired with the orange border and grey graph paper reminds me of candy corn!).

1023brookestewarthalloweencard2
I went simple and looked for some circles within the collection to embellish the card. I attached the die cut and stickers with foam tape for some added dimension. I finished it off with some purple and white baker’s twine.
Supplies:
672 Alpha + Bits
675 Paper Pieces
664 Spooky Town
376 12mm Combo Designer Tapes
667 Leaf Storm


Treat Bag

1023brookestewarttreatbag1

I started out with the cute little bag cut from my Silhouette Cameo. I love the orange pumpkin paper and decided to use that for the bag and build from there. I embellished the treat bag with the blue polka dot paper and a piece from the die cut pack.

1023brookestewarttreatbag2

Supplies:
666 Pick a Punkin’
675 Paper Pieces
672 Alpha + Bits
664 Spooky Town


I added a black cardstock border around the die cut piece so it would stand out a bit more. I then added the owl sticker (adhered with foam tape) and the “Got Treats” sticker from the Apha+Bits sticker sheet.

We really hope you have enjoyed today’s feature. We also want to extend a sincere thank you to Brook Stewart for her fabulous projects and Bella Blvd for sharing their company with us. Be sure to visit Bella Blvd to see more of their great products.

In order to enter the give-away to win the Trick or Treat collection and coordinating embellishments show above, please leave us a comment in the comments section of this post. Winner will be announced next Wednesday on the Paper Crafter’s Library blog!

Winner of Graphic 45 Give-Away

I’d like to extend a HUGE thank you to Graphic 45 and their guest designer Nichola Battilana for sharing such a wonderful project and for their generous give-away of their collection shown below.

1016Bohemian Bazaarprize

And now, the moment you’ve all been waiting for…….the winner is……Barbara Diane!

1023Graphic45winner

Congratulations Barbara!! Be sure to email us at customerservice@papercrafterslibrary.com to claim your prize. Please be sure to put “Graphic 45 Winner” in the subject line of the email, and then in the email itself, be sure to include your full mailing address and phone number.

For those of you that didn’t win, each week on PCL we feature a different company, and each of those companies generously sponsors a prize. Join us next week when we feature another great company.

andreasiggypcl

Trendy Tuesday – Cityscapes

 Trendy Tuesday – Cityscapes
by Katherine Elliot

Images of city skylines are trending in the paper craft world.  Whether you live in a beautiful city, the countryside, or suburbia, the iconic imagery of high rise buildings make wonderful backgrounds or focal points on your projects.  City skyline scenes are terrific for memorable urban destinations in your scrapbooks and perfect for cards to send to loved ones living in faraway places.

Card by Laura Bassen, featuring stamps and Super 2 dies from Paper Smooches, image source Paper Smooches blog

Cut cardstock with metal dies of cityscapes that include tiny, high rise windows, like the skyline dies from Paper Smooches, My Favorite Things, Kelly Purkey, and Memory Box, and layer to add dimension and show off any colors or backgrounds behind the scenes in your projects.

Card by Lisa Carroll featuring My Favorite Things Skyline border die, image source INKlinations

 3Project life insert from Kelly Purkey, image source It’s Me, KP

*Kelly Purkey Wafer Thin Die SKYLINE SMNS-004Kelly Purkey Skyline die, image source Simon Says Stamp

 Card featuring Memory Box Cityscape Nightline die, image source Doodlebugs

Mix and match coordinating solid skyline dies, such as those offered by Memory Box and My Favorite Things.  The solid skyline images look terrific on their own, too.  Try using the negative of a die cut as a stencil or mask like Debbie Carriere used in her fun birthday card shown here… Card by Debbie Carriere, featuring images from My Favorite Things, image source A Simple Diversion

 MFT Skyline Die, image source Frantic Stamper

You can also achieve beautiful results by stamping a city skyline.  Freshly Squeezed Stamps,  Sweet n’ Sassy Stamps, and Mama Elephant,  are just a few stamp companies with some terrifically trendy city scenes.  Check out these wonderful creations using cityscape stamps from these brands…

Card by Lynn Mangan featuring Freshly Squeezed Stamps, On Trend, stamp set, image source The Mango Boys & Me

Card by Diane Zechman, featuring Landscape Silhouette stamp from Sweet n’ Sassy Stamps, image source Paper Cookies

Card by Cheiron Brandon, featuring stamps from Mama Elephant, image source Cheiron’s Crafty Life

 Central Park stamp set from Mama Elephant 

Papertrey Ink just released some new stamps with some places you may recognize.  Catch glimpses of some famous landmarks in their City Scene stamps and coordinating sets.

Card by Danielle Flanders, featuring City Scene stamps from Papertrey Ink, image source Homespun with Heart

 Check out more urban vibes in these projects featuring products from Stampers Anonymous, Penny Black and Unity Stamp Company.

Cityscape tag by Patti Behan, featuring Tim Holtz City Scape stamp from Stampers Anonymous, image source Ranger InkCard featuring Penny Black Skyline stamp, image source Penny Black


Card featuring City of Love stamp, stamp and image source Unity Stamp Company

Last, but not least, check out how a city scene looks on this beautiful Halloween card.  I love the spooky vibe created by Deborah Frings on her witchy Halloween greeting card.  I hunted for this project and even though it was made for last year’s trick or treat season, I was so glad I found it to share with you…

Halloween Greeting card by Deborah Frings, image source Deborah’s Gems

City dwellers or city dreamers, I hope you were inspired today.  Happy crafting, everyone!

Featured Artist/Designer: Karolyn Loncon

Today on the Paper Crafter’s Library blog, we’re continuing our weekly featured artist spotlight whereby each week we spotlight a different artist/designer in the paper crafting & mixed media world and introduce you to their fabulous work.

Today we’re thrilled to welcome back – Karolyn Loncon

Before we show you Karolyn’s fabulous projects, let’s get to know her a little bit more…

516karolynlonconbiopicHello! My name is Karolyn Loncon.  I’m a retired Legal Assistant, married to Garry since 1980, and mom to Amy (newly married to Joe) and Ashley (married to Blake and the mother to my grandsons, Brecken and Brenner.)  I’m blessed to live in Issaquah, Washington in the summer, and Chandler, Arizona in the winter – the best of both worlds!  I love most paper crafts, but especially stamping and card-making.  The name of my blog is Paper Therapy.  I love to laugh, shop, travel and play BINGO (don’t judge – LOL)!

I started paper crafting in 2002 when my older daughter “abandoned” me to go to college.  Scrapbooking was my therapy.  Shortly thereafter, a friend invited me to a Stampin’ Up! party, and the rest is history.  Once I discovered stamping and card making, my need for instant gratification took over.  I haven’t touched a scrapbook since!  Ha!  I would say that my style is mostly clean and simple, although I throw in some fun and cute every now and then.  I’ve been fortunate to have many of my projects published in paper crafting magazines (in fact, my typewriter shaped card is on the COVER of the November/December issue of Paper Crafts Magazine – eeeekkk!) and thoroughly enjoy that whole publication process.  I am currently on the design team for Paper Smooches Stamps and an as yet to be revealed challenge blog (shhhh . . . more details will be revealed very, very soon!)  My other “social networking” information is located in the upper right corner of my blog – I’d love for you to follow me!

This is my second feature with Paper Crafter’s Library, and I can tell you that it’s just as thrilling the second time as it was the first!  I hope you enjoy the project that I’ve created for you all!

Featured Designer Project
1017karolynlonconPaper Crafters Library Eat Drink & Be Merry

I don’t know about you, but I am LOVING the “chalkboard” look that I’m seeing everywhere these days – stamping, scrapbooking, art prints, interior design – it’s everywhere, I tell ya!!  It’s so much fun and I feel like it’s an awesome creative outlet that truly works with every style! The “chalkboard” look is super easy to accomplish with stamps and inks, especially since you don’t have to have a “perfect” impression every single time.  Here’s how I created my project:

  1. Die cut the flowers and leaves out of chalk stock using wafer thin dies and a manual die cut machine (I used my Big Shot).  If you don’t have chalk stock on hand, black card stock works just as well – it just doesn’t have as smooth a surface and therefore is less forgiving.  But again – it’s not important to be perfect here, so any “flaws” are a-okay!
  2. Ink up and stamp the corresponding stamps onto each of the die cuts using a white pigment ink.  I used my all time fave white pigment ink here – the Hero Arts Unicorn ink is AH-MAZING!!  Typically it would be a clean and opaque impression every single time.  But here, I wanted that “I missed a spot” inked effect, so I just tapped my stamps into the ink ever so gently and then stamped.  You don’t need or want a lot of ink on your stamps as it tends to “muddle” your images.
  3. Cut a white card base (white card stock), a red layer (red cardstock), and a black (chalk stock) main image panel.  Adhere the red panel behind the black main image panel.  Wrap red baker’s twine around the top of the main image panel and tie in a bow.  Adhere the layered image panel to the card front with dimensional foam squares.
  4. Arrange the stamped die cuts on the card front, and adhere them with dimensional foam tape and adhesive.
  5. To achieve that true “chalkboard” look, I dipped my finger into the white pigment ink and smeared it around the stamped arrangement.  Again, you don’t want to have a lot of ink on your finger – a little goes a long ways.  I have to say that this was the hardest thing for me because I am typically a very “clean and simple” girl.  I don’t do messy.  But once I got the hang of it (ignore the finger print on the upper right edge), I really liked how it looked!

There ya go – easy peasy, right?!  Here’s a close up of the stamped images.  

1017karolynlonconPaper Crafters Library Eat Drink & Be Merry Close Up

Creating this was kind of therapeutic – a girl’s got to get her fingers dirty every now and then, I guess.  Here’s one last glance at the finished project:  

1017karolynlonconPaper Crafters Library Eat Drink & Be Merry 3

Supplies:
Stamps:
  Fresh Cut Florals and Written On Ribbon (W Plus 9 Designs)
Ink:  Unicorn Pigment Ink (Hero Arts)
Paper:  Chalk Stock (Canvas Corp.), White Linen CS
(Ellen Hutson), Red Hot CS (My Favorite Things)
Other:  Fresh Cut Florals Dies and Written on Ribbon Dies (W Plus 9 Designs), Maraschino Baker’s Twine (The Twinery), Stamp Press (Martha  Stewart)

I have one last tip that I thought I’d offer up.  I’ve often struggled with lining up a stamp with its coordinating die cut (I like to die cut and then stamp).  I found a new-to-me tool that helped me IMMENSELY with this dilemma.  Martha Stewart Crafts (and I think Fiskars) has come out with a stamp press that makes lining up clear stamps with the die cut beyond easy, and gives you a perfect stamped image every single time!  The stamp press allows you to align and hover the stamp over the top of the die cut and place it in the perfect spot before pressing down to stamp.  Using the stamp press saved me so much grief and irritation because I wasn’t having to die cut and re-die cut over and over because of stamping “boo boos.”  I love when a tool can make your crafty life so much easier, don’t you?!

Well, that’s it for me today, friends.  I so hope you enjoyed my project.  I’d like to send out a huge thank you to Andrea for asking me to visit again.  If you all have any questions, please don’t hesitate to drop me an email (garkarlon@msn.com)!


We hope you have enjoyed the fun creations from Karolyn and we would also like to extend a warm thank you her for sharing this fabulous project with us! Please take a minute to stop by Karolyn’s Blog and see more of her beautiful work (and let her know we sent you).

Featured Company: Graphic 45


We are happy to bring you this week’s Featured Company: Graphic 45. We are so excited to be featuring them regularly on Paper Crafter’s Library. And this week we have a Bohemian Bazaar collection and Graphic 45 Ornate Metal Label Holder prize package give-away.
1016Bohemian Bazaarprize 

You can get more details on this prize package at the end of the post.

For those of you unfamiliar with Graphic 45 , we’d like to take a minute to re-introduce them to you.

Graphic 45 is an award-winning scrapbook and paper crafting company­— owned and operated by a mother and her two daughters.

Diane Schultz—Designer and CEO (aka mother)

“I’m passionate about being creative and eager to make it possible for others to find their creative voice. My background includes stints as a designer for, McCalls, Simplicity, Vogue/ Butterick, Mattel Toy Company and a host of other jobs that each, in some way, led me to what I do now. At 45 I went back to school and got my degree in graphic design— I named the company to celebrate that achievement.”

Aimee Filimoehala —Director of Operations

“I wear a lot of hats and love it that way. Business, marketing, operations, etc. have made me a pro at multitasking (aka juggling‑figuratively and literally). When we launched Graphic 45 just three years ago we had no idea what was in store, working together as a family has been an amazing journey that we all feel so grateful to be apart of.”

Charee Filimoehala —Director of Customer Service and Design Team Coordinator

“I joined the team a little over three years ago and haven’t looked back…what a life-changing experience this has been. I love working with and around creative people and products (not to mention I like my co-workers quite a bit). I spend my days working with our friendly stores and talented design team…the occasional trip to a workshop or tradeshow pretty nice too.”

Together we create vintage inspired crafting products that capture the flamboyant style of the 1920’s and 30’s – with vibrant color, irresistible texture and imaginative design to create products with decades-old appeal that’s both fresh and familiar. Let our products inspire your next scrapbook layout, card, album or home decor project.

Graphic 45 Designer Nichola Battilana

Our Graphic 45 Guest Designer for this week is Nichola Battilana who is part of the 2013 Graphic 45 Design Team. You can see Nichola’s fabulous project below, but first, here is a little more about Nichola:

1016N_BattilanaMy name is Nichola and I am a graphic designer, artist and blissfully messy maker. I am absolutely passionate about making stuff of every sort. Whether it’s upcycling, painting, mixed media, sculpture, assemblage, crafting, I jump in and create with positive, joyful abandon.

Most of my work is inspired by make-believe, magic, folklore, fairies, nonsense and nature. While I strive to create quality, well-crafted items, I also aim to achieve a sense of whimsy and wonderment in my pieces.

I am thrilled to share my work, and totally tickled to represent the Graphic 45 design team today.


Graphic 45 Designer Project
 1016Graphic45_typography_post_office_Nichola_Battilana_1of10

I’m so excited about this post!  Today I have one of my very favourite projects. Postal Station No. 45!

1016Graphic45_typography_post_office_Nichola_Battilana_3of101016Graphic45_typography_post_office_Nichola_Battilana_9of10

Very often, when little people come to visit my studio, they will discover that imps, elves and faeries have left them miniature mail. I thought that it was about time that they had a proper place to work from, so I created this post office for them.

1016Graphic45_typography_post_office_Nichola_Battilana_7of101016Graphic45_typography_post_office_Nichola_Battilana_6of10

The base of the piece is a Mini Album Display Case from Ginas Designs. The drawer has been upturned and hinged to the top to create a spot for secret messages (or hiding candy). Graphic 45’s Typography line embellishes the piece, it’s stickers providing perfect classic advertising posters for the little place.

1016Graphic45_typography_post_office_Nichola_Battilana_5of101016Graphic45_typography_post_office_Nichola_Battilana_4of101016Graphic45_typography_post_office_Nichola_Battilana_2of101016Graphic45_typography_post_office_Nichola_Battilana_10of10

Inside there are stacks of little letters and brown paper parcels waiting for delivery.

1016Graphic45_typography_post_office_Nichola_Battilana_8of10

Want to make your own? Here’s the complete supply list:

Graphic 45 Typography
Typography
Inspire
Celebrate
Create
Inscribe
Dream
Journey
Typography Tags & Pockets
Typography Stickers
Typography Chipboard
12 Days of Christmas
> Pear Tree (totally snuck in!)
Graphic 45 Staples

Antique Metal Door Pull
Ornate Metal Keys
Ornate Metal Key Holes
Ornate Metal Label Holder
ColorCore Cardstock
Heritage Kraft
Ginas Designs

Mini Album Display Case
Steampunk Shape Set

Faux Metal Hands
Small Square Brass Hinges
Small wooden table
Metallic Mini Brads
Red Thread
Miniature Books and Scrolls
Pen Nibs
Scor-Tape
Tacky Glue


We hope you have enjoyed this fun creation from Nichola. I would also like to extend a warm thank you to Nichola for sharing her fabulous project with us! Please take a minute to stop by Nichola’s Blog and of course the Graphic 45 blog to check out all their amazing creations! And don’t forget to leave a comment below to enter to win the Graphic 45 collection listed above.

Winner of May Arts Give-Away

mayartslogoI’d like to extend a HUGE thank you to May Arts and their guest designer Jessica Kephart for sharing such a wonderful project and for their generous give-away of 2 rolls of ribbon from their collection shown below.

SAMSUNG DIGITAL CAMERA

And now, the moment you’ve all been waiting for…….the winner is……Pam Delcastilho!

1016mayartswinner

Congratulations Pam!! Be sure to email us at customerservice@papercrafterslibrary.com to claim your prize. Please be sure to put “May Arts Winner” in the subject line of the email, and then in the email itself, be sure to include your full mailing address and phone number.

For those of you that didn’t win, each week on PCL we feature a different company, and each of those companies generously sponsors a prize. Join us next week when we feature another great company.

andreasiggypcl