Today on the Paper Crafter’s Library blog, we’re continuing our weekly featured artist spotlight whereby each week we spotlight a different artist/designer in the paper crafting & mixed media world and introduce you to their fabulous work.
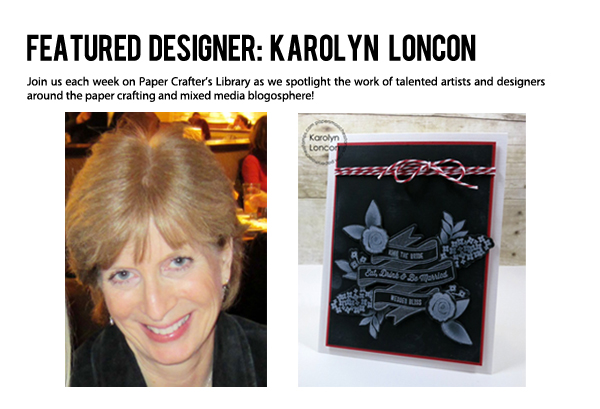
Today we’re thrilled to welcome back – Karolyn Loncon
Before we show you Karolyn’s fabulous projects, let’s get to know her a little bit more…
 Hello! My name is Karolyn Loncon. I’m a retired Legal Assistant, married to Garry since 1980, and mom to Amy (newly married to Joe) and Ashley (married to Blake and the mother to my grandsons, Brecken and Brenner.) I’m blessed to live in Issaquah, Washington in the summer, and Chandler, Arizona in the winter – the best of both worlds! I love most paper crafts, but especially stamping and card-making. The name of my blog is Paper Therapy. I love to laugh, shop, travel and play BINGO (don’t judge – LOL)!
I started paper crafting in 2002 when my older daughter “abandoned” me to go to college. Scrapbooking was my therapy. Shortly thereafter, a friend invited me to a Stampin’ Up! party, and the rest is history. Once I discovered stamping and card making, my need for instant gratification took over. I haven’t touched a scrapbook since! Ha! I would say that my style is mostly clean and simple, although I throw in some fun and cute every now and then. I’ve been fortunate to have many of my projects published in paper crafting magazines (in fact, my typewriter shaped card is on the COVER of the November/December issue of Paper Crafts Magazine – eeeekkk!) and thoroughly enjoy that whole publication process. I am currently on the design team for Paper Smooches Stamps and an as yet to be revealed challenge blog (shhhh . . . more details will be revealed very, very soon!) My other “social networking” information is located in the upper right corner of my blog – I’d love for you to follow me!
This is my second feature with Paper Crafter’s Library, and I can tell you that it’s just as thrilling the second time as it was the first! I hope you enjoy the project that I’ve created for you all!
Featured Designer Project

I don’t know about you, but I am LOVING the “chalkboard” look that I’m seeing everywhere these days – stamping, scrapbooking, art prints, interior design – it’s everywhere, I tell ya!! It’s so much fun and I feel like it’s an awesome creative outlet that truly works with every style! The “chalkboard” look is super easy to accomplish with stamps and inks, especially since you don’t have to have a “perfect” impression every single time. Here’s how I created my project:
- Die cut the flowers and leaves out of chalk stock using wafer thin dies and a manual die cut machine (I used my Big Shot). If you don’t have chalk stock on hand, black card stock works just as well – it just doesn’t have as smooth a surface and therefore is less forgiving. But again – it’s not important to be perfect here, so any “flaws” are a-okay!
- Ink up and stamp the corresponding stamps onto each of the die cuts using a white pigment ink. I used my all time fave white pigment ink here – the Hero Arts Unicorn ink is AH-MAZING!! Typically it would be a clean and opaque impression every single time. But here, I wanted that “I missed a spot” inked effect, so I just tapped my stamps into the ink ever so gently and then stamped. You don’t need or want a lot of ink on your stamps as it tends to “muddle” your images.
- Cut a white card base (white card stock), a red layer (red cardstock), and a black (chalk stock) main image panel. Adhere the red panel behind the black main image panel. Wrap red baker’s twine around the top of the main image panel and tie in a bow. Adhere the layered image panel to the card front with dimensional foam squares.
- Arrange the stamped die cuts on the card front, and adhere them with dimensional foam tape and adhesive.
- To achieve that true “chalkboard” look, I dipped my finger into the white pigment ink and smeared it around the stamped arrangement. Again, you don’t want to have a lot of ink on your finger – a little goes a long ways. I have to say that this was the hardest thing for me because I am typically a very “clean and simple” girl. I don’t do messy. But once I got the hang of it (ignore the finger print on the upper right edge), I really liked how it looked!
There ya go – easy peasy, right?! Here’s a close up of the stamped images.

Creating this was kind of therapeutic – a girl’s got to get her fingers dirty every now and then, I guess. Here’s one last glance at the finished project:

Supplies:
Stamps: Fresh Cut Florals and Written On Ribbon (W Plus 9 Designs)
Ink: Unicorn Pigment Ink (Hero Arts)
Paper: Chalk Stock (Canvas Corp.), White Linen CS (Ellen Hutson), Red Hot CS (My Favorite Things)
Other: Fresh Cut Florals Dies and Written on Ribbon Dies (W Plus 9 Designs), Maraschino Baker’s Twine (The Twinery), Stamp Press (Martha Stewart)
I have one last tip that I thought I’d offer up. I’ve often struggled with lining up a stamp with its coordinating die cut (I like to die cut and then stamp). I found a new-to-me tool that helped me IMMENSELY with this dilemma. Martha Stewart Crafts (and I think Fiskars) has come out with a stamp press that makes lining up clear stamps with the die cut beyond easy, and gives you a perfect stamped image every single time! The stamp press allows you to align and hover the stamp over the top of the die cut and place it in the perfect spot before pressing down to stamp. Using the stamp press saved me so much grief and irritation because I wasn’t having to die cut and re-die cut over and over because of stamping “boo boos.” I love when a tool can make your crafty life so much easier, don’t you?!
Well, that’s it for me today, friends. I so hope you enjoyed my project. I’d like to send out a huge thank you to Andrea for asking me to visit again. If you all have any questions, please don’t hesitate to drop me an email (garkarlon@msn.com)!
We hope you have enjoyed the fun creations from Karolyn and we would also like to extend a warm thank you her for sharing this fabulous project with us! Please take a minute to stop by Karolyn’s Blog and see more of her beautiful work (and let her know we sent you).

Love this card and congrats to Karolyn for being featured!!
LOVE THIS!!! I have GOT to try this technique. Can you believe I have NEVER EVER done this?!!! I KNOW…WHERE HAVE I BEEN??!!! Obviously not keeping up with you! LOL! 😉 Congrats on being featured my friend. As always…you are freakin’ Ah-Mazing! 🙂 You are Da Queen of Crafting!
Beautiful!
Thank you so much for sharing this Card with us Karoyln. I just LOVE the simple, plainly written, and easy to follow directions. Are you sure that you are not a Retired Teacher? Great use of the Trendy Chalkboard Technique. I want to try this now.
Love this technique. You did a great job on this card. Thanks for sharing.
Beautiful card!