Mixed Media Monday: “Life is a Marathon Not a Sprint” Video Tutorial

ArtJournalExpressLogoHappy Monday everyone! Welcome to another edition of Art Journal Express brought to you by Andrea from her personal blog The Art of Simple.

Art Journal Express is a weekly video tutorial series she created for her personal blog The Art of Simple. Each week on Monday she posts a video tutorial on how she created one of her art journal pages from start to finish. Because a typical art journal page takes between 20 minutes to an hour for her to create – which makes for a super long video to upload to You Tube, and for you to watch – the video clips are sped up, rather than having you watch what she’s doing in real time – hence the word “express” in Art Journal Express. However, what makes these video tutorials different from most of the “sped up” art journaling video tutorials out there is that Andrea narrated for you exactly what she’s doing and what she’s using – that way, even though you’re watching a “fast forward” version, you don’t miss a single detail.

The videos are hosted on a You Tube Channel that is separate from the Paper Crafter’s Library You Tube Channel, so if you don’t want to miss a single edition of Art Journal Express please subscribe to that You Tube Channel (you can do so from the video tutorial page from today’s post).

Today’s page is called “Life is a Marathon Not a Sprint” – shown below. You can watch a video tutorial HERE.

LifeIsAMarathonCloseUpBlog-550W

Paper Crafter’s Library Educator/Designer Opportunity

We are excited to announce that Paper Crafters Library is expanding and we would like to add your talent to the mix!  We are looking to hire 4-6 part time Educators/Designers.

As I’m sure you are aware, the world of paper crafting is HUGE! The sheer number of different manufacturers, products, tools, techniques and project ideas can be overwhelming to the average crafter.

That’s why in 2011 Paper Crafter’s Library (PCL) was launched with the goal of creating a video-based website that provides an all-in-one learning solution for paper crafters.  With over 2000 videos in our library to date and over 25 videos being added each month, we are currently the largest and most comprehensive online resource for paper crafters worldwide. What makes us different from everyone else – whether it’s online communities, classrooms, craft review sites or blogs – is that we have organized and indexed all of our videos into a video library, so that everything is all in one place, making it easy for our members to find what they are looking for.

At PCL we try to take a three-pronged approach to education.  We teach the basics of how to use a product, we look at different ways and techniques in which a product can be used and we then use the product in as many different projects of different styles as we can.  Our ultimate goal is to help you make the most of the product that you choose to purchase.

As part of the Educator/Designer position, we would require you to:

1) film one or more videos per month which would be approximately 10-15 minutes in length.  These videos could be completed projects such as cards, scrapbook pages  or 3D items, technique videos or product/tool how to’s.

2) For each video involving a completed project we would also require you to submit a supply list, dimensions and step by step written directions which would then be turned into a pdf handout (~1 to 2 pages in length)

Monetary compensation is provided for the videos, but the amount of compensation is variable depending on the length of the video and the complexity of the technique/project. Additional information about compensation will be provided at such time as you are offered a position.

Additional benefits would include promotion of you & and your blog on the PCL blog, social media sites and newsletter as one of our designer/educators, along with access to the member area of the site.  You would also be offered the opportunity to join our affiliate program earning a healthy commission on any sign ups using your affiliate link (additional information will be provided at such time as you are offered a position).

Please note that any videos you create and are compensated for by Paper Crafter’s Library would then become the property of Paper Crafter’s Library to be posted in our members only area.  These videos can not be used for other purposes or posted elsewhere online. 

In addition, this position is that of an independent contractor –  your compensation is strictly based on the completed videos that you provide to us – you are not paid an hourly wage nor are health insurance/benefits are provided. There is also no specific “term” to the contract – if either you or we feel that this position is not a good fit, either party can terminate the agreement at any time.  

If you are a friendly and enthusiastic person who is passionate about paper crafting, and enjoys teaching and inspiring others – then we want to hear from you!

In order to apply:

  • Film a video tutorial of you creating a project that is representative of your work.  This video tutorial should be no longer than about 10 minutes in length.  We are just trying to get an idea of your crafting and teaching style.  Please ensure that you film the video in the highest quality possible.  Some of the things we are looking for include adequate lighting, a close up view of what you are creating (preferably the camera angled straight down on your work surface as though someone were looking over your shoulder watching you create), no camera shake and a clear picture.  Once your video is filmed, please upload the raw unedited video to Dropbox and send us an invitation to your Dropbox folder (if you are unsure how to do this, please email us and we can help you with this.)
  • Email us using PCL Educator/Designer Application in the subject line.  In the email please include the following information:
    • tell us a little bit about yourself (a short bio)
    • tell us how long you have been involved in paper crafting or mixed media and what types of creating you do (ie. cards, scrapbooks, 3D, altered art, art journaling, mixed media, etc.)
    • a link to your blog, Facebook page and any other social media sites if you have them

Application Deadline is Friday, February 28, 2014. Please note that we will only consider applications that follow the guidelines outlined above.

If you have any questions, please feel free to email us at: customerservice@papercrafterslibrary.com and we will help you in any way we can.

We will respond to all applications to let you know it was received.  You will be notified by Friday, March 7th if your application is being considered.  We wish everyone luck and look forward to all the amazing creations you have to share.

Please Welcome New Paper Crafter’s Library Educator/Designer Christy Reuling

A few months back we decided to add to the Paper Crafter’s Library team. We sent out a number of invitations and selected four ladies to join our team as Educator/Designers.  They have been hard at work, creating some paper crafting projects to share with our Paper Crafter’s Library members.

It is with great pleasure that we introduce you to the first of our Educator/Designers, Christy Reuling. Christy is very excited to be a part of our team!

Learn More About Christy

ChristianaReulingPhoto-250W

Hi, I’m Christy, and I’m a writer, a reader, a world-traveler, a dreamer, and friend. I’ve made my home in such exotic locals as Honduras, Germany, and Cameroon, West Africa, before returning to my hometown of Erie, Pennsylvania to settle down and raise my beautiful family. I’m married to my soulmate, and we have three wonderfully precocious boys who definitely keep things lively. I’ve always been a crafty girl, but I didn’t discover paper crafting until January of 2010. At the same time, I started my blog, Christy Gets Crafty, to document my journey. I love card making especially, because it’s all about putting love on paper and giving it away.  

If you are interested in seeing more of Christy’s work, we encourage you to check out and bookmark her blog.

Please help us to warmly welcome Christy!

Featured Artist/Designer: Lindsay Amrhein

Today on the Paper Crafter’s Library blog, we’re continuing our weekly featured artist spotlight whereby each week we spotlight a different artist/designer in the paper crafting & mixed media world and introduce you to their fabulous work.  Today we’re thrilled to welcome Lindsay Amrhein.

Before we show you Lindsay’s projects, let’s get to know her a little bit more…

Lindsay-02132014Hi!  I am so glad to be here today to share what I love with you, making cards!  I have been making and sharing my projects for about 4 years now (hard to believe) on my blog, Note To Self.  I live in Northeast Ohio with my very patient husband and two little boys, Jonathan and Dallas.  They sure do keep me busy, but I wouldn’t trade it for anything.  Much has changed since I started papercrafting, from adding another child to our family, to my husband becoming self employed.  I have always found crafting to be a constant, and a way to unwind from stress.  I have been published in Paper Crafts and Cards magazine, and have created for various design teams over the years.  Though I usually create cards, I love to whip up a layout every now and then when time allows.  You can always find me at my blog, capturing inspiration on Pinterest and adding my projects to my Flickr page!

For the projects I created for you today, I used some of my favorite things, stamps, ink, and dies!

Celebrate

For my first card, I used a fun embossing folder and diffuser to create texture on my white card front.  To add more depth to my flower die cut, I ran it through twice, using two different colors of pink, and added a smaller one in the center, staggering them to add interest.  To finish it, I stamped my sentiment and added a little enamel dot in the flowers center.

Lindsay1-02132014-550W

Lindsay2-02132014-550W

Gradient Thanks

The next card packs quite a punch, using Distress inks to blend my colors, creating a gradient look.  I ran the panel through my die cut machine with a border die, and popped it up onto a white card base.  Don’t let the daunting task of tiny foam squares deter you from giving this a try!  It might take awhile to secure the dimensional adhesive, but the effect is well worth it.  Leaving just enough room for my sentiment, I layered a thanks die cut multiple times, glueing each layer, and secured it in the opening, adding a few die cut hearts and covering them with some shine.

Lindsay3-02132014-550W

Lindsay4-02132014-550W

Celebrate Card
Paper: Marshmallow, Juicy Pear, Candy Hearts, Lollipop Bazzill Card Shoppe; Vellum The Paper Source
Stamps: Scripty Sayings Paper Smooches
Ink: Onyx Black Versafine Tsukineko
Embellishments: Yellow Enamel Dot My Minds Eye
Tools: Honeycomb Texture Fade Embossing Folder Tim Holtz; Poinsettia Die set, Reflections Die set Paper Smooches; Corner Rounder We R Memory Keepers

Gradient Thanks
Paper: Marshmallow, Licorice Twist Bazzill Card Shoppe
Ink: Tumbled Glass, Peacock Feathers, Mowed Lawn, Salty Ocean Distress Ink Ranger
Tools: Piestra Tile Die Memory Box; Thanks die, Hearts Die set Paper Smooches
Embellishment: Glossy Accents Ranger

I want to thank the lovely ladies at Paper Crafters Library for inviting me here, to inspire you today.  I hope you’ve learned a little something, and will use some of these techniques in your next project.

We hope you have enjoyed today’s projects courtesy of Lindsay.  Also, be sure to stop by Lindsay’s blog to see even more of her beautiful work (and let her know we sent you).

pcandreasiggy

Featured Company: May Arts


mayartslogo

This week we are thrilled to welcome back May Arts! In today’s spotlight you’ll learn more about May Arts, see a fantastic project by Charlene Driggs and have the opportunity to win a “winners choice” of 2 spools of Ribbon from May Arts. (details at the end of this post).


May Arts Ribbon

About May Arts

May Arts Ribbon was founded in the early 1980’s in Riverside, Connecticut. The original products were high-end silk flowers imported from Taiwan, which were decorated using quality ribbons. The decorative ribbons proved so popular among customers that the business gradually evolved into a dedicated ribbon wholesaler.

As a family-owned and operated business, May Arts began a long-standing tradition of quality, affordability and exceptional customer service. We are dedicated to carrying on this same tradition by offering high quality products at competitive prices. Our friendly, knowledgeable staff is always happy to answer your questions or to assist you in placing your order.

May Arts carries a wide selection of quality ribbons to choose from; such as grosgrain, silk, satin, burlap and a variety of prints and patterns. All inventory is held in stock, so we can ship orders out right away—typically the same day.

Where to Buy May Arts Ribbons

The May Arts website is their wholesale site for online and brink and mortar retailers. We’ve linked to it so that you can easily view their entire product line in one place. There are numerous places where you can purchase May Arts Ribbons including many local scrapbook stores as well as online stores. Two of the online stores that carry the biggest selections that we are aware of include Amazon, who carry the complete May Arts Ribbon Line (plus you can qualify for free shipping). Click on the link we provided and it will take you to our May Arts Ribbon Search Results. To find a particular ribbon, go to the May Arts website, find the name of the ribbon and color and then enter that into your Amazon search results. Please note that through Amazon you’re buying by the roll. Most other online and local scrapbook stores sell May Arts Ribbon by the yard. One of the online stores that carries a great selection is Stamp Simply Ribbon Store.

May Arts Designer

Today we welcome Charlene Driggs. We are so excited to have her showcase her work today on Paper Crafter’s Library. You can see Charlene’s fabulous project below, but first, here is a little more about her:

CharleneDriggs-250WHi!  My name is Charlene Driggs.  I’m a member of the May Arts Ribbon Design Team as well as a wife, mom, Nana, friend, business owner, gardener, baker, crafter, sewer, card maker, paper collector and ribbon lover.  I love my life and my jobs and my sweet little puppy buddy who keeps me company as I work.


Gift Bag

Today, I’m going to share how I turn my tiny ribbon scraps and findings and a plain brown bag into a beautiful gift bag.

CharleneDriggs1-02122014-400W

I started with this plain brown bag that measures 8 ½” x 5”.  You can use virtually any size bag you’d like, just make the window larger or smaller to suit your bag.

CharleneDriggs2-02122014-400W

I used a Spellbinders Square die to draw a square onto the front of my bag, and then cut the square out of the bag with scissors.  You may cut any shape you’d like!

Next, gather your ribbon scraps, findings and pretty papers.

CharleneDriggs3-02122014-400W

Cut the designer paper to fit your bag, then, place it over the opening on your bag.  You won’t be attaching it yet.  Trace your bag opening onto the designer paper you’ll use to cover the bag front.  Die cut the designer paper with your Spellbinders die.  Attach the designer paper to front of your bag with double-sided tape or glue.  Sponge edges of the bag front with ink, if desired.

Die cut a piece of acrylic slightly larger than your window.  Place double-sided tape around the edges of the acrylic, and then attach it to the inside of the bag over the opening.  Cover the outside edge with ribbon, if desired.

CharleneDriggs4-02122014-400W

Now, die cut a square slightly larger than your bag opening, from a scrap of designer paper, then get ready to play!  Arrange your scraps of paper, ribbons and findings on the designer paper square until you’re satisfied with how they look.  Some of my paper scraps were only ½ inch wide!  Don’t be afraid to overlap them, stack them, mix and match them!  Even the glittered heart was salvaged from an old project.

CharleneDriggs5-02122014-400W

Once you have a design you like, you can begin gluing the pieces down.  I used double sided tape for the paper and hot glue for the embellishments.

CharleneDriggs6-02122014-400W

Once you have your piece of art finished, slip it into a clear bag. Place double sided tape at the top and bottom of the bag and attach to the inside of the bag over the window.

CharleneDriggs7-02122014-400W

Tie on a big beautiful May Arts bow and you have gift bag that doubles as a gift!  The mixed media piece can also be used as a card front, if desired.

CharleneDriggs1-02122014-400W

Supplies: May Arts Ribbon; buttons, metal key, pearls, paper flowers, chipboard heart, DCWV designer papers, Scor-Tape, hot glue

We hope you have enjoyed today’s feature. We want to extend a sincere thank you to Charlene Driggs for her fabulous project and May Arts for sharing their company with us. Be sure to visit May Arts to see more of their great products.

In order to enter the give-away to win your choice of two rolls of ribbon, please leave us a comment in the comments section of this post. One winner will be announced next Wednesday on the Paper Crafter’s Library blog!

pcandreasiggy


Featured Company: Graphic 45

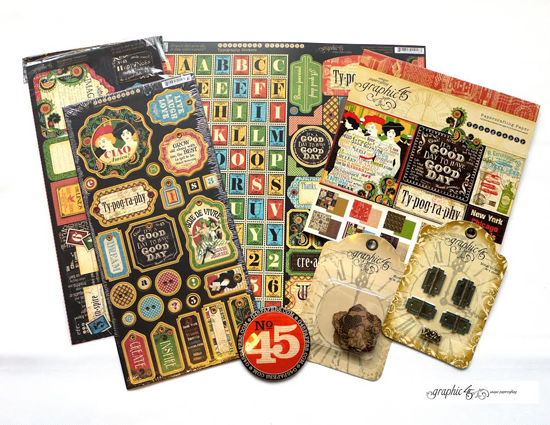
We are happy to bring you this week’s Featured Company: Graphic 45. We are so excited to be featuring them regularly on Paper Crafter’s Library! And this week we have a Ty-pog-ra-phy collection prize package give-away.  Details will be at the end of this post.

TypographyPrizePack-550W

For those of you unfamiliar with Graphic 45 , we’d like to take a minute to re-introduce them to you.

Graphic 45 is an award-winning scrapbook and paper crafting company­— owned and operated by a mother and her two daughters.

Diane Schultz—Designer and CEO (aka mother)

“I’m passionate about being creative and eager to make it possible for others to find their creative voice. My background includes stints as a designer for, McCalls, Simplicity, Vogue/ Butterick, Mattel Toy Company and a host of other jobs that each, in some way, led me to what I do now. At 45 I went back to school and got my degree in graphic design— I named the company to celebrate that achievement.”

Aimee Filimoehala —Director of Operations

“I wear a lot of hats and love it that way. Business, marketing, operations, etc. have made me a pro at multitasking (aka juggling‑figuratively and literally). When we launched Graphic 45 just three years ago we had no idea what was in store, working together as a family has been an amazing journey that we all feel so grateful to be apart of.”

Charee Filimoehala —Director of Customer Service and Design Team Coordinator

“I joined the team a little over three years ago and haven’t looked back…what a life-changing experience this has been. I love working with and around creative people and products (not to mention I like my co-workers quite a bit). I spend my days working with our friendly stores and talented design team…the occasional trip to a workshop or tradeshow pretty nice too.”

Together we create vintage inspired crafting products that capture the flamboyant style of the 1920’s and 30’s – with vibrant color, irresistible texture and imaginative design to create products with decades-old appeal that’s both fresh and familiar. Let our products inspire your next scrapbook layout, card, album or home decor project.

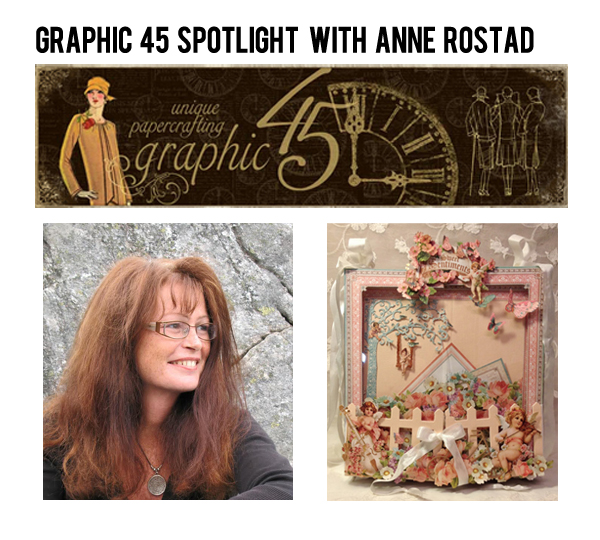
Graphic 45 Designer Anne Rostad

Our Graphic 45 Guest Designer for this week is Anne Rostad who is part of the 2013 Graphic 45 Design Team. You can see Anne’s fabulous project below, but first, here is a little more about Anne:

AnneRostad-02122014-250WMy name is Anne Rostad and I live in Norway.  I am 54 years old and I like all sorts of crafting.  Mini albums and making things out of chipboard are my favorites. I have been crafting all my life and always like to make something with my hands. I have been playing with papers and chipboard for the last 5 years. I discovered Graphic 45 about 3 years ago and fell in love from the first minute  – with the beautiful vintage papers and all the fun images to fussy cut out! So much fun 🙂

I live in a small city in the south coast and my 2 grown up boys who live near by me give me so much happiness 🙂


G45 Sweet Sentiments Easel Mini Album Calendar

I made a calendar mini album for Graphic 45’s winter CHA 2014 booth with the beautiful Sweet Sentiments paper collection. There are so many gorgeous images to cut out and I was in fussy cut heaven creating with this paper line! Most of  the images are popped up with pop dots (3D foam) and covered with Claudine Hellmuth multi medium matte.  I had fun fussy cutting out the images and putting them together to a scene 🙂   The album is made from the 8 x 8 easel album and I also used Coordinations light and the 6 x 6 paper pad from Secret Garden that coordinate very well with this paper line.  I changed out the wire binding for seam binding.

ANNESPAPERCREATIONS.COM

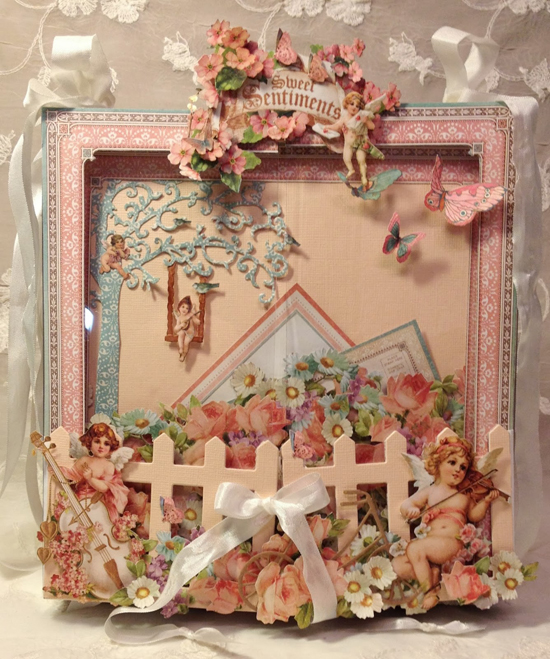
The cover is made out of acetate and the fence die is from AccuCut Crafts.  It is held closed with seam binding.  The acetate is scored on the sides to make some room for the pages and glued on the easel album with Tyvek envelopes hinges.

ANNESPAPERCREATIONS.COM

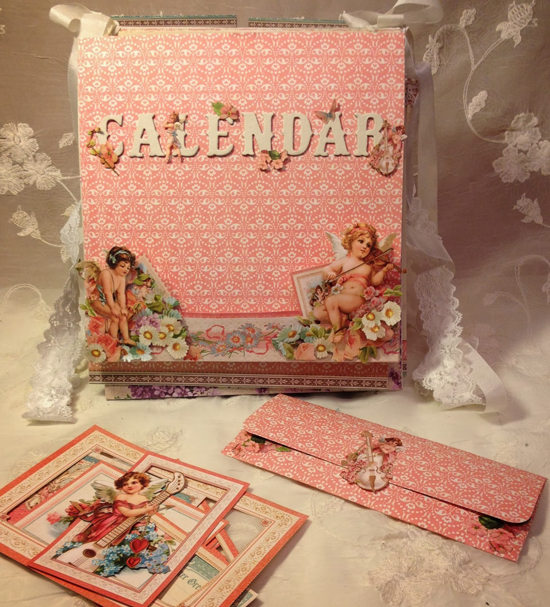
Here is the other side.  It is bound together with lace from Wild Orchid Crafts.  The alphabet die is from AccuCut Crafts.

ANNESPAPERCREATIONS.COM

One decor clip for each front side.

ANNESPAPERCREATIONS.COM

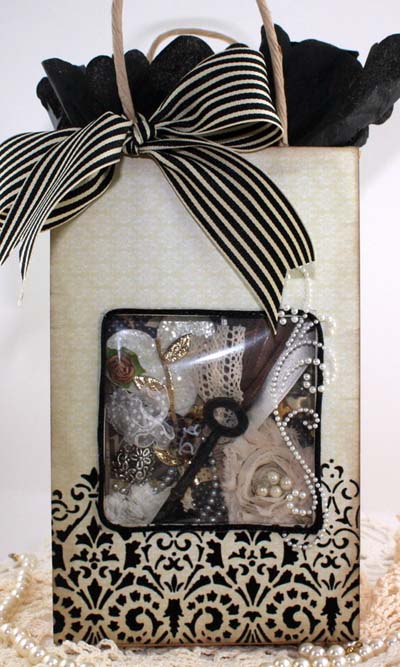
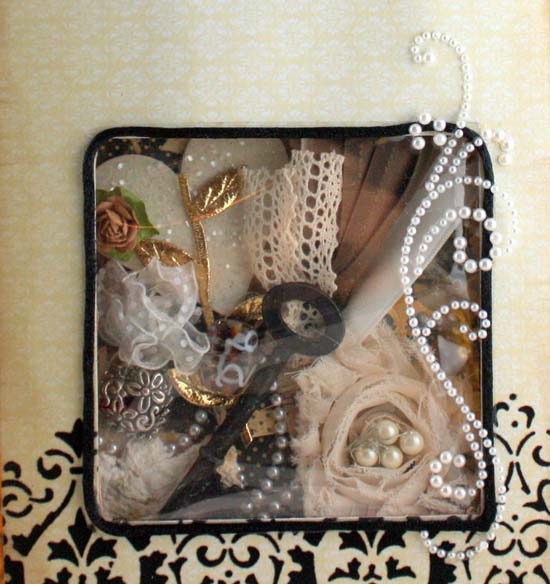
There is a pocket in the bottom to hold some extra fussy cut outs and frames to decorate the plain dividers in the album.

ANNESPAPERCREATIONS.COM

January

All the mini calendars are fastened to the pages with magnets.  I found the calendars on Google and printed them out.

ANNESPAPERCREATIONS.COM

The triangle pockets can flip out and closes with a magnet.

ANNESPAPERCREATIONS.COM

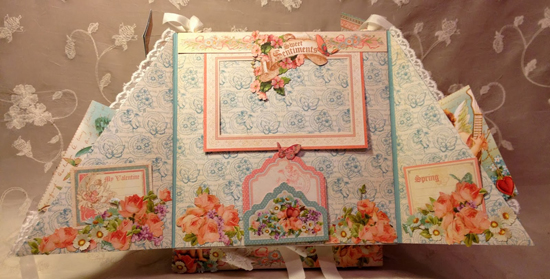
All the divider pages between each month are the same.

Here is a place for photos and journaling.

ANNESPAPERCREATIONS.COM

February

I used a die from Cherry Lynn.

ANNESPAPERCREATIONS.COM

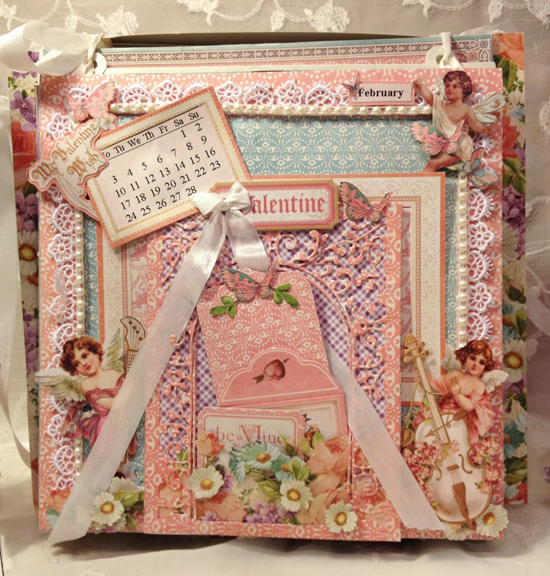
There is more room inside under the flap .
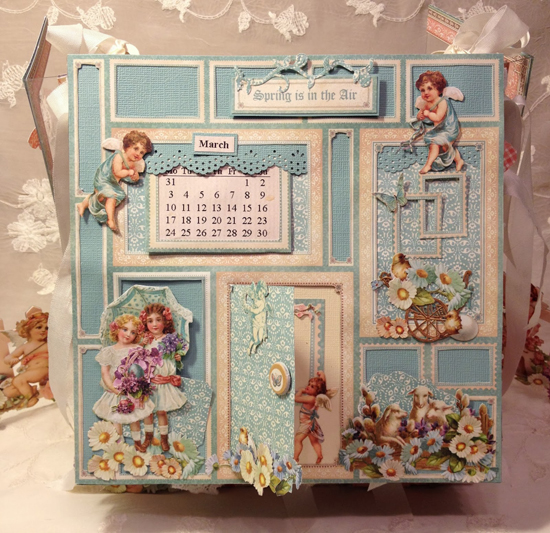
ANNESPAPERCREATIONS.COM

March

This is a magnet page and all the images are fastened with magnets.  I used an 8 x 8 paper and cut out the images from the frames to make this frame page.  I made a door from one of the frames that can open.

ANNESPAPERCREATIONS.COM

April

The lace is from WOC.  I used a Martha Stewart Doily punch for the border.

ANNESPAPERCREATIONS.COM

I made some side panels that flips out to each side.  The pockets are from the cardstock cut outs and more pockets are made with the Martha Stewart doily punch.  There is a place for photos on the frames and behind.

ANNESPAPERCREATIONS.COM

May

I had so much fun fussy cutting out the images and putting them together to a scene 🙂  The window die is from Spellbinders.
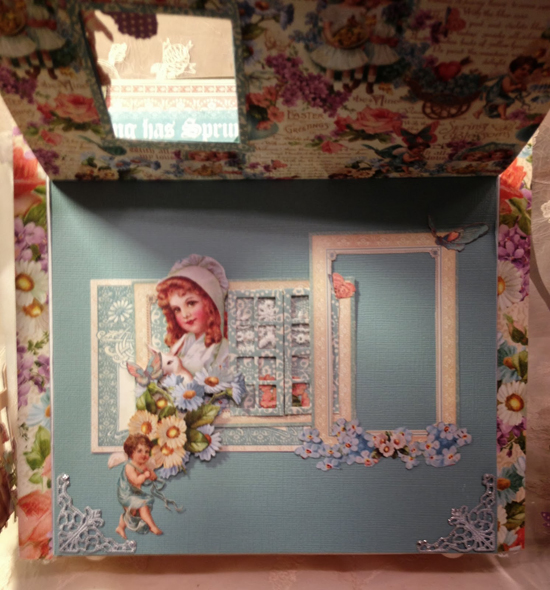
ANNESPAPERCREATIONS.COM

June

I used the window die from Spellbinders again and cut out the middle part so the image behind shows through.

ANNESPAPERCREATIONS.COM

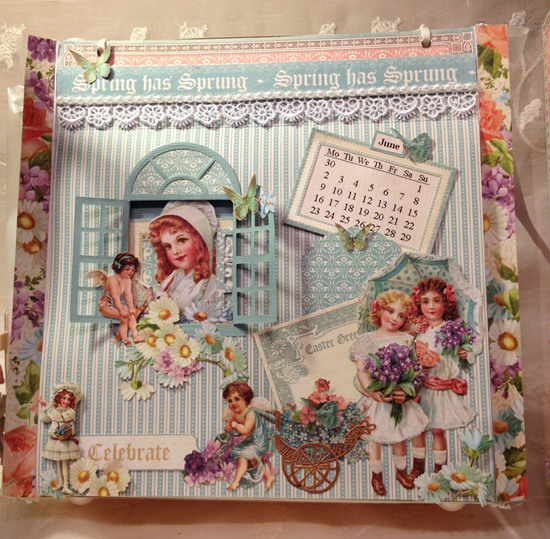
The page flips up and there are more places for photos and journaling.

ANNESPAPERCREATIONS.COM

July

I love love love the cherub images 🙂  I used the gate die from Spellbinders and trellis die from Cottage Cutz.

ANNESPAPERCREATIONS.COM

August

I made this page as a photo frame.

ANNESPAPERCREATIONS.COM

A hidden pocket slides up and a photo can also be placed in behind.

ANNESPAPERCREATIONS.COM

September

Here again I made a magnet page and all the images are fastened with magnets.  I used an 8 x 8 paper and cut out the images from the frames to make this frame page.

ANNESPAPERCREATIONS.COM

October

The buckle is from the cardstock cut outs.

ANNESPAPERCREATIONS.COM

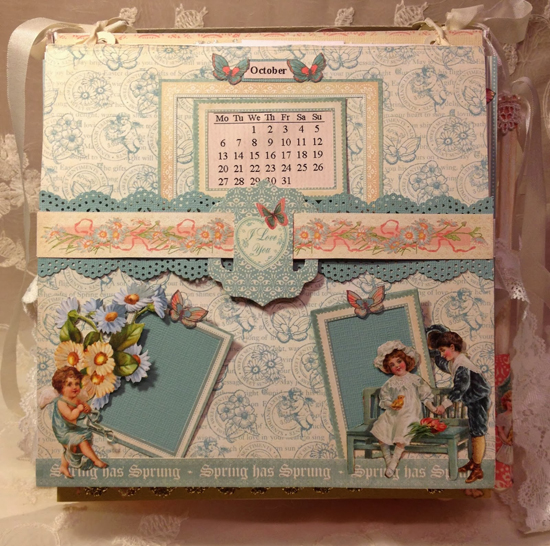
Even more hidden places LOL.  Two panels slide out from the side and the front slides up.

ANNESPAPERCREATIONS.COM

November

Banner with laces from WOC. Photo mat behind and a envelope.

ANNESPAPERCREATIONS.COM

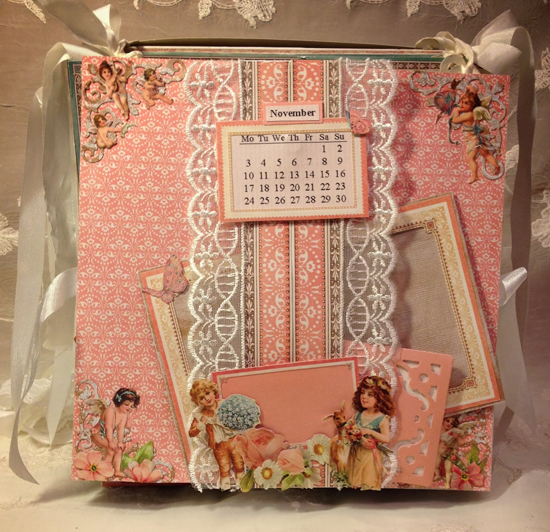
The banner can slide from side to side.
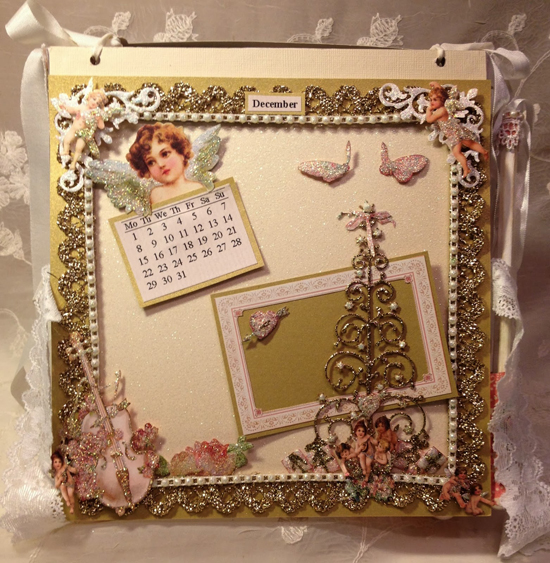
ANNESPAPERCREATIONS.COM

December

Here I used some gold and glitter papers from my stash and decorated around with gold lace and flat back pearls. The Christmas tree die is from Memory Box.  I used stickles on most of the images to give the page a Christmas feel.

ANNESPAPERCREATIONS.COM

Here are some close up pictures.  I used White and Diamond stickles to embellish the page.

ANNESPAPERCREATIONS.COM

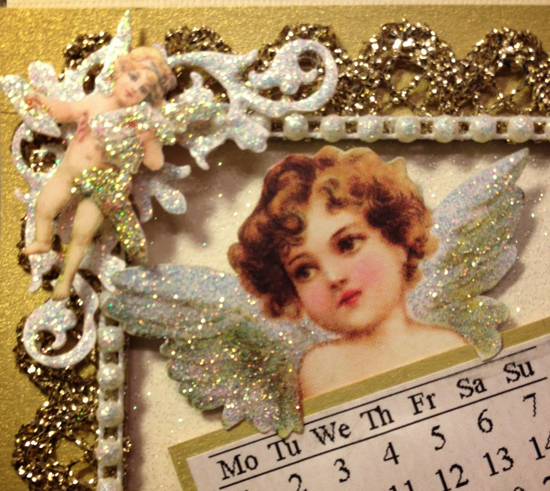
I used Gold stickles on the Christmas tree.

ANNESPAPERCREATIONS.COM

Supplies:

Graphic 45 Sweet Sentiments collection, easel album, dies, stickles, laces, Claudine Hellmuth multi medium matte, seam binding, acetate, magnets, white paint, 3D foam, Tyvek envelope and calendar.

Thanks for stopping by and have fun creating 🙂  Hugs, Anne.

We hope you have enjoyed this fun creation from Anne. I would also like to extend a warm thank you to Anne for sharing her fabulous project with us! Please take a minute to stop by Anne’s blog, You Tube channel or Pinterest page and of course the Graphic 45 blog to check out all their amazing creations!  Be sure to leave a comment on this post to enter to win the Graphic 45 collection listed above.
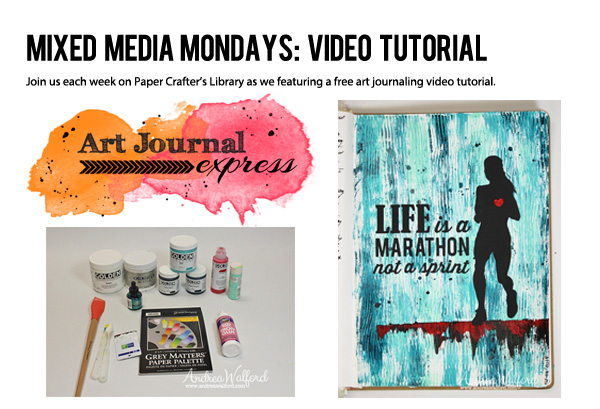
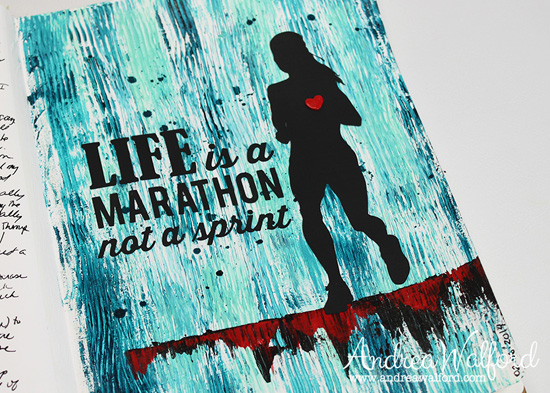
Winner of Fancy Pants Give-Away

blacklogowithborder

I’d like to extend a HUGE thank you to Jodi Sanford for sharing such a wonderful project and to Fancy Pants Designs for their generous give-away of the As You Wish paper pack shown below.

FancyPantsPrizePack-02052014-550W

And now, the moment you’ve all been waiting for…….the winner is……Martie Rollin!

Fancy Pants Winner

Congratulations Martie! Be sure to email us at customerservice@papercrafterslibrary.com to claim your prize. Please be sure to put “Fancy Pants Winner” in the subject line of the email, and then in the email itself, be sure to include your full mailing address and phone number.

Join us next week when we feature another great company.

andreasiggypcl

Trendy Tuesday – Pretty Paper Doilies

Trendy Tuesday – Pretty Paper Doilies

by Katherine Elliot

Full of feminine grace, the delicate doily is a lovely decoration for many occasions.  From romantic Valentines to any project that could use a pretty textured layer, you can find doilies adorning many trendy projects lately.  Here’s a few projects to be inspired by and to enjoy…

French Lace Paper Doilies from the Paper Mart

Doilies are easy to use on their own to decorate a pretty package or vase, but they are increasingly popular to use as embellished layers on cards.

Card by Alice Wertz, featuring stamps from Mama Elephant, image source Mama Elephant blog

Center and show off the entire lace edged doily or crop it and adhere just a portion to your card or project for additional interest.

Card by Lauren Taylor, featuring stamps from Paper Smooches, image source Lauren Taylor Made and  Stamp Fever

Card by Gillian Ross,  image source Made with Sparkle

Adorn your doily decoration with more feminine images and embellishments, like beautiful flowers, pearls and ribbon and you are sure to impress any deserving female friend.  Frilly can be fabulous for someone special and that’s exactly what these next cards are, absolutely fabulous with some stitched edging as well as pretty twine and flowers.

Card by Kathy Montgomery, featuring stamps from Lili of the Valley, image source In My Little Korner

Card by Jessica Fick, featuring stamps from The Craft’s Meow, image source iEmbellish

Find different sizes and shapes of paper doilies to add to your projects at your local craft store,  favorite on-line store, or direct marketing retailer.

main imageBo Bunny small doilies, image source Scrapbook Express

Royal Lace Paper Doilies White Hearts-4 Inch 24/Pkg, , hi-resHeart shaped doilies from Royal Lace, image source JoAnn Crafts

The traditional doily comes ready made with a pretty texture and design, but that doesn’t mean you have to shy away from textures and shapes on your project.   Show off other shapes like hexagons, triangles and arrows with your doily layer for more trendy effects.   Card by Bronwyn Eastley, featuring hexagon embossing folder from Stampin’ Up!,  image source addINKtive designs

2014-01 Paper Pumpkin Alternate 1

Card by Rae Harper-Burnet, image source Wild West Paper Arts

Create your own doilies with your favorite cardstock using any of the fun paper craft tools available today.  Punches, diecuts and stamps in a variety of doily designs are they key to a completely DIY craft project.

Martha Stewart Circle Edge Punch Eyelet Doily, image source Scrapbook.com

 Scrapbook page by Jodi Baune featuring mini doilies from Cheery Lynn Designs by Jodi Baune, image source Dancing in the Rain

 Die-namics High Tea Party Doily

Die-namics Doily die by My Favorite Things

Bella Doilies 2

 Unity Company Bella Doilies stamp set, image source Unity Stamp Co.

Doily stamps come in a variety of sizes, both great and small, and can be useful as focal points as well as subtle background shapes.

   9059 - Lace Doily Rubber Stamp - Sku: J101

Lace Doily rubber stamp from Great Impressions Stamps  

Card by Erin Taylor, featuring Lace Doily from Great Impressions Stamps, image source Erin Taylor Designs

 Large paper doilies can be folded and shaped to use for other fun craft projects.  Create your own place cards, decorate special treats, or create frilly decorations for a wedding or baby shower using white or colored doilies.  It’s an easy yet fancy touch you can use for the festive occasion.

  Steps for Valentine DIY, Doily Envelope Tutorial

Doily envelope and instructions by Jennifer Carroll, image source from Celebrating Everyday Life 

Dyed doilies decorating treat and favor boxes by Molly, instructions and image source Crafty Monday

Paper doily flowers by Amanda Coleman, tutorial and image source Popper and Mimi 

Anyone else remember the days when you got out the old glue stick and attached a pretty doily to a shoe box with a slit on the top all decorated to receive Valentine greetings in school?   The doily has come a long way since then, and likely so have your crafting skills.  Doilies can be frilly, fancy and fabulous.  Go ahead, embrace the frills of a pretty doily.  Happy crafting and have a very Happy Valentines Day!


Papercrafterslibrary x DressHead Chiffon Peplum Dress

Papercrafterslibrary x DressHead Chiffon Peplum Dress- Midi / Zip Back Fastening / Bodycon Fit

Be the center of attention with this papercrafterslibrary x www.dresshead.com classy thin strapped midi chiffon dress. The midi length of the skirt is perfect for the office and adds an elegant touch for the evening. Slip a short business jacket on for work. When the day is done, simply slip off your jacket and you are ready for a night on the town. This dress looks excellent with heels. Black patent leather heels will look especially nice when teamed up with a matching Diamante clasp purse. You will love the feel of the light weigh fabric and the perfect bodycon fit. The color of this dress is really chic and full of good taste. The zip back fastening is well tailored. This midi peplum chiffon dress is a definite must have.

Freebie Friday: Everything Is Going To Be Fantastic

Happy Friday everyone! Today on our Freebie Friday feature we have another card tutorial for you.

Just a reminder that our Freebie Friday features might include a project, an element that you can print and use in your scrapbooking/card making, a cut file to use in an electronic die cutting machine, a short technique video or a video introducing you to a product. You will also see regular freebies on some of our social media and other channels. Be sure to also check out Andrea’s blog on Thursdays, subscribe to our newsletter (which comes out on Fridays) and like our Facebook page. Make sure you check these three sources regularly as any elements and cut files that we give away will ONLY be available for one week and then will be moved to the Paper Crafter’s Library store as well as the Paper Crafter’s Library member area.

Everything Is Going To Be Fantastic Card

In today’s video I’m going to show you how to create this Everything Is Going To Be Fantastic card featuring Cas-ual Friday’s Truth Is stamp set and coloring with Copic markers.

EverythingIsGoingToBeFantastic-02072014-550W

Download the pdf handout here

If you’re currently not a member of Paper Crafter’s Library, we encourage you to take a look at the benefits of membership. Along with our existing video library of over 2000 videos, you’ll receive daily inspiration, great project ideas, fun techniques, instruction on how to use your products and more! For more information and to join, click here.

Have a great weekend!

pcandreasiggy