
Today on the Paper Crafter’s Library blog, we’re continuing our weekly featured artist spotlight whereby each week we spotlight a different artist/designer in the paper crafting & mixed media world and introduce you to their fabulous work. Today we’re thrilled to welcome Lindsay Amrhein.
Before we show you Lindsay’s projects, let’s get to know her a little bit more…
 Hi! I am so glad to be here today to share what I love with you, making cards! I have been making and sharing my projects for about 4 years now (hard to believe) on my blog, Note To Self. I live in Northeast Ohio with my very patient husband and two little boys, Jonathan and Dallas. They sure do keep me busy, but I wouldn’t trade it for anything. Much has changed since I started papercrafting, from adding another child to our family, to my husband becoming self employed. I have always found crafting to be a constant, and a way to unwind from stress. I have been published in Paper Crafts and Cards magazine, and have created for various design teams over the years. Though I usually create cards, I love to whip up a layout every now and then when time allows. You can always find me at my blog, capturing inspiration on Pinterest and adding my projects to my Flickr page!
For the projects I created for you today, I used some of my favorite things, stamps, ink, and dies!
Celebrate
For my first card, I used a fun embossing folder and diffuser to create texture on my white card front. To add more depth to my flower die cut, I ran it through twice, using two different colors of pink, and added a smaller one in the center, staggering them to add interest. To finish it, I stamped my sentiment and added a little enamel dot in the flowers center.


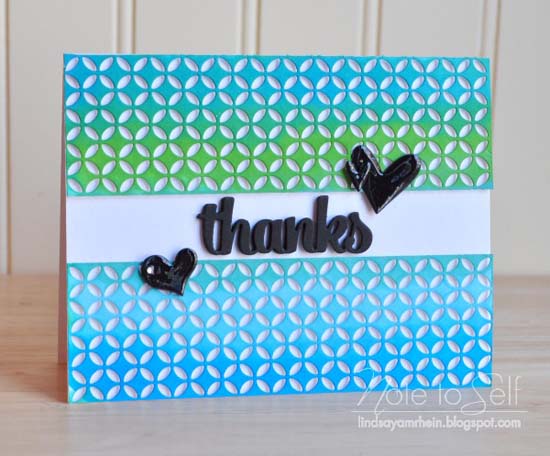
Gradient Thanks
The next card packs quite a punch, using Distress inks to blend my colors, creating a gradient look. I ran the panel through my die cut machine with a border die, and popped it up onto a white card base. Don’t let the daunting task of tiny foam squares deter you from giving this a try! It might take awhile to secure the dimensional adhesive, but the effect is well worth it. Leaving just enough room for my sentiment, I layered a thanks die cut multiple times, glueing each layer, and secured it in the opening, adding a few die cut hearts and covering them with some shine.

Celebrate Card
Paper: Marshmallow, Juicy Pear, Candy Hearts, Lollipop Bazzill Card Shoppe; Vellum The Paper Source
Stamps: Scripty Sayings Paper Smooches
Ink: Onyx Black Versafine Tsukineko
Embellishments: Yellow Enamel Dot My Minds Eye
Tools: Honeycomb Texture Fade Embossing Folder Tim Holtz; Poinsettia Die set, Reflections Die set Paper Smooches; Corner Rounder We R Memory Keepers
Gradient Thanks
Paper: Marshmallow, Licorice Twist Bazzill Card Shoppe
Ink: Tumbled Glass, Peacock Feathers, Mowed Lawn, Salty Ocean Distress Ink Ranger
Tools: Piestra Tile Die Memory Box; Thanks die, Hearts Die set Paper Smooches
Embellishment: Glossy Accents Ranger
I want to thank the lovely ladies at Paper Crafters Library for inviting me here, to inspire you today. I hope you’ve learned a little something, and will use some of these techniques in your next project.
We hope you have enjoyed today’s projects courtesy of Lindsay. Also, be sure to stop by Lindsay’s blog to see even more of her beautiful work (and let her know we sent you).

Love Lindsay’s work. These cards are no exception 🙂
Love Lindsay’s work…gorgeous projects!
Awesome, colorful projects!! Love, love, love that flower!
I’ve just recently seen diffusers in a supply catalog and wondered what they were. The celebrate card shows that a diffuser prevents the dry embossing in a shaped area…interesting. I’m going to have to learn more about this technique. Thanks for this feature.
Congrats , Lindsay, on the guest feature! Love your beautiful work here today!
These are just gorgeous!
Terrific cards, Lindsey! I adore the designs and the gradient ink looks great. TF the inspiration. 🙂
Oh my both are stunning but I LOVE what you did with the PS poinsettia die…I have this and might have to “lift” this! Awesome job