Featured Artist/Designer: Joyce Mehrberg

Welcome to another Featured Artist/Designer Spotlight. Today we’re thrilled to welcome Joyce Mehrberg.  Before we show you Joyce’s project, let’s get to know her a little bit more…

JoyceMehrbergProfilePic-10162014-250WI never really thought of myself as a creative person until I started stamping in the summer of 2010, when I had my youngest daughter’s birthday party at Paper Source.  Once I discovered clear stamps and the on-line blogging community, I was hooked.  I am currently on the CASology Design Team, and I would describe my stamping style as mostly CAS, with a little bit of cute and some graphic thrown in for fun.  I like mixing stamps from all different stamp companies, and  could not create without my dies and Big Shot machine.  I live in a small beach town in San Diego County with my husband, two teenage daughters and our dog.  I worked in the corporate world for many years before retiring to spend more time with my family.  My other interests include spinning, reading and hanging out with my family.

Thanks Card

Hi.  Today I am going to show you how to make a very simple card that packs a big punch.  It’s a great way to use up patterned paper scraps as well.

JoyceMehrberg1-10162014-550W

Cut a card base 4 7/8″ by 7″ and score at 3 1/2″.

JoyceMehrberg2-10162014-550W

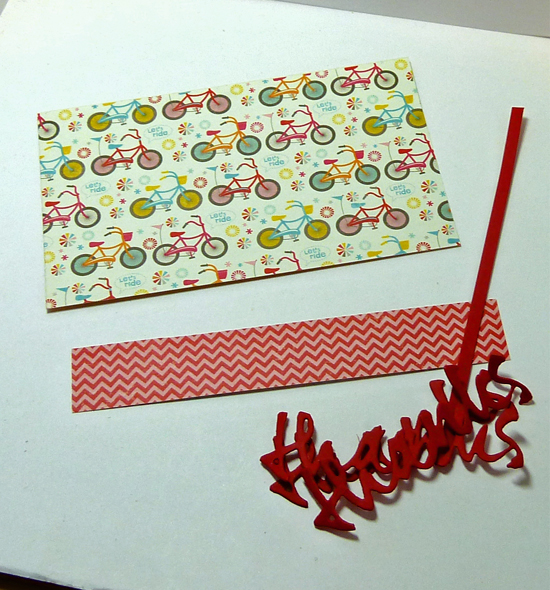
You will need a 3″ by 4 7/8″ piece of patterned paper, a 3/4″ by 4 7/8″ piece of coordinating paper, a matching solid paper about 1/8″ by 4 7/8 and a few die cuts of the same word.  I used the ‘thanks’ Wet Paint die by Papertrey Ink, and I cut it out three times and glued them all together for dimension and stability.

JoyceMehrberg3-10162014-550W

Adhere your patterned paper to your card base, and then adhere the thin  piece of card stock over the place where your two patterns meet.  I used my corner chomper to round the lower right corner.

JoyceMehrberg4-10162014-550W

The next thing you need to do is to slice the card front about an inch from the right side.  This is the only tricky part, because you want to slice right up to the fold–but no further.  The best way I found to do this is to use my Fiskars trimmer.  I placed the left edge of my card at the 3 7/8″ mark and put a little stack of scraps right at the top of my card to block the blade from continuing over the front of the card and on to the back.

JoyceMehrberg5-10162014-550W

Here is a closer view of the cut area.

JoyceMehrberg6-10162014-550W

Adhere the right strip to the card base.  You want only the larger portion on the left to be able to open.

JoyceMehrberg7-10162014-550W

Adhere the stacked die cut word so that most of the word is attached to the card front and a little bit of the word is hanging over the edge.

JoyceMehrberg1-10162014-550W

Here I have made a little set of these cards.  They would make a great gift.

JoyceMehrberg8-10162014-550W

Supplies

Card Stock:  Recollections 110 pound White, Papertrey Pure Poppy
Pattern Paper:  My Minds Eye My Girl
Dies:  Papertrey Wet Paint Dies

We hope you have enjoyed today’s project courtesy of Joyce Mehrberg.  Be sure to stop by Joyce’s blog to see even more of her beautiful work (and let her know we sent you).

Have a great day!

Karen

Featured Company: Graphic 45

We are happy to bring you this week’s Featured Company: Graphic 45. We are so excited to be featuring them regularly on Paper Crafter’s Library! And this week we have a “Raining Cats and Dogs” collection prize package give-away valued at $71. WOW!!! Details will be at the end of this post.

Graphic45Prize-10152014-550W

For those of you unfamiliar with Graphic 45, we’d like to take a minute to re-introduce them to you.

Graphic 45 is an award-winning scrapbook and paper crafting company­— owned and operated by a mother and her two daughters.

Diane Schultz—Designer and CEO (aka mother)

“I’m passionate about being creative and eager to make it possible for others to find their creative voice. My background includes stints as a designer for, McCalls, Simplicity, Vogue/ Butterick, Mattel Toy Company and a host of other jobs that each, in some way, led me to what I do now. At 45 I went back to school and got my degree in graphic design— I named the company to celebrate that achievement.”

Aimee Filimoehala —Director of Operations

“I wear a lot of hats and love it that way. Business, marketing, operations, etc. have made me a pro at multitasking (aka juggling‑figuratively and literally). When we launched Graphic 45 in 2008 we had no idea what was in store, working together as a family has been an amazing journey that we all feel so grateful to be apart of.”

Charee Filimoehala —Director of Customer Service and Social Media Coordinator

“I joined the team in 2009 and haven’t looked back…what a life-changing experience this has been. I love working with and around creative people and products (not to mention I like my co-workers quite a bit). I spend my days working with our friendly stores and talented design team…the occasional trip somewhere warm is pretty nice too.”

Together we create vintage inspired crafting products that capture the flamboyant style of the 1920’s and 30’s – with vibrant color, irresistible texture and imaginative design to create products with decades-old appeal that’s both fresh and familiar. Let our products inspire your next scrapbook layout, card, album or home decor project.

Graphic 45 Designer – Ginger Ropp

Our Graphic 45 Guest Designer for this week is Ginger Ropp who is part of the 2014 Graphic 45 Design Team. You can see Ginger’s fabulous project below, but first, here is a little more about her:

GingerRoppProfilePic-10152014-240WHi, my name is Ginger Ropp. I am so excited to be a part of the Graphic 45 Design Team for 2014. I live in Renton, Washington with my husband of 27 years. I have two beautiful grandchildren that are an absolute joy.

I started papercrafting several years ago. I enjoy creating mini albums, layouts, cards, and altered projects. I love teaching and sharing my projects with others through my blog, you tube channel, as well as in a classroom environment at a local scrapbook store or retreat.

My husband and I love to travel and enjoy just relaxing on a sunny beach.


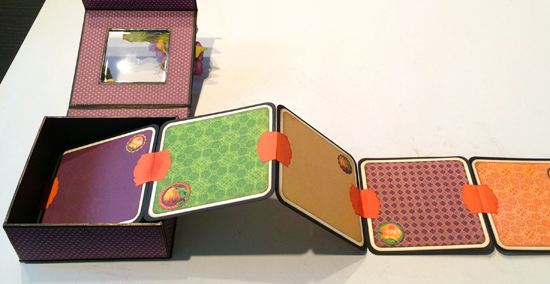
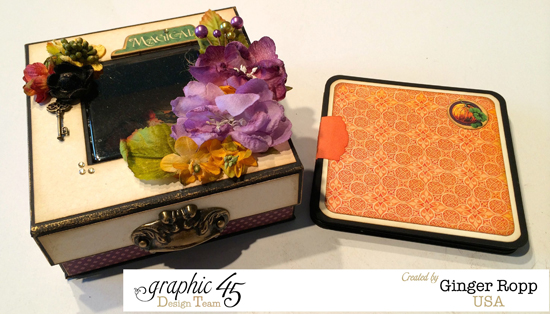
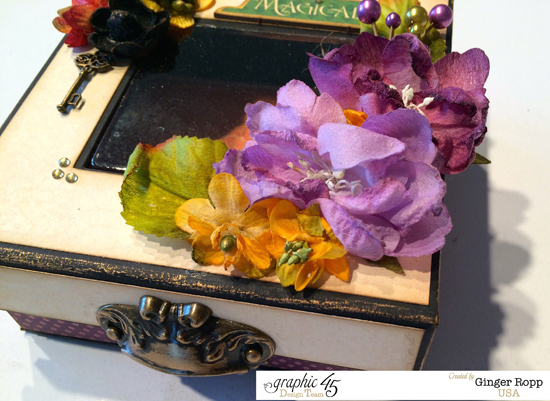
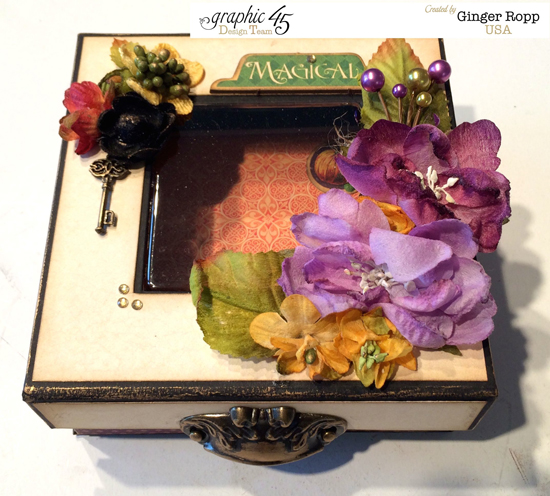
Altered Box & Accordion Photo Album

GingerRopp4-10152014-550W

GingerRopp1-10152014-550W

GingerRopp3-10152014-550W

GingerRopp2-10152014-550W

GingerRopp5-10152014-550W

Check out this video for more information about Ginger’s album.

Supplies

Graphic 45 An Eerie Tale 8×8 Paper Pad
Graphic 45 An Eerie Tale Chipboard 1 & 2
Graphic 45 Staples Drawer Pull
Graphic 45 Staples 5×5 Black Mixed Media Box
Graphic 45 An Eerie Tale 6×6 Patterns and Solids
Graphic 45 An Eerie Tale Banners
Graphic 45 Staples Ornate Metal Keys
Petaloo Flowers
Stampin Up 8-½ x 11 Very Vanilla Cardstock
Antique Gold Rub-n-Buff

I would like to extend a warm thank you to Ginger for sharing her fabulous project with us! Please take a minute to stop by Ginger’s blog and of course the Graphic 45 blog to check out all their amazing creations! Be sure to leave a comment on this post to enter to win the Graphic 45 collection listed above.

Winner of the Designs By Ryn Give Away!

DesignsByRynLogo-10082014-550W

I’d like to extend a HUGE thank you to Design By Ryn’s design team for sharing such wonderful projects and to Designs By Ryn for their generous give-away of the three stencils shown below.

DesignsByRynPrize1-10082014-200W DesignsByRynPrize2-10082014-200W DesignsByRynPrize3-10082014-200W

And now, the moment you’ve all been waiting for…….the winner is……Debbie Cudley!  If you didn’t win, be sure to check out the Designs By Ryn blog to see if your name was picked there.

DesignsByRynWinner

Congratulations Debbie! Be sure to email us at customerservice@papercrafterslibrary.com to claim your prize. Please be sure to put “Designs By Ryn Winner” in the subject line of the email, and then in the email itself, be sure to include your full mailing address and phone number.

Join us next week when we feature another great company!

Trend Watch – Focal Point Greetings

Today it’s all about cards that are totally focused on the greetings. I love to use such greetings for CAS cards, but you can make any kind of card with it. It’s also great way to personalize your cards. You could even think of making your own words or sentiments.

Let’s start with the most obvious way to make a lovely greeting on your card: stamping. There are a lot of great sentiment stamps nowadays with beautiful lettering. And…they give you a quick way to add a great message to your card.

You can find an example on this card from Shona Chambers. Everything is focused on the sentiment but the card has some beautiful finishing touches with the stitched border and sequins, so it doesn’t get boring.

shona-chambers
Kindness by Shona Chambers, image source Twine around

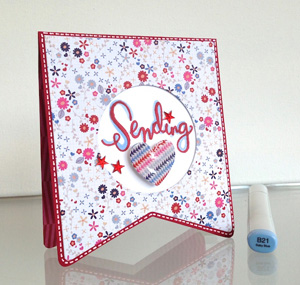
Sentiment stamps are also great to use with patterned papers, as you can see on this cute card from Kathy.

kathy-daily-marker
Sending love by Kathy, image source The Daily Marker

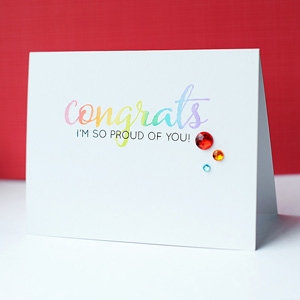
Lea Lawson created a beautiful rainbow effect with the stamping on this card.

lea-lawson
Congrats by Lea Lawson, image source Leas Cupcakes and Sunshine

Color effects are a great way to make your sentiment stand out. Julia Altermann also uses some beautiful colors on her card, but on this one it’s the background that gets the color instead of the stamp.

julia-alterman
A Friend by Julia Altermann, image source Just One More Card

But there are more ways to create a great focal point greeting. You could also use one of those pretty dies. Inge used a great one from MFT.

blogblom-inge
You mean the world to me by Inge, image source Blogblom

When talking about focal point greetings, I just couldn’t miss this card from Laura Bassen. Pretty much everything on this card is based on letters. For the background she used a great stencil, made from a die and more die-cuts for the happy. The dies are great to use in combination with a stamp!

laura-bassen
Happy Birthday by Laura Bassen, image source Doublestick Heaven

Shaker cards are still very popular and great to use with dies, so you can use these for some great focal point greeting cards. Like this one from Toni.

frankiehelpscraft
Happy thoughts by Toni, image source Frankie Helps Craft

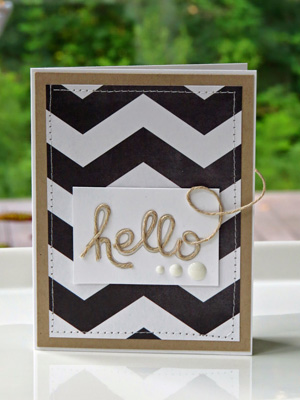
I also love this card from I Card Everyone, it’s a combination from a die with some twine. It’s just so pretty!

Kelly-hello
Hello by I Card Everyone, image source I Card Everyone

And did you already know you can use wood veneer to create a faux letterpress effect? Jocelyn Olsen used it to create this beautiful card.

jocelyn-olsen
Love by Jocelyn Olson, image source Red Balloon Cards

If you can’t find the right word in a stamp set or die, you can make your own words with chipboard letters or letter stamps. Ashley Marcu used some chipboard to create this box.

cherry-hill
Card box by Ashley Marcu, image source Cherry Hill Design

I have some supplies to share with you to end with!

neat-and-tangled

Neat and tangled, So verry blessed

AveryElleCakeCandlesThumb__59986.1405462373.1280.1280

Avery Elle, Cake and Candles

mft_cs48_lovestory_webpreview

My Favourite Things, Love Story

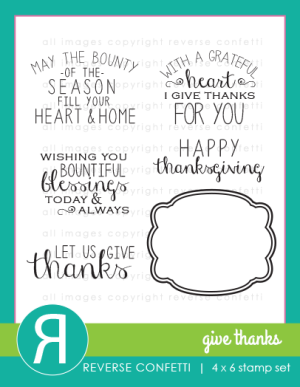
Reverse-GiveThanksProductGraphicA1-300x387

Reverse Confettie, Give Thanks

lilinker-1_302824_FS

Lil’ Inker, Hello Word Die

If you’re already making Christmas cards, check out this die from Paper Smooches.

PS-SED-14-161-2T

Paper Smooches, Christmas Words 2

If you would like the freedom of making your own words, you could try these letters.

freckledfawn-SepKit_woodalpha_ff8d7e2b-75aa-4891-a0bd-f986df19ae3b_1024x1024

Freckled Fawn, Wood Chip Alphabet

LF381_ClairesABCs_1024x1024

Lawn Fawn, Claire’s ABCs

 Enjoy your crafting! – Lucinde

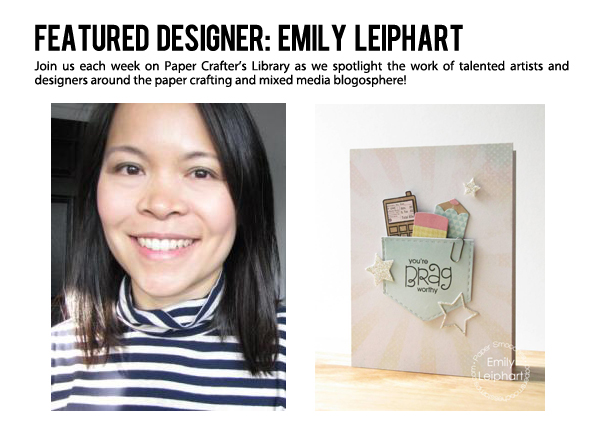
Featured Artist/Designer: Emily Leiphart

Welcome to another Featured Artist/Designer Spotlight.  Today we’re thrilled to welcome Emily Leiphart.  Before we show you Emily’s project, let’s get to know her a little bit more…

EmilyLeiphartProfilePic-10092014-235WHi, it’s Emily, and I’m thrilled to be the featured artist this week at the Paper Crafter’s Library. I live in Toronto, Ontario with my design engineer husband and our six-year-old son who seems to have inherited unlimited creativity from both of us. Yay! I have always been artistic, making clothes for my dolls at a young age and earrings for all my friends as a teenager. My mom was the one who insisted on receiving handmade cards so I’ve been making them for as long as I can remember. About five years ago, a friend I worked with introduced me to blogging and I discovered the amazing world of paper crafting. Since then, I’ve been on 10 different design teams and published countless times with Paper Crafts & Scrapbooking magazine. I like to describe my style as fun, unusual and sometimes ridiculous. LOL! You can find me at my blog www.leiphartonart.blogspot.com, on Facebook and YouTube.


Brag Worthy Card

EmilyLeiphart1-10092014-550W

I used Paper Smooches stamps and dies to create this card for my son to let him know how proud I am. He is always drawing or sketching something! After his school had its open house, a few of the parents said they noticed his work and asked me if I was an artist. 😉

EmilyLeiphart2-10092014-550W

I used patterned papers for the background, as well as to die cut and paper piece the majority of elements on the card. I added super sparkly die cut stars and a mini paper clip to embellish and highlight the sentiment.

EmilyLeiphart3-10092014-550W

I hope you enjoyed this fun project. Thanks so much for stopping by!

Supplies:

Cardstock: (white) Neenah
Patterned Paper: (Dreamy 6×6 paper pad) Heidi Swapp
Specialty Paper: (glimmer diamonds) Stampin’ Up!
Clear Stamps: (Uplifters, Teen Routine) Paper Smooches
Pigment Ink: (black) Tsukineko Versafine
Embellishments: (mini paper clip) Tim Holtz
Dies: (Pocket, School Icons, Stars, Stitched) Paper Smooches
Tools: (Big Shot) Sizzix, (trimmer) Fiskars, (scoring board) Martha Stewart, (scissors) EK Success

We hope you have enjoyed today’s project courtesy of Emily Leiphart.  Be sure to stop by Emily’s blog to see even more of her beautiful work (and let her know we sent you). You can also find Emily on Facebook and YouTube.

Have a great day!

Karen
Featured Company: Designs By Ryn

DesignsByRynLogo-10082014-550W

This week we are thrilled to welcome Designs By Ryn! In today’s spotlight you’ll learn more about Designs By Ryn, see many fantastic projects by their design team and have TWO chances to win a set of three stencils shown below (details at the end of this post).

DesignsByRynPrize1-10082014-200W DesignsByRynPrize2-10082014-200W DesignsByRynPrize3-10082014-200W

About Designs By Ryn

DesignsByRynProfilePic-10082014-250WDesigns by Ryn is the manifestation of a dream that began a long time ago for me. I have always wanted to create a lifestyle that fits me and what I want out of my life. One that would allow me to create during working hours and give me the flexibility in my schedule to travel. For the longest time I wondered if something was wrong with me for not fitting into the multitude of ready made jobs that I tried.  It wasn’t until around four years ago when I attended a seminar at the Small Business Centre in London, Ontario that I realized that many of those misfit traits of mine were what they called entrepreneurial.

I was hooked by that idea but had absolutely no working knowledge of business.  The next few months I laboured over a business plan and submitted it to a program offered at the Centre – the Self Employment Benefit Program. To my absolute joy I was accepted!

I was given a foundation of business related workshops and an advisor – Gord Evans – who went over and above to help me with my project – a business that offered high quality rubber stamp designs based on my artwork. The beginnings of Designs by Ryn.

In order to have the flexibility of location that I wanted my store would need to be online. Never mind that I was almost completely technologically challenged and didn’t own a computer! The library computers just wouldn’t cut it so I walked into Staples and many questions later walked out with a laptop, printer and… A boyfriend?! Lol. That’s another story all together 😉

He became my “tech department” helping with the many issues that came with designing, printing and cutting my catalogues and product cards from home. I also bought a scroll saw – another foreign piece of machinery to me – determined to hand cut the stamps once mounted on cling cushion. The first day I was in tears having destroyed at least half of my attempts but in time I learned.

The website went through several transformations which took a lot of time and patience. The delays forced me to focus on marketing to stores and at festivals. It wasn’t until early 2012 that at long last the new version of my site was released as a fully functioning store.

I am now thrilled to see my stamps getting international exposure. I have built a Design Team of 8 wonderfully kind and talented ladies who consistently create inspiring art using the stamps – Alie Hoogenboezem-de Vries (Netherlands), Anja Hardenfels (Germany), Eileen Godwin (UK), Karin van den Broek (Netherlands), Kellie Murton (US), Miranda Degenaars (Netherlands), Shirley Deatcher (Canada) and Wendy McCarthy (UK). I also encourage customers to share their work by hosting a monthly Customer Creation Challenge on my blog. I find myself constantly delighted by what people make. The most inspiring part is that this business is allowing me to connect in a meaningful way to other creative individuals around the world.

Recently I have branched into offering Unmounted Rubber Sheets of my designs to stores (listed on my site) and have also released a new line of Stencils. These are the first three!

DesignsByRynPrize1-10082014-200W DesignsByRynPrize2-10082014-200W DesignsByRynPrize3-10082014-200W

I am giving them away to celebrate being featured in this creative space. A big thank you to the Paper Crafter’s Library for being such a wonderful support over the years!

Thank you for taking an interest in me and for reading about my journey. I hope you enjoy my Design Team’s beautiful examples and welcome you to connect with me or any of them online. Their blogs are included with their pics and my info is listed below. Bye for now 🙂

Designer Projects

DesignsByRyn1-10082014-550W

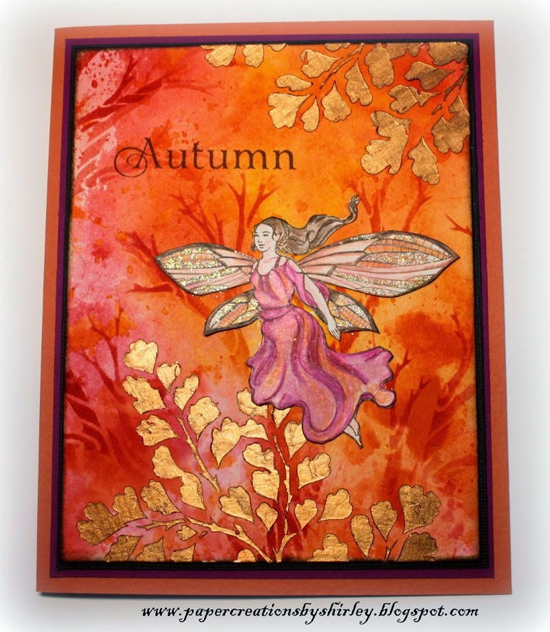
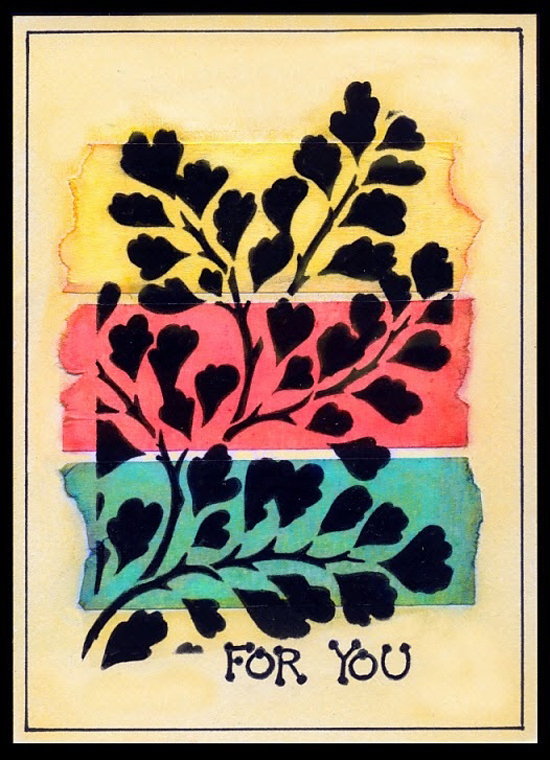
By Shirley Deatcher using Maidenhair Fern and Flowing Branches (stencils) and Dragonfly Faerie (stamp).

DesignsByRyn2-10082014-550W

By Eileen Godwin using Maidenhair Fern (stencil) and Rising Bubbles (stamp)

DesignsByRyn3-10082014-550W

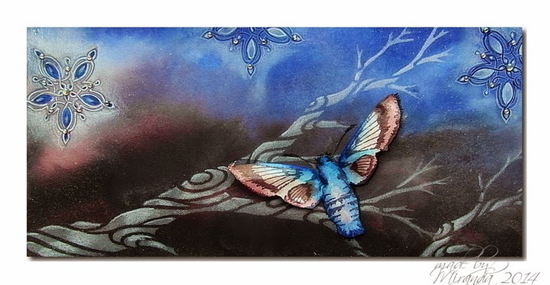
By Miranda Degenaars using Flowing Branches (stencil), Lucine and Celtic Star Set (stamps)

DesignsByRyn4-10082014-550W

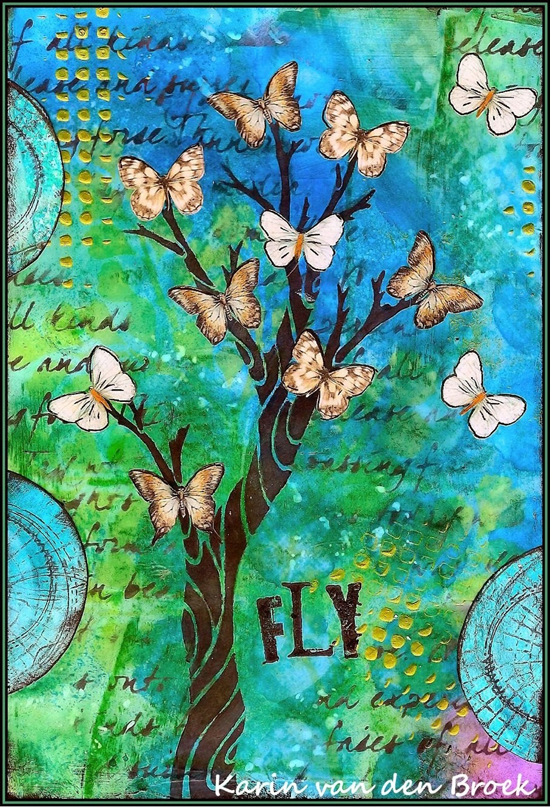
By Karin van den Broek using Flowing Branches (stencil)

DesignsByRyn5-10082014-550W

By Alie Hoogenboezem-de Vries using Flowing Branches (stencil) and assorted Designs by Ryn stamps

Made with Repix (http://repix.it)

By Wendy McCarthy using Flowing Branches (stencil)

DesignsByRyn7-10082014-550W

By Anja Hardenfels using Maidenhair Fern (stencil)

We hope you have enjoyed today’s feature. We want to extend a sincere thank you to Designs By Ryn for sharing their company with us. Be sure to visit Designs By Ryn to see more of their products and their blog for some inspiration!  You can also follow them on Facebook and Pinterest.

In order to enter the give-away to win the prize shown above, please leave us a comment in the comments section of this post and for your second chance to win, leave a comment on Ryn’s blog post too!  We will announce the winner of our give away next Wednesday on the Paper Crafter’s Library blog!  Be sure to check out Ryn’s blog next week for her winner!


Winner of the Lawn Fawn Give Away!

LawnFawnLogo-550W

I’d like to extend a HUGE thank you to Lawn Fawn’s guest designer Lynnette Kauffman for sharing such a wonderful project and to Lawn Fawn for their generous give-away of a $25 US Gift Certificate.

LawnFawnPrize-10012014-550W

And now, the moment you’ve all been waiting for…….the winner is……Linda!

LawnFawnWinner

Congratulations Linda! Be sure to email us at customerservice@papercrafterslibrary.com to claim your prize. Please be sure to put “Lawn Fawn Winner” in the subject line of the email, and then in the email itself, be sure to include your full mailing address and phone number.

Join us next week when we feature another great company.

Trend Watch – Making a Spectacle Out of Your Paper Projects

I have worn glasses since the first grade.  My mother claims its because I sat too close to the television to watch my beloved commercials.   I think it was because I was always trying to read because I was so studious 🙂   The good thing about getting glasses was that I could then actually see what was happening on the chalkboard and could participate in class.  The bad thing is that I never got to pick out my glasses and they were very uncool.  Fast forward to a cooler lens time.  Among the coolest folks, hipsters wear the huge glasses I used to have, Clark Kent rocks a great pair and cat eye glasses are making a come back.  Glasses are a serious fashion accessory.  This is true for crafts too.  Check out all these crafty ways to incorporate this trend that continues to stay strong.

I just love the cheekiness of this expression for this ever-so-awesome card.  Dig the red cat eyeglasses.  Do you remember the American talk show host Sally Jessy Rafael that used to rock the red glasses?  Classic.

awesome_2014sep5

card by Barbara Anders photo courtesy of My Favorite Things blog

Amy took a another beloved character and personified her in the white on white glasses homage.  This is so creative and fun.  I just love this card.  The sentiment and the whiskers on the glasses are awesome touches.

hello kitty

card by Amy Rohl photo courtesy of Ink About Me

Another clever personification is the smartie pants that Mel created.  This is a super fun pun that includes Smarties candies.   Plus, it is always a great time to remind girls how smart they are.

smartie_pants

card by Mel photo courtesy of Doxie Mel Designs

This cute little spectacled doggy is just so cute and he makes a great little statement piece for male cards.

hey dude dog

card by Jessy Christopher photo courtesy of Jillibean Soup blog

I don’t know if Elena was trying to create a likeness of Velma from the Scooby Doo cartoon but this geeky little girl is so spectacular.   Notice how she used glossy accents to give the glasses a shine and tint.  Very chic!

peppermint patty

card by Elena photo courtesy of Just Me

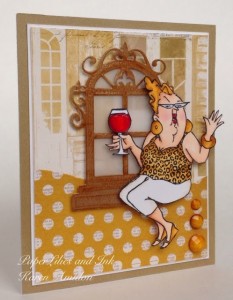
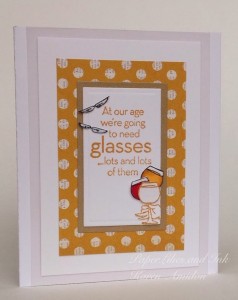
I just love the ladies of Art Impressions.  They are hilarious and unapologetic.  So when I saw this card with the double use of wine glasses and spectacle glasses, I was just in love.  Nailed it.

AI front AI inside

card by Karen Amidon photo courtesy of Paper Lillies and Ink

How adorable is this shaped purse card with the sun shades hanging from the handle?  Very fun.

Purse with Sunglasses

card by Susan Edwards photo courtesy of Busy with the Cricky

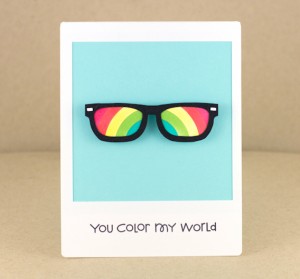
And if you live someplace chilly and are already missing the sun, take a gander at the lovely rainbow in these beautifully created sunglasses by Nina.  You can almost create warm thoughts.

GI-2012-Run2-You-Color-My-World-Nina-Yang-Waffle-Flower

card by Nina Yang photo courtesy of Waffle Flower blog

The sentiment and the rhinestones are just perfect in this clean design card from Dana.  You could use this as a fashionable birthday card.

oldie but goodie

card by Dana Gustafson photo courtesy of Paper Daydream

Isn’t this card just the cat’s pajamas?  How clever is this lady?  On her blog, Kim says she was inspired after having an eye exam.  I love her use of vellum everywhere except behind the eyeglasses.

stay focused Kimberly Crawford

card by Kimberly Crawford photo courtesy of For the Love of Paper

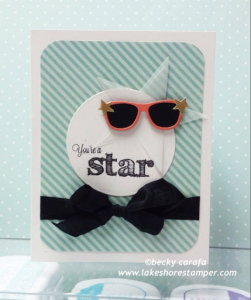
Becky created her own sunglasses embellishment that just adds a coolness factor to this card.

you are a star

card by Becky Carafa photo courtesy of The Lakeshore Stamper

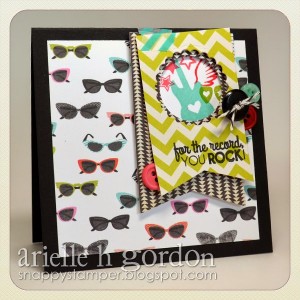
The coolness just keeps coming with this rockin’ card from Arielle.  Look how the paper just adds edge to her design.  I love the colors she choose.

you rock

card by Arielle Gordon photo courtesy of Snappy Stampin’ with Arielle

Glasses and sunglasses in paper form, dies and embellishments are cooler than ever.   I hope you found some inspiration to create your own pattern or try out a new way of using them.

So go ahead… make something pretty.

glasses die

glasses stamps

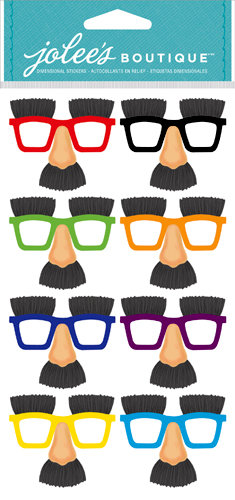
glasses stickers

AI stamp

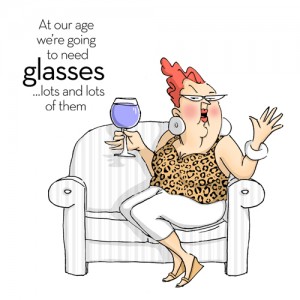
lady in glasses

glasses paper

PCL Membership Highlights September 22 – October 3

Today we wanted to show you a behind-the-scenes sneak peek of some of the projects that were released to our members these past two weeks. So the sneak peek you see below is a snapshot of some of the video tutorials & pdf handouts our members received for the weeks of September 22, 2014 – October 3, 2014.

MemberHighlights-10062014

Each week at Paper Crafter’s Library our monthly members can expect to receive access to a minimum of 5 exclusive videos each week – totaling around 20 videos each month. In planning for our projects we ensure that we cover a range of project types so that there is something for everyone whatever their interest or preference – whether it be card making, stamping, scrapbooking, altered art, mixed media, 3D items, templates, techniques etc. Projects range in difficulty level – so there will always be projects in library for whatever your paper crafting “level” whether you are a beginning paper crafter, or a more advanced paper crafter.

Highlights these two weeks:

  • An art journal page
  • A scrapbook page
  • Spirelli string art card
  • Shadow stamping
  • Some cards from our For All Things Creative Inspiration Collection
  • MDS – Creating a torn edge on your project

Read about all the perks of being a Paper Crafter’s Library member you can visit our Benefits of Membership page HERE.

BecomeAMemberGreen

Art Journal Express: “Explore” Video Tutorial

ArtJournalExpressLogo-550W Welcome to another edition of Art Journal Express brought to you by Andrea from her personal blog Andrea Walford Designs.
Art Journal Express is a video tutorial series she created for her personal blog Andrea Walford Designs. In each video, you will see how she created one of her art journal pages from start to finish. Because a typical art journal page takes between 20 minutes to an hour for her to create – which makes for a super long video to upload to You Tube, and for you to watch – the video clips are sped up, rather than having you watch what she’s doing in real time – hence the word “express” in Art Journal Express. However, what makes these video tutorials different from most of the “sped up” art journaling video tutorials out there is that Andrea narrates for you exactly what she’s doing and what she’s using – that way, even though you’re watching a “fast forward” version, you don’t miss a single detail.

The videos are hosted on a You Tube Channel that is separate from the Paper Crafter’s Library You Tube Channel, so if you don’t want to miss a single edition of Art Journal Express please subscribe to that You Tube Channel (you can do so from the video tutorial page from today’s post).

Today’s page is called “Explore” – shown below. You can watch a video tutorial HERE.

ExploreArtJournalPageCloseUp-Blog-1024x698