Winner of the Taylored Expressions Give Away!

TayloredExpressionsLogo-10222014-500W

I’d like to extend a HUGE thank you to Taylored Expressions for sharing such a wonderful project and for their generous give-away of their collection shown below.

TayloredExpressionsPrize-10222014-550W

And now, the moment you’ve all been waiting for…….the winner is……Monique Stevens!

TayloredExpressionsWinner

Congratulations Monique Stevens! Be sure to email us at customerservice@papercrafterslibrary.com to claim your prize. Please be sure to put “Taylored Expressions Winner” in the subject line of the email, and then in the email itself, be sure to include your full mailing address and phone number.

Join us next week when we feature another great company!

Trend Watch – Aviation Abounds

Welcome Aboard and Thank You for joining us for today’s scheduled departure 🙂  OK, Aviation is (kind of) in my blood–My husband is a pilot, his uncle was a pilot, his cousin is a pilot and my father was and brothers are, all in the manufacturing side of aviation.  I spent a few years in the private/corporate sector of aviation as a flight department administrator and scheduler–The theme of aviation was going to happen at some point of my being a Trend Reporter for PCL 🙂

I’ve shortened the flight plan for today with airplanes, helicopters, hot air balloons…maybe even an occasional UFO thrown in there for excitement!  As technology has definitely increased the WOW factor in aviation design, paper crafters create their own airworthy designs with the crafting technology of today, that gives us images in stamp, die and even digital forms (and then some!).

This wonderful 3D paper airplane creation by Ann, was made as a special Father’s Day greeting for her dad.  She utilized decorative papers and assembled each piece of the plane from a PDF pattern. As she advises in her blog post about this project “..have in mind how you want to decorate it and decorate each piece as you make it.”  Good advice Ann!

Fathers Day Airplane 2
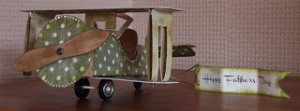
Father’s Day airplane card by Ann-Whitch Craft

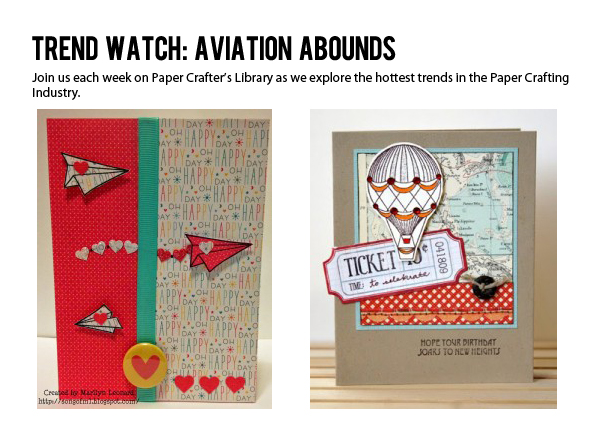
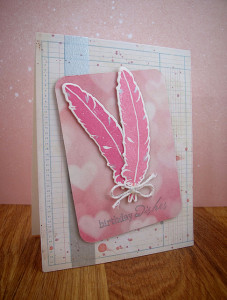
From a 3D paper airplane to the old-school style paper airplanes, Marilyn used the darling Flying By stamp set from Lawn Fawn to create this fun, love-filled greeting.  She embellished each fussy cut paper airplane image with a little heart to carry the love where ever this card may go!

Watermark_Love_Plane_1Card from Marilyn’s Cricut CraftsFlying by to say Hi card

Michelle Lupton (you may recognize her name as a PCL Featured Artist) made this lovely birthday card for a friend who was going to be traveling.  Her heat embossed, die cut airplane and its banner look crisp, clean and downright tranquil against her Versamark cloud background.  Fly the friendly skies!

Plane
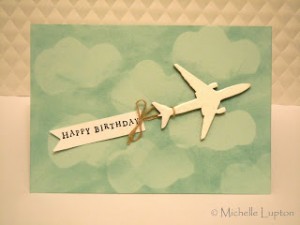
Alice’s Birthday Again card by Michelle Lupton at Handmade by Michelle

Dana used stamps and this digital helicopter image from her (retired) Kiddie Conveyance Hero Arts Digital Kit to create this whimsical card.  Dana’s beautiful coloring of the helicopter and use of a white gel pen, brings this copter and its furry pilot to life.

5665365707_c9d8957457
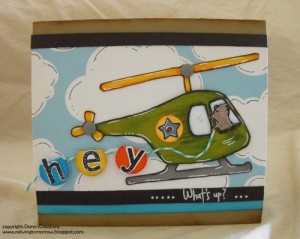
Hey What’s Up card created by Dana Colbourne at her blog Reliving Tomorrow

Floating back in time, Shelly Hickox created this gorgeous steampunk style, honeycomb hot air balloon that looks like it’s going to lift right off of this beautiful home décor piece.  Tre magnifique!

AO Paris ExpoParis Exposition home décor piece by Stamptramp Shelly Hickox for Simon Says Stamp

Layering her background with a piece of map patterned paper and making a ‘ticket to celebrate” embellishment, Tricia Ulberg (aka Lizzie) is using one of her own images to create an uplifting birthday greeting.  Tricia is co-owner of Lizzie Anne Designs and the hot air balloon image is from their Vintage Birthday set.

TU_hotairballoon_card
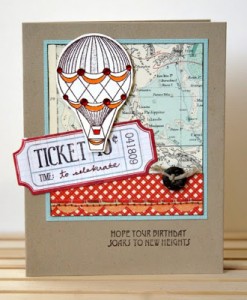
Vintage Balloon birthday card by Tricia Ulberg-aka Lizzie at Lizzie Ann Designs

Talk about out of this world!  Mo created this E.T.-special card with Distress Inking for her background, heat embossing and that multi-wonder product, Glossy Accents.  Can you see the tiny aliens in the UFO?  Mo, as she said, “doodled” those in herself before sealing them off from our atmosphere (with Glossy Accents!).

rockets-and-rayguns
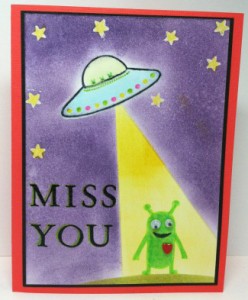
Miss You card by Mo–Cards by Mo

Want a little interaction from your UFO’s?  Well, at least the ones on cards?

IMG_5122 cr red

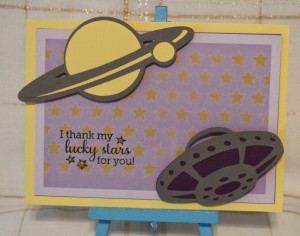
Melissa mounted a wobble element to give this saucer some shake!

IMG_5128 cr redLucky Stars wobble card by Melissa at Created by Sunshine Honeybee

Regardless of your relation to aviation, it’s a timeless theme and never goes out of style.  You can suit your cards for all types of occasions and for all manner of aviation enthusiast.  So, before you go off into your own wild blue yonder of creation, here are just a few goodies to pack into your flight bag.  And Thank You again for joining us on today’s flight.

Happy Crafting-Shari

Ready to print and cut PDF airplane template

Vliegtuig Sandra's Scrapshop (1)

Sandra’s Scrapshop

Lawn Fawn carries several aviation themed clear stamp sets.

LF386_FlyingBy_1024x1024

Flying By clear stamp set by Lawn Fawn

LF511_BlueSkies_large
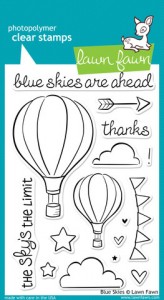
Blue Skies clear stamp set by Lawn Fawn

LF347_BonVoyage_large
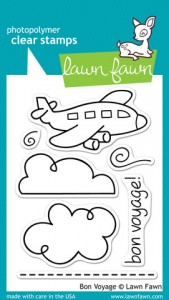
Bon Voyage clear stamp set by Lawn Fawn

For vintage inspired aerial creations, you can choose images from Tim Holtz from his stamp line with Stampers Anonymous.

CMS130_remnants
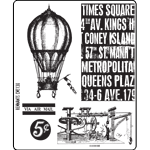
Remnants cling mount stamp set by Tim Holtz/Stampers Anonymous

CMS102_air_travel
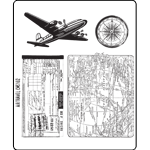
Air Travel cling mount stamp set by Tim Holtz/Stampers Anonymous

There are also digital and die forms of aviation shapes ready for take-off.

t350_4bdd30f1a706a798c5f2758d0a4e0ad4Vintage Travel digital kit from Hero Arts

KiddieConveyance(retired) Kiddie Conveyance digital art kit by Hero Arts

0001
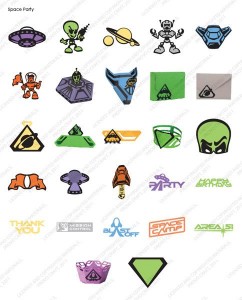
Die cuts found on the Space Party cartridge from Cricut

For larger aeronautical creations-

A10102
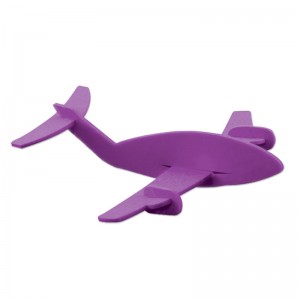
3D Airplane Die kit from Sizzix

Last boarding call for embellishments that you can use for those finishing touches.

Wood Veneer Shapes

CT-0350 wood_veneer_1
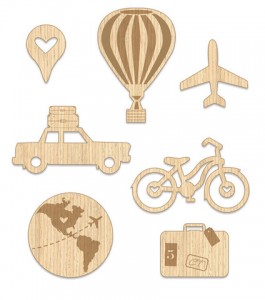
Let’s Go Traveling wood veneer set from ChicTags.com

Stickers

SBC_ek-50-20412_1

SBC_ek-50-21071_1EK Success Jolee’s Boutique Stickers

Keep It CASual #2: Fall Thank You Card

Happy Monday everyone! Welcome back to another Keep it CASual –  a video series featuring Clean and Simple Card Making.

In today’s video I’m going to show you how I made this Fall Thank You Card which features a stamped glitter technique.

KeepItCASual2-FallThankYouCard

For today’s card I once again turned to my stash of Papertrey Ink products.  Now I promise you that Papertrey Ink products are not the Only products I own, and not ALL the Keep it CASual cards will use Papertrey Ink products.

There are actually a TON of different manufactures whose products I absolutely love. It just so happens that I am in severe shortage of new current products to use, and I am having a huge difficulty trying to decide what to buy. Decision, decisions…..LOL

I am getting ready to place an order at Simon Says Stamp – my go-to place for buying my paper crafting supplies – so you should be seeing some new stuff soon.

Keep It CASual 2: Fall Thank You Card

Here’s the video on how I created this card.

Here’s a list of the supplies I used:

  • Stamps: Autumn Acorns (Papertrey Ink)
  • Ink:  Adirondack Earthtones Espresso (Ranger)
  • Paper: Stamper’s Select White Cardstock (Papertrey Ink, Classic Calico Collection Vol 2 (Studio Calico)
  • Accessories: Autumn Acorns Die (Papertrey Ink); Big Shot (Sizzix); Essential Glue Pad (Tsukineko); Dark Chocolate Vintage Buttons (Papertrey Ink);  Dark Gold, Copper, Sand and Bronze Opaque Microfine Glitters (Glitter Ritz); Linen thread, Stampin’ Dimensionals (Stampin’ Up!)

Stamps, paper and ink can be purchased from Papertrey Ink – click on the links above to get to each page.  Other products used are linked below and can be purchased from  Simon Says Stamp.

I hope you enjoyed today’s video tutorial and I’ll see you at the next Keep it CASual!

Art Journal Express #20: Video Tutorial “Make Art” Art Journal Page

ArtJournalExpressLogo-550WWelcome to another edition of Art Journal Express brought to you by me, Andrea, from my blog Andrea Walford Designs.

Art Journal Express a free video tutorial series where I show you how I created one of my art journal pages from start to finish.

For today’s page I pulled out one of my Crafter’s Workshop templates and a fun new product I recently added to my stash – Liquitex Professional Spray Paints – and created this fun and bright, but also super easy art journal page.

Today’s page is called “Make Art” and you can watch the video tutorial from HERE.

Art Journal Express 20: "Make Art" Art Journal Page by Andrea Walford

The videos are hosted on a You Tube Channel that is separate from the Paper Crafter’s Library You Tube Channel, so if you don’t want to miss a single edition of Art Journal Express please subscribe to that You Tube Channel (you can do so from the video tutorial page from today’s post).

Featured Artist/Designer: Gabrielle Pollacco

Welcome to another Featured Artist/Designer Spotlight. Today we’re thrilled to welcome Gabrielle Pollacco. Before we show you Gabrielle’s project, let’s get to know her a little bit more…

GabriellePollaccoProfilePic-10232014-250WHi, my name is Gabrielle Pollacco, I’m honored to have been asked to create a project for The Paper Crafters Library.   I’ve been scrapbooking for many years now and have had the privilege of being on a number of wonderful manufacturing design teams including Bo Bunny Designs, Websters Pages, Maja Design, Dusty Attic Design, Shimmerz Paints, The Scrapbook Diaries, as well as being a contributer to a print magazine as well. I have a blog site and a YouTube Channel where I share my work and show step by step how I create my projects.

When I was in school I majored in commercial arts and later on worked for a trade show display company as a project manager.  When my girls were little I started to get into scrapbooking, and I haven’t looked back since.  Over the years my work has evolved, and while I would describe my work as ‘vintage/shabby-chic’, I’ve been dabbling more and more in mixed media’s over the years.  I’m delighted to share my newest mixed with the subscribers to The Paper Crafters Library!

Mixed Media Nature Canvas

GabriellePollacco2-10232014-550W

GabriellePollacco3-10232014-550W

GabriellePollacco4-10232014-550W

GabriellePollacco5-10232014-550W

GabriellePollacco6-10232014-550W

GabriellePollacco7-10232014-550W

You can watch a video on how Gabrielle created her project below.

Supplies:

– 5×7 Canvas
– Patterned Paper:  Tim Holtz “Wallflower” paper pad
– Chipboard:  Dusty Attic Designs (Vine Corner #2, Decorative Keyholes, Chicken Wire Panel, Mini Hinges)
– Shimmerz Paint: Dazzlerz “Sea U in the Mornin’
– Ink: Ingvild Bolme’s (Branch Bark, Green Moss Chalk Ink), Tim Holtz Distress Ink (Vintage Photo, Walnut Stain)
– Air Dry Clay:  Martha Stewart (eggs)
– Nest: Spanish Moss, Cheese-cloth
– Stencil:  Crafter’s Workshop ‘Mini Damask’ 6×6 Stencil
– Adhesives: Aleenes, Tombow, 3 in 1
– Metal Dimensional Paint: Scribbles
– Butterfly accent: K&Company
– Other: twine, burlap, random charms, light gage jewellery wire.

We hope you have enjoyed today’s project courtesy of Gabrielle Pollacco. Be sure to stop by Gabrielle’s blog to see even more of her beautiful work (and let her know we sent you). You can also find Gabrielle on YouTube.

Have a great day!

Featured Company: Taylored Expressions

TayloredExpressionsLogo-10222014-500W

This week we are thrilled to welcome Taylored Expressions! In today’s spotlight you’ll learn more about Taylored Expressions, see a fantastic project by Taylor VanBruggen (Owner & Creative Director) and have the opportunity to win the Sunshiny Day stamp set, Lattice Cutting Plate and Pocket & Pages 3×4 Photo Frame die (details at the end of this post).

TayloredExpressionsPrize-10222014-550W

About Taylored Expressions

Joyful. Creative. Caring. At Taylored Expressions, our company mission goes beyond manufacturing high quality stamps and dies. Born from a passion to share the art of paper crafting with others, we strive to provide meaningful ways for people to express joy and live their lives creatively.

Based in Iowa, Taylored Expressions has proudly manufactured rubber stamps and dies in the U.S. since 2008. From coordinated kits to crafting supplies, our retail web-based store offers hand-selected products to make paper crafting simple and fun. Taylored Expressions stamps, dies, paper, and embellishments may also be found in retail stores across the globe.

Taylored Expressions Designer – Taylor VanBruggen

Today we welcome Taylor VanBruggen, Owner & Creative Director, Taylored Expressions. We are so excited to have her showcase her work today on Paper Crafter’s Library. You can see Taylor’s fabulous project below, but first, here is a little more about her:

TayloredExpressionsProfilePic-10222014-500WA graduate of Northwestern College, Taylor began Taylored Expressions in 2008 in Pasadena, CA before relocating to her childhood home state of Iowa. Mother to Madelyn and Charlotte, Taylor works alongside her husband, Jon, in the newly expanded Taylored Expressions offices near Des Moines. When not in her craft studio or spending time with her family, Taylor can be found haunting garage sales, on the volleyball court, or repurposing an old piece of furniture into something fresh and fun.


Wishing You A Bright Sunshiny Day!

Taylor’s card features stamps, dies, and paper from Taylored Expressions. She used TE’s fan favorite set, Sunshiny Day, TE’s Lattice Cutting Plate and TE’s 3×4 Pockets & Pages Photo Frame die to create this simple, clean, and happy card.

TayloredExpressions1-10222014-550W

Here’s a close up of the card.

TayloredExpressions2-10222014-550W

Supplies (all from Taylored Expressions unless otherwise noted)
Stamps: Sunshiny Day
Dies: Lattice Cutting Plate, P&P 3×3 Photo Frame
Cardstock: Lollipop, Sugar Cube, Granny Smith, Cookie Monster
Patterned Paper: Hocus Pocus 6×6 Paper Pack
Other: Memento Tuxedo Black Ink (Tsukineko), Markers (Copic)

We hope you have enjoyed today’s feature. We want to extend a sincere thank you to Taylor VanBruggen for her fabulous project and for sharing her company with us. Be sure to visit Taylored Expressions to see more of their products and their blog for some inspiration!  You can also follow them on Facebook, Pinterest and YouTube.

In order to enter the give-away to win the prize shown above, please leave us a comment in the comments section of this post. One winner will be announced next Wednesday on the Paper Crafter’s Library blog!

Winner of the Graphic 45 Give Away!

I’d like to extend a HUGE thank you to Graphic 45’s guest designer Ginger Ropp for sharing such a wonderful project and to Graphic 45 for their generous give-away of their collection shown below.

Graphic45Prize-10152014-550W

And now, the moment you’ve all been waiting for…….the winner is……Judy Nelson!

Graphic45Winner

Congratulations Judy! Be sure to email us at customerservice@papercrafterslibrary.com to claim your prize. Please be sure to put “Graphic 45 Winner” in the subject line of the email, and then in the email itself, be sure to include your full mailing address and phone number.

Join us next week when we feature another great company!

Trend Watch – Feathers

I want to call the trend this week a Trendy Tuesday feathered boomerang trend.   You have probably seen the use of real feathers used in paper projects in the past.  Now there are so many manufacturers that have come out with handy dies and clever crafters that have come up with ways to make their own feathers there is a feathery resurgence I just had to share with you.  I invite you to look through some of these beautiful examples to get inspired anew in the feather trend.

 Michele created this card with stamps from Waltzingmouse , the Fine Feathers set.  The feathers look so realistic I had to look several times to make sure they were stamps.  Her color choice and blending are so lovely.

feather wreath

card by Michelle photo courtesy of Amusing Michelle

Aaron’s card is so colorful and I just love the contrast of the pinks and purples in her card.  You can see the different techniques she used with each feather.  It is so cheerful and perfect for a birthday card.

happy birthday

card by Aaron Brown photo courtesy of Booth #32

Aren’t these die cuts great?  I love the trend of keeping some of the negative of the die within it and coloring it too.  Look at the “spaces” in the feathers that are colored along with the outline.  That just adds a bit of extra interest that is so creative.

Hello_RW_Main_Kit

card by Robyn Werlich photo courtesy of Studio Calico blog

Rachel had so many fun trends in this card I had to include it.  Plus, I am a sucker for anything pink and this card was right up my alley for the bokeh look in the background, the splatters and of course the awesome pink feathers.

pink feathers

card by Rachel photo courtesy of Seize the Stamp

I haven’t yet started any pocket scrapbooking yet but am obsessed with a good shaker and this super awesome example is so trendy and well done, I just ooohed and aaahed when I saw it.

Confetti Pocket (6) copy

pocket card by Bronwyn Eastley photo courtesy of AddINKtive Designs

I was totally floored when I saw this mobile and immediately wanted to make one of my own.  Look at the natural curve Allison created on each of her feathers.  The colors are so rich and are perfect for the season.  She stamped and die cut each of the feathers.  It turned out beautifully.

stampinup_paperfeather_mobile_artisan_nicepeoplestamp

mobile by Allison Okamitsu photo courtesy of Nice People Stamp

Feathers are so versatile.  This next card shows off the lovely white on white design and is used for a simple sympathy card which looks very stately.

sympathy 2

card by Mandy photo courtesy of A little Space of my own

They can also be added for a fun color punch like Jingle used in her color on color card below.  The solid nature of the feathers makes it perfect for a deep gold saturation and looks great on this card.

teal on teal

card by Jingle photo courtesy of Just Jingle

I just love how you can use various products you may already have to play with new ways to make this trend your own.  Vellum is a lovely alternative that adds a cool unexpected bonus to your projects.  The feathers look awesome on this thank you card.

vellum flowers

card by Heidi Baks photo courtesy of Running with Scissors Stamper

If you follow the link on Rebekah’s site you can see her tutorial for making your own feathers sans the die with washi tape!  You can design them to match whichever paper projects you have going now.

washi feathers

feathers by Rebekah Gough photo courtesy of A Bit of Sunshine when Skies are Grey

Feathers also make a cool background too.  I just love the look Yana creates from her scrap paper.

yana-smakula-2014-card-Spellbinders-Hero-Arts-Miss-You-So-Much-2

card by Yana Smakula photo courtesy of Yana Smakula Cardmaking and Scrapbooking

I am very excited to try the emboss resist technique Helen used to create this awesome purple background with the white feathers floating on it.

emboss resist

card by Helen photo courtesy of H2 Designs

If you had not participated in this trend on the first go round, I hope I have inspired you to give it a try for some of your paper projects in the future.  I have also found several products you can check out to help bring the creativity to your crafting desk.  So go ahead… make something pretty.

spellbinders

  fiskars punch

    embossing folderRonda Palazzari Fancy Feathers wooden cuts

kelly feathers

feather paper

feather stamp


stampin up

Funky-Feathers-STORE_1024x1024

*NEW* Keep It CASual #1 Video Tutorial and PCL Member Highlights

Happy Monday everyone!  I’d like to introduce you to a brand new feature we’re launching here on the Paper Crafter’s Library blog.  It’s called  Keep It CASual – and it’s a video series featuring Clean and Simple Card Making.  Each Keep it CASual video will be released on a Monday although as of yet, we’re not really sure how many times a month we’ll be posting this feature.

In today’s video I’m going to show you how I made this Happy Spooky Halloween Card.

HappySpookyHalloweenPic1Blog

Halloween is one of my favourite holidays of the year to create projects for, although typically I end up creating more projects than I actually have people to given them to LOL!

Pretty much all the products I used other than the rhinestones are from Papertrey Ink.  The stamp set and coordinating die I used are both called  Mr. Bones.  I also used the Spider Web Trio die. These are all older products released a few years ago (I don’t remember exactly when), but I love them so much I find myself reaching for them over and over again.

HappySpookyHalloweenPic2Blog

Here’s the video on how I created this card.


Here’s a list of the supplies I used:

  • Stamps: Mr. Bones (Papertrey Ink)
  • Ink: Royal Velvet (Papertrey Ink); Jet Black Archival (Ranger)
  • Paper: Stamper’s Select White Cardstock, Royal Velvet Pattern Pack, True Black Cardstock (Papertrey Ink)
  • Accessories: Mr. Bones Die, Spider Web Trio Die (Papertrey Ink); Big Shot (Sizzix); Sticky Stuff Embossing Powder (Judikins); Charcoal Baker’s Twine (the Twinery); Jewels Basic Rhinestones (Stampin’ Up!); Black Opaque Microfine Glitter (Glitter Ritz); Foam Mounting Tape (Scotch 3M); glue dots, 3D foam squares (Thermoweb)

HappySpookyHalloweenPic3Blog

Stamps, paper and ink can be purchased from Papertrey Ink.  Other products used are linked below and can be purchased from  Simon Says Stamp.

Paper Crafter’s Library Member Highlights

I  also wanted to show you a behind-the-scenes sneak peek of some of the projects that were released to our members these past two weeks. We’ve put together a sneak peek you of just a few of the video tutorials & pdf handouts our members received during the weeks of October 6 – October 17, 2014.

MemberHighlights-10202014

 Each week at Paper Crafter’s Library our monthly members can expect to receive access to a minimum of 5 exclusive videos each week.  Typcially members receive upwards of 25 exclusive videos each month.  In planning for our projects we ensure that we cover a range of project types so that there is something for everyone whatever their interest or preference – whether it be card making, stamping, scrapbooking, altered art, mixed media, 3D items, templates, techniques etc. Projects range in difficulty level – so there will always be projects in library for whatever your paper crafting “level” whether you are a beginning paper crafter, or a more intermediate paper crafter.

Highlights these two weeks:

  • An art journal page
  • A scrapbook page
  • Using Twinkling H2O’s to create a background for die cutting elements
  • Watercoloring using Distress markers
  • Watercoloring using watercolor paints
  • Cards from our Amazing Birthday Creative Inspiration Collection
  • MDS – Adding photos and text to punches

Read about all the perks of being a Paper Crafter’s Library member you can visit our Benefits of Membership page HERE.

BecomeAMemberGreen

*NEW* Holiday Cards 2014 Class Giveaway and a New Art Journal Express Video Tutorial

*We are giving away 2 spots to the Holiday Cards 2014 Class – to enter to win please leave a comment in the comments section of this post*

It’s that time of year again when stores have started to stock their shelves with Christmas merchandise and gift-giving ideas are starting to appear in our mailboxes, on tv and online. It can seem overwhelming to start thinking about Christmas when Canadian Thanksgiving has just barely ended and American Thanksgiving is still a month away…..but as I’ve learned from past years – it’s never too early to start planning and prepping! There’s no worse feeling than hitting December 1st and feeling panic set in because there is still SO much to do.

For the past few years I’ve started getting ready for Christmas EARLY – and I’d like to help YOU get started early too. That’s why I’d like to invite you to join me in this 2 week Christmas and Holiday card class.

Over the course of the next two weeks we’ll be making 16 different Christmas cards EACH with a video tutorial and beautifully designed PDF handout. This class centers around 4 different Stampin’ Up! stamp sets, and I’ll show you how to create 4 different cards with each stamp set. The cards will range from simple to more advanced and will cover a variety of different techniques including colouring with Blendabilities, watercoloring with dye inks & a blender pen, dry embossing, die cutting and a few special folds cards.

Please note that although this class uses Stampin’ Up! product, the card designs and techniques are pretty EASILY adapted to Christmas and Holiday stamp sets from your other favorite companies.

*** If you are a Paper Crafter’s Library member please DO NOT sign up for this class as the projects are included in your membership ***

RegisterNowHolidayCardBlitz

Your registration comes with LIFETIME access to all Holiday Cards videos & PDFs.

Class Type Class Dates SALE Price
Self-paced Oct. 27, 2014 to
Nov. 7, 2014
$19.95
(regular $24.95)

* a $5 discount off the regular price of the class is being offered if you sign up by Thursday, October 23rd.

Supply List

In order to fully enjoy and participate in this class you will need access to a computer and high speed internet. A full supply list is posted in the classroom once you join. At the very least you will need:

  • Christmas or Holiday themed stamp sets (the 4 main stamp sets used are Wondrous Wreath, Festival of Trees, Get Your Santa On and Cheerful Christmas – full supply list is posted in the class once you are registered). Please note that you can substitute other stamp sets.
  • A variety of sentiment stamp sets
  • Dye-based inks

Most other card designs & supplies can be adapted or substituted if you don’t have the exact thing we used.

Class Content

Please note that all lessons, PDF handouts, and videos are provided in English. At this time, videos are not subtitled or captioned. You will need high-speed internet access in order to properly view the videos.

Refund Policy

Because this is digital content – in most cases class fees are non-refundable. If however you have paid for the class and are unable to access the classroom, please notify us within 7 days of registering for a full refund.

*** If you are a Paper Crafter’s Library member please do NOT sign up for this class as the projects are included in your membership ***

RegisterNowHolidayCardBlitz

Once you have registered please keep your eye on your email inbox for an email for us with further details on how you will access the class information. You should receive this email within 24 hours of your purchase. If you do not see an email in your inbox please check your spam folder. For questions please email us at customerservice@papercrafterslibrary.com


 Art Journal Express Video Tutorial

ArtJournalExpressLogo-550W Welcome to another edition of Art Journal Express brought to you by me, Andrea, from one of my personal blogs Andrea Walford Designs.

Art Journal Express a free video tutorial series where I show you how I created one of my art journal pages from start to finish. Because a typical art journal page takes between 20 minutes to an hour for me to create – which makes for a super long video to upload to You Tube, and for you to watch – the video clips are sped up, rather than having you watch what I’m doing in real time – hence the word “express” in Art Journal Express. However, what makes these video tutorials different from most of the “sped up” art journaling video tutorials out there is that I narrate for you exactly what I’m doing and what I’m using – that way, even though you’re watching a “fast forward” version, you don’t miss a single detail.

The videos are hosted on a You Tube Channel that is separate from the Paper Crafter’s Library You Tube Channel, so if you don’t want to miss a single edition of Art Journal Express please subscribe to that You Tube Channel (you can do so from the video tutorial page from today’s post).

Today’s page is called “Shine” – shown below. You can watch a video tutorial HERE.

ShineArtJournalCloseUp-Blog