Graphic 45 Spotlight With Designer Denise Hahn

Here is the latest installment of our Grahpi 45 Guest Designers.  Many of you may remember that back in April we hosted a Graphic 45 Week on the Paper Crafter’s Library Blog.  It was week filled with projects and inspiration using Graphic 45’s Tropical Travelogue Collection. We had such a great experience partnering with Graphic 45 and their design team, and such a great response from you, that we’ve decided to partner with them on an ongoing basis.  The first and third week of every month one of the Graphic 45 Designers will share a project they’ve created here on the PCL Blog.    We started with our monthly designers in June and before I introduce you to our latest Designer, I just wanted to take a minute to re-introduce Graphic 45 for those of you that may not be familiar with the company.

Graphic 45 is an award-winning scrapbook and paper crafting company­— owned and operated by a mother and her two daughters.

Diane Schultz (pictured center)—Designer and CEO (aka mother)

“I’m passionate about being creative and eager to make it possible for others to find their creative voice. My background includes stints as a designer for, McCalls, Simplicity, Vogue/ Butterick, Mattel Toy Company and a host of other jobs that each, in some way, led me to what I do now. At 45 I went back to school and got my degree in graphic design— I named the company to celebrate that achievement.”

Aimee Filimoehala (pictured left) —Director of Operations

“I wear a lot of hats and love it that way.  Business, marketing, operations, etc. have made me a pro at multitasking (aka juggling‑figuratively and literally). When we launched Graphic 45 just three years ago we had no idea what was in store, working together as a family has been an amazing journey that we all feel so grateful to be apart of.”

Charee Filimoehala (pictured right)—Director of Customer Service and Design Team Coordinator

“I joined the team a little over three years ago and haven’t looked back…what a life-changing experience this has been.  I love working with and around creative people and products (not to mention I like my co-workers quite a bit).  I spend my days working with our friendly stores and talented design team…the occasional trip to a workshop or tradeshow pretty nice too.”

Together we create vintage inspired crafting products that capture the flamboyant style of the 1920’s and 30’s – with vibrant color, irresistible texture and imaginative design to create products with decades-old appeal that’s both fresh and familiar. Let our products inspire your next scrapbook layout, card, album or home decor project.

***********

Here’s a picture of their booth at the CHA show which absolutely blows us away every year! The artwork inside is absolutely stunning and totally unique.  At the last show as we were speaking with Diane she told us that many of the altered pieces were vintage finds which she and her team transformed with their gorgeous Graphic 45 products.  We can’t wait to stop by their booth at the Chicago CHA and see what they’ve got in store this year!

Here’s a picture of the Graphic 45 team – they’re always dressed in period costumes to complement the themes in their collections – every day of the show brings a new set of costumes.  The ones shown below were for their Little Darlings collection.

Graphic 45 Designer Denise Hahn

Our next Graphic 45 Guest Designer for this month is Denise Hahn.  Denise is part of the 2012 Graphic 45 Design Team.

Denise HahnYou can see Denise’s fabulous project below, but first, here is a little more about Denise:

My name is Denise Hahn and I am a mixed media artist and crafter from Long Beach California. I have always loved creating and I get my creativity from my Mom and Grandmother. They always had elaborately decorated packages under the Christmas tree along with handmade decorations. They also sewed amazing Halloween costumes for us. I was always in awe of what they could create and soon started joining them. But somehow I lost sight of creating and for many years let it slip away. Then I was introduced to scrapbooking from a friend and I have never looked back. I consider myself a crafter of all trades; I do paper crafting, mixed media, altered art, and jewelry. But I am always looking to learn new things. Currently I spend my time teaching workshops and creating for the Graphic 45 Design Team and Clearsnaps Creative Team. I live in Long Beach, Ca with my husband and our two lovable pit bulls Juno and Pipi. When I am not crafting I enjoy rollerskating, biking, and skiing in Colorado. You can visit my blog at inmyblueroom.blogspot.com
Graphic 45 Design Project:
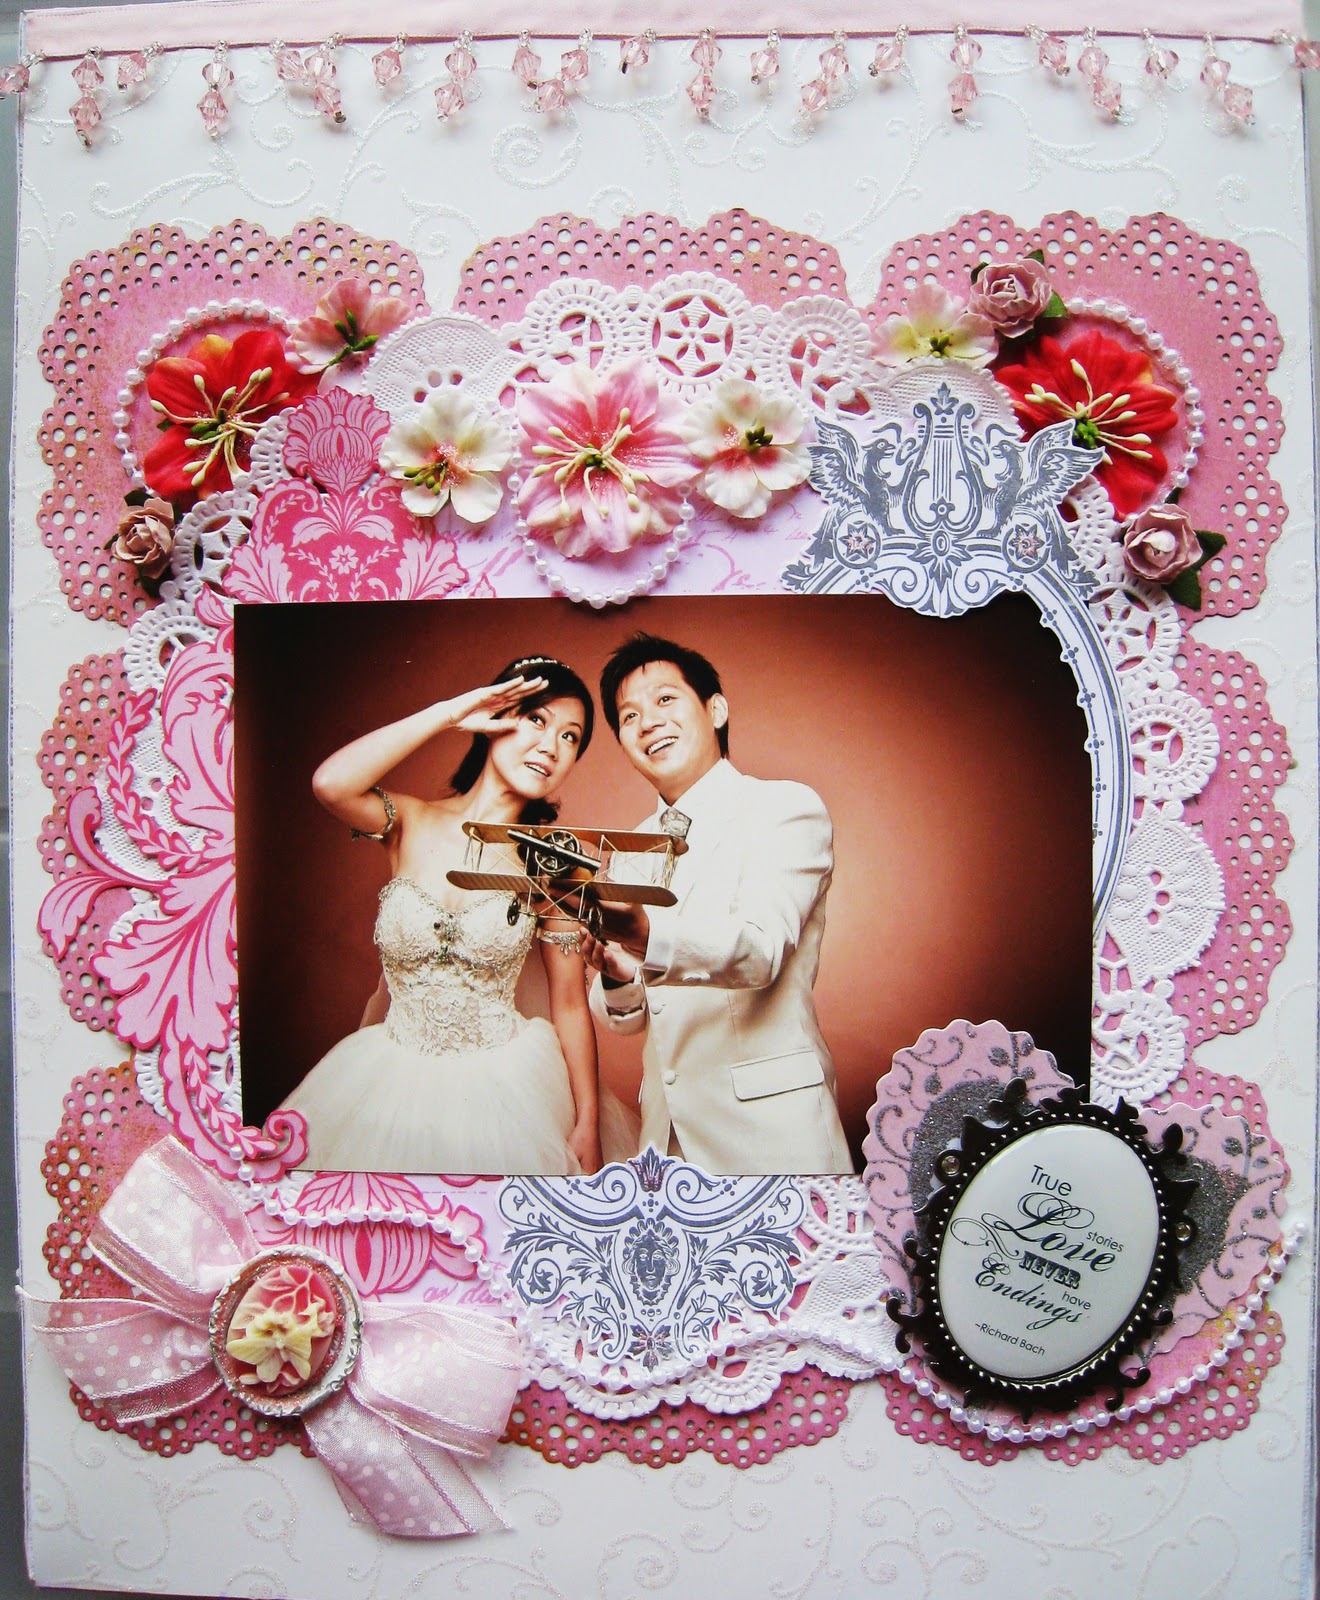
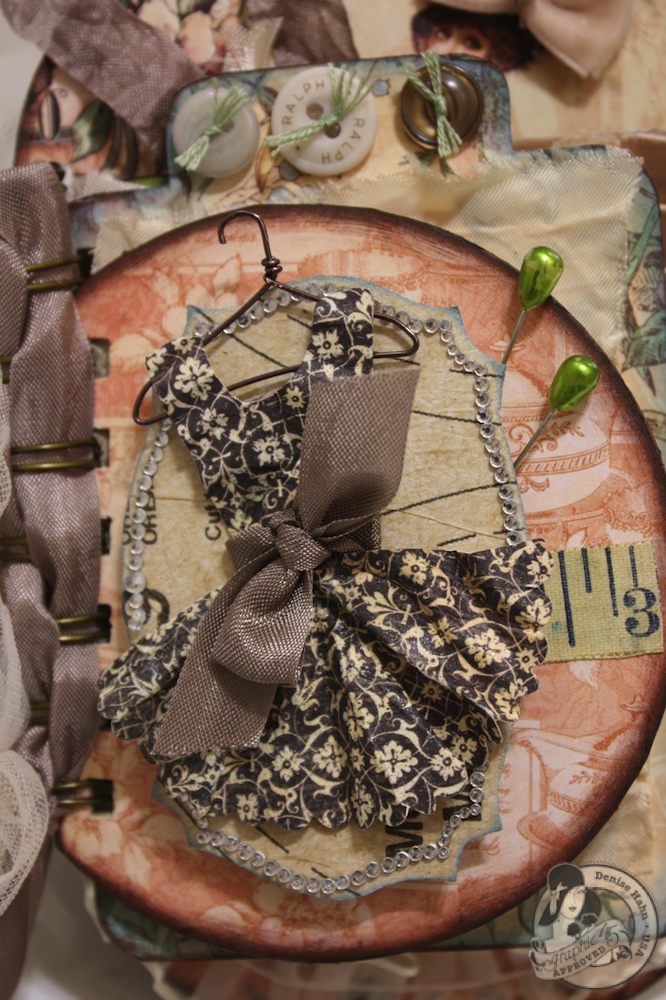
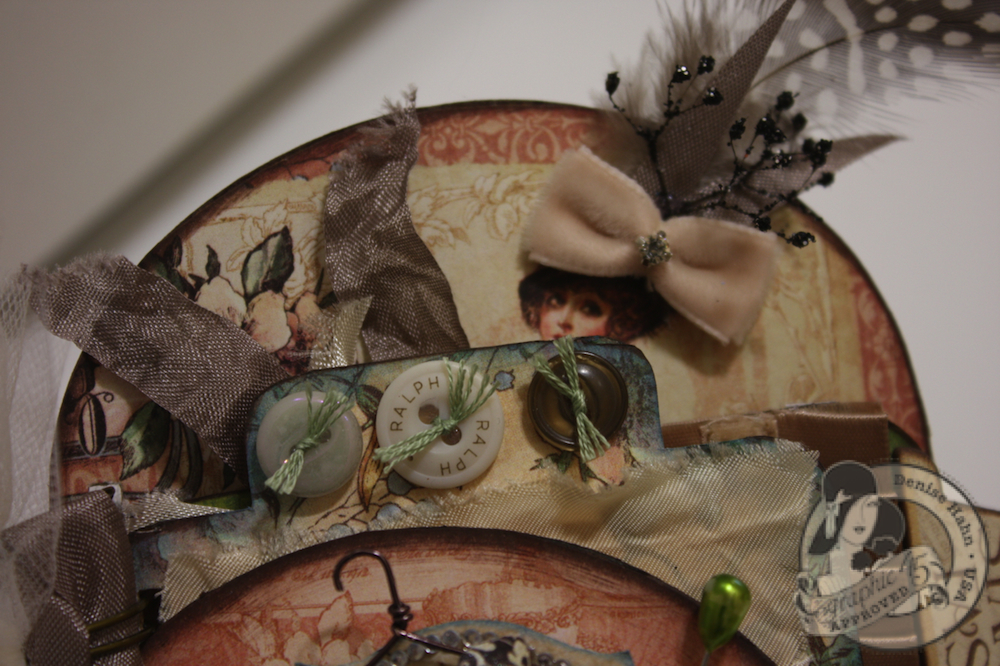
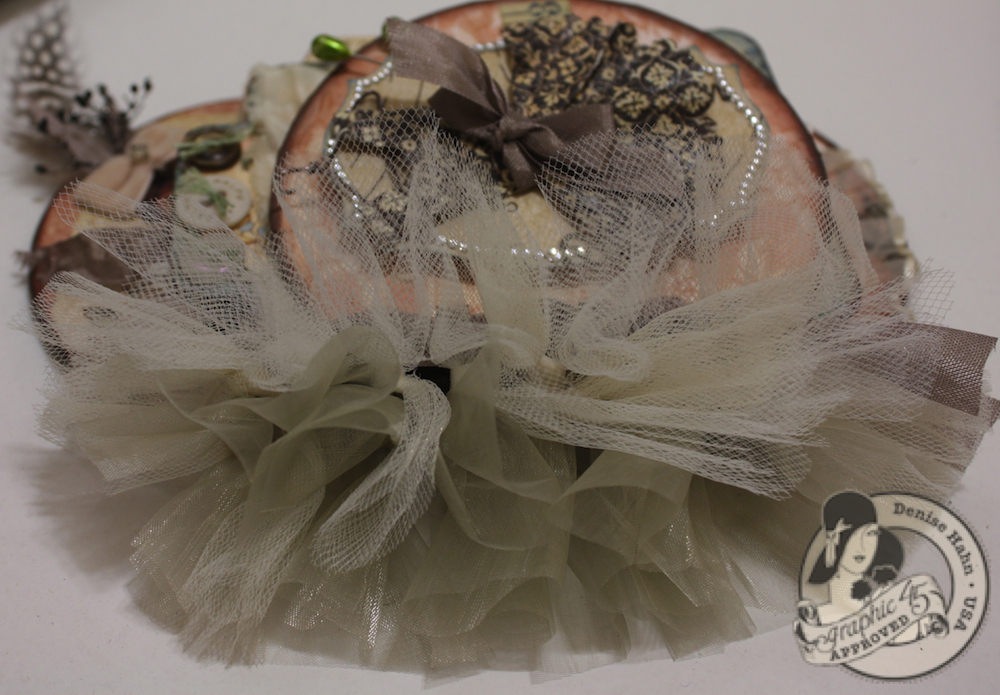
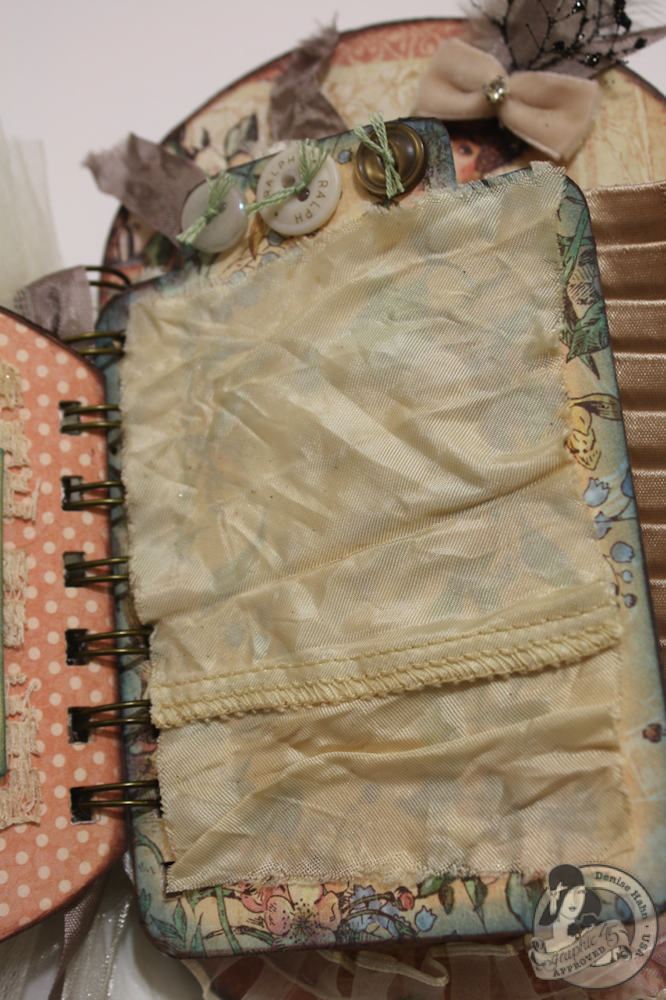
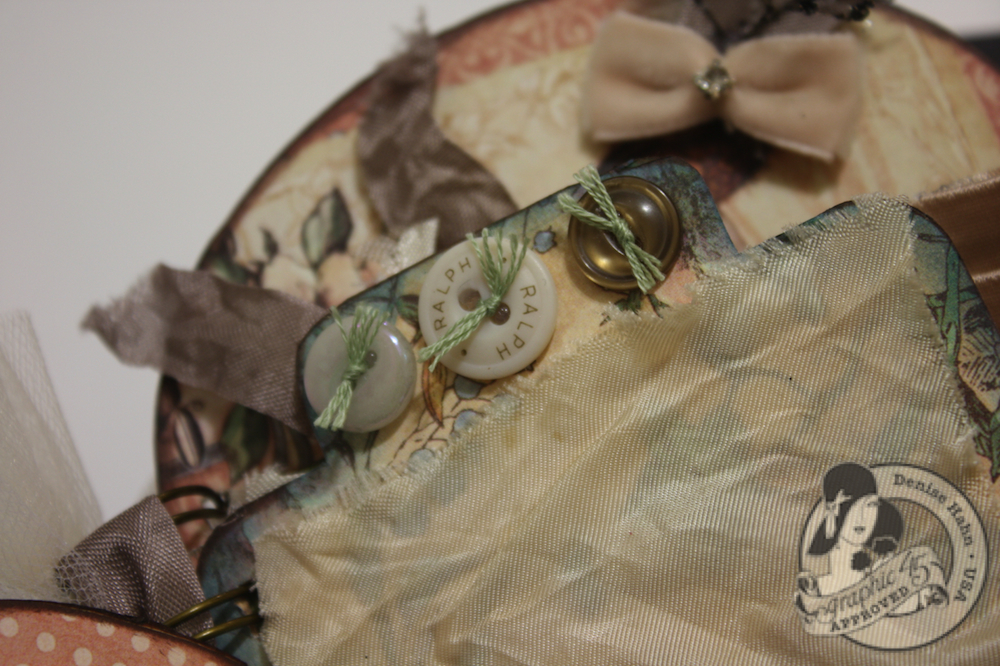
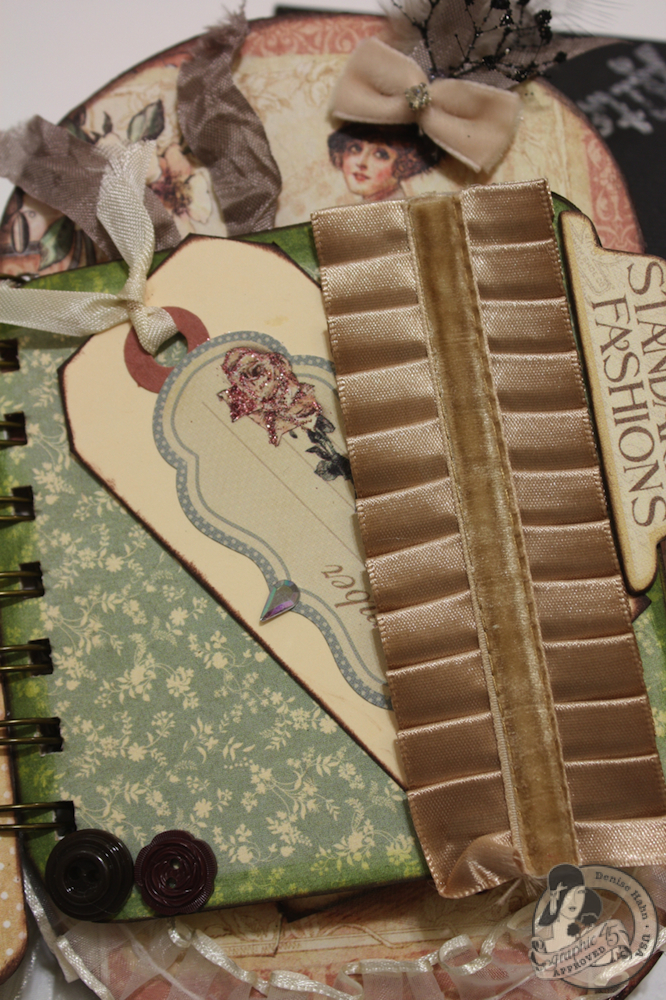
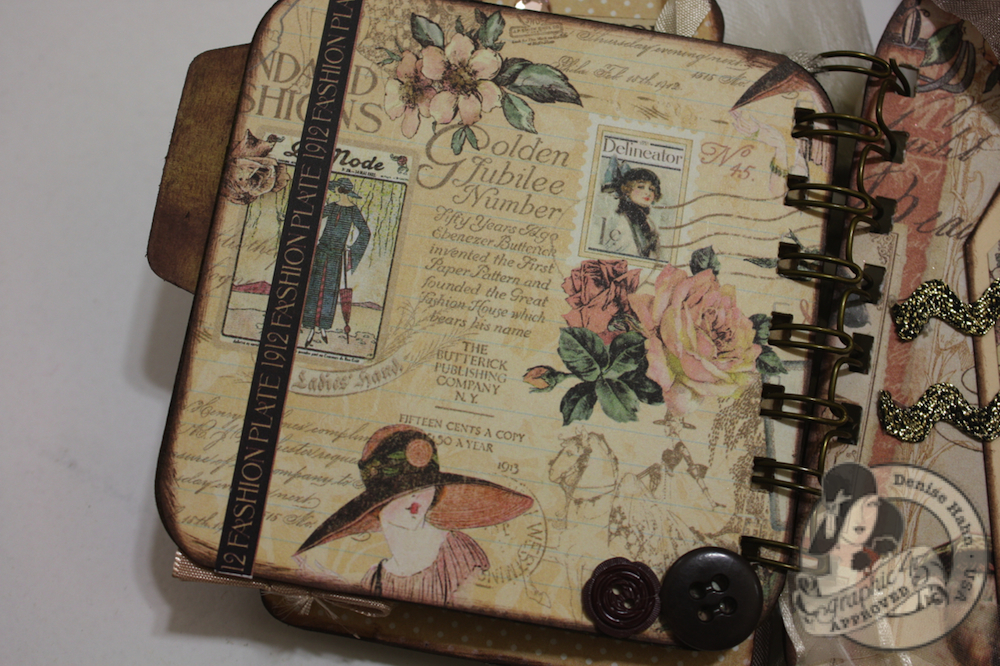
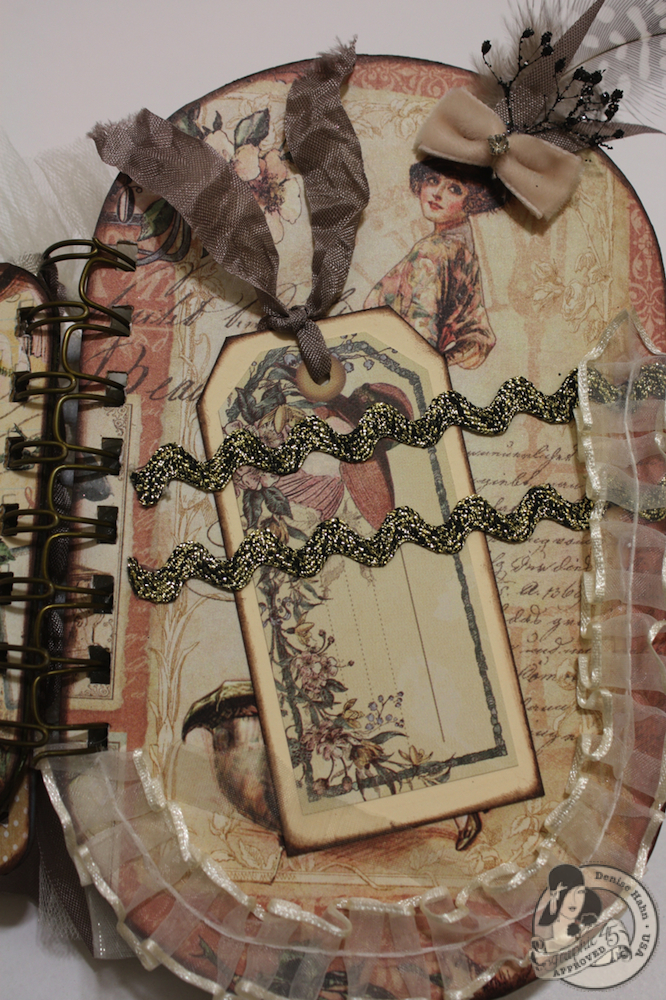
Ladies Diary Mini

The pictures below showcase the fabulous project created by Denise.  Some of the pictures are a close up of specific parts of the project.  After the pictures, you can watch the video tutorial by Denise to learn more about how to put this beautiful Mini together. The first picture is a view of the completed project and then you will see the close up pictures.  Feel free to also visit Denise’s blog here.

 Denise Hahn

Denise Hahn

Denise Hahn

 Denise Hahn

 Denise Hahn

 Denise Hahn

 Denise Hahn

 Denise Hahn

 Denise Hahn

 Denise Hahn

 Denise Hahn

 Denise Hahn

Denise Hahn

Now you can see  her project come together with the video tutorial below:

We hope you have enjoyed this beautiful creation from Denise.  I would also like to extend a warm thank you to Denise for sharing her wonderful project with us! Please take a minute to stop by Denise’s Blog and of course the Graphic 45 blog to check out all their amazing creations!

Trendy Tuesday – Tickets

Trendy Tuesday – Tickets
By Colleen Harshaw

My oh my….where to begin?  I know I have mentioned CHA before (the Craft & Hobby Association trade show occurs twice a year), and it was in reading about CHA Winter 2012 that I first caught wind of this ticket craze.  Well, we are going to have a lot more to talk about soon, because CHA Summer 2012 started today in the Chicago area!  Stay tuned to see what trends are going to be coming out of The Windy City as the articles begin popping up in blog-land later this week.  Don’t forget to check back here with us on Trendy Tuesdays so that we can fill you in!

OK….back to the tickets.  They are everywhere!  You can find patterned papers, embellishments, stamps and dies all keeping in the theme of tickets.  Some day I would really like to know who decides what the next trends are going to be.  Have you ever wondered about that?  Does someone send out a memo in the crafting industry to tell all the designers and manufacturers to show up with ticket themed product lines for CHA?  How is it that they all knew that tickets were going to be hot at CHA winter?!

Once again, I digress!  We really should move on to the projects that I found for your viewing pleasure!

Below I found this very cute card posted over at Splitcoast Stampers.  I believe the tickets were stamped with a stamp from MFT stamps.

Card by ‘rhonda3’
Photo courtesy of www.splitcoaststampers.com

Next I found this beautiful shaped card created by Beate Johns.   The ticket you see on this card was stamped from the Ticket Notes Sentiment Stamp Set from Whimsy Stamps.  Beate is amazing with her Copic markers.  Check out how beautifully she coloured this little girl!

Card by Beate Johns for Whimsy Stamps
Photo courtesy of www.splitcoaststampers.com

These patriotic tags were created for a challenge and I was lucky enough to find them posted over at Splitcoast Stampers!  This project gives us another example of how this ticket trend can be incorporated into your projects.  You don’t have to be making cards or scrapbook layouts in order to participate in these trends!

Project by ‘corgidusty’
Photo courtesy of www.splitcoaststampers.com

Deb Felts designed the project that you see below for Gina K. Designs.  She used a vintage ticket holder that is available from 7 Gypsies, along with the Ticket Trio Stamp Set from Gina K. Designs.  If you like the vintage look, or vinatage travel themed items, 7 Gypsies is your place!  They have a section on their website (www.sevengypsies.com) entitled ‘tags, ephemera & tickets’.  Yes, they have a tab on their site just for tickets!

Project by Deb Felts for Gina K. Designs
Photo courtesy of www.splitcoaststampers.com

I thought this gift presentation was so cute and clever!   This would be easy to do for almost any occassion.  Concert tickets, homemade coupons, even gift cards could be packaged this way!

Project by Kim (atsamom)
Photo courtesy of www.splitcoaststampers.com

Lastly I have a scrapbook layout to share that incorporates the ticket theme that we are talking about today.  In this case the tickets are blank, allowing you to add your own journaling or sentiment.

Scrapbook page by Kirsteen Gill of www.creatinwithkirsteen.com
Photo courtesy of www.splitcoaststampers.com

Stampin’ Up! has created a Simply Scrappin’ Kit called Tickets and Tags.  I have seen some really cute projects online using this kit.  There are so many possibilities!  As a matter of fact, the scrapbook page above was created using this kit!

Stampin’ Up! – Simply Scrappin’ Kit – Tickets and Tags
Photo courtesy of Stampin’ Up!

The Little Yellow Bicycle has some adorable collections.  One such collection is the Escape Collection.  You can see a ticket and journaling card book containing tickets from the Escape Collection pictured below.  The Little Yellow Bicycle has other collections that contain tickets as well.  You can find pictures of all of the collections on their website.

Little Yellow Bicycle Escape Collection – Tear out ticket & journaling card book
Photo courtesy of www.mylyb.com

There are a number of ticket themed stamp sets available on the market at the moment.  Once such set is the Treasured Moments Tickets Stamp Set from Whimsy Stamps, pictured below.  Whimsy Stamps also has another ticket themed stamp set available called Ticket Notes (not pictured).

Raindrop Echo Designs for Whimsy Stamps – Treasured Moments Tickets
Photo courtesy of www.whimsystamps.com

Sweet ‘n Sassy Stamps didn’t want to miss this trend either.  They have their own ticket stamp with interchangeable sentiments, as shown below.

Sweet ‘n Sassy – Ticket Sentiments Clear Stamp Set
Photo courtesy of www.sweetnsassystamps.com

Gina K. Designs has taken things even further with their ticket themed stamp set called Ticket Trio.  It is available in either acrylic or rubber, and it coodinates with Spellbinders Labels & Tags Die set.

Gina K. Designs – Ticket Trio Stamp Set (available in acrylic or rubber)
Photo courtesy of www.ginakdesigns.com

My Favorite Things Stamps always seems to be on trend.  So, of course, we would expect them to come out with a ticket themed stamp set!  They offer the package shown below.  You get both a ticket stamp set and a matching ticket die-namics die.  The ‘Just the Ticket’ die can be purchased individually as well.  MFT also offers a Mini Ticket Strip Border Die (not pictured).

My Favorite Things – Die-namics Just the Ticket and Stamp Set
Photo courtesy of www.mftstamps.com

In closing, there are many different options out there for making and using tickets in your paper crafting.  Some other companies that have ticket themed papers, embellishments and products include (but are not limited to!) October Afternoon, Maya Road and Prima.  Take a bit of time to cruise the internet and you may be surprised at the vastness of the options you will find available!

Happy crafting!  🙂

Project Newsletter Makeover Challenge – You Are So…Sweet

Welcome to the Makeover Monday challenge. Every Monday, as part of our project ideas newsletter we’re going to make over a card, scrapbook page or 3D project, showing you how easy it is to use existing designs (your own OR someone else’s) as inspiration. This week, Tracy has designed this You Are So… Sweet card.

Your challenge – as with our previous Makeover Monday Challenges – is to use our piece as inspiration and make it into a card, scrapbook page, or other project. You can use the layout, the colors, an element you like…it can look like our piece, or nothing at all like our piece. We want to see where YOU take this. This challenge is strictly a “work from your stash” challenge.

As a newsletter subscriber you will have received a link to a private web page, from which you can watch the video tutorial. If you didn’t receive the video tutorial link then please be sure to email us at customerservice@papercrafterslibrary.com. In order to ensure you don’t miss any more of our Makeover Monday Challenge video tutorials, please be sure you sign up for our FREE email newsletter from the top right sidebar of this blog. Please note that the video tutorial will be available for general viewing for one week only – and then will be moved into our library for our members only

Every Monday, here on the blog, we’re going to post the original picture, and the made over picture. You will have ONE week to upload your challenge piece. Instead of a weekly prize though, we’re going to award a prize monthly. So for each week you participate and each project you submit – you will get one entry into our monthly draw. On the first Monday of each month – we will announce one challenge winner, who will be featured as a guest designer on the Paper Crafter’s Library blog as well as our Facebook page. As a guest designer, we’ll feature your biography, some of your favorite paper crafting projects and we’ll link to your blog.

Our inspiration piece, shown below, is a project created by Sally Traidman that we found on the Society of Stampaholics blog. We loved the way that Sally used dimensional embellishments as her focal point for her card and just added punched out co-ordinating CS circles to pop each embellishment a bit more off of her card.

Here are the details on how you can participate in the Makeover Monday Challenge:

A new Makeover Monday Challenge video tutorial will be emailed out to newsletter subscribers every Monday (so make sure you are signed up). Then, here on the blog, we will post a picture of our inspiration piece and made-over project along with an Inlinkz button for you to enter your project. Here are the details:

  • Work from your own stash to create a project based on the inspiration project provided – you can use any products you would like, and make any type of project you like – card, scrapbook page, album, 3D item etc.
  • Post your project on your blog, in your gallery or on any other photo-hosting site (such as photobucket or flickr).
  • Click on our inLinkz button below to add a link to your project for our challenge
  • You will have until 7am, Monday, July 23rd to add your link to the list to be eligible to win. And you can enter as many times as you like.
  • For each project you submit, your name will be entered into our monthly draw. The winner will be announced on Monday, August 6th.

Good luck to everyone and we look forward to seeing your projects!


2013 Calendar and Note Pads Tin PDF Handout and Video

Over the last several months I’ve been getting a lot of emails asking when the 2013 Calendar and Note Pad Tins and the refills will be back. I’m excited to announce that for our fourth year in a row, we are finally ready to take pre-orders through the Sunny Stampin’ Store!

For those of you unfamiliar with the Calendar and Note Pad tins let me tell you a bit about them. Back in 2009, I found that I was always scrambling to find something to write on and write with – whether it was when I was at home on the phone trying to take a message, or out and about trying to make a note to myself or wanting to check my calendar. Inevitably when that would happen I never seemed to have a calendar or note pad handy!

That’s when I came up with a solution to my problem – a custom-designed Calendar & Note Pad Tin. I wanted something portable, durable, small and of course pretty. I couldn’t find anything like that…so I made it! I started with a 5 1/4″ x 5 1/4″ hinged CD tin and integrated some customized elements to make it a one-of-a-kind gift. Because I didn’t have a “Just a Note” stamp, I designed the ”Just a Note” greeting that you see on the front of the tin, on my computer.

Download the pdf handout here

Download the Just A Note labels here

You can view a video on how Tracy created this calendar and note pad tin below.

I had the calendar that you see on the inside front cover of the tin (also shown below) custom-made so that it perfectly fit the inside of the tin. The calendars are 4 7/8″ x 4 7/8″. The font used for the months and the date match the font used for the “just a note” on the front of the tin.

calendar and tin

As you can see from the picture of the tin at the beginning of this post, and the picture below, I also had some note-pads custom designed to fit insite the tin. The notepads are 3 3/4″ x 4 3/4″. There’s 50 sheets on the notepad and the lines are black so they match with any color scheme.

calendars and tins

As we did last year, we offering this in several options. Please note that these are ALL pre-orders – we will be taking pre-orders until the end of July and then the orders will start to ship at the end of August 2012 . Because everything is custom-designed and manufactured, I don’t want to order too many and end up with hoards left over, or too little, and then run out.

Different this year – as soon it’s ready – EVERYONE will be receiving the pdf handout and video tutorial on how to create these tins absolutely FREE! So keep your eye here on the blog for that.

There is a lot of info in this post, so please be sure you read it all!

One of the things I do have to give you a heads up about is shipping. As we are located in Canada, the most “cost-effective” option for shipping is Canada Post. I use that term loosly because it’s still not cheap. The only methods of shipping we offer are small packet air (which I don’t really recommend because it is not trackable) and expedited – which is trackable, and the fastest method. We used to offer a small packet surface option, but ran into too many problems with it being waaaaaaay too slow (as in at least 4 weeks to the US), and not trackable.

I do want to assure you that we only charge you what we are charged. We do not mark up shipping. Because we are a small company with small volumes of shipping we don’t qualify for some of those great shipping volume discounts that bigger stores get. If perchance you are overcharged (which we will only know when we start shipping the packages out), we will re-imburse you the difference. Shipping in Canada is based on weight and package size. Because of the weight in particular, for most of you, shipping is probably going to start at about $12 – $15. What I have found though is that the more you get, the better the deal. So if you only want one of’s I would recommend ordering as a group (with a friend or a few friends). So please be prepared.

*For Stampin’ Up! Demonstrators wanting to offer this as a class: as we do every year, we will be re-designing the tin using all Stampin’ Up! products and we will be putting together a cost analysis sheet and suggested pricing if you want to offer this as a class to your customers. If you email us to let us know you are a demonstrator, then we will send it to you once it’s released. The suggested pricing will be assuming that the tins are being made using all SU product of course. I’d love it someone could do me a favour. There are a number of demos that have bought the calendar and note pad bundles every year. I can no longer announce it or let them know on the demo-only boards like Sudsol, and other yahoo groups, so if one of you could let those that might be interested know, I would appreciate it!

So here’s what we have:

Calendar & Note Pad Tin Kit Pre-order – $17.95 CAN These kits include all the supplies needed to make the project shown in the main picture (pencil/pen colors will vary). You’ll receive a pdf handout with the kit and a link to page from which you can view a video on how it’s made.

note pad and tins

Calendar Bundle Pre-order – $7 Each bundle has 5 calendars

calendar and tin

Note Pad Bundle Pre-order – $7 Each bundle has 5 note pads

calendars and tins

Bundle of 5 tins pre-order – $25 Each bundle includs five 5 1/4″ x 5 1/4″ tins

calendar tins

Once again, just a reminder, these are ALL pre-orders – we will be taking pre-orders until the end of July and then the orders will start to ship at the end of August 2012.

Paper Crafter’s Library Members will be receiving the 2013 calendar templates in pdf form for the Desktop and Calendar Easel project as soon as we have them from the printer. Anyone that purchased the Desktop and Calendar Easel tutorial (or who purchases it any time going forward) will also receive it as soon as it’s ready.


Technique Thursday: Applying Alcohol Inks To Metal

This week on Paper Crafter’s Library’s Technique Thursday Sophia continues her series on using Alcohol inks. For the first tag, Sophia shows you how to apply alcohol inks directly to a foil sheet in order to be used as an embellishment.  On the Love You tag, Sophia applies alcohol inks to a die cut image.  Then, she dry embosses the die cut element and shows you how to remove the alcohol inks from the raised surface. 

For those of you unfamiliar with Technique Thursday , this is where we create and feature projects for our Club 52 online class (our year-long technique club), which our Paper Crafter’s Library members also access as a free benefit of their membership.

If you’re interested in checking out what we’ve covered so far, you can look at our Club 52 page. If you’re a technique junkie and would like to learn new techniques (as many of them are ones we have created), or revisit old ones – you can still sign up from this page – you’ll be able to access all 45 weeks we’ve done so far, plus the remaining weeks, and your access to the classroom will last for 15 months.

If you are not already receiving our weekly email newsletter, make sure you take a minute to sign up from the top right sidebar of our blog. Every Monday we create an exclusive project with a video tutorial for all of our newsletter subscribers and Paper Crafter’s Library members. So make sure that you sign up now, so that you don’t miss out!

Techniques and Projects Using Dryer Sheets

Many of us have have used dryer sheets laying around that we just toss in the garbage.  Have you ever thought about using them in your paper crafting?  This week, in the Paper Crafter’s Library, Michelle Wecksler – one of our Designer/Educators has created a series of projects with video tutorials showcasing different ways of using dryer sheets.

For those of you that haven’t yet met Michelle, let me re-introduce her, and then let her tell you about her projects. You can see more of Michelle’s work on her blog Figments of My Imagination.

Michelle Wecksler

“I live in Denver, Colorado and am humbled by the gorgeous Rocky Mountains on a daily basis. I live with my partner Michael and our four-legged kids; Willow the cat and Buddy the dog.

I think of myself as a Renaissance woman when it comes to art – I might be playing with paper one day and mosaics the next! Paper crafting is a special love of mine – just the feel of paper in my hands gets the creative juices flowing! I have been a Stampin’ Up! Demonstrator for 4 years and have had numerous projects published in Paper Crafts magazine. I am also a “recovering lawyer.” After receiving my law degree and becoming an attorney in Atlanta, GA, I spent very little time actually practicing law – it just didn’t warm my heart. Instead I found myself drawn to mediation, consulting and teaching. Currently you can still find me on the road conducting training sessions at corporations on the topics of communication skills, negotiation skills and conflict resolution. Returning to the craft room after a trip keeps me centered.Making art is my true passion! Thank you for letting me share my passion with you.

My biggest goal when it comes to papercrafting and art in general is to honor myself as a creative being and to allow myself to express my creativity! I would also like to continue to find my own voice – my own style – when it comes to my art. The only way for me to do that is to keep creating; to keep being open to making mistakes, and to continue to move forward no matter what my inner critic says! I know that going into the craft room keeps me centered. Making art in any form is my true passion and I appreciate the opportunity to share it with you!

I think sometimes we sit around waiting for the right moment, the right mood, the right inspiration. I don’t know about you, but I’m tired of waiting! I think the best way to jump start your creativity is to just show up at the place where you do your art making, grab the first stamp or tool or card stock or color that jumps out at you and do something with it! When you show your creativity that you are willing to jump in with both feet, your creativity has a tendency to keep running!”

Inked Dryer Sheet Background

We have all played around with the direct to paper technique – taking our ink pads and pressing them directly onto our card stock to create beautiful and interesting backgrounds.  Why not try the same technique for dryer sheets!?  For this project I used my ink pads and some Dazzling Diamonds glitter to create a gorgeous glittery background for the hummingbird image.  This simple technique can create a WOW effect on your cards and paper craft projects!

InkedDryerSheetBackground

Paper Crafter’s Library Members can check out the video and download the pdf handout here.  (You must be logged in to view the video)

 Abstract Dryer Sheet Pieces

I love creating clean and simple cards that can be used for any occasion.  For this card I decided to apply heat to colored dryer sheets to see what might happen!  I discovered that you can make fun little abstract shapes that can be used to easily decorate all-occasion cards.  If you are going to give this technique a try, please heed the warnings!  I set off the smoke detectors in my house on my first attempt!!!!  I strongly recommend doing this project outdoors or in a very well-ventilated area.

AbstractDryerSheetPieces

Paper Crafter’s Library Members can check out the video and download the pdf handout here.  (You must be logged in to view the video)

 Painted Dryer Sheet & Embossed Butterfly Card

I combined two different techniques for today’s card.  First I used some die cut butterflies to emboss my card stock with the Big Shot.  Next I used some shimmer paint to add some bling to my dryer sheet before die cutting the sheet into a butterfly.  See all the details in today’s video and pdf instructions!  Of course, you can use either technique independently for your cards and paper craft projects.  Enjoy!

EmbossedDryerSheetButterflyCard

Paper Crafter’s Library Members can check out t the video and download the pdf handout here.  (You must be logged in to view the video)

 Sprayed Dryer Sheet Die Cut Flower

I love to combine drops of ink refill with water in small spray bottles and use the spray to create different effects on my cards and paper craft projects.  You can use the same spray to create gorgeous colors on your dryer sheets.  Once the sheets are dry, you can die cut them like a piece of card stock.  For this card I layered the colored die cut flowers for the focal piece and added a fun marbled button to the center.

ThinkingOfYouDryerSheetFlower

A video and pdf handout will be available to memebers later this week.

 Dryer Sheet Flower Barrette

For today’s project I wanted to share with you how you can take used dryer sheets from your laundry and make them into gorgeous gifts to share!  This flower on this barrette was created with some basics:  an old dryer sheet , some scissors, a heat tool and a brad!  So simple!  If you are going to give this project a try, please do so outdoors or in a very well-ventilated area (as per the instructions).

DryerSheetFlowerBarrette

A video and pdf handout will be available to memebers later this week.

Trendy Tuesday – Jewelry and Charms

Trendy Tuesday – Jewelry & Charms
By: Katherine Elliot

Jewelry and charms are the ultimate embellishments.   Dangle a pretty trinket or a cute charm on a card or scrapbook page, or design an original wearable handmade creation, and you have transformed a project into a true keepsake.  Below are a few projects and brands that show off this attractive & inspiring trend.   Check out this parade of projects and products and you”ll be charmed, I”m sure…

Shannan Teubner created the keepsake bookmark below with decorative twine & a charm.  The simple project makes a lovely gift.  She created the charm using the tools found at Epiphany Crafts.

Pocket card with charm bookmark, image source withfeathersandsequins.blogspot.com

Chris at Easily Amused has many lovely cards adorned very simply with different charms which match the themes of her cards. 

Goldfish Girl card featuring My Favorite Things stamp, image source Easily Amused

In the example below, an additional close up photo shows more clearly the addition of a crystal bead and metal charm embellishing the card.

Sweet Sunday Take Time card featuring My Favorite Things stamp , images from Easily Amused 

Keep in mind, your card does not need to be elaborate for a charm to sweetly adorn your greeting.

Small Wonder card by Bonnie Klass  featuring greeting from Stampin” Up! , image source Stamping with Klass

  If you”re looking for simple charms like the ones above, your local craft store jewelry aisle is a great source.  Look for charms, beads, jump rings and other jewelry findings that help you create an embellishment that can be easy to attach to a project. 

Beaded charm card, image source Kat n” Drew Cards, wheresyourcolor.blogspot.com

 Not just confined to cards, check out the pearls, pendant and a line of beads added to this scrapbook page.  The added baubles give the impression that this couple will surely be leading a charmed life together!

Scrapbook page featuring line of dangling beads, image source scrappypixie.blogspot.com

Of course, while trinkets & charms are certainly alluring on your paper craft projects,  these fun embellishments can inspire you to branch out and create your own custom jewelry.

Remember this post from the Library?  This simple tile necklace is so pretty and so easy to make.

Check out the “how to” video  at the Papercrafters” Library from this previous post:  Prima Marketing Spotlight Sun Kiss Collection

Stampin” Up! fans may have been sad to see the Simply Adorned line discontinued this year, but that line certainly demonstrated some lovely projects which are still creatively inspiring.

Simply Adorned necklace charm with key and heart trinkets by Robin Spinner, image source Splitcoast Stampers

If you are looking for some more information on how to make your own jewelry and other sources for tools to use, check out some of the instructions and items available at Artbeads.com.

Monkey Business Bracelet, image source and instructions at artbeads.com

Several craft companies have unique charms and fun tools for this trend.   Prima Marketing, Vintaj, Tim Holtz findings, are just a few of the popular brands offering many different styles to suit your taste.

 Sunkiss Metal Charms by Prima Marketing, image source twopeasinabucket.com 

Vintaj Natural Brass Co. has many classic charms and other jewelry making supplies.  Matching hardware and findings make easily attachable charms for your projects.

image source vintaj.com


 image source vintaj.com

Vintaj has also teamed up with Sizzix to create embossing dies that can be used with metal blanks or other malleable metal and run through the Sizzix Big Shot, transforming plain metal charms into a customized piece.

Metal blank embossing die image source vintaj.com

We”re always on the look out for a variety of projects to showcase the trends featured, so check out this very cool 3D project featuring some Tim Holtz embellishments…

Pen & pencil organizer created by Linda Cain, image source inspirationemporium.com

*Tim Holtz Idea-ology WORD STICKS Metal Charm Hardware

Tim Holtz Idea-ology Word Sticks, image source simonsaysstamp.com

Adding a metal charm to your project is not always practical, especially if you”ve made a card you want to send through the mail.  Have no fear, products like the dies below from My Favorite Things, help you make your own paper or chipboard charms which may be much easier to slip in an envelope. 

I Ruff You! card featuring stamps from There She Goes, image source Megan Lock Designs

Die-namics Pet Charms

My Favorite Things Die-namics, image source mftstamps.com

   One last card I must share which shows some attractive nautical charms.  This tri-fold card by Grace Nywening really stands out as an amazing example of a card turned keepsake. 

Smooth Sailing card featuring stamps from Our Daily Bread, image source Th-INK-ingofYou.blogspot.com

Now it”s time to “charm” my husband into letting me spend a little more time in my craft room to try my hand at creating a few of these things.  I hope you”re inspired to do the same.  Happy crafting!


Win a One Year Membership to Paper Crafter’s Library & the June and July 1st Winners!

This past January Paper Crafter’s Library celebrated our first year anniversary – and in that time we have established ourselves as the THE all-in-one learning solution for paper crafters with the largest {and best} online library of video tutorials on the internet. From beginner through to advanced, covering product instruction, techniques and project ideas for stamping, card making, scrapbooking and altered art – we have something for everyone! We’re proud of how far we have come, and we’re hoping you can help us spread the word!

That’s why as part of our first anniversary celebrations we have an exciting new contest which we are running for a total of 9 months – where we will be giving away a total of 18 ONE YEAR MEMBERSHIPS to the Paper Crafter’s Library – each valued at $200! We will announce 2 winners at the beginning of EACH MONTH – we started in April, and we’ll be ending in January of 2013.

There’s several ways to enter, and each way gives you 1 entry into our draw – so the more ways you participate the greater your chances of winning:

1. Put our Fan Badge on the sidebar of your blog or website. In the right hand sidebar of our blog, under the heading “Grab Our Fan Badge” you’ll find a box with the html code which you just need to copy and paste into the sidebar of your blog.

2. Create a post on your blog letting everyone know they can win a One Year Subscription to Paper Crafter’s Library and linking back to this post for instructions on how to win.

3. Post about our give-away on your Facebook Page linking back to this post.

Once you have done any or all of these things, leave us a comment here on this post letting us know, with a link back to your blog or FB page and we’ll pop by for a visit. When you leave your name, make sure that if you don’t put your full last name, at the very least you put your last initial.

So how do you enter if you don’t have a blog or FB page? Simple, leave us comments on our daily blog posts. We love hearing back from you, we love your feedback and we read each and every comment. For every comment you leave on one of our blog posts* you get one entry into that month’s draw. * Please note Freebie Friday is separate from this contest – comments left for our Freebie Friday give-aways do NOT count as entries in this contest.

Remember, we’ll be running this contest for the next 5 months, so you will have LOTS of opportunities to win. The next two winners will be announced at the beginning of August. Please note this contest is open to current Paper Crafter’s Library members – if you are a current member and you win, that time will be added on to the end of your subscription.

Now,  before I announce July’s winners, I realized that June’s winners did not get posted.  I apologize for not realizing it sooner.   So let me start with June’s winners…..

and

And now on to our winners for July…

and

Congratulations to all of you! Please email us at customerservice@papercrafterslibrary.com and put “PCL One Year Subscription Winner” in the subject line. We’ll need you to email us all your info – first and last name, your choice of a username and password, your mailing address and phone number.

We’ll be picking two more winners in August – so if you’ve entered already but weren’t picked, there are still plenty of opportunities to win! Make sure the badge is still there on your blog, put up another post or tweet or FB letting people know about our contest and then leave a comment here in this post linking back, or simply keep visiting and leaving us comments.

Project Newsletter Makeover Challenge – You’re Too Kind Chevrons

Welcome to the Makeover Monday challenge. Every Monday, as part of our project ideas newsletter we’re going to make over a card, scrapbook page or 3D project, showing you how easy it is to use existing designs (your own OR someone else’s) as inspiration. This week, Tracy has designed this You’re Too Kind Chevrons card.

Your challenge – as with our previous Makeover Monday Challenges – is to use our piece as inspiration and make it into a card, scrapbook page, or other project. You can use the layout, the colors, an element you like…it can look like our piece, or nothing at all like our piece. We want to see where YOU take this. This challenge is strictly a “work from your stash” challenge.

As a newsletter subscriber you will have received a link to a private web page, from which you can watch the video tutorial. If you didn’t receive the video tutorial link then please be sure to email us at customerservice@papercrafterslibrary.com. In order to ensure you don’t miss any more of our Makeover Monday Challenge video tutorials, please be sure you sign up for our FREE email newsletter from the top right sidebar of this blog. Please note that the video tutorial will be available for general viewing for one week only – and then will be moved into our library for our members only

Every Monday, here on the blog, we’re going to post the original picture, and the made over picture. You will have ONE week to upload your challenge piece. Instead of a weekly prize though, we’re going to award a prize monthly. So for each week you participate and each project you submit – you will get one entry into our monthly draw. On the first Monday of each month – we will announce one challenge winner, who will be featured as a guest designer on the Paper Crafter’s Library blog as well as our Facebook page. As a guest designer, we’ll feature your biography, some of your favorite paper crafting projects and we’ll link to your blog.

Our inspiration piece, shown below, is a project found on Erin Lincoln’s blog.  We loved the way that Erin used up scrap pieces of brightly colored scrap DP to create the background for her card.

Here are the details on how you can participate in the Makeover Monday Challenge:

A new Makeover Monday Challenge video tutorial will be emailed out to newsletter subscribers every Monday (so make sure you are signed up). Then, here on the blog, we will post a picture of our inspiration piece and made-over project along with an Inlinkz button for you to enter your project. Here are the details:

  • Work from your own stash to create a project based on the inspiration project provided – you can use any products you would like, and make any type of project you like – card, scrapbook page, album, 3D item etc.
  • Post your project on your blog, in your gallery or on any other photo-hosting site (such as photobucket or flickr).
  • Click on our inLinkz button below to add a link to your project for our challenge
  • You will have until 7am, Monday, July 16th to add your link to the list to be eligible to win. And you can enter as many times as you like.
  • For each project you submit, your name will be entered into our monthly draw. The winner will be announced on Monday, August 6th.

Good luck to everyone and we look forward to seeing your projects!


2013 Calendar and Note Pads Tins Pre-Order is On!

note pad and tins

Over the last several months I’ve been getting a lot of emails asking when the 2013 Calendar and Note Pad Tins and the refills will be back.  I’m excited to announce that  for our fourth year in a row, we are finally ready to take pre-orders through the Sunny Stampin’ Store!

For those of you unfamiliar with the Calendar and Note Pad tins let me tell you a bit about them.  Back in 2009, I found that I was always scrambling to find something to write on and write with –  whether it was when I was at home on the phone trying to take a message, or out and about trying to make a note to myself or wanting to check my calendar.  Inevitably when that would happen I never seemed to have a calendar or note pad handy!

That’s when I came up with a solution to my problem – a custom-designed Calendar & Note Pad Tin.  I wanted something portable, durable, small and of course pretty.  I couldn’t find anything like that…so I made it!   I started with a 5 1/4″ x 5 1/4″ hinged CD tin and integrated some customized elements to make it a one-of-a-kind gift.  Because I didn’t have a “Just a Note” stamp, I designed the ”Just a Note” greeting that you see on the front of the tin, on my computer.  

I had the calendar that you see on the inside front cover of the tin (also shown below) custom-made so that it perfectly fit the inside of the tin. The calendars are 4 7/8″ x 4 7/8″. The font used for the months and the date match the font used for the “just a note” on the front of the tin.

calendar and tin

As you can see from the picture of the tin at the beginning of this post, and the picture below, I also had some note-pads custom designed to fit insite the tin. The notepads are 3 3/4″ x 4 3/4″. There’s 50 sheets on the notepad and the lines are black so they match with any color scheme.

calendars and tins

As we did last year, we offering this in several options. Please note that these are ALL pre-orders – we will be taking pre-orders until the end of July and then the orders will start to ship at the end of August 2012 .  Because everything is custom-designed and manufactured, I don’t want to order too many and end up with hoards left over, or too little, and then run out.  

Different this year – as soon it’s ready – EVERYONE will be receiving the pdf handout and video tutorial on how to create these tins absolutely FREE! So keep your eye here on the blog for that.

There is a lot of info in this post, so please be sure you read it all!

One of the things I do have to give you a heads up about is shipping.  As we are located in Canada, the most “cost-effective” option for shipping is Canada Post.  I use that term loosly because it’s still not cheap.  The only methods of shipping we offer are small packet air (which I don’t really recommend because it is not trackable) and expedited – which is trackable, and the fastest method.  We used to offer a small packet surface option, but ran into too many problems with it being waaaaaaay too slow (as in at least 4 weeks to the US), and not trackable.

I do want to assure you that we only charge you what we are charged.  We do not mark up shipping. Because we are a small company with small volumes of shipping we don’t qualify for some of those great shipping volume discounts that bigger stores get.  If perchance you are overcharged (which we will only know when we start shipping the packages out), we will re-imburse you the difference.  Shipping in Canada is based on weight and package size.  Because of the weight in particular, for most of you, shipping is probably going to start at about $12 – $15.  What I have found though is that the more you get, the better the deal.  So if you only want one of’s I would recommend ordering as a group (with a friend or a few friends).  So please be prepared.

*For Stampin’ Up! Demonstrators wanting to offer this as a class: as we do every year, we will be re-designing the tin using all Stampin’ Up! products and we will be putting together a cost analysis sheet and suggested pricing if you want to offer this as a class to your customers. If you email us to let us know you are a demonstrator, then we will send it to you once it’s released.   The suggested pricing will be assuming that the tins are being made using all SU product of course.  I’d love it someone could do me a favour.  There are a number of demos that have bought the calendar and note pad bundles every year.  I can no longer announce it or let them know on the demo-only boards like Sudsol, and other yahoo groups, so if one of you could let those that might be interested know, I would appreciate it!

So here’s what we have:

Calendar & Note Pad Tin Kit Pre-order – $17.95 CAN These kits include all the supplies needed to make the project shown in the main picture (pencil/pen colors will vary).  You’ll receive a pdf handout with the kit and a link to page from which you can view a video on how it’s made.

note pad and tins

Calendar Bundle Pre-order – $7 Each bundle has 5 calendars

calendar and tin

Note Pad Bundle Pre-order – $7 Each bundle has 5 note pads

calendars and tins

Bundle of 5 tins pre-order – $25 Each bundle includs five 5 1/4″ x 5 1/4″ tins

calendar tins

Once again, just a reminder, these are ALL pre-orders – we will be taking pre-orders until the end of July and then the orders will start to ship at the end of August 2012.

Paper Crafter’s Library Members will be receiving the 2013 calendar templates in pdf form for the Desktop and Calendar Easel project as soon as we have them from the printer.  Anyone that purchased the Desktop and Calendar Easel tutorial (or who purchases it any time going forward) will also receive it as soon as it’s ready.

Okay, and now info about the give-away.

I will be giving away the completed Calendar and Note Pad tin to two lucky winners. All you have to do to enter is leave a comment in the comments section of this post.  You have until July 31st to enter this give-away.  Winners will be announced August 1st and pre-orders will begin to ship end of August.