Featured Artist/Designer: Jean Martin

Today on the Paper Crafter’s Library blog, we’re continuing our weekly featured artist spotlight whereby each week we spotlight a different artist/designer in the paper crafting & mixed media world and introduce you to their fabulous work.

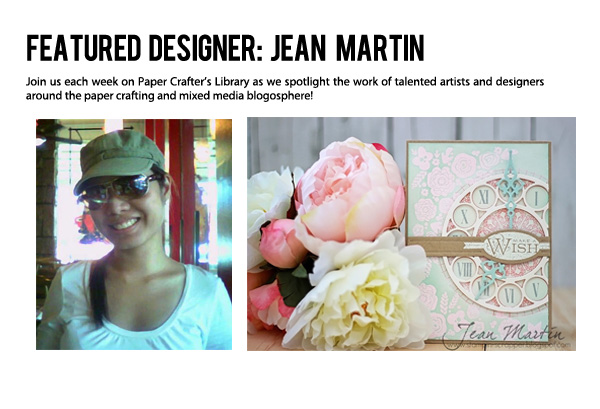
Today we’re thrilled to welcome – Jean Martin

Before we show you her fabulous projects, let’s get to know her a little bit more…

502jeanmartinheadshotHi! My name is Jean Martin and I live in New York with my husband Ren and our 3 cats. I tried my hand at Scrapbooking in 2009 but did not keep at it for long. In 2010, I discovered card making and blogging. I fell in love with the craft as well as the wonderful people in blogland. I haven’t looked back since and have been very fortunate to be a part of a few amazing design teams. My style is a combination of different styles. In fact, I don’t think there’s a category for it. Lol. It’s been evolving on me ever since I started card making. Lately though, I’ve been calling my style Clean and Simple Shabby Chic. I love to stamp and make my own background papers. I also love to make layered cards. Recently, I’ve been trying out 3D projects. I’m learning and growing in this craft every single day and I hope my readers enjoy what I put out there. I was thrilled to be invited as a Featured Guest Designer here in Paper Crafters Library. I have a card and a tutorial for you today. I hope you’ll enjoy it! 

Blog: http://stampin-scrapper.blogspot.com/

Card Project

 502jeanmartinbanner

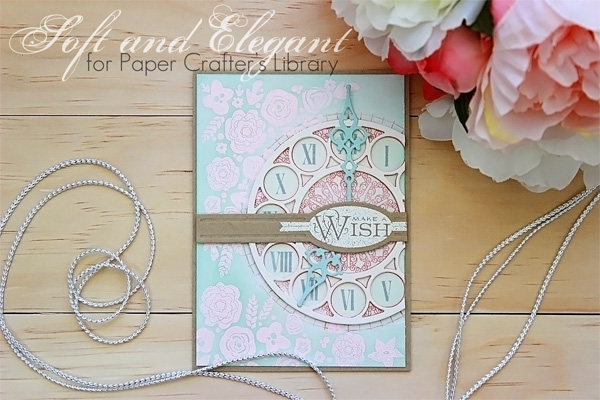
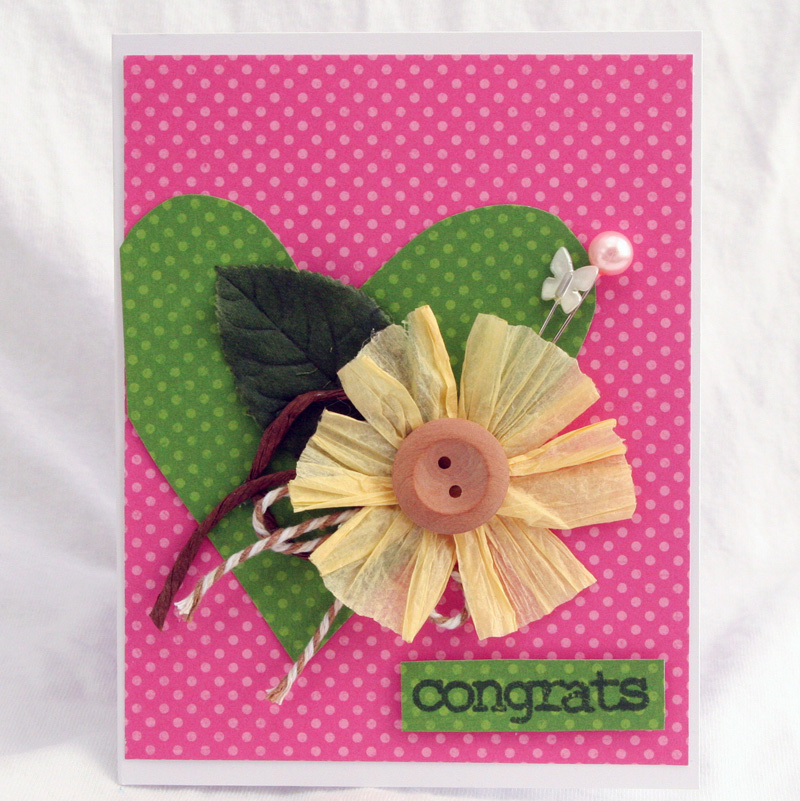
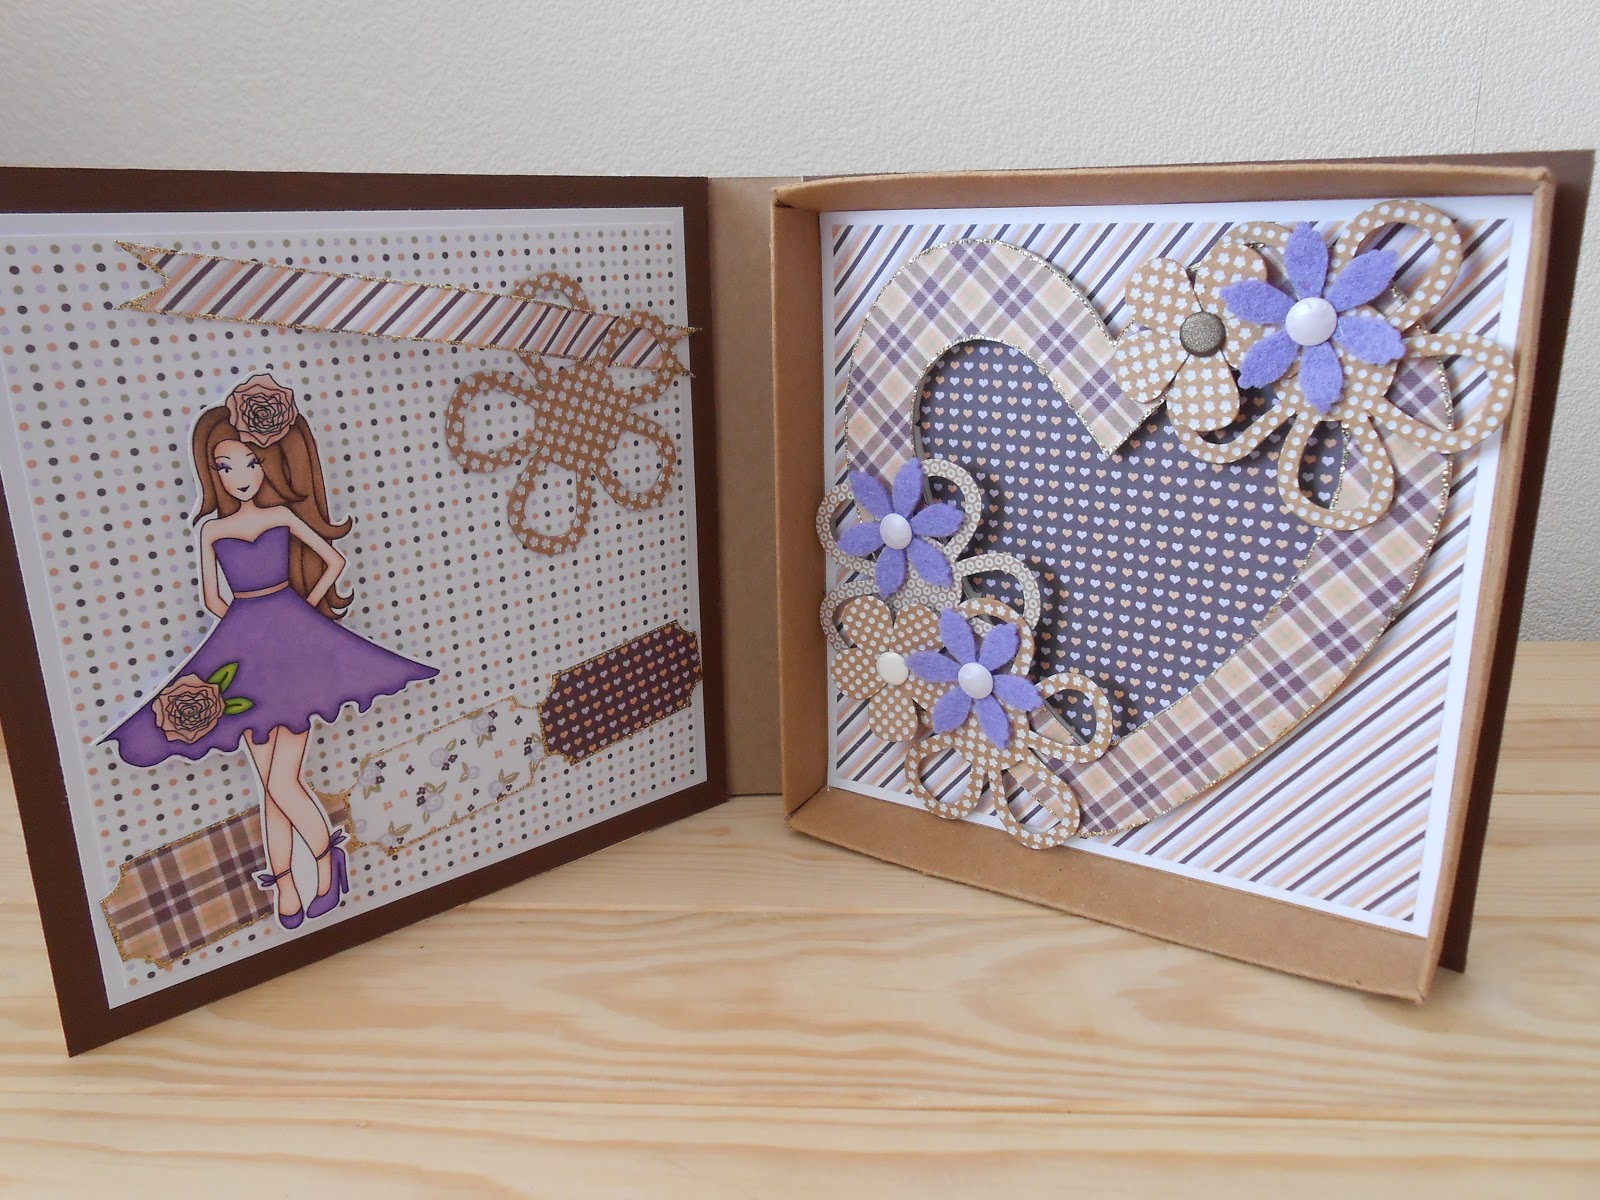
I have a card for you today and I would like to take you through a small tutorial on how I create my cards. I love cards with a lot of layers and soft pretty colors. This one has a whole lot of those in store. So sit back and I hope you enjoy this.

 502jeanmartin1

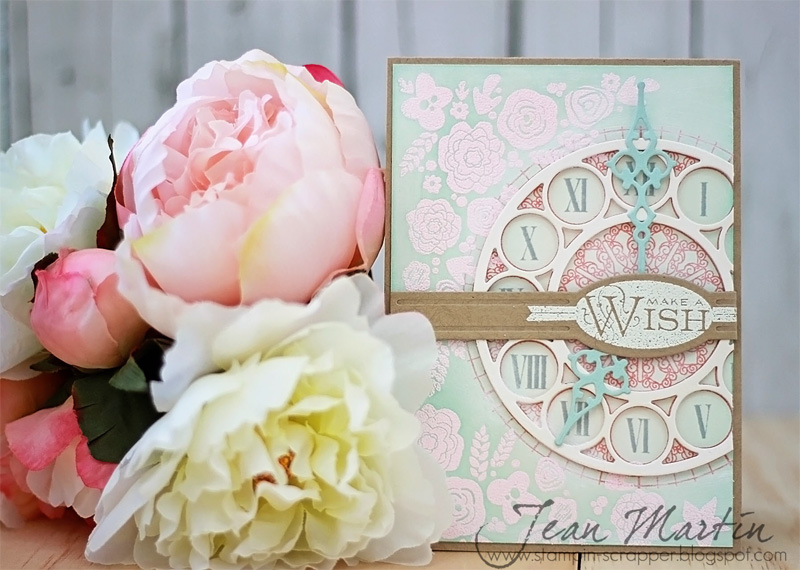
Here’s a close up of my card to give you a sense of how many layers I used and what basic steps I took to create it.

502jeanmartin2

{1} Stamp floral image from PTI’s Mini Blooms Stamp Set with Versamark Ink.

{2} Heat emboss with pink embossing powder.

{3} Ink edges with Hero Arts Soft Pool Ink.

502jeanmartin3

{4} Stamp the clock face image from PTI’s Hands of Time Stamp Set in Melon Berry.

{5} Stamp the numbers in Hero Arts Soft Granite. Dab some white acrylic paint around the clock face.

{6} Die cut the clock face with PTI’s Clock Face Die and attach with foam tape.

{7} Die cut the clock hands from PTI’s Hands of Time Die and the belly band from PTI’s Photofinish Strips Die Collection
502jeanmartin4

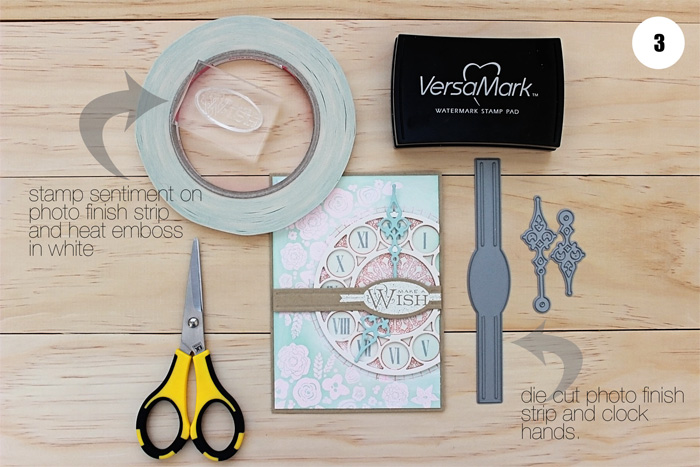
{8} Stamp the sentiment Make a Wish from PTI’s Everyday Photofinishers Stamp Set in Versamark Ink and heat emboss with white embossing powder.

{9} Adhere the clock hands with some foam tape and the belly band with a strip of adhesive.

{10} Adhere the decorated panel onto main card base.

502jeanmartin5

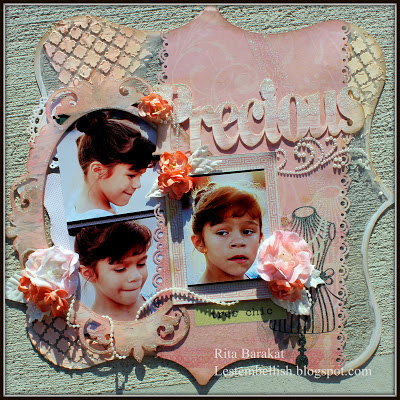
Here’s a close up of my card and all the little details in it. I know there are a lot of steps that went into making it. But in the end, I think that a card that has a lot of details and was lovingly put together will really be appreciated by its recipient.

502jeanmartin6

I hope this has inspired you to try making more “layered” cards. All the effort is totally worth it in the end. Besides, it allows you to spend more crafty time in your craft room!


Supplies (All supplies are from PTI unless otherwise noted)

Cardstock – Kraft, Vintage Cream
Stamps – Mini Blooms, Hands of Time, Everyday Photofinishers
Dies – Hands of Time, Everyday Photofinishers
Inks – Berry Sorbet, Soft Pool, Soft Granite (Hero Arts Shadow Inks), Versamark
Others – pink, white embossing powder (Stampendous), white acrylic paint dabber (Ranger)


We hope you have enjoyed today’s projects courtesy of Jean Martin.  Also, be sure to stop by Jean’s blog to see even more of her beautiful work (and let her know we sent you).


Featured Company: Maya Road

I’m so excited to bring you this week’s Featured Company which is also a returning company: Maya Road!    We are long time fans of Maya Road and are so happy they have returned. 

About Maya Road

Maya Road was born in 2003. Two sisters, Deborah and Caroline, were spending the weekend together, and went shopping for all of the latest scrapbooking supplies. As they browsed the aisles, they were struck by how difficult it was to find unique scrapbooking products and how expensive products were. They started chatting about products they wanted to see, and they brainstormed how they could combine their business knowledge and design skills to produce the unique products for scrapbooking. Thus, Maya Road was formed.

After much soul-searching, they decided to launch Maya Road nationally with 38 unique products at HIA (the prior name for CHA Tradeshow) in 2004. Since then Maya Road has added over 2000 new products to their line. Creative items include such as chipboard, trims, twines, metals, Maya Mists, embellishments and more.

Maya Road was founded on a belief in each person’s creative ability and on the commitment to making high quality scrapbooking products available and affordable to everyone. Maya Road believes that scrapbooking and memory keeping should be an everyday event available to everyone.

Our signature products are carried in over 1000 scrapbooking stores in the US, Australia, Canada, the UK and beyond. People often ask where the term “Maya Road” comes from. Maya is actually a combination of nicknames, Caroline and Deborah, had as kids. They looked up “Maya” and realized it meant “The Art of Creation” and thus, Maya Road was born.

Follow Maya Road on Twitter, Facebook, Pinterest, YouTube and on their Design Team Blog

Twitter: http://twitter.com/#!/mayaroad

Facebook: https://www.facebook.com/mayaroad

Pinterest: http://pinterest.com/mayaroad/

YouTube: http://www.youtube.com/user/MayaRoadJourney/videos


Special Maya Road Guest Designer

Today we also have a special Maya Road Guest Designer. Caroline Lau is one of the owners of Maya Road as well as designs for the company.  We are so excited to have her showcase her work today on Paper Crafter’s Library. You can leave a comment below the post telling us what you like about her projects for a chance to win the Maya Road prize package shown below.
501PCL giveaway

You can see Caroline’s fabulous projects below, but first, here is a little more about her:

501carolinelauheadshotCaroline Lau is one of the partners/owners of Maya Road. Caroline started Maya Road at the end of 2003 with her sister. After a long career as a Chemical Engineer, Caroline left her job to work on Maya Road full time over 8 year ago. Caroline’s work has been published in magazines such as Creating Keepsakes, Scrapbooks, Etc, Paper Crafts, Memory Makers and Somerset Studio.


She is thrilled to be able to travel around to share with everyone her love of Maya Road products!In addition to Maya Road, Caroline enjoys spending time with her family – David (husband) and two kids (Noah and Olivia). Caroline also enjoys soccer, sewing, running and yoga.

Maya Road Card Projects

501carolinelaucard 1
Supplies needed:

Card 1
Card base – White

Patterned paper (Bo Bunny Dots)
Maya Road Vintage Pale Pink Pearl Pins
Maya Road Vintage Pearl Butterfly Pins
Maya Road Alterable Wood Buttons
Maya Road Canary Paper Twine Cording
Maya Road Fabric Leaves
Maya Road Earth Paper Twine Cording
Maya Road Tiramisu Twine Cording
Maya Road Card Sentiments Stamp Set
Adhesive
Scissors
Foam Dots
Paper Trimmer
Black Ink Pad
Acrylic Block

Instructions

1.Cut the pink patterned dot paper to fit on card base. Leave a 1/4″ white edge showing so cut your pink paper 1/2″ smaller than the card base for the length and width.
2. Free hand cut the green heart and attach it to the pink paper. Attach the pink paper to the card base.
3. Cut three – 2″ long pieces of the Canary Paper Twine Cording. Unravel each and twist slightly in the middle to form three bow tie shaped pieces. Glue them together as shown to form flower. Add large Alterable Button to the middle.
4. Cut a 4″ long piece of the Earth Paper Twine Cording. Curl as shown and attach to the back of the flower.
5. Attach the fabric leaf to the back of the flower.
6. Take a 5″ piece of the Tiramisu Twine Cording and tie a bow. Attach to the back of the flower.
7. Attach the flower to the card and add the two pins.
8. Stamp the sentiment onto the green patterned paper. Cut out. Attach to the card with foam dots.

501carolinelaucard 2

Card 2
Card base – White
Patterned paper (Bo Bunny Dots/ Fancy Pants/ MME)
Maya Road Crystal Pin
Maya Road Alterable Wood Buttons
Maya Road Cloud Twine Cording
Maya Road Blue Mojito Twine Cording
Maya Road Card Sentiments Stamp Set
Maya Road Canary Yellow Tu-Tu Tulle
Maya Road Mini Wood Ruler
Orange Brad (Jenni Bowlin)
Adhesive
Scissors
Foam Dots
Paper Trimmer
Black Ink Pad
Acrylic Block


Instructions.
1.Cut the lace paper to fit onto the card base. Leave a 1/4″ white edge showing so cut your pink paper 1/2″ smaller than the card base for the length and width. Next cut the dot paper a 1/2″ smaller than the lace paper for the length and width.
2. Glue patterned papers together and onto card.
3. Take a 5″ long piece of the Tu-Tu Tulle. Roll into a spiral to form a flower. Add a small Alterable Button to the middle. Trim the excess tulle so that the diameter of the flower is about 1.5″.
4. Cut two two leaves free hand from patterned paper. Glue to the back of the flower.
5. Cut a 4″ long piece of the Cloud White Paper Twine Cording. Curl and attach to the back of the flower.
6. Stamp the sentiment onto the orange patterned paper. Cut out.
7. Assemble the card. Add the ruler, flower, brad and pin.
8. Tie a bow using 5″ of Blue Mojito Twine Cording. Attach to card.
9. Attach the word sentiments with foam dots.


We hope you have enjoyed today’s feature. We want to extend a sincere thank you to Caroline Lau for her fabulous project and Maya Road for sharing their company with us. Be sure to visit Maya Road to see more of their great products.

In order to enter the give-away to win the fabulous Maya Road prize package shown above, please leave us a comment in the comments section of this post. Winner will be announced next Wednesday on the Paper Crafter’s Library blog!

Featured Company: Faber-Castell Design Memory Craft

DMC_Newlogo_RegMark_2012
I’m so excited to bring you to this week’s Featured Company and a returning company: Faber-Castell Design Memory Craft! In today’s spotlight you’ll learn more about Faber-Castell, see a fantastic project by one of their designers and have the opportunity to win a prize package consisting of their Gelatos Colors shown below (details at the end of this post).

 501prizegiveaway

About Faber-Castell Design Memory Craft

Founded in 1761, Faber-Castell Design Memory Craft is a leading manufacturer in high quality crafting supplies. count

The 8th generation behind Faber-Castell Design Memory Craft: Count Anton Wolfgang von Faber-Castell.
2011 was a milestone year for Faber-Castell USA as we celebrate the 250th Anniversary of Faber-Castell. We are proud of our longevity and what it represents – consistent delivery of a quality experience in all areas of business. In keeping with Lothar von Faber’s quote, “to rise to the highest rank by making the best that can be made in the whole world” Faber-Castell USA is committed to staying true to this vision of quality, tradition, and innovation now and in the future.

Product: Paper Crafter Crayons are highly pigmented wax crayons that can be used on all types of crafting surfaces such as cardstock, chipboard, canvas, embossed paper and wood. The unique twist-up design also allows you to sharpen the crayons. Available in 24 brilliant colors.


Special Faber-Castell Design Memory Craft Guest Designer

Today we also have a special Faber-Castell Guest Designer. Rita Barakat is part of the 2013 Faber-Castell Design Team. You can leave a comment below the post telling us what you like about her project for a chance to win a prize package consisting of their Gelatos Colors pictured above.
You can see Rita’s fabulous project below, but first, here is a little more about Rita:

501designerheadshotRita channels her boundless energy into her family; wife and mother to five children, directing a youth choir & drama team and her eclectic paper crafting projects. Rita is a mixed media artist and educator. Her work has been published in various magazines. She works with several manufactures in the industry including Clear Scraps, DCWV, Susan K Weckessor, and Artiscellar.
http://letsembellish.blogspot.com/


Designer Project:

501pic3

Hey there bloggers Rita Barakat here! Today I am sharing a layout I made on a Clear Scraps 12×12 XL acrylic shape; I photographed it twice so you could see the details- once on cement (above) and the other with a piece of orange card stock behind it.

501pic2

The title and large frame are also acrylic pieces.

501project1


Altered with gesso and Gelatos.

501project2

Color with Gelatos…

501project3


Blend with a sponge. 

501project4

Add some glitter!

501project5

501project6 501project7


Gelatos® Colors
arecreamy sticks of water-soluble medium that glides smoothly onto nearly any surface to create rich swaths of color. Use it on all types of paper, cloth, canvas, wood, rubber, foam, and clear stamps.  Available in 36 colors.
• Lightfast
• Acid-free
• Archival
• Odorless
• Permanent
• Works on Stamps
• Creat on Dark Surfaces


We hope you have enjoyed today’s feature. We want to extend a sincere thank you to Rita Karabat for her fabulous project and Faber-Castell Design Memory Craft for sharing their company with us. Be sure to visit Faber-Castell to see more of their great products. 
In order to enter the give-away to win the prize package shown above, please leave us a comment in the comments section of this post. Winner will be announced next Wednesday on the Paper Crafter’s Library blog!

Trendy Tuesday – Enamel Dots

Trendy Tuesday – Enamel Dots

by Katherine Elliot

Have you seen these pretty, shiny dots on projects lately?  My guess is you”ve seen them, and seen a lot of them.  They are popular, fun, and simple embellishments to add to your paper crafts.  More brands are offering them, too, so take a look at these projects and be inspired to dot, dot, dot away!


Card by Angie Tieman, image source Schwooo!

My Minds Eye is the most prevalent brand of enamel dots.  MME offers packages of coordinating color dots that match many of their paper lines.  As shown in Debby Hughes” super clean & simple card below, however, finding dots that match a patterned paper is just a bonus, as they stand out great on their own.


Card by Debby Hughes, image source Lime Doodle Design

Lost & Found 3 Ruby Enamel Dots 40/Pkg LF3044

My Minds Eye Enamel Dots, image source Stuff4Scrapbooking

Enamel dots accent other trendy shapes, like the arrows seen in Danni Reid”s card shown here…

Danni Reid for MMECard by Danni Reid, image source My Minds Eye blog

The colorful dots make great flower centers, too, as shown in Nicole Laha”s card below…

Card by Nicole Laha, image source, She Zig Zags

More MME dots decorate this colorful scrapbook page…

Jana Eubank for MME

 Scrapbook page by Jana Eubank, using MME Enamel Dots, image source

Enamel dots add some dimension to your project and can be a refreshing alternative to rhinestones or other bling you may be otherwise drawn to use.

Card by Misty Lynn, image source Little Buck”s Creations

Sssproject2_photo2Card and image source from Nichol Magouirk

Other brands offer enamel dots, too.  We all appreciate coordinating colors that match the vast array of brands and various product lines, so you may be interested in these other options from Teresa Collins Designs and Basic Grey…

Card by LeNae Gerig, image source Paper Wishes

Now and Then enamel dots from Teresa Collins Designs, image source Paper Wishes


Basic Grey Candy Buttons

 Basic Grey candy buttons look great in the pretty spring colors coordinating with Adrienne Alvis” Project Life page below…

Project Life page by Adrienne Alvis,  embellished with candy buttons, image source Paper Fab

Other embellishments that closely resemble enamel dots or can be used very similarly are easy to find, too.  Whether you prefer the original shiny opaque embellishments, or something with a little more bling, both can easily be mixed and matched.  Mini pearls and gems from Doodlebug Designs and Studio Calico and Candi Dots from Craftwork Cards are just a few options to consider.

Image coming soon!

Doodlebug Design mini pearls

Studio Calico enamel dots & gems

Decorated box by Emma Smith using Candi dots, image source Craftwork Cards blog 
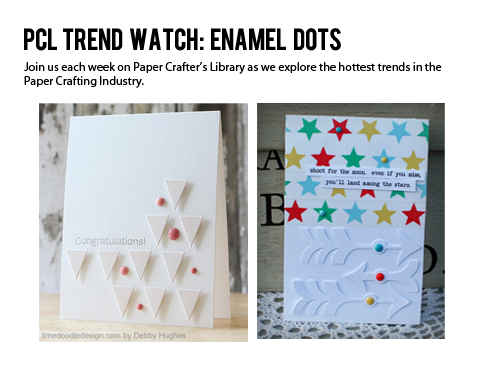
Candi dots from Craftwork Cards, image source Scrapbook.com

Another fun idea is to create your own dots!  This could be a great DIY project for some neglected nail polish found in your beauty supplies, as JJ Bolton used in her card below.  Check on her link for information on how she made her own version of enamel dots.

Card by JJ Bolton, DIY dots using nail polish, image source Ribbon Girls

For this last project I”ll share today from the talented Dana Fleckenstein, I just want to reach out and touch these pretty dots…

 Card by Dana Fleckenstein, image source Pixels and Glue

Have you noticed all the different sizes of dots that are including in most brands” enamel dots sets?  The various sizes look like such pretty droplets of paint, or maybe like drops of colorful rain that fell from a make believe rainbow…  Ah… to dream…  Happy crafting, everyone!

Free Project of the Week – Funky For You – 04 26 2013

This week for our Free Project of the Week we have this Funky For You card.  I just love how this card came together.  I chose the patterned paper first then wanted to figure out how to use a few of the funky patterns.  I thought pop them!  So I die cut a few circles to highlight the patterned paper.  Adding in this simple greeting allowed the patterns to pop off the card.  This is a very simple and fun way to use patterned paper!

FunkyForYou-04262013-550W

You can download the pdf handout here

You can watch a video on how to create the Funky For You card below:

If you enjoyed today’s project, you enjoy our style of teaching and would like to learn even more I encourage you to check out the benefits of becoming a Paper Crafter’s Library member.

pctracysiggy

Featured Artist: Amy Wanford

Today on the Paper Crafter’s Library blog, we’re continuing our weekly featured artist spotlight whereby each week we spotlight a different artist/designer in the paper crafting & mixed media world and introduce you to their fabulous work.

Today we’re thrilled to welcome – Amy Wanford

Before we show you her fabulous projects, let’s get to know her a little bit more…

amywanfordheadshotHey! I’m Amy Wanford, also known as Aimes. I’m a tea, toast and  paper-crafting addict from England and currently live in Sheffield with  my fiancé. I’ve always loved getting my craft on with various mediums and I discovered the joys of stamps and ink in 2008 and started my blog, Crafting Confessions in 2009.  I’ve been lucky enough to have my projects published in magazines such as Paper Crafts and CARDS and serve on design teams. I currently design for Clearly Besotted Stamps, Uniko Studio and the challenge site, CASE Study. The highlight of my crafting adventures so far has been designing stamp sets and seeing them being manufactured for purchase.

When it comes to creating, I’m a card maker and one that gravitates  towards a clean and simple style (CAS). CAS and graphic designs make my  heart skip a beat. I love to think outside of the box and use a product  for a purpose it maybe wasn’t intended for, or use items around the house and incorporate them into my designs. I also  get a real kick out of creating interactive cards: it’s like creating  magic before the recipient’s very eyes!

I’m delighted to be featured here on Paper Crafter’s Library and hope you’ll like my projects.

So, let’s get straight to it!

Card Projects

amywanfordWith Deepest Sympathy2

First up is a card that we as card-makers all struggle to create at one  point or another: sympathy cards. If I know the recipient well, then  I’ll brave a bit of colour in my design – otherwise I tend to stick with neutrals.

amywanfordWith Deepest Sympathy Close Up2

I find that vellum is a fantastic material to work with (and not just for sympathy cards), I honestly don’t use it enough! On this project I’ve emphasised the calming nature of that beautiful water lily stamp by embossing it on to vellum and using pencil crayons on the reverse to add colour. The result of shading on the reverse is a more muted, subtle splash of colour. Vellum is also used to mat and layer my focal panel onto an aqua card base. Using vellum means it will coordinate perfectly; acting as a lighter shade of whatever card I use as my card base.


Supplies

Card 1
Stamps: Water Lily and Sentiment from the set ‘With Love’ (Clearly Besotted Stamps)
Ink: London Fog (Memento)/Versarmark (Tsukineko)
Cardstock: Aqua Mist, Vellum, White (Papertrey Ink)
Accessories: Detail White Embossing Powder (Stampendous)/Canvas and  Linen Impression Plate (Papertrey Ink)/Pencil Crayons (Craft Supply)

Next is a bolder project that hits two trends on the scene right now: feathers and gold!

amywanfordFeather Thank You3

My feathers were cut using my Cricut Mini from white cardstock. I like  to bulk cut embellishments from white cardstock as I can add  coordinating colour to them later for future projects using alcohol ink  markers. So these feathers were originally white, but I coloured them with a black marker before dabbing my Versamark pad over the tips of them. I then sprinkled gold embossing powder over the inked tips and melted the powder with a heat gun to create this fun, trendy  embellishments. Tip: Make sure the alcohol ink is dry before sprinkling your embossing powder over the clear ink, otherwise it will stick all over the feather!

Supplies
Card 2
Stamps: Sentiment from the set, ‘Label Love: Thank You’ (Uniko Studio)
Ink: Tuxedo Black (Memento)/Versamark (Tsukineko)
Cardstock: White (Papertrey Ink)
Accessories: Black Alcohol Promarker (Letraset)/Gold Embossing Powder  (Stampendous)/Canvas and Linen Impression Plate (Papertrey Ink)/Feather  from Southwest Cartridge, Cricut Mini (Cricut)


We hope you have enjoyed today’s projects courtesy of Amy Wanford. Also, be sure to stop by Amy’s blog to see even more of her beautiful work (and let her know we sent you).

Winner of Fancy Pants Give-Away


I’d like to extend a HUGE thank you to Fancy Pants Designs and their designer Vicki Chrisman for sharing such a wonderful project and for their generous give-away of their Park Bench Collection Pack.

parkbenchcollectiongiveaway

And now, the moment you’ve all been waiting for…….the winner is…… Sheila R!

417winner

Congratulations Sheila!! Be sure to email us at customerservice@papercrafterslibrary.com to claim your prize. Please be sure to put “Fancy Pants Designs” in the subject line of the email, and then in the email itself, be sure to include your full mailing address and phone number.

For those of you that didn’t win, each week on PCL we feature a different company, and each of those companies generously sponsors a prize. We will be back next week with more features.

andreasiggypcl

Trendy Tuesday – Frogs & Toads

Trendy Tuesday – Frogs & Toads
by Katherine Elliot

One of the first signs of spring around my neck of the woods is the sound of tree frogs chattering away in the morning, waking up and thawing out from a long, cold winter.  If it doesn”t yet look like spring where you are, let me just say, it looks like it”s on the way!  Let me admit now,  it”s hard to separate frogs and toads in the paper craft world, so these little creatures will share the spotlight this week.

Birthday card by Jana Millen, image source This Little Card of Mine

Jan Millen”s adorable birthday card shown above features a very cute frog from the Paper Smooches stamp set, Little Fellas.  You may notice many of the projects and products featured are biased towards the frog variety.  Maybe the famous Muppett, Kermit the Frog, has influenced mainstream culture over the years, I really cannot say, but hey, they are both cute.

Want a little information on the official differences between a frog and toad?  Just do a search to find fun facts like the link here.  Luckily, there will be no science quiz at the end of this post, so just enjoy these projects and the “toadily unfrogettable” puns you can find to match them!

GretchenMcElveen_Birthday Boy card3_Toadally awesome card

Card by Gretchen McElveen featuring Bella Blvd Toadily Cool stamp  image source Bella Blvd.

Unity Stamp branded with Bella Blvd, image source Scrapbook.com

Card by Kecia Waters featuring Frog Eating Fly stamp from Rubbernecker Stamps, image source Stamping Deets

Vicki Parson did a terrific job coloring her digital stamp image, Frog Boy from Hambo Stamps on her beautifully embellished card.  The digital image download comes with a few phrases, too, including the cute one she used.  I love this fun take on a get well card.

 Get Well card by Vicki Parson, image source StampSmiles.com

“Hello, Ma Baby, Hello My Darling….” Anyone else remember the singing frog from the old Looney Tunes show?  This DRS Designs Singing Frog stamp captures that childhood memory for me.  Now if I can only get that song outta my head…

Wonderful Day card by Jennifer E, image source Ink n” Scrap Habits

A smiling frog looks so cheerful on a card.  Papertrey Ink has a stamp set and matching dies for their Boy Basics Frog Hop Mini Stamp set.  The stamp and another sweet punny greeting was used in the project below. Hoppy Birthday

Card featuring Frog Hop Mini Stamp by Debbie Olson, image source Papertrey Ink

Inky Antics” line of “Honey Pop” stamps are designed to go with unique honeycomb papers, to allow you to insert a surprise pop-up on the inside of a card.  Of course they have a frog/toad theme set that includes cute images and sentiments.

Frog Honeypop Clear Stamp Set HPOP-11027

Frog Honeypop Clear stamp from Inky Antics, image source Stuff4Scrapbooking

The honeycomb paper pop-ups look like a lot of fun.  Check out the pop-up honeycomb toadstool in the card below created by Michelle Pearson.


Card by Michelle Pearson featuring honeycomb pop-up using Honey Pop stamp, image source Inspiration Blooms

 And now, for the more serious minded toad lover…  

Sir Toad stamp from Stampendous

Stampendous” Sir Toad stamp has a vintage vibe that looks great in the project featured below.

Sir Toad Muchas Gracias, image source Stampendous.com

Of course nothing beats the cute and simple for sweet CAS projects.  The images from Hero Arts may suit the occasion you”re looking for.  Hero Arts” Adorable Creatures digital download includes this cutie…

Card by Shari Carroll featuring Lily Pad Greetings stamps from Hero Arts

Digital stamps, Adorable Creatures from Hero Arts, image source Two Peas in a Bucket 

Looking for something other than a stamp?  Lifestyle Crafts offers this sweet Frog die.

frog (leap frog)

 QuicKutz Leap Frog die from Lifestyle Crafts

Froggy embellishments are fun, too.  Eyelet Outlet offers some of the largest variety of brads, eyelets and “quicklets” I”ve seen (quicklets are like eyelets, just even easier to use).  Check out their frog brads and lily pad quicklets…

Frog brads and Lily Pad Quicklets from Eyelet Outlet

The unique shape of a frog or toad makes it a great creature to recreate by “Punch Art.”  A selection of punched circles, ovals, and small flowers created this lily pad posed frog on Josee Smuck”s card featured here…

Punch art frog card by Josee Smuck, image source Stamping Jo.com

A layer of patterned paper on this next punch art frog offers another option for this technique.  And if you ask me, I”d have a hard time not adding a couple dimensional googly eyes to a funny fella like this…

Frog box

Punch, die shape art Frog Box from Fiskars.com

 For an interactive, “fun for the whole family” paper craft project of the week, check out these origami frogs.  Do you remember making these in school?  I do!

Origami Frogs for passover

Origami Jumping Frogs, image source CreativeJewishMom.com

Check out a quick visual tutorial for how to make Origami Jumping Frogs at Nice Hobbies.org.

Now I must be hopping right along preparing for another trendy topic that I hope you”ll find ribbit-ing!
(I know, groan….)   😉

Happy crafting, everyone.

Free Project of the Week – You Make Me Happy – 04 19 2013

This week for our Free Project of the Week we have this You Make Me Happy card.  I absolutely love the colors and patterns in the Park Bench Collection from Fancy Pants Designs.  The patterns and colors are so easy to work with.  I started with the greeting and with the addtion of the Park Bench buttons over the beautiful patterned paper,  my “You Make Me Happy” card was complete!

YouMakeMeHappy-04192013-550W

You can download the pdf handout here

You can watch a video on how to complete the You Make Me Happy card below:

If you enjoyed today’s project, you enjoy our style of teaching and would like to learn even more I encourage you to check out the benefits of becoming a Paper Crafter’s Library member.

pctracysiggy

Guest Designer: Gayatri Murali

Today on the Paper Crafter’s Library blog, we’re continuing our weekly featured artist spotlight whereby each week we spotlight a different artist/designer in the paper crafting & mixed media world and introduce you to their fabulous work.

Today we’re thrilled to welcome – Gayatri Murali

Before we show you her fabulous projects, let’s get to know her a little bit more…

gayatrimatriheadshotMy name is Gayatri Murali also known as scrapawayg3 at various galleries.  I am a therapist by profession but chose to be a stay at home mom to my children.  I live in Perth, Australia with my husband, two teen children and my dog.   I started scrap booking first about 7 years ago. I am a card maker since 4 years. I began making cards with leftover papers after making a scrapbook page. But was unhappy with writing my own sentiments as my handwriting is not very pretty. That was when I started looking for sentiment stamps. I became a Stampin’ Up! demo. Soon all the polymer clear stamps excited me and I converted from rubber stamps to clear stamps lol! I still use rubber cling stamps:)  

My style is clean simple, bold and bright. I like graphic cards. I love to experiment with stamps and inks on cardstocks and therefore tend to use less pattern papers and embellishments. I love when I am able to think outside the box and be able to out it on paper. I also love trend and tend to use them on my cards. My Blog is called Handmade by G3.  I blog almost everyday.  My inspirations come from visiting blogs, going through magazine and Aha! Pinterest. I love Pinterest. I spend hours pinning. so if you like to see what I pin, here is my Pinterest Board http://pinterest.com/gayatri/  

I am also active in social media links to which are there on my blog right side bar:) 

I am so excited to be featured on Paper Craft Library. Hope you enjoy my projects for today.  


Card Projects 

First up. I love to layered stamping. Here is my one layer card with layered stamping to give depth.

 gayatrimurali2

I have used large bold leaf cluster stamp. Large solid images work well for layered stamping. I have used three different colours usually two light colours and one darker colour. This gives depth to the layers. Keeping with the bold theme, my sentiment is also big and bold. Love the colours of spring. Makes me happy.  

For the second card, I have used embellishments and pattern paper.  Still clean and simple but graphic.

 gayatrimultari1

There is a no stamping on this card. I have used a pattern paper on the background. And arranged the chipboard arrows, speech bubble and badges to give a collage effect. The sentiment are on the badges which says “you and me” “be happy” The arrows, speech bubbles and badges all are trendy.  


So, I hope I have inspired you with couple of my cards. If you want to see more of my projects, please visit my blog. I like to thank Paper Craft Library for inviting me to be featured today. Big hugs!  

Supplies

Card #1
Cardstock: Stampers Select White from Papertrey Ink
Stamp Set: Woodgrain Silhouette stamp set from Wplus9 and Big Greetings from My Favourite Things.   Inks: Yoyo Yellow from SU, Bubblegum and Soft Granite from Hero Arts. Archival Jet Black Ink from Rangers.

Card #2
Cardstock: Stampers Select White from Papertrey Ink
Pattern Paper: Snippets 6 x 6 Paper Pad from Studio Calico
Accessories: Snippets Chipboard Arrows and Speech Bubble. Snippets Badges from Studio Calico.

We hope you have enjoyed today’s projects courtesy of Gayatri Murali. Also, be sure to stop by Gayatri’s blog to see even more of her beautiful work (and let her know we sent you).