Featured Company: Fancy Pants Designs

FancypantssquarelogoNEWSMALL

I’m so excited to bring you this week’s Featured Company which is also a returning company: Fancy Pants Designs!   At CHA 2013 in Anaheim, as I was walking the aisles keeping my eyes open for great companies and products to spotlight, I was immediately drawn in by the gorgeous products in the Fancy Pants booth. Which is why I was thrilled that Jodi (one of the owners) accepted our invitation!  They have been featured before and we are so pleased to have them back with us.  In today’s spotlight you’ll learn more about Fancy Pants Designs, see a fantastic project by one of their designers and have the opportunity to win the Park Bench Collection shown below (details at the end of this post).

 parkbenchcollectiongiveaway

About Fancy Pants Designs

With their combined knowledge, Jodi {the creative person} and Jared {the business person} took a chance on a dream and founded their own unique company.

jodiandjared

Fancy Pants Designs premiered their first collections to the craft and hobby industry in the Winter of 2005. What started as a home-based business quickly flourished into an exciting opportunity of bringing creative ideas to life in many different mediums.

We are proud to offer high quality designs for a variety of industries through the production and licensing of original artwork. With a group of creative directors, talented designers and experienced staff, Fancy Pants Designs continues to provide the latest and greatest designs to crafters worldwide.

Be sure to visit us at our many “Fancy” locations online! We’ve always got something going on everywhere, so don’t miss out!

Special Fancy Pants Guest Designer

VickiChrismanheadshot
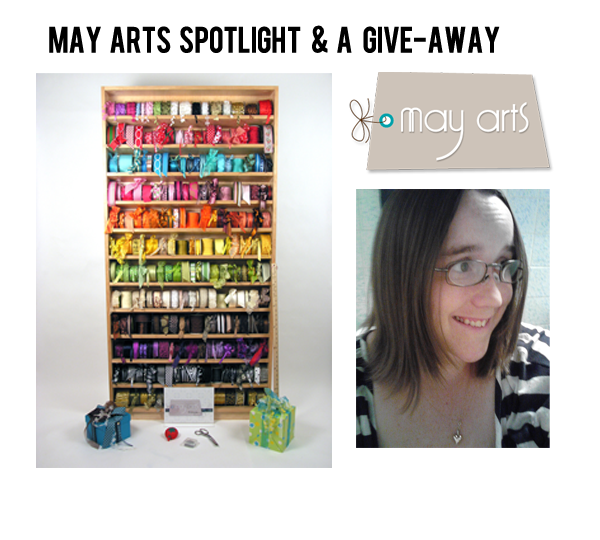
Today we also have a special Fancy Pants Designs Guest Designer. Vicki Chrisman is part of the 2013 Fancy Pants Design Team. We are so excited to have her showcase her work today on Paper Crafter’s Library. You can leave a comment below the post telling us what you like about her project for a chance to win a the package of Fancy Pants Designs Park Bench Collection.

You can see Vicki’s fabulous project below, but first, here is a little more about her:

My name is Vicki Chrisman. I live in Nebraska with my husband, and two sons. I have been a paper crafter for years, and love it even more now than when I first started (if that’s possible). What started as a hobby, has now become an obsession. lol! Always new exciting products to create with, and inspiration to be found everywhere. I am honored to be a part of the Fancy Pants Team, and to have the opportunity to design for such a great company.

Live Simply Canvas Project

 Vicki Fancy Pants 12x12 canvas

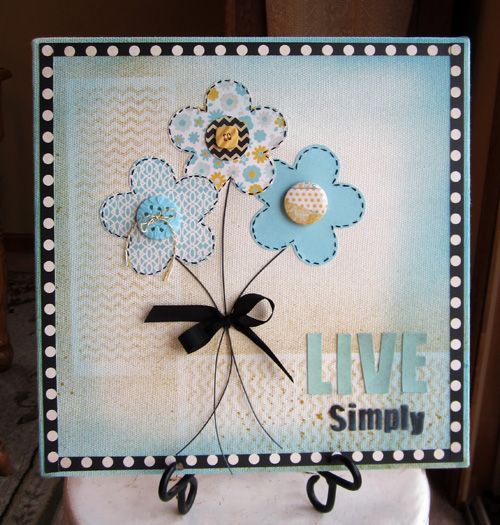
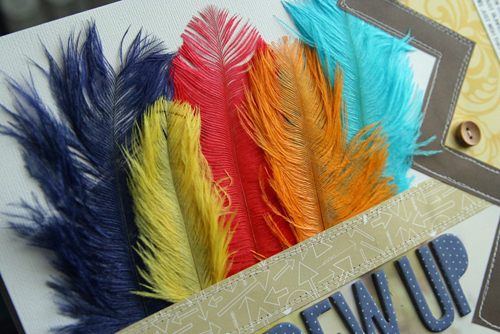
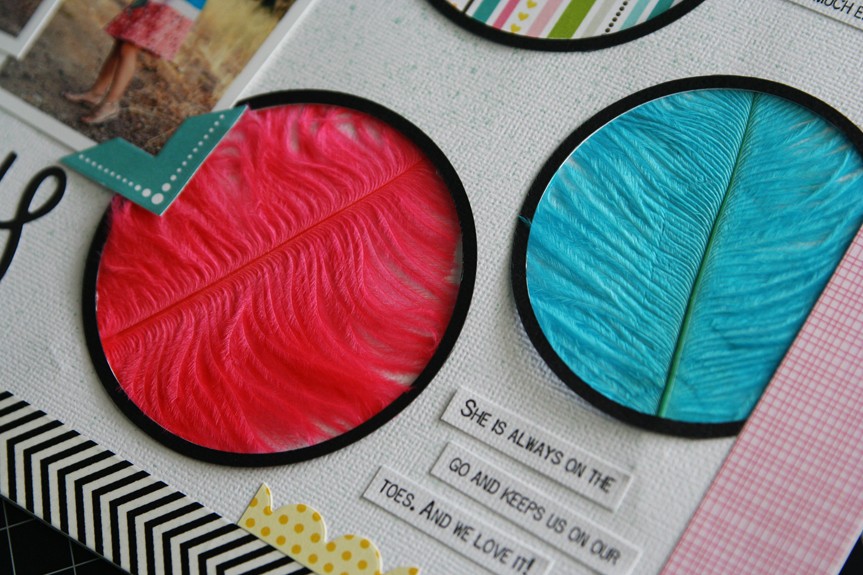
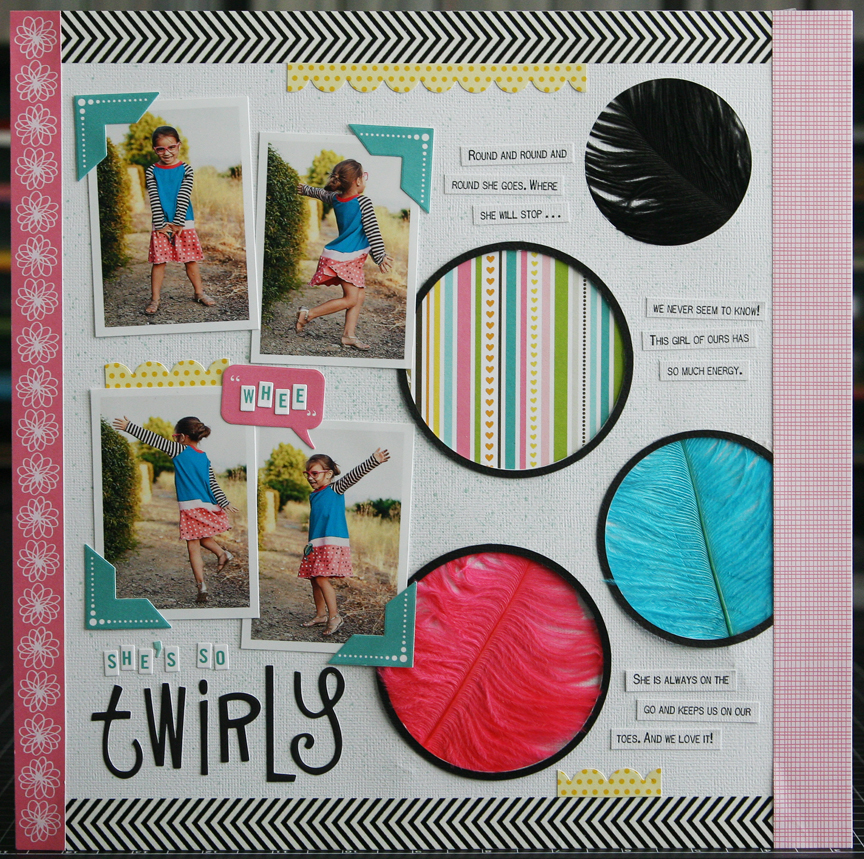
Today I like to share with you how to create this simple but beautiful  12×12 canvas  using the Park Bench  line.


  1. I chose to use mists to add a little color to my canvas background, but you could also use paints … or even choose to leave it blank.   On my canvas I added blue around the edges of my canvas.Vicki Fancy Pants Canvas step 1
  2.  I then chose one of the patterns from the 3×8 Pattern Stencil Set and a Dijon colored mist to add some interest to the canvas background.Vicki Fancy Pants Canvas step 2
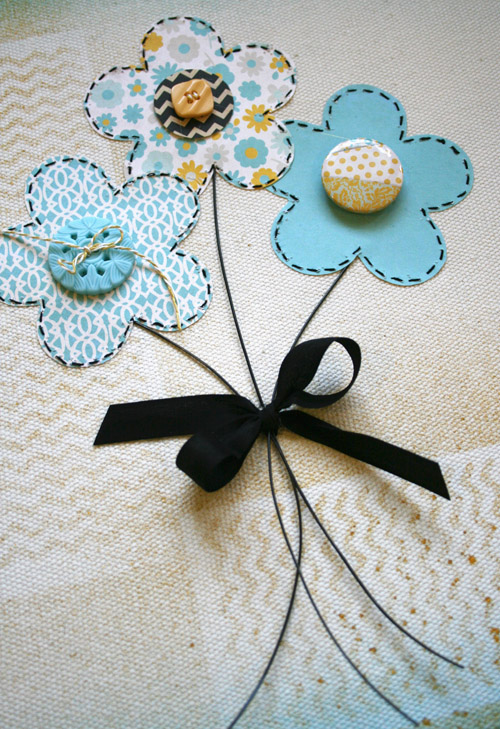
  3. Cut three basic flower shapes, from this line, each 3 inches wide.  If you don’t have a basic flower   shape, there is one below you are welcome to use.Vicki Fancy Pants Canvas step 3FLOWER TEMPLATEVicki Fancy Pants Canvas step 4 flower templet
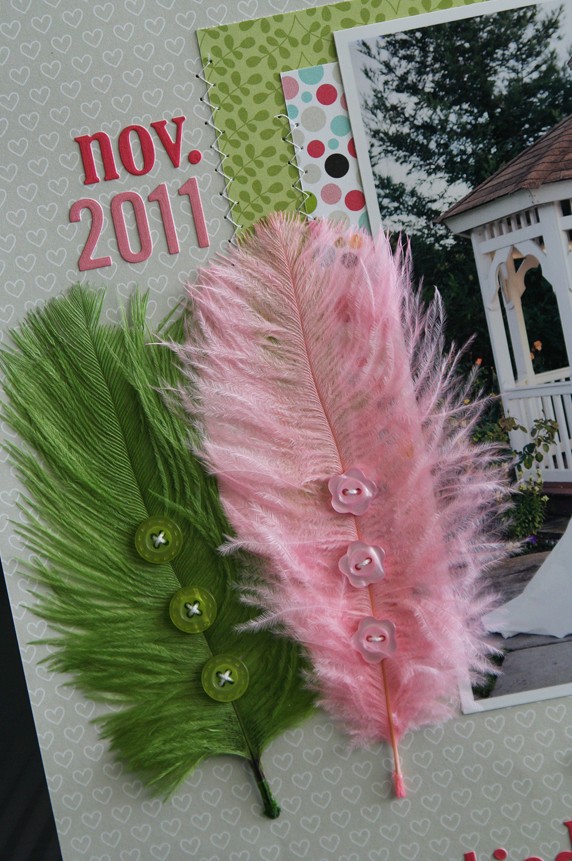
  4. If you don’t feel comfortable hand stitching, before you add your flowers to the canvas, you can add small stitch lines, by making dashes around the edges of the flowers with a fine black marker.    If you plan to stitch, start by adhering your flowers with a dot of hot glue in the center and placing them on the canvas where you want them. This will hold them in place while you stitch.    ( for best results, use 2 strands of black embroidery floss and a small needle)Vicki Fancy Pants Canvas step 5
  5. Cut three pieces of wire for your flower stems ( approx. 6- 7 inches).   Add these by tucking them just under the paper at the base of each flower and gathering them with a ribbon in the center.  Attach the ribbon to the canvas with a bit of hot glue.   Add Buttons to the centers of the flowers.  Trim strips to add border to your canvas.
Vicki Fancy Pants Canvas step 6
We hope you have enjoyed today’s feature. We want to extend a sincere thank you to Vicki Chrisman for her fabulous project and Fancy Pants Designs for sharing their company with us. Be sure to visit Fancy Pants Designs to see more of their great products.

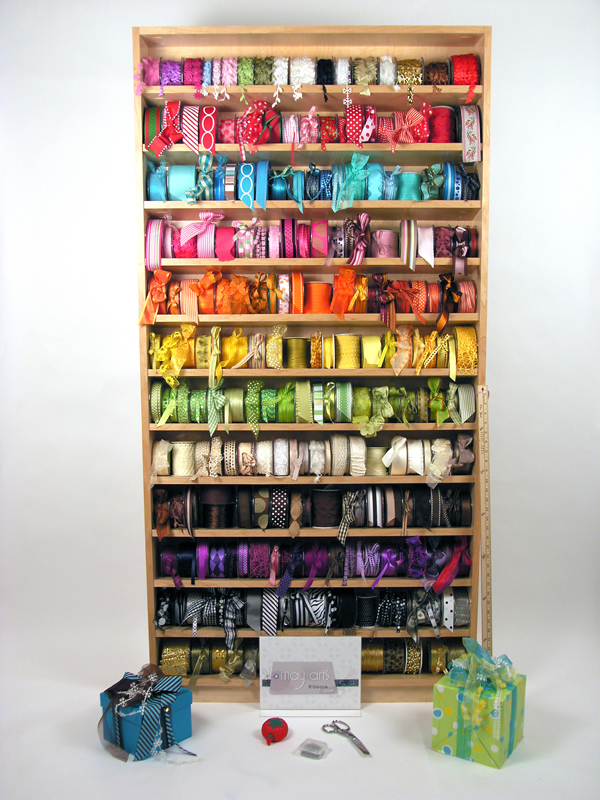
In order to enter the give-away to win the Park Bench collection shown above, please leave us a comment in the comments section of this post. Winner will be announced next Wednesday on the Paper Crafter’s Library blog!

Winners of Bella Blvd Give-Away

 logo

I’d like to extend a HUGE thank you to Bella Blvd and their designer Laura Vegas for sharing such a wonderful project and for their generous give-away of their feathers.  The good news is that they are giving away 9 packages of feathers.

bellagiveaway

And now, the moment you’ve all been waiting for…….the winners are all listed below……!

410blogwinner1funk 410blogwinner2karyle 410blogwinner3jennyfer 410blogwinner4Bliss 410blogwinner5Dailey 410blogwinner7BethW 410blogwinner6Hundley 410blogwinner8Doreen 410blogwinner9triciadee

Congratulations to all the winners!!  Be sure to email us at customerservice@papercrafterslibrary.com to claim your prize. Please be sure to put “Bella Blvd Winner” in the subject line of the email, and then in the email itself, be sure to include your full mailing address and phone number.

For those of you that didn’t win, each week on PCL we feature a different company, and each of those companies generously sponsors a prize. This week we are featuring Fancy Pants Designs.  Be sure to check out their give-away.

andreasiggypcl

Winner of May Arts Give-Away

mayartslogo

I’d like to extend a HUGE thank you to May Arts and their designer DeeDee Catron for sharing such a wonderful project and for their generous give-away of two rolls of their awesome ribbon.

 SAMSUNG DIGITAL CAMERA

And now, the moment you’ve all been waiting for…….the winner is……  Sharti!

410blogwinnerpostedon417

Congratulations to all the winners!! Be sure to email us at customerservice@papercrafterslibrary.com to claim your prize. Please be sure to put “May Arts Winner” in the subject line of the email, and then in the email itself, be sure to include your full mailing address and phone number.

For those of you that didn’t win, each week on PCL we feature a different company, and each of those companies generously sponsors a prize. This week we are featuring Fancy Pants Designs. Be sure to check out their give-away.

andreasiggypcl

Trendy Tuesday – Project Life Kits

Trendy Tuesday – Project Life Kits
by Katherine Elliot

If you have never heard about “Project Life,” then peek your head out from under that rock where you”ve been hiding and check out these attractive and popular scrapbook kits.  I admit I felt like one of those rock-hiders when I first discovered how prolific this scrapbook trend is in the blogosphere.  It is inspiring to see how easily a scrapbook project goes together with one of these kits.  The kits can be used in other paper craft projects and mini albums, too, so you do not have to be a traditional scrapbook addict to enjoy these.

Here are a few images from some original Becky Higgins” Project Life kits

Seafoampostcard

Seafoam Edition Core Kit for Project Life, image source Enjoy It by Elise Blaha

A complete kit would include an album or binder, divided photo sleeve inserts, and a selection of coordinated pre-cut card stock and designed papers that fit in the inserts.  You simply slip in photos and the pre-cut designs where you want to easily complete a layout that is ready to go or can be further embellished how ever you like.

Project Life Sample: Seafoam Edition

Core kit inserts shown in a divided photo sleeve, image source BeckyHiggins.com

The easiest transition from a plain old photo album to a Project Life album may be to simply use a photo “as is.”  However,  there is something stunning about re-sized or enlarged photos cut to fit the divided slots.  This is one of my favorite examples of a very creative photo display on one of these pages…

Project Life layout by Mary Ann Perry, image source Cherish Everyday

The divided photo sleeves can also hold other items that you”d like to include in your album, like ticket stubs, keepsakes and personal notes.  The designs can be as simple or as complicated as you like.

Weekly Challenge_LeenaLoh1

Studio Calico Project Life, image source Studio Calico blog

The Project Life craze has inspired many companies to come out with additions, accessories and kits to help you create your own unique books and projects.  Studio Calico has monthly kits that include the latest styles and embellishments to keep your project on trend.

Studio Calico Block Party Project Life kit, image source Studio Calico

Other companies like We R Memory Keepers and Echo Park Paper Company also have their own scrapbook kits.  They offer albums, divided photo sleeves and coordinating journaling cards, papers and embellishments.

We R Memory Keepers” line is called Albums Made Easy.Webster Journaling Cards

Webster Journaling Cards for Albums Made Easy from WeR Memory Keepers

12x12 Ring 4-6x4, 4-3x4 Photo Sleeves

WeR Memory Keepers divided photos sleeves

Echo Park”s Photo Freedom kits come in many choices to create your own signature style.

Linda Auclair pf volume 1 right page sized copy

Echo Park Photo Freedom layout by Linda Auclair, by image source EchoParkPaper blog


Echo Park designer photo sleeves, image source EchoParkPaper.com

Echo Park Scoot Journaling Cards, image source Two Peas in a Bucket

The papers and journaling cards offered are great for these album kits, but they are suitable for other projects, too.  Some journaling cards are often sold as 12×12 pages.  Cut them to fit any of your cards, mini albums, as well as traditional scrapbook pages.

Card by Wendy Sue using an Echo Park journaling card, image source Two Peas in a Bucket

Accordion fold project using Echo Park journaling cards by Ann Vento, image source Raindrop Echo DesignsLBD-Marbled-Easter-Eggs

Scrapbook page using 3×4 card elements, designed by Summer Fullerton, image source LilyBeeDesign

Other scrapbook papers are easily adapted for use in a Project Life album or similar kit.  Some are ready for you to cut or already sized for the photo sleeves.  Patterned papers like the ones shown below from My Minds Eye and Fancy Pants Designs offer even more style options to add to your scrapbook album repertoire.

Life Stories paper from My Minds Eye, image source A Cherry on Top

Fancy Pants 4×6 Brag Pad, image source Two Peas in a Bucket

Scrapbook layout featuring Down by the Shore, Fancy Pants Designs Brag Pad, by Nancy Damiano, image source Two Peas in a Bucket Gallery

Jenni Bowlin Studio and Simple Stories also offer journaling cards to use in albums or as a focal point on a card or other project.

Journaling cards from Jenni Bowlin Studio 


Card by Ranjini Malhotra using Jenni Bowlin Studio Journaling Card, image source Jenni Bowlin Studio

Today card1

Card using Simple Stories Journal Cards, image source Simple Stories

3110-01 copy

Simple Stories 24/7 Journal Cards, image source Simple Stories

Of course you can create your own inserts and trim paper for one of these albums with what you have on hand, but wait, there”s more!  The digital world is filled with even more options and some of them are free!  Web sites such as Inspired by Peanut & Bean  and One Velvet Morning offer some links and free digital print outs for your projects.

Digital Family filler card from One Velvet Morning

These kits provide an awesome way to complete an album and provide you a layout that may help you shorten the time needed to complete a scrapbook.  However, the huge variety of products may mean it will still take a long time to decide what your favorite design may be.  Luckily, just add or remove an insert or photo and your album can change with your mood.

If you are a card maker, like me, you may find a kit like this easier to start scrapping using the “smaller canvas” of the 3×4 or 4×6 inserts.  A bonus, whatever insert you don”t use in an album is ready to go onto your next card.

Happy crafting everyone!


Free Project of the Week – Floral Gratitude – 04 12 2013

This week for our Free Project of the Week we have a Floral Gratitude card I created which features these small five petal ribbon flowers using May Arts ribbons.  The flowers were super easy to create and yet are so cute.  They may a perfect accent not only for cards but would also look great on scrapbook pages or other projects. I used nice bold greeting from Artistique Designs – a new stamp line which has not yet been released (these are the pre-production samples).

FloralGratitude-04122013-550W

You can download the pdf handout here

You can watch a video on how to create the small five petal ribbon flowers below:

You can watch a video on how to complete the Floral Gratitude card below:

If you enjoyed today’s project, you enjoy our style of teaching and would like to learn even more I encourage you to check out the benefits of becoming a Paper Crafter’s Library member.

pctracysiggy

Featured Designer: Ardyth Percy-Robb

Today on the Paper Crafter’s Library blog, we’re continuing our weekly featured artist spotlight whereby each week we spotlight a different artist/designer in the paper crafting & mixed media world and introduce you to their fabulous work.

Today we’re thrilled to welcome – Ardyth Percy-Robb

Before we show you her fabulous projects, let’s get to know her a little bit more…

ardythheadshotI started cardmaking in 2006, at a Stampin’ Up! Party and have never looked back. Before that, I would not have claimed to be crafty or creative at all – I’m an accountant! 

I started uploading cards to Splitcoaststampers in 2006 but was really a blog ‘watcher’ until I started my blog, MASKerade in January 2012. I love clean, graphic design with bold colours and lots of white space. My favourite cards are the ones where stamps are used in unexpected ways to create something completely different.

Currently, I’m a sahm to my 13 year old son and my 9 year old daughter. I also volunteer in my daughter’s school and I am the piano accompanist for two children’s choirs.

I’m so excited that Andrea asked me to show my work here at Papercrafter’s Library today!


Card Projects

Recycling a good idea! When there are multiple birthdays in a short period of time, I will often make two (or more!) different cards using one idea. My main idea for these cards was to have a gap in the front of the card, through which you can get a sneak peek of what’s inside.

ardythPCL1a
ardythPCL1b
ardythPCL1c


For the first card, I used acetate to bridge the gap, and glued the letters to that, so that they
would ‘float’ on the front of the card. The ‘treat’ inside is the rest of the sentiment, stamped in big letters and bold colours. When you open the envelope, you’ll have a tantalizing, colourful view of the inside of the card and really want to open it to see what’s hiding there!

 ardythPCL2a
ardythPCL2b
ardythPCL2c

For the second card, I used the letters themselves to bridge the gap.  I cut the letters and edged them in glitter. Once they were dry, I glued them to the card, using graph paper behind it, to keep everything straight and lined up. I stamped ‘birthday’ on the front of the card. This time the whole sentiment is on the front of the card, so the ‘treat’ inside is the masked and sponged rainbow. Of course there are many other variations on this idea – you could use coloured letters, or you could use something other than letters – a pretty swirl, maybe. But you get the idea – there’s nothing saying you can’t use one idea as a jumping off point and keep it going and going…..


Supplies:

Both Cards – Gina K Pure Luxury  120 lb Cardstock (white)
Memory Box Parker Upper Case dies
Cuttlebug

Card 1
Acetate sheet (Staples)
MFT Stamps Monogram Alphabet
Stampin’ Up Ink (Melon Mambo, Lucky Limeade, Concord Crush, Only Orange)

Card 2
Stardust Stickles
Tim Holtz Distress Ink (Squeezed Lemonade, Spiced Marmalade, Picked Raspberry, Dusty Concord, Salty Ocean, Mowed Grass)
Memento Tuxedo Black Ink
Waltzingmouse Stamps


We hope you have enjoyed today’s projects courtesy of Ardyth Percy-Robb.  Also, be sure to stop by Ardyth’s blog to see even more of her beautiful work (and let her know we sent you).


Featured Company: Bella Blvd

logo

I’m so excited to bring you to this week’s Featured Company: Bella Blvd. In today’s spotlight you’ll learn more about Bella Blvd, see a fantastic project by one of their designers and have the opportunity to win a collection their beautiful feathers shown below (details at the end of this post).

bellagiveaway

About Bella Blvd

Bella Blvd began its journey back when owner and founder, Stephanie Hunt, was in high school, she just didn’t know it. When her passion for scrapbooking was born so were her dreams.  After completing her very first scrapbook album, she realized that designing such paper products would be a dream come true.

When trying to decide on a company name, Stephanie wanted it to resemble some of her other passions: family and travel. Her Italian family heritage has shaped her life and traditions, and traveling was always encouraged to learn new cultures and gain experience. While studying abroad in Italy during college, the phrase “ Ciao Bella!” echoed the cobblestone streets. That was it! Literally meaning, hello beautiful, ciao bella was the perfect combination of her Italian family roots and her dreams for the products. Beautiful designs, beautiful colors, beautiful brand. Bella Blvd was born in June 2008.

Bella’s product pride is its versatility, quality, and affordability. Paper and stickers are the essentials in creating a single scrapbooking layout or card.  Consumers can now find and purchase Bella Blvd worldwide. Our product line and embellishments continue to expand with leading industry and fashion trends, all the while creating excitement daily through our social media outlets and daily Studio Blog.

http://www.bellablvd.typepad.com/
http://www.bellablvd.net/


Special Bella Blvd Guest Designer

Today we also have a special Bella Blvd guest designer.  Laura Vegas is part of the 2013 Bella Blvd Design Team. You can leave a comment below the post telling us what you like about her project for a chance to win a set of their beautiful Feathers pictured above.
You can see Laura’s fabulous project below, but first, here is a little more about Laura:

LauravegasheadshotHi there! I’m Laura Vegas, from Northern California, where I live with my husband Joe, and my two gorgeous daughters, Alyssa (16) and Sarah (13). I have been scrapbooking for over 18 years now. I started shortly before my first daughter was born, and have not slowed down since. I scrapbook mostly about my girls and our family, but like to mix it up now and then by scrapping photos and stories about my daycare kids and family friends as well. I have been fortunate enough to design for Lil’ Davis, Making Memories, Jillibean Soup and Pebbles, and was proudly a member of the 2010, 2011 and 2012 Creating Keepsakes Dream Team. I am currently serving as the Design Team Coordinator for Bella Blvd, designing for Kerri Bradford Studio, and am a member of the 2013 Scrapbook & Cards Today design team. I have been published in Scrapbook & Cards Today, Creating Keepsakes, Scrapbooks Etc, Scrapbook Trends, Cards, Create, Paper Trends, Papercrafts, and PaperKuts magazines.


Designer Project:
Hey everyone! Laura here today to share a few layouts with you featuring one of Bella Blvd’s newest embellishments … feathers! These lightweight embellishments come in a wide variety of bright and fun colors and they add a ton of texture and dimension to your paper projects. One of the biggest questions about the feathers is how to adhere them. I’m going to share a few of my favorite ways of adhering feathers with you today.

shegrewup2One of the easiest and quickest ways to adhere feathers is to staple them directly to your layout or card, and it’s the “adhesive” of choice that I use the most when it comes to working with real feathers.
LauraVegas_BellaBlvd_Shessotwirly3
Simply position the feathers were you want them to lay and staple the bottom ends of the feathers to secure them in place. In most of the projects that I have used feathers on, I knew that I would be placing something over the ends of my feathers, which would cover up the staples.
shegrewup4In the example above, I stapled five feathers to my layout, and then adhered a strip of machine stitched patterned paper directly over the ends of the feathers, hiding the staples in the process.

LauraVegas_BellaBlvd_SheGrewUp


LauraVegas_BellaBlvd_WeTiedTheKnot2Another way to attach the feathers to your projects is to stitch them in place. You can either hand stitch just the feathers themselves, adding a few small cross stitches down the length of the feather, or you can stitch an embellishment on top of the feather to help hold it in place.
LauraVegas_BellaBlvd_WeTiedTheKnot3In the examples above, I have arranged three feathers across my page, and picked out some coordinating buttons to layer on top of each feather. I added a few small glue dots under each feather to lightly hold them in place before stitching.

LauraVegas_BellaBlvd_WeTiedTheKnot4
I held each button over the center part of the feathers, making sure to bring my thread up one side of the feather and down on the other side. This way, the threaded button “grabbed” the feather and held it down in place.


LauraVegas_BellaBlvd_WeTiedTheKnot

LauraVegas_BellaBlvd_Senior2In the example above, I secured my feathers to my layout in two different ways. First, I stapled the bottom of each feather directly to the page. I added three crochet hearts along the bottom of the feathers, so they helped hide the staples.

LauraVegas_BellaBlvd_Senior3I also used my journaling strips to add some extra security to my feathers. I did not use any adhesive on my journaling strips, but adhered them to the page using a tiny brad on either end of each strip.

LauraVegas_BellaBlvd_Senior4Adding my journaling directly on top of my feathers allowed me to use the brads to grab onto the feathers and adhere them down a bit more, and the journaling strips also helped to keep the top of the feathers in place so that they don’t shift around.
LauraVegas_BellaBlvd_Senior
LauraVegas_BellaBlvd_Shessotwirly2In my last layout, I got a little more creative with my feathers, letting them peek out from behind the circle cut outs on the page. I started by using a circle cutter to cut out four circles of varying sizes on my white cardstock background paper.
shessotwirly3I placed the paper with the cut outs on top of another sheet of white cardstock and traced my circles onto the bottom sheet with a pencil. Once I knew where on the page my circles would go, I arranged a few feathers over those traced circles (on the full sheet of cardstock) and stapled the ends in place.

LauraVegas_BellaBlvd_Shessotwirly4Then I adhered my original sheet of cardstock (with the cut out circles) directly over the paper with the feathers attached. This gives the feathers a bit of a peek-a-boo look, as they are all peeking out from behind the circles.

LauraVegas_BellaBlvd_ShesSoTwirly

We really hope you have enjoyed today’s feature. We also want to extend a sincere thank you to Laura Vegas for her fabulous project and Bella Blvd for sharing their company with us. Be sure to visit Bella Blvd to see more of their great products.

So now, details on the give-away:

In order to enter the give-away to win a pack of the Bella Blvd feathers, shown above, please leave us a comment in the comments section of this post. Winner will be announced next Wednesday on the Paper Crafter’s Library blog!

Featured Company: May Arts

mayartslogo

Today we are excited to welcome back one of this week’s Featured Company May Arts and to share a beautiful creation from one of their designers using some gorgeous May Arts Ribbon.

Here at Paper Crafter’s Library we’re ribbon lovers – you’ll find ribbon on almost all of our projects – which is why we’re so thrilled to bring you another fabulous May Arts project. You haven’t seen ribbon until you’ve seen May Arts Ribbon – they offer a multitude of different colors and styles of ribbon to suit any preference and taste – and all of it, top quality!

And, we also have a give-a-way for you!! Two lucky winners will receive a “winners choice” of 2 spools of Ribbon from May Arts. One winner will be drawn from all the comments left here on the Paper Crafter’s Library blog to win AND one winner will be drawn from all the comments left on the May Arts Blog to win. You certainly have a lot to choose from

May Arts Ribbon

Remember, each comment you leave is one entry, so be sure to visit today not only for the great project idea, but also to enter your name into our give-away.

About May Arts

May Arts Ribbon was founded in the early 1980’s in Riverside, Connecticut. The original products were high-end silk flowers imported from Taiwan, which were decorated using quality ribbons. The decorative ribbons proved so popular among customers that the business gradually evolved into a dedicated ribbon wholesaler.

As a family-owned and operated business, May Arts began a long-standing tradition of quality, affordability and exceptional customer service. We are dedicated to carrying on this same tradition by offering high quality products at competitive prices. Our friendly, knowledgeable staff is always happy to answer your questions or to assist you in placing your order.

May Arts carries a wide selection of quality ribbons to choose from; such as grosgrain, silk, satin, burlap and a variety of prints and patterns. All inventory is held in stock, so we can ship orders out right away—typically the same day.

Where to Buy May Arts Ribbons

The May Arts website is their wholesale site for online and brink and mortar retailers. We’ve linked to it so that you can easily view their entire product line in one place. There are numerous places where you can purchase May Arts Ribbons including many local scrapbook stores as well as online stores. Two of the online stores that carry the biggest selections that we are aware of include Amazon, who carry the complete May Arts Ribbon Line (plus you can qualify for free shipping). Click on the link we provided and it will take you to our May Arts Ribbon Search Results. To find a particular ribbon, go to the May Arts website, find the name of the ribbon and color and then enter that into your Amazon search results. Please note that through Amazon you’re buying by the roll. Most other online and local scrapbook stores sell May Arts Ribbon by the yard. One of the online stores that carries a great selection is Stamp Simply Ribbon Store.

Special May Arts Guest Designer

DeeDeeCatron_PCL_MayArts_headshot

Today we a special project for you created by May Arts Guest Designer DeeDee Catron.  You can see DeeDee’s fabulous project below, but first, here is a little more about DeeDee:

My name is DeeDee Catron, I’m a 25 year old mama, wife, and life lover. I’m the Marketing and Artistic Director for Viva Las VegaStamps! Where I design pink rubber stamps, and the Owner/Creative Director of UmWowStudio where I design chipboard embellishments.  You can find my blog at http://umwowstudio.blogspot.com/


May Arts Designer Project

GEDSC DIGITAL CAMERA

Today I’ve focused on using ribbon as a mask. If you’d like to see something similar you can view a May Arts video here:


I’ve also taken the time today to show in step out pictures a different webbing on a smaller scale using different supplies!

DeeDeeCatron_PCL_MayArts_RibbonInstructions409

1) Gather your supplies!
2) Prepare your chipboard surface by rubbing it down with a light layer of gesso.
3) Allow to dry. Should only take about a minute. Keep your layer light!
4) Position May Arts webbing over prepared chip.
5) Smear gesso through the webbing onto the chipboard.
6) Cover the entire thing from side to side, top to bottom.
7) Remove mask and allow to dry completely. You can hit it with a heat gun if you like, but it will alter the pattern of the ribbon if heated for too long. Gesso is an acrylic plastic and will bubble under too much heat.
8) Gather your Distress Stain – I used Weathered Wood for a nice navy blue gray feel.
9) Also get a squirt bottle!
10) Completely douse your piece in stain. Fill all the cracks and puddle that baby up!
11) Use a cloth, napkin, towel.. whatever to mop up some of the extra stain on the surface.
12) Spritz with water to give it a bit of a muddled effect.
13) Allow to dry!

GEDSC DIGITAL CAMERA

Now you have a beautiful embellishment for any artwork! You can make them any color. To finish the piece stamp on your paper, distress it, layer some thread, May Arts ribbon and your new embellishment!

Supplies:
May Arts ribbons : SM08 – black burlap string, 379-58-35 – navy pleated satin, and EM02 – ivory netting.
Ranger : Distress Stain – weathered wood, Distress Ink – broken china and black soot. Gauche Alchemy : washi tape
Fancy Pants : corrugated cardboard – white
Tattered Angels : Chalkboard mist – charcoal 
My Mind’s Eye : paper and epoxy brad
UmWowStudio : Layered Butterfly basic shape
Viva Las VegaStamps!:
Dictionary Page and Dream Big
From my stash : cheese cloth, twine, gesso.


We hope you have enjoyed today’s feature. We want to extend a sincere thank you to DeeDee Catron for her fabulous projects and May Arts for sharing their company with us. Be sure to visit May Arts to see more of their great products and to enter the fabulous give-away.

In order to enter the give-away to win the ribbon rolls, please leave us a comment in the comments section of this post and visit May Arts to leave a comment on their blog as well. Winners will be announced next week on the Paper Crafter’s Library blog!

Winner of Faber-Castell Design Memory Craft Give-away

DMC_Newlogo_RegMark_2012

I’d like to extend a HUGE thank you to Faber-Castell Design Memory Craft and their designer Vivian Keh for sharing such a wonderful project and for their generous give-away of their Paper Crafter Crayons.

April2013giveaway

And now, the moment you’ve all been waiting for…….the winner is……Colleayn Klaibourne!

403blogwinner

Congratulations Colleayn. Be sure to email us at customerservice@papercrafterslibrary.com to claim your prize. Please be sure to put “Faber-Castell Crayon Winner” in the subject line of the email, and then in the email itself, be sure to include your full mailing address and phone number.

For those of you that didn’t win, each week on PCL we feature a different company, and each of those companies generously sponsors a prize. This week we are featuring Bella Blvd. and May Arts. Be sure to check out their give-aways.

andreasiggypcl

Trendy Tuesday – Stars

Trendy Tuesday – Stars
By Colleen Harshaw

Hi everyone!  Today I want to talk about a trend that we have been seeing in papercrafting for a while now…STARS.  I kind of like this trend because it isn’t gender specific.  Stars can be used on masculine or feminine cards and even scrapbook pages.  They can be used for the old or young alike.  Let’s just say, stars don’t discriminate!
TT10-2

The first card that I have to show you is a great example of a card for someone young.  In this case the star has the center cut out so that you can see the card base below.  That technique is a breeze to do with a die cutting machine, but a bit more work to execute by hand!  The colours used on this card scream ‘fun’ and keep in theme with the whimsy of the focal image.
TT10-1

This next image shows the inside of Karen’s card from above.  Decorating the inside of cards is right on trend too.  I know we have talked about that before!  Although it is more work, the end result is really pleasing to the eye.  It is always a nice surprise to receive a card that is beautifully decorated on the inside as well as the outside.  Karen placed a matching star on the inside of her card, which ties the whole thing together nicely.

TT10-3

Next I have a second card sample for you.  This one is Halloween themed and incorporates stars as well.  This card was created by Jen del Muro for The Cat’s Pajamas.

TT10-4
Card created by Jen del Muro for The Cat’s Pajamas

My next project sample is a decorated gift bag.  You will see the star pattern on kraft coloured paper used as a background for the flower embellishment.  Depending on what colour your star accents are, it can be a very patriotic image for Americans.  Being Canadian myself, I try to stay away from using red, white and blue stars!  This bag turned out beautifully, with an old world Americana feel to it.

TT10-7
Project by Melissa Phillips for Lilybean’s Paperie

Next I have an art journal page to share with you.  Art journaling is another big trend right now.  I haven’t given it a try myself.  I find it a bit intimidating, if I am honest!  I love the idea, it is just the execution of it that scares me.

This page uses a cool palette of blues and whites.  You will notice some stars sprinkled around the page, some with cutout centers and others that are solid.  I like the splatters.  The idea that something does not have to be exact is a bit of a stretch for me, but I love the concept.

TT10-9
Project by karenliz on scrapbook.com

This next project is a page from a December Daily journal.  If you haven’t done this project before, I would highly recommend it.  You basically create one scrapbook/journal page for each day of December in order to document your holiday season.  The key to being able to complete the project is to have all of the planning and pages laid out before December ever begins.  The bones of the book are there, and then you can just add photos and journaling at the end of each day.  It is a really great keepsake to have at the end of a busy holiday season!

This December Daily page happens to include stars.  It really isn’t that surprising since stars have a huge significance for those who celebrate Christmas.

TT10-10
Page by Michelle Hernandez on scrapbook.com

The next project is a mini album.  You will have to look closely to see the stars on these layouts!  It looks as though small star shaped stickers were used in circular patterns on various album pages.  This gives a unifying effect to the pages while drawing your eye towards the focal image at the same time.

I have to say, I really like the effect of the black and white photos on the white background.  This also allows the stars and embellishments to stand out without competing with a background pattern.

TT10-5

TT10-6
Album by Nicole Martel for May Arts Ribbon Blog

The next sample is a scrapbook page which I think is really adorable.  I might just have to scraplift this one for my own album!

TT10-8
Layout by Lisa Dickinson on scrapbook.com

My very last sample of the day is another scrapbook layout.  This one appears to use a star overlay.  I have not ever made one of these myself, so I would probably be inclined to buy one!  Although, with the world of die cutting machines and electronic scrapbooking options growing every day, I am pretty sure there is a way to do this at home.  The effect is pretty cool.

TT10-11
Layout by Lisa Dickinson on scrapbook.com

OK, now for the product list.  I am not going to bore you with an endless list of star shaped products.  Suffice to say, there are a lot of options out there.  You will find them quite easily on your own, after all, we all can easily recognize a star!  So, on that note, here are just a few options.

These are wood veneer stars.  I thought they could give you some good options for painting or distressing.  They would also offer some texture and dimension to your projects.

TT10-12

Classic Calico Collection Wood Veneer Stars

Next I have a paper selection for you from My Mind’s Eye.  I have to admit that I am a bit of a paper junkie and I have a weakness for My Mind’s Eye.  This selection happens to be double sided and it measures 12 x 12.

TT10-13Boy Crazy Collection from My Mind’s Eye – Seeing Stars
Photo credit to twopeasinabucket.com

I love the look of this packet!  It is listed as ‘downloadable product’ over at twopeasinabucket.com.  I am guessing that means it is for all you digital scrapbookers out there!  I cannot claim to be part of that category.  If I was, perhaps my spare bedroom would not be such a disaster zone right now!

TT10-14September Storyteller 2012 Element Pack – downloadable product
by Just Jaimee.  Photo credit to twopeasinabucket.com

This next item is by Pink Paislee.  They are resistable chipboard stars.

TT10-16Resistable Chipboard Stars by Pink Paislee
Photo courtesy of twopeasinabucket.com

Next I have a squeeze punch to share with you.   This one is made by Jenni Bowlin, but I imagine that there are other brands available.  Interestingly, this star punch has eight points instead of the standard five you usually see.

TT10-15Jenni Bowlin Squeeze Punch – Quilt Star
Photo credit to twopeasinabucket.com

The last item I have to share with you is another trend setting item….washi tape.  This particular variety is by Freckled Fawn.

TT10-17Washi Tape by Freckled Fawn
Photo credit to twopeasinabucket.com

That wraps things up for this edition of Trendy Tuesday.  Thanks for reading and happy crafting!