Featured Artist/Designer: Ashley Stephens

Today on the Paper Crafter’s Library blog, we’re continuing our weekly featured artist spotlight whereby each week we spotlight a different artist/designer in the paper crafting & mixed media world and introduce you to their fabulous work. Today we’re thrilled to welcome Ashley Stephens.

Before we show you Ashley’s project, let’s get to know her a little bit more…

AshleyStephens-04032014-250W

My name is Ashley Stephens and I’m from Boise, Idaho though I currently live in Germany with my husband and four year old. I work full time at a youth center and go to school full time for graphic design so life is very busy but that’s just how I like it! I’ve been scrapbooking for about five years now and have been on design teams for Simple Stories and Pebbles. I also knit, quilt, sew clothing, and dabble in calligraphy. If there were more hours in the day that list would be even longer! Typically my style is pretty straightforward and bold- I like white space and clean lines.


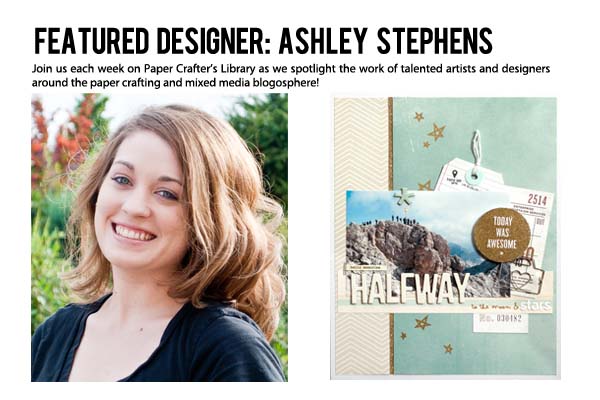
Halfway To The Moon and Stars

I started this page knowing I wanted to use the gold star rub-ons. I don’t have a lot of gold accessories in my stash so I opted to create my own using glitter embossing powder. I used double sided tape to create the stripe of gold along the left side and a graphic stamp for a bit of punch on the right. After that, the rest of the page came together quickly! I also tucked my journaling in behind my photo due to space constraints but also to add to the layered look I started on the right side.

AshleyStephens1-04032014-550W

Here’s a close up of the journaling tag.

AshleyStephens2-04032014-550W

Supplies:

Cardstock: Bazzill
Patterned paper: My Mind’s Eye, Carta Bella, Simple Stories for Cocoa Daisy, Basic Grey
Alphas: American Crafts, Studio Calico, Basic Grey
Stamps: Studio Calico, Cocoa Daisy
Rubons: Studio Calico
Embossing Powder: American Crafts
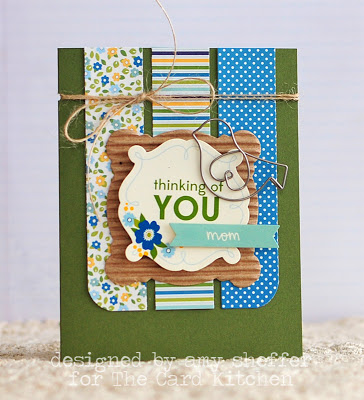
Camera paper clip: Maya Road

We hope you have enjoyed today’s projects courtesy of Ashley Stephens.  Also, be sure to stop by Ashley’s blog to see even more of her beautiful work (and let her know we sent you).

pcandreasiggy

Featured Company: Hero Arts

HeroArts-04022014-400W

This week we are thrilled to welcome Hero Arts! In today’s spotlight you’ll learn more about Hero Arts, see a fantastic project by Kelly Rasmussen and have the opportunity to win the two stamp sets and three daubers shown below (details at the end of this post).

HeroArtsPrizePack-04022014-550W

About Hero Arts

Hero Arts is a top brand in the crafting market with almost 40 years of experience making premium stamps, papers and inks. Hero Arts is a family-run, green-certified, solar-powered, manufacturing company that continues to hand-make a majority of its products here in the USA. The company is well known for its industry-leading website, high-quality products, and stylish designs. For more, visit www.heroarts.com.

Hero Arts Designer

Today we welcome Kelly Rasmussen. We are so excited to have her showcase her work today on Paper Crafter’s Library. You can see Kelly’s fabulous project below, but first, here is a little more about her:

KellyRasmussen-04022014-250WKelly began making cards when she was in college and has been addicted ever since. She quit her day job as a graphic designer to become a stay-at-home mom and has been working with Hero Arts since 2009. Besides making cards she also enjoys shopping, photography, graphic design, baking and spending time with her family and friends. Kelly lives in a small town in Nebraska with her husband Lee and three children Halle, Gage and Lexi.


Designer Project

Watercolor is such a popular trend in the crafting world right now and one of my favorite ways to create the look is by using Hero Arts Daubers.

HeroArts1-04022014-550W

To create this card I first heat embossed the Happy Birthday Grid stamp (K5924) onto some watercolor paper. Then I used various colors of Hero Arts Daubers mixed with some water to color in the image. The embossing traps the color, making it easy to stay in the lines.

Once this piece completely dried I used the “iron-off technique” to iron off the embossed area resulting in a completely smooth image on the watercolor paper. Just place a piece of copy paper over your stamped image and rub a hot iron over the embossed image. Make sure to use a new piece of copy paper each time you lift up your paper — it will probably take 3 or 4 times to completely remove the embossing.

To finish off the card I used the White Dauber on a Charcoal card base to create the polka dot background. Then I added a strip of Pool paper along the left side, a scattering of sequins and that’s all there is to it!

Here are some close up images of the card.

HeroArts2-04022014-550W

HeroArts3-04022014-550W

Supplies:

Hero Arts Happy Birthday Grid Stamp (K5924)
Hero Arts Charcoal Layering Paper
Hero Arts Pool Layering Paper
Hero Arts Tide Pool Dauber
Hero Arts Lemon Yellow Dauber
Hero Arts Ultra Pink Dauber
Hero Arts Lime Green Dauber
Hero Arts Dark Quartz Dauber
Hero Arts Charcoal Dauber
Hero Arts White Dauber
Tim Holtz Distress Watercolor Cardstock
We R Memory Keepers Corner Chomper
silver and clear sequins
paintbrush
water
iron
copy paper

We hope you have enjoyed today’s feature. We want to extend a sincere thank you to Kelly Rasmussen for her fabulous project and Hero Arts for sharing their company with us. Be sure to visit Hero Arts to see more of their great products and stop by their blog for more inspiration.  You can also find Hero Arts on Facebook.

In order to enter the give-away to win the prize shown above, please leave us a comment in the comments section of this post. One winner will be announced next Wednesday on the Paper Crafter’s Library blog!

pcandreasiggy


Winner of the CAS-ual Fridays Stamps Give Away

CAS-ualFridaysStampsLogo

I’d like to extend a HUGE thank you to CAS-ual Fridays Stamps and owner Michele Gross for sharing such a wonderful project and for their generous give-away of their collection shown below.


CAS-ualFridaysStampsPrize-550W

And now, the moment you’ve all been waiting for…….the winner is……Kelly Flaherty!

CASualFridaysStampsWinner

Congratulations Kelly! Be sure to email us at customerservice@papercrafterslibrary.com to claim your prize. Please be sure to put “CAS-ual Fridays Stamps Winner” in the subject line of the email, and then in the email itself, be sure to include your full mailing address and phone number.

Join us next week when we feature another great company.

andreasiggypcl

Trendy Tuesday – Cute Clips

by Aliya White

I love the little extras you can put on cards but sometimes I need inspiration on what to do with them.  I started off writing this story just about the  shaped paper clips you see everywhere but then I saw so many fun clips that folks were DIYing themselves that I wanted to include them too.  So this story is going to focus on the cuteness of all of these clips and some beautiful ways you can use them in your paper projects.

Who can resist a little blue bird?  Amy used this adorable metal clip on a card for mom.  His little wing even makes an upside down heart.  How sweet is that?  She attached the clip up front so you can see the entire bird and wing in the front of the card.

0213-04_thinkingofyoumom

card by Amy Sheffer photo courtesy of Pickled Paper Designs

I haven’t had the courage yet to try the easel cards and I just love how this next one turned out.  The occasion also adds to the specialness of this card.

Adoption-Card-v1-500x354

card by Pamela Staples photo courtesy of Sunny Girl Scraps

A close up of the above card so you can see how the arrow points to a sentiment on the card.

Adoption-Card-inset

Pamela Staples card inset photo courtesy of Sunny Girl Scraps

Susan takes advantage of lots of lovely layers to create this bright card.  Several tags and twine and paper arrows all help highlight the sentiment Hello Lovely.  The metal arrow adds a fun touch.

hello lovely

card by Susan Wong photo courtesy of Stamping with Susan

Amy created this card with the intention of it being masculine.  I love how she used the paper and washi tape to create a worn look.  Even the embellishment takes on a more masculine feel with the elements she chose.

masculine-label

card by Amy O’Neill photo courtesy of Amy’s Paper Crafts

I just love how this card carries the sending love theme throughout the whole card.  Sealed with a kiss as the sentiment is just taken to the next level with the adorable heart clip on the letter.

Sent with love

card by Marisa Gunn photo courtesy of Dzines by Meg

The stitching on this card is just awesome.  I think it means you don’t have to be perfect to be perfect for a special someone.  Cute and sweet and complimented with a little metal clip couple on the bottom.  This would make a great anniversary card.

youreperfect

card by Jules Hollis photo courtesy of Inspired Jules

This next card uses a little mini clip and twine to jazz it up.  It is so sweet the way it highlights the sentiment.

ilinacrouse_hiphiphooray15_1

card by Ilina Crouse photo courtesy of Just for You

I have seen these alligator clips at office supply stores but they have never looked this cute.  The colors are so fun and the baker’s twine looks awesome on top.  They do look totally rock star!

RCinnerrockstar1_aks

card by Amy Sheffer photo courtesy of Picked Paper Designs

This next card shows off the type of clip that will lay perfectly flat on your card or page.  I love the colors Marisa chose and it is perfect that she added the metal arrow to highlight her stamped sentiment.

stay calm and be awesome

card by Marisa Gunn photo courtesy of Dzines by Meg

At first I thought the paper clip embellishment was added by Lea, but come to find out you can buy predecorated clips with patterned paper flags attached to them.  There is a lot of beautiful detail on this card between the painted effect, the glitter stars and sentiment and the embellished paper clips tells your eyes to go one more place before you declare the card a winner.

True north

card by Lea Lawson photo courtesy of Lea’s Cupcakes and Sunshine

Lin used her clips to hang a banner.  I love that it is hanging vertically like a list.  She added the paper hearts to each of her clips for a custom design.

You constantly surprise me

card by Lin Brandyberry photo courtesy of Sending Hugs

I just could not resist including this sweet card.  The rays of sun are little clips.  Incorporated into the design of your project is another great way to use pins and clips.

 paperclip sun

card by Meghan photo courtesy of Pink Bike

So there you have it.  For inspiration, you can think of highlighting a part of your paper craft, pointing out the sentiment, incorporating it into the design or using them to actually hang a sentiment or element.  I love how you can buy the clips decorated but even more, you can make your own from supplies you have on hand.

So go ahead…make something pretty.

Below are a few of the clips you can buy ready to go.

prima butterfly paper clips round and flag clips

studio calico clips with bows studio calico paper clips

tim holtz minis arrows clips

Featured Artist/Designer: Alice Wertz

Today on the Paper Crafter’s Library blog, we’re continuing our weekly featured artist spotlight whereby each week we spotlight a different artist/designer in the paper crafting & mixed media world and introduce you to their fabulous work.

Today we’re thrilled to welcome Alice Wertz.

Before we show you Alice’s project, let’s get to know her a little bit more…

AliceWertz-03272014-250WHi! My name is Alice Wertz. I am a happy card maker living in Northern California with my loving husband and our two cat children. I started making cards around 2007 or 2008 and have been enjoying every minute of it. I am excited to be featured here today. It’s such an honor and hope you enjoy my project! =)


Instead of a card, I decided that I’d make something special for this feature. =)

AliceWertz1-03272014-550W

The embroidery hoop measures 4 1/2″ in diameter (without the fastening) and is a perfect platform for a little scene like this if you are tired of seeing a card!

AliceWertz2-03272014-550W

The stamps and patterned paper are from Lawn Fawn’s Into the Woods collection. Even though that’s a fall collection, they work perfectly for Spring themed projects as well, don’t you think? =) The images are colored with Copic markers.

Supplies:

Cardstock: (white) Papertrey Ink
Clear stamps: (fox, log, deer, acorn, speech bubbles from Into the Woods set) Lawn Fawn
Patterned paper: (clouds, green pattern from Into the Woods 6×6 Petite Paper Pack) Lawn Fawn
Dye ink: (Tuxedo Black) Tsukineko, (Orange Soda, Butter Bar, Tide Pool) Hero Arts
Color medium: (markers) Copic
Other: (foam tape) 3M, (embroidery hoop) Michaels

That’s all I have. Hope you enjoyed it and thanks so much for stopping by! =)

hugs,
Alice

We hope you have enjoyed today’s projects courtesy of Alice Wertz.  Also, be sure to stop by Alice’s blog to see even more of her beautiful work (and let her know we sent you).  You can also find Alice on Pinterest and Facebook.

pcandreasiggy

Featured Company: CAS-ual Fridays Stamps

CAS-ualFridaysStampsLogo

This week we are thrilled to welcome CAS-ual Fridays Stamps! In today’s spotlight you’ll learn more about CAS-ual Fridays Stamps, see a fantastic project by Michele Gross, the owner and designer, and have the opportunity to win a fabulous prize – Houndstooth, Loving Thoughts, Heart Note Fri-Dies and Heart Board Fri-Dies (shown below) valued at over $50. (details at the end of this post).

CAS-ualFridaysStampsPrize-550W

About CAS-ual Fridays Stamps

Founded in 2012, CAS-ual Fridays Stamps is a small company with big ideas located in beautiful Colorado.  The stamps are made of the finest clear photopolymer available, and proudly made in the Heartland of America. They love ink and stamp like a dream!  Our new line of Fri-Dies will coordinate with lots of our stamp sets, and are also made right here in the USA.

My designs are based on my love for Clean And Simple design, hence the CAS in our name, but will delight any stamper’s style. Whether you are a CAS enthusiast, or lover of Utterly Adorable Layers, you will have a blast getting inky with them.

New designs are released nearly every month. We’ll always start the party off with amazing sneak peeks from the Girl Fridays, and your chance to win prizes on the store blog.  We’ll continue with inspirations and tips throughout the month for your oohing and aahing pleasure, so be sure to follow our blog or facebook page so you don’t miss anything.  You’ll also want to follow us on Pinterest where each stamp and die set has it’s very own board filled with amazing project inspiration.

Please visit the CAS-ual Fridays Stamps website to see all the designs we have for you to ooh and aah over, and check out the list of stores where you can find them.  I truly had a blast designing these stamps and dies, and I just can’t wait for you to start having fun with them!

Michele Gross, Owner-Designer-Illustrator of CAS-ual Fridays Stamps

Today we welcome Michele Gross. We are so excited to have her showcase her work today on Paper Crafter’s Library. You can see Michele’s fabulous project below, but first, here is a little more about her:

MicheleGross-03262014-250WI rarely get inky anymore as most of my creative time is spent designing new stamps and dies, or packing up happy mail. When I’m not designing or packing orders, I put on my wife and mom hat.  I’m lucky to be married to my wonderful husband who thinks everything I do is awesome, and mom to our 2 amazing sons who keep me busy shuttling them to wrestling practices and tournaments, and doing endless loads of laundry for them.  I’ve been 39 so many times that I often have to do the math to see how old I really am.  I enjoy “reality” television, funny movies, loud music, and a nice glass of Pinot Noir. Little things make me happy, and Friday is my favorite day of the week.


Oh How I Love You Card

MicheleGross1-03262014-550W

I recently discovered that Canvas Corp has 12 x 12 canvas sheets in a variety of colors, and decided to use my Heart Board heart die to cut a few canvas hearts.  I cut a set of hearts from black and white canvas sheets.  I used the largest and smallest black hearts and adhered them to my panel using foam tape to pop them up.  Next, I sprayed the center white heart with a couple fun colors of glimmer mist, and after it dried I adhered it directly onto the panel between the black hearts.  Lastly, I stamped one of my favorite sentiments from Loving Thoughts at the bottom of the panel, then adhered it to the card base.  Simple but lots of fun!  You could easily substitute black and white cardstock instead of the canvas, but I like the bit of soft texture the canvas gives.

Supplies:

Loving Thoughts stamps and Heart Board Fri-Die
Canvas Sheets from Canvas Corp.
White Prismatic cardstock from Bazzill
assorted glimmer mists
Graphite Black Brilliance ink from Tsukineko
foam tape and Big Shot

What Would I Do Without You Card

MicheleGross2-03262014-550W

I needed a thank you card for someone who is always there for me, so I based my card around the pretty little sentiment from Loving Thoughts.  I stamped the sentiment at the bottom of my card base, using an ink color that coordinated with the glitter paper I wanted to use for my Heart Note die cut.  Next I stamped the middle sized Houndstooth border onto a strip of white cardstock in a pretty blue because I just love the way blue and red look together.  I adhered that border strip directly onto the cardstock, then added my sparkly and completely adorable Heart Note onto it with foam tape to give it a nice dimension.

Supplies:

Loving Thoughts and Houndstooth stamps, Heart Note Fri-Die
White Prismatic cardstock from Bazzill
Red glitter cardstock from Best Creations
Rhubarb Stalk and Bahama Blue Memento ink from Tsukineko
foam tape and Big Shot

We hope you have enjoyed today’s feature. We want to extend a sincere thank you to Michele Gross for her fabulous projects and her company CAS-ual Fridays Stamps with us. Be sure to visit CAS-ual Fridays Stamps to see more of their great products.

In order to enter the give-away to win the prize shown above, please leave us a comment in the comments section of this post. One winner will be announced next Wednesday on the Paper Crafter’s Library blog!

pcandreasiggy


Winner of the Lawn Fawn Give Away

LawnFawnLogo-550W

I’d like to extend a HUGE thank you to Lawn Fawn’s guest designer Yainea for sharing such a wonderful project and to Lawn Fawn for their generous give-away of their collection shown below.

LawnFawnPCLMarch2014Products-550W

And now, the moment you’ve all been waiting for…….the winner is……Kathleen Spaeth!

Lawn Fawn Winner

Congratulations Kathleen! Be sure to email us at customerservice@papercrafterslibrary.com to claim your prize. Please be sure to put “Lawn Fawn Winner” in the subject line of the email, and then in the email itself, be sure to include your full mailing address and phone number.

Join us next week when we feature another great company.

andreasiggypcl

Trendy Tuesday – Watercolor

 Watercolor

by Katherine Elliot

Technique trends offer fun ways to expand your creativity.  Watercolor techniques are some of the hottest coloring trends out there, so I’m excited to share some terrific examples from some extremely talented people showcasing this fun technique.  Take a look…

Card by Susie Wittwer, image source ProCraftination 

Using water based inks, markers, misters, aqua painters or water brushes will help you create beautiful swirls of color like shown on many of the cards featured today.  Stop by the artists’ blog posts to find details on how they created their masterful works and the various tools they employed.

a little birdie told meCard by Virginia Lu,  image source Virginia’s View Challenge

Blending many shades of ink can give you a wonderful rainbow of color to display, or you can choose just a couple colors to create a water swirled landscape.  Heat embossed designs that will resist the color added to your project are also a favorite technique to combine with your watercolor effects.

Card by Jo Nevil, image source Splitcoast Stampers

Hero Arts Faux Watercolor Background by Jennifer McGuire 2Card featuring heat embossed stamp and faux watercolor technique using Distress Ink markers by Jennifer McGuire, image source Hero Arts

Card by Nicole Picadura, image source Scraps and Stamps

Card by Lyndal Higgins, image source Ideas and Paper

Precision may not be necessary when playing with a watercolor technique, but creating the perfect background can take some practice.  It can certainly help if you find some tools to  help make your project come together effortlessly.  Look for stamps like My Favorite Things’ Watercolor Backdrops and Papertrey Ink’s Watercolor Wonder that allow you to very easily ink up a perfectly painted shape.

Watercolor-Backdrops-1---OHSCard by Cindy Lawrence featuring DC Watercolor Backdrops from My Favorite Things, image source The Creative Closet

Card featuring PTI Watercolor Wonder stamp set, stamps and image source Papertrey Ink

Products can make a difference when you are playing with water and paper.  Look for watercolor paper or cardstock, aqua painters, and gelatos that can offer you some of the best results in the watercolor world.

Distress Watercolor Cardstock

Ranger Ink Tim Holtz Distress Watercolor Cardstock

Bonnie Klass’ instructions on using re-inkers with a Stampin’ Up! Aqua Painter, tutorial and image source Stamping with Klass

*Faber-Castell YELLOW Gelatos Clear Stamp and Brush 4pk 770157

Faber Castell Gelatos, image source Simon Says Stamp

So-sweetScrapbook page by Emilia van den Heuvel featuring watercolor effects using Gelatos, image source Faber Castell Design Memory Craft

Drips, drops, smears of color make the most natural watercolor effects unique.  A stenciled patterned peaking through Chrissie Tobas’ next card shows off more trendy effects you can use with this technique.

Card by Chrissie Tobas featuring stamps from Newton’s Nook Designs, image source Harvest Moon Papiere

You can use your colorful watercolors as a background for many different springtime or any time occasions.

Card by Donna Mikasa, featuring stamps from Mama Elephant, image source Three Umbrellas

Spheres of  soft colors set very simply behind a bold sentiment on JJ Bolton’s card below shows another unique way to play with watercolors.

Card by JJ Bolton, image source Ribbon Girls

Scrapbook pages and mixed media projects can also embrace the beauty of watercolor effects.  Your layouts and creations take on additional artistic qualities when you try any painterly effects and watercoloring is no exception.  Check out these beautiful examples…

LoveRightNowScrapbook page by Lisa Dickinson, image source Gettin’ By, video tutorial at  Inspired, Two Peas in a Bucket

Scrapbook page by Bernii Miller, image source Weekend at Berniis

CreateYourselfSinglePageBlogMixed media Art Journal Page by Andrea Walford, video tutorial and image source The Art of Simple

By now most of us can sense the snow melting and rainy season approaching. Why not capture some of that moisture and turn it into something creative?!  Go ahead, give some watercolor techniques a try.  Happy crafting, everyone!

Featured Artist/Designer: Karin Åkesdotter

Today on the Paper Crafter’s Library blog, we’re continuing our weekly featured artist spotlight whereby each week we spotlight a different artist/designer in the paper crafting & mixed media world and introduce you to their fabulous work.

Today we’re thrilled to welcome Karin Åkesdotter.

Before we show you Karin’s project, let’s get to know her a little bit more…

KarinAkesdotter-250WMy name is Karin Åkesdotter and I live in Gothenburg Sweden with my husband and our 5-year-old son. I teach needlework and language fulltime at a 7-9 grade school and I love my work and my students, but always wish I had more time for my hobbies; cardmaking and watercolorpainting.
I started my blog Peppermint Patty’s Papercraft in 2010 and have loved every minute. I’ve made some wonderful new friends from all over the World.  I have been published in my favorite magazines, received awards that I’m really proud of and have had the chance to design and guest design for many fantastic companies. Currently I am so happy to be on 4 design teams that I absolutely LOVE: Purple Onions Designs, Waltzing Mouse Stamps, Lawnscaping and Paper Smooches SPARKS challenge team.
I think I would describe my style as CAS and cute.  I tried to make 2 cards for this post that represent “me”.

Thinking Of You Card

I used watercolorpaper as a card base.  I stamped the raccoon first using Archival ink.  I then masked the raccoon so I could stamp the background. I colored the images and background with watercolor pencils. I put a layer of glossy accents on top of the raccoon to give it some more dimension.  After that I cut a frame using Spellbinders dies and adhered it on top of the card using foam adhesive. After I had everything in place I stamped my sentiment.

KarinAkesdotter2-03202014-550W

You Brighten My Day Card

First I stamped and colored the fox image and cut it out. I used watercolor pencils for this image too.  I embossed the sentiment onto Bazzill’s cardstock, placed some die cut leaves onto the cardstock, just above the greeting and then I attached the fox to the sentiment panel directly over the leaves.  I then dry embossed a panel with swirls and added that to the card base with foam adhesive.  Then I attached the sentiment panel to the card with yet more foam adhesive.  (I really love that stuff and think it is key to beautiful cards with nice dimension to them!)

KarinAkesdotter3-03202014-550W

Supplies:

Card 1
Stamps: Purple Onions Design
Dies: Spellbinders
Paper: Heavy weight Watercolorpaper
Other: Derwents watercolor pencils, Glossy accents by Rangers

Card 2
Stamps: Lawn Fawn
Dies: Spellbinders rectangles, W Plus 9 Leaves
Cardstock: Bazzill Kraft, Basic and Card Shoppe
Other: Ranger embossing powder, Hero Arts Sizzix embossing folder, Derwents watercolor pencils

We hope you have enjoyed today’s projects courtesy of Karin Åkesdotter.  Also, be sure to stop by Karin’s blog, follow her on Pinterest or on Flickr to see even more of her beautiful work (and let her know we sent you).

pcandreasiggy

Featured Company: Lawn Fawn

LawnFawnLogo-550W

This week we are thrilled to welcome Lawn Fawn! In today’s spotlight you’ll learn more about Lawn Fawn, see a fantastic project by Yainea, one of their designers, and have the opportunity to win a fabulous prize package shown below (details at the end of this post).

LawnFawnPCLMarch2014Products-550W

About Lawn Fawn

lawnfawnowners

We’re a small company from Southern California that specializes in crafting products that are fun and lively. We began in March 2010 with the release of four stamp sets and are now proud to showcase our entire collection of over 95 sets in our little corner of the web. In 2012, we introduced paper, stickers and twine, and as of 2013 we are happy to feature new dies for some of our most popular stamp sets!

At Lawn Fawn, we love crafting products that are truly one of a kind. All of our stamps and paper feature original designs that have been created just for you; even our fonts have been customized! Our products have been seen in the pages of Paper Crafts, CARDS, Take Ten, and Creating Keepsakes magazines with many more publications to come.

Here at Lawn Fawn you will find crafting products that are cute, whimsical, and even a bit quirky, but one thing they all have in common is the ability to inspire creativity in everyone. Our products can’t wait to jump start your next craft project!

Visit us anytime to browse our latest products or simply find inspiration! And don’t forget to check out our Flickr and Facebook pages, follow us on Twitter and read our blog. We love to feature our customers and give away free stuff!

We hope our products make you smile!

Lawn Fawn Designer

Today we welcome Yainea. We are so excited to have her showcase her work today on Paper Crafter’s Library. You can see Yainea’s fabulous project below, but first, here is a little more about her:

SONY DSCHello! My name is Cristina but I use Yainea as a nickname all the time. I live in a small city in the northwest of Spain. As a Computer Engineer I love all computer related stuff, even playing video games. In the complete opposite of that I love making all kind of things with my own hands: baking, sewing, painting and of course, crafting! Also, I love animals (I have two dogs and a cat), going to the movies and reading 🙂 I’m really excited about becoming a member of the amazing Lawn Fawn design team! I love Lawn Fawn stamps, they are super cute and unique! Here in Spain cardmaking and scrapbooking are not very popular yet so when, some time ago, I saw “Winter Bunny” for the first time, I didn’t know anything about stamping. That little guy is the one guilty of that I’m here today! Well… He’s so cute! I hope you find inspiration in my incoming Lawn Fawn projects so we could have fun together! Thank you 🙂

Designer Project

Yainea has created a super cute scene with Lawn Fawn’s Happy Trails and Starry Backdrops sets. I love the way she heat embossed the stars to create a wonderful night time sky. The idea of putting the sentiment in the moon is brilliant! She colored her stamped images with Copics. The bright bold color really makes them pop from the card!

SONY DSC

Supplies:

Lawn Fawn Happy Trails stamp set
Lawn Fawn Starry Backdrops stamp set
Lawn Fawn Circle Stackables Lawn Cuts dies
Versamark Ink
Memento Tuxedo Black Ink
Copic Markers

We hope you have enjoyed today’s feature. We want to extend a sincere thank you to Yainea for her fabulous project and Lawn Fawn for sharing their company with us. Be sure to visit Lawn Fawn’s blog to see more of their great products.

In order to enter the give-away to win the prize shown above, please leave us a comment in the comments section of this post. One winner will be announced next Wednesday on the Paper Crafter’s Library blog!

pcandreasiggy