Hello there! I’m so happy summer is almost here. I’m so excited to share my projects with you this month. My first project was inspired by the Amy Tangerine product line. For this first project I share how to make your own day book. It’s a great way to use random pieces of designer paper that you may have laying around. I hope you try it out – it’s so simple.
Here’s a close up view of the various pages inside the album.
For my second project, I show a simple way to add an even coating of glitter to a stamped image. This is another simple technique and you get great results. It can be used on any stamped image, so I hope you are inspired to try it out. Sorry, my photo did not capture all the glitter but the video showcases the technique and all the ‘bling’!
My final project is a bonus project so there is no video tutorial, but there is the PDF handout. For this project I decided to create a two page scrapbook layout. I am happy to say that I was able to reuse packaging from some embellishments. I also was able to do some stamping. I hope you enjoy this layout and are inspired to get scrapping!
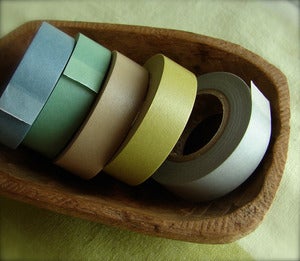
Washi tape, what is it? Essentially, it is decorative masking tape which is typically very thin, easy to tear off the roll and adhere to a project. This is a simple product with lots of possibilities. A wide assortment of decorative tapes come in an amazing array of colors, patterns, widths and styles to easily add flair to any project including cards, scrapbook pages, packaging and home decor.Colorful Japanese Washi tape from cutetape.com; image source cutetape.com
What can you do with this tape? Tear off what you want to decorate just about anything. Paper crafts are perfect of course, but you can expand your craftiness by adding some pretty tape to binder clips, packaging, and other projects around the house that are begging for a zing of color or your personal touch.
Washi tape decorated gift tags, instructions and image source found at happytape.blogspot.com
Binder clips decorated with Japanese masking tape, image source cumbersome.com
Click on the links to the sites where I found these images to see more options on how to use Washi tape on many decorative projects.
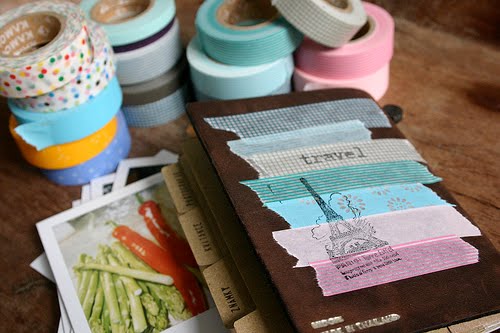
A decorative touch on a travel journal with stamped tape, more ideas and image source from teaforjoy.blogspot.com
Pretty tape decorates a plain package beautifully. More tape projects and image source at
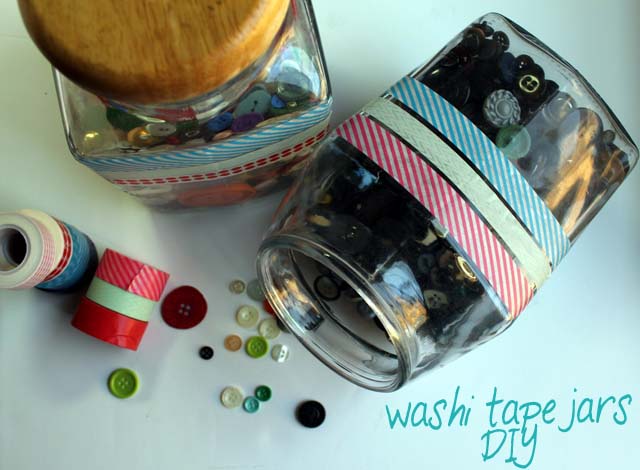
Decorate plain jars that hold your stash of embellishments, ribbons, buttons, or brads with some pretty tape – easy, peasy!
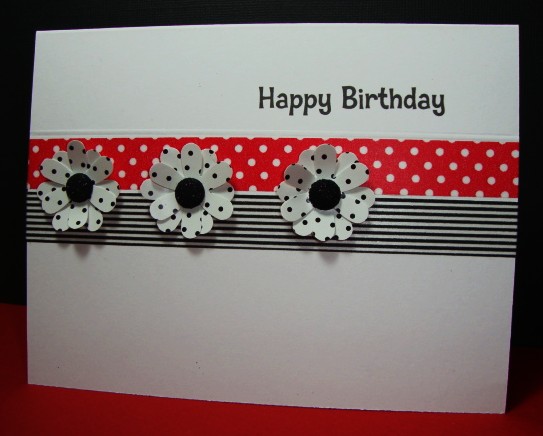
Oh, and cards? Why yes, of course cards are perfect candidates for a little Washi tape. A strip of tape behind the tag is shown on the bottom of this very pretty card by Lori Barnett…
Companies very familiar to the paper craft community have some excellent decorative tapes which easily coordinate with other products they offer. While they are not all tagged as “washi tape,” they are similar in style, and can be fun additions to your cards or scrapbook pages.
We R Memory Keepers Washi Tape, image source scrapbook.com
Is one pattern or one color on a role too restrictive for your creativity? The Section Smash tape from K & Company gives you a lot of different options on your projects with it”s multiple styles and colors all on one roll.
Tim Holtz tissue tape is a popular decorative tape that comes in different translucent patterns. Besides just adhering the tape flat on a project, see more ideas on how to create a tape flower or tape ruffle in Tim”s tissue tape ideas blog post from last year.
Tissue tape flower on tag project shown above, image source timholtz.typepad.com
Of course, I must show you another cute little card that uses some Washi tape in a fashionable way- a couple torn, short strips accent the corner of this cheerful card…
Welcome to the Makeover Monday challenge. Every Monday, as part of our project ideas newsletter we’re going to make over one of our own older cards, showing you how easy it is to use existing designs (your own OR someone else’s) as inspiration. This week, Paper Crafter’s Library Senior Educator/Designer Tracy Wegener has designed this “Growing Family” card.
Your challenge – as with our previous Makeover Monday Challenges – is to use our piece as inspiration and make it into a card, scrapbook page, or other project. You can use the layout, the colors, an element you like…it can look like our piece, or nothing at all like our piece. We want to see where YOU take this. This challenge is strictly a “work from your stash” challenge.
As a newsletter subscriber you will have received a link to a private web page, from which you can watch the video tutorial. If you didn’t receive the video tutorial link then please be sure to email us at customerservice@papercrafterslibrary.com. In order to ensure you don’t miss any more of our Makeover Monday Challenge video tutorials, please be sure you sign up for our FREE email newsletter from the top right sidebar of this blog. Please note that the video tutorial will be available for general viewing for one week only – and then will be moved into our library for our members only
Every Monday, here on the blog, we’re going to post the original picture, and the made over picture. You will have ONE week to upload your challenge piece. Instead of a weekly prize though, we’re going to award a prize monthly. So for each week you participate and each project you submit – you will get one entry into our monthly draw. On the first Monday of each month – we will announce one challenge winner, who will be featured as a guest designer on the Paper Crafter’s Library blog as well as our Facebook page. As a guest designer, we’ll feature your biography, some of your favorite paper crafting projects and we’ll link to your blog.
Our inspiration piece, shown below, is an archived project from the Andrea Walford blog.
Here are the details on how you can participate in the Makeover Monday Challenge:
A new Makeover Monday Challenge video tutorial will be emailed out to newsletter subscribers every Monday (so make sure you are signed up). Then, here on the blog, we will post a picture of our inspiration piece and made-over project along with an Inlinkz button for you to enter your project. Here are the details:
Work from your own stash to create a project based on the inspiration project provided – you can use any products you would like, and make any type of project you like – card, scrapbook page, album, 3D item etc.
Post your project on your blog, in your gallery or on any other photo-hosting site (such as photobucket or flickr).
Click on our inLinkz button below to add a link to your project for our challenge
You will have until 7am, Monday, June 18th to add your link to the list to be eligible to win. And you can enter as many times as you like.
For each project you submit, your name will be entered into our monthly draw. The winner will be announced on Monday, July 2nd.
Good luck to everyone and we look forward to seeing your projects!
I hope you’ve all enjoyed our 2 day spotlight on American Crafts and their fabulous Amy Tangerine Sketchbook Collection. When I first saw the patterns and colors in this collection I have to admit, I was intimidated. The colors? Totally my style! The patterns? Way different than what I typically work with. I took it as a challenge and a way to stretch myself creatively and push myself out of my comfort zone. The result? Totally loved it! What can I say…American Crafts absolutely rocks! You’ll definitely be seeing more projects using their products.
So now, before I announce the winner of the prize pack, I wanted to take a minute to thank American Crafts for their generosity both as an invited sponsor and for their donation of the prize pack.
Drumroll please…..
Congratulations Shannon – you are the lucky winner of the American Crafts Amy Tangerine Prize Pack Pictured above.
Now although this wasn’t planned, this comment brought a huge smile to my face – it’s not every day that we hear from 10 year old paper crafters. So, we decided to put together a special prize pack just for you Abby!
Please email us at customerservice@papercrafterslibrary.com to claim your prize. Be sure to put “American Crafts Blog Winner” in the subject line and include your full shipping address and phone number in the body of the email.
So that’s it for this week. We’ll be back next week with more great project ideas and a two day Prima Marketing spotlight on Thursday and Friday so stay tuned!
Welcome to Day 2 of our American Crafts Spotlight here on the Paper Crafter’s Library blog! Today we’re continuing our focus on some of American Crafts’ amazing tools, as well as sharing more great project ideas created using the Amy Tangerine Sketchbook Collection by American Crafts. We’ll also be giving away the American Crafts prize pack shown below, filled with Amy Tangerine Sketchbook products generously donated by American Crafts.
American Crafts Prize Pack – Leave a Comment to Win the Prize Pack Pictured Below
Before we jump into our projects and videos for today, let me once again introduce you to American Crafts:
American Crafts
Founded in 1994, American Crafts initially specialized in pen manufacturing — many of which are still part of the company’s lineup today — before transitioning in the late 1990s to creating innovative, well-designed products for the emerging scrapbooking industry. Since then, American Crafts has steadily expanded its product offering, becoming a trendsetter along the way. In 2009, American Crafts acquired the Pebbles Inc. brand, and in late 2011 the Crate Paper brand, to offer an even wider variety of products to scrapbookers. American Crafts is known for fresh, clean product design and friendly, personalized customer service. Products feature bright, vibrant colors and a contemporary feel, inspiring crafters to record their memories in a fun, sophisticated, and stylish way.
Product Spotlight: Cut Up 12″ x 12″ Rotary Blade Trimmer
In the video below I spotlight the American Crafts Cut Up 12″x 12″ Rotary Blade Trimmer – I’ll give you a close up of all the features, show you how to use it, how to change the blades as well as how to change the cutting bar.
In addition to our product spotlight, as we mentioned above, we’ve also created a number of different projects for you featuring the Amy Tangerine Sketchbook Collection. The projects for today were ones that I (Andrea) created. One of our aims in creating these projects was to show you how incredibly versatile this product line is, how quickly and easily you can put cards together using these products, and how many different looks you can achieve.
Floral Beauty Card
The Floral Beauty Card below is the perfect design if you need to create gorgeous cards in a hurry. The background of the card is the Harper’s Hue patterned paper – it already has the design and the gorgeous watercolored effect. I simply matted the paper onto coordinating colors of card stock and then used one of the Amy Tangerine Doodle Dimensional Stickers as my focal point. Finish it off with some black polka dot ribbon from the American Crafts Amy Tangerine Sketchbook Ribbon Value Pack and a bit of baker’s twine and you have a simple yet striking card!
Paper Crafter’s Library members can access the video tutorial and handout for this Wonderful Memories card here. (You must be logged in to access this page.)
Paper Crafter’s Library members can access the video tutorial and handout for this Spread The Love card here. (You must be logged in to access this page.)
Paper Crafter’s Library members can access the video tutorial and handout for this Floral Hello card here. (You must be logged in to access this page.)
Paper Crafter’s Library members can access the video tutorial and handout for this Together scrapbook page here. (You must be logged in to access this page.)
Supplies
Ink: Black Pitt pen (Faber-Castell)
Paper: Sketchbook Collection DP (Amy Tangerine – American Crafts)
Accessories: Sketchbook Remarks Dimensional Stickers Doodle, Sketchbook Bits Embellishments Die Cut Shapes, Sketchbook Flat Top Fabric Brads, Sketchbook Value Pack Premium Ribbon 24 Spools, Sketchbook Foam Thickers Alphabet Stickers Journal/Black (Amy Tangerine – American Crafts); buttons (papertrey ink); Leaf Green Zipper trim (Maya Road); Tape Runner XL (thermo-web); double sided tape (Scotch); Charcoal baker’s twine (The Twinery); 6” wide acrylic graph ruler (Fiskars); 3” wide acrylic graph ruler (EK Success); paper snips, Craft and Rubber scissors, Fabric scissors, paper-piercing tool, foam mat, mini glue dots, buttons (Stampin’ Up!); 450 Quick Dry adhesive (Helmar); buttons (Bo Bunny); black rhinestones (Kaiser Craft)
So there you have it! Day 2 – our final day – of our American Crafts Spotlight! I hope you’ve found today to be informative and inspirational!
A Bit About Paper Crafter’s Library
The world of paper crafting is HUGE! Whether you are a beginner, or you’ve been creating for years, the sheer number of different products, tools, techniques and project ideas can be overwhelming. After spending 6 years helping thousands of paper crafters around the world become more successful in the creative space through her series of kits, digital tutorials and online classes, Andrea Walford began looking for a new approach to education. In 2011 she launched Paper Crafter’s Library – the first, and still to this day, only website that provides an all-in-one learning solution for paper crafters. With almost 800 videos currently in their library and 4-5 new videos added each week, Paper Crafter’s Library offers comprehensive training on products, tools, techniques, and project ideas. From beginner through to advanced, whether your interest is in stamping, card making, scrapbooking, creating 3D items or altered art – you’ll find all the resources you need to navigate the world of paper crafting in ONE place, organized and indexed so that it’s quick and easy to find.
To enter to win our American Crafts prize pack generously donated by American Crafts, please leave your comment to below. Winners will be announced at 11 pm EST.
Welcome to our American Crafts Spotlight here on the Paper Crafter’s Library blog! Today and tomorrow we’re going to introduce you to a couple of American Crafts’ amazing tools, as well as share a number of different projects that were created using the Amy Tangerine Sketchbook Collection by American Crafts pictured above. We’ll also be giving away the American Crafts prize pack shown below, filled with Amy Tangerine Sketchbook products generously donated by American Crafts.
American Crafts Prize Pack – Leave a Comment to Win the Prize Pack Pictured Below
Before we jump into our projects and videos for today, let me introduce you to American Crafts:
American Crafts
Founded in 1994, American Crafts initially specialized in pen manufacturing — many of which are still part of the company’s lineup today — before transitioning in the late 1990s to creating innovative, well-designed products for the emerging scrapbooking industry. Since then, American Crafts has steadily expanded its product offering, becoming a trendsetter along the way. In 2009, American Crafts acquired the Pebbles Inc. brand, and in late 2011 the Crate Paper brand, to offer an even wider variety of products to scrapbookers. American Crafts is known for fresh, clean product design and friendly, personalized customer service. Products feature bright, vibrant colors and a contemporary feel, inspiring crafters to record their memories in a fun, sophisticated, and stylish way.
Product Spotlight: Knock Outs Interchangeable Border Punch System
Knock Outs is an interchangeable border punch system that allows you to create a decorative border on your project, and then switch out the punch to add a different border to your next project. The picture below shows you the Border Starter Kit as well as all the currently available punch designs. I have a video tutorial for you that demonstrates exactly how to use this border punch system.
In addition to our product spotlight, as we mentioned above, we’ve also created a number of different projects for you featuring the Amy Tangerine Sketchbook Collection. Our projects for today were created by Tracy, and the projects you’ll see tomorrow were ones that I (Andrea) created. One of our aims in creating these projects was to show you how incredibly versatile this product line is, how quickly and easily you can put cards together using these products, and how many different looks you can achieve.
“Love….the Best Feeling” Card
Our first card for today is “Love….the Best Feeling” Don’t you just love the color scheme? We have a free video tutorial on how Tracy made this card below, along with a free PDF handout.
Our second card for today is this smile card in which Tracy cut out elements from the Lily’s Landscape patterned paper and popped them up on her card using dimensional foam. Such a great way to use patterned paper that you may feel is too busy to use on it’s own.
Paper Crafter’s Library members can access the video tutorial and handout for this Smile card here. (You must be logged in to access this page.)
Accessories: Sketchbook Foam Thickers (American Crafts); black rhinestones (Kaiser Craft); Primary Ebony Super Fine embossing powder (WOW! Embossing); embossing buddy, paper snips, Stampin’ Dimensionals, bone folder (Stampin’ Up!); Heat It! tool (Ranger); Tape Runner XL (thermo-web)
Thanks So Much Card
In Tracy’s Thanks so Much Card, she create the focal point of her card using the Sketchbook Remarks Fabric Stickers. In order to help them stand out on the vibrant patterned paper she uses on the card front, she matted the fabric stickers onto black card stock. The buttons with button twine adds the perfect finishing touch. The greeting itself was created using a Dymo Label Maker.
Paper Crafter’s Library members can access the video tutorial and handout for this Thanks So Much card here. (You must be logged in to access this page.)
Accessories: Sketchbook Remarks Fabric Stickers Pigment (Amy Tangerine – American Crafts); bone folder, paper snips, Stampin’ Dimensionals (Stampin’ Up!); black jute (May Arts); Orange buttons (papertrey ink); Caption Maker (Dymo); Tape Runner XL , tiny glue dots (thermo-web)
Remember… Corkboard with Push Pins
Tracy’s last project for today is this cork board with push pins. What I love about this project (other than everything LOL) is that she cut the prongs off of the fabric brads and then stuck them to a flat top thumb tack to create a decorative push pin. Wouldn’t this be great for a tween or teen’s locker?
Paper Crafter’s Library members can access the video tutorial and handout for this Remember…Corkboard with Push Pins here. (You must be logged in to access this page.)
Supplies
Paper: Sketchbook Collection DP (Amy Tangerine – American Crafts)
Accessories: Heavy weight chipboard, cork piece, wire cutters (Craft Store); red liner tape (Simon Says Stamp); ½” Round-It-All (Zutter); Tombow multi-purpose liquid adhesive (Tombow); Hot Glue (Martha Stewart); Stampin’ Dimensionals (Stampin’ Up!); Charcoal baker’s twine, Peapod baker’s twine (The Twinery); Sketchbook Remarks Sticker Book Accents & Phrases, Sketchbook Remarks Dimensional Stickers Doodle, Sketchbook Flat Top Fabric Brads, Sketchbook Bits Embellishments Die Cut Shapes, Sketchbook Value Pack Premium ribbon 24 spools (Amy Tangerine – American Crafts); flat head push pins (Hardware Store); Ribbon scissors, sanding block, paper snips (Stampin’ Up!)
So there you have it! Day 1 of our American Crafts Spotlight! I hope you’ve found today to be informative and inspirational!
A Bit About Paper Crafter’s Library
The world of paper crafting is HUGE! Whether you are a beginner, or you’ve been creating for years, the sheer number of different products, tools, techniques and project ideas can be overwhelming. After spending 6 years helping thousands of paper crafters around the world become more successful in the creative space through her series of kits, digital tutorials and online classes, Andrea Walford began looking for a new approach to education. In 2011 she launched Paper Crafter’s Library – the first, and still to this day, only website that provides an all-in-one learning solution for paper crafters. With almost 800 videos currently in their library and 4-5 new videos added each week, Paper Crafter’s Library offers comprehensive training on products, tools, techniques, and project ideas. From beginner through to advanced, whether your interest is in stamping, card making, scrapbooking, creating 3D items or altered art – you’ll find all the resources you need to navigate the world of paper crafting in ONE place, organized and indexed so that it’s quick and easy to find.
Many of you may remember that back in April we hosted a Graphic 45 Week on the Paper Crafter’s Library Blog. It was week filled with projects and inspiration using Graphic 45’s Tropical Travelogue Collection. We had such a great experience partnering with Graphic 45 and their design team, and such a great response from you, that we’ve decided to partner with them on an ongoing basis. The first and third week of every month one of the Graphic 45 Designers will share a project they’ve created here on the PCL Blog. Before I introduce you to our first Designer, I just wanted to take a minute to re-introduce Graphic 45 for those of you that may not be familiar with the company.
Graphic 45 is an award-winning scrapbook and paper crafting company— owned and operated by a mother and her two daughters.
Diane Schultz (pictured center)—Designer and CEO (aka mother)
“I’m passionate about being creative and eager to make it possible for others to find their creative voice. My background includes stints as a designer for, McCalls, Simplicity, Vogue/ Butterick, Mattel Toy Company and a host of other jobs that each, in some way, led me to what I do now. At 45 I went back to school and got my degree in graphic design— I named the company to celebrate that achievement.”
Aimee Filimoehala (pictured left) —Director of Operations
“I wear a lot of hats and love it that way. Business, marketing, operations, etc. have made me a pro at multitasking (aka juggling‑figuratively and literally). When we launched Graphic 45 just three years ago we had no idea what was in store, working together as a family has been an amazing journey that we all feel so grateful to be apart of.”
Charee Filimoehala (pictured right)—Director of Customer Service and Design Team Coordinator
“I joined the team a little over three years ago and haven’t looked back…what a life-changing experience this has been. I love working with and around creative people and products (not to mention I like my co-workers quite a bit). I spend my days working with our friendly stores and talented design team…the occasional trip to a workshop or tradeshow pretty nice too.”
Together we create vintage inspired crafting products that capture the flamboyant style of the 1920’s and 30’s – with vibrant color, irresistible texture and imaginative design to create products with decades-old appeal that’s both fresh and familiar. Let our products inspire your next scrapbook layout, card, album or home decor project.
***********
Here’s a picture of their booth at the CHA show which absolutely blows us away every year! The artwork inside is absolutely stunning and totally unique. At the last show as we were speaking with Diane she told us that many of the altered pieces were vintage finds which she and her team transformed with their gorgeous Graphic 45 products. We can’t wait to stop by their booth at the Chicago CHA and see what they’ve got in store this year!
Here’s a picture of the Graphic 45 team – they’re always dressed in period costumes to complement the themes in their collections – every day of the show brings a new set of costumes. The ones shown below were for their Little Darlings collection.
Graphic 45 Designer Alberto Juarez
Our first Graphic 45 Guest Designer for this month is Alberto Juarez. Alberto is part of the 2012 Graphic 45 Design Team.
You can see Alberto’s fabulous project below, but first, here is a little more about Alberto:
I’m a guy from Spain, I’m 24 years old and I have been doing scrapbooking for over two years. I discovered scrapbook totally by chance as I wanted to make a special gift. I wanted to make a diary for a trip (I love to travel) and that’s how I discovered the wonderful world of scrapbooking. My style is vintage, totally a classic vintage Victorian European style. I also enjoy working with bright colors. The vintage bright colors are perfect and of course there is no other brand besides Graphic45 that offers all of that.
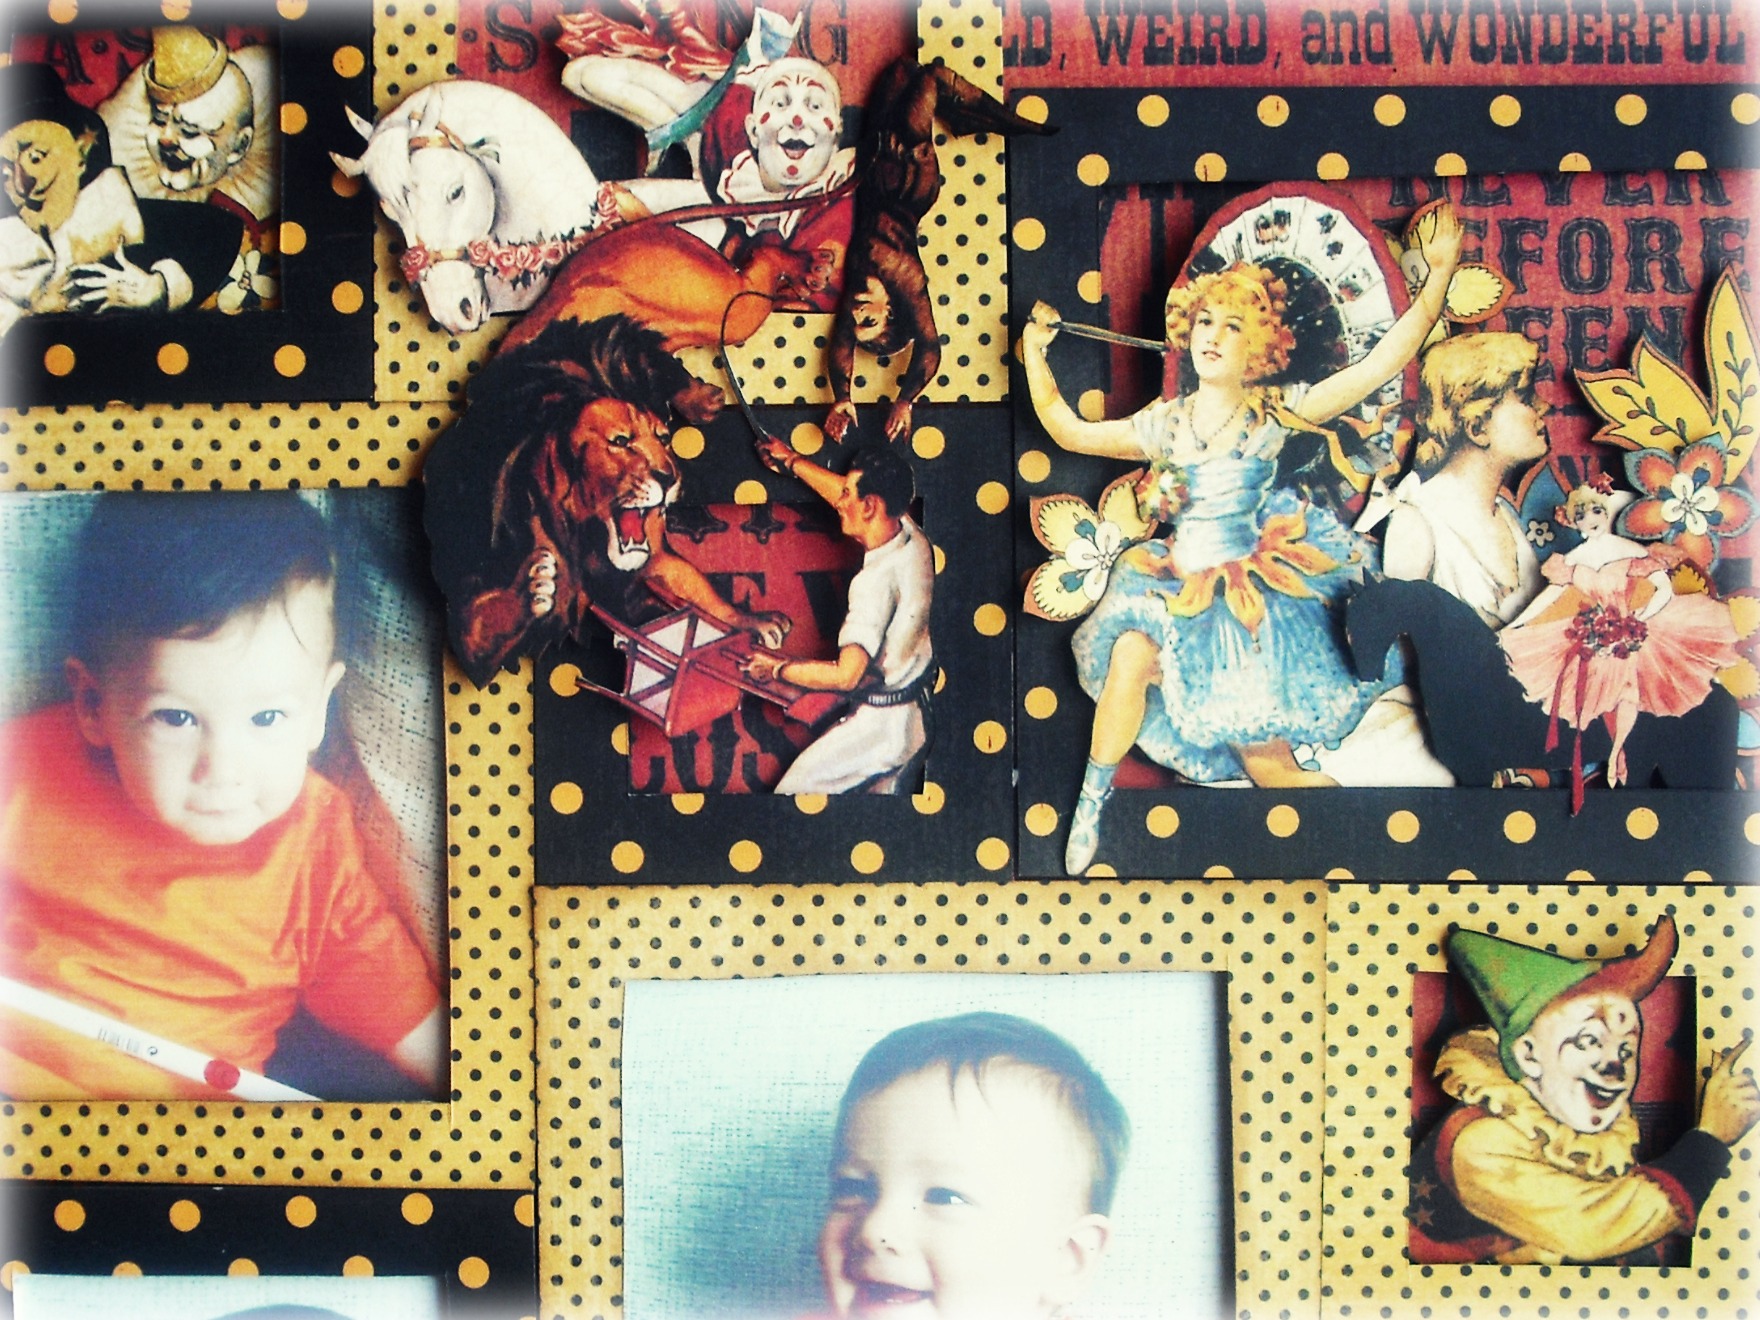
Fun Circus Layout
In this layout I chose a picture of my nephew, who is laughing all the time. It was so much fun as there was a clown next to him, hence I decided to choose the Le Cirque collection, because the colors are so fun. This expresses exactly what I want to transmit. The idea of working with frames in which I tell the story was made easy with the Graphic 45 papers as there are so many elements you can cut apart and use.
*******************
I would like to extend a warm thank you to Alberto for sharing his wonderful layout with us! Please take a minute to stop by Alberto’s Blog and of course the Graphic 45 blog to check out all their amazing creations!
Today I’m so thrilled to welcome a special Guest Designer to the Paper Crafter’s Library Blog – Ashley Cannon Newell! I have been a long-time follower of Ashley’s, absolutely loving her style of paper crafting….and I just know you’re going to love the projects she is sharing with us today! But first, let’s get to know her a little bit more…
I’m Ashley and I have a passion for paper crafting, photography, fashion, and trying new recipes in the kitchen. I have always been interested in the arts since I can remember. I started my first scrapbook in high school and that was long before any industry focused products were available. I started blogging in 2008 after discovering the paper crafting online world. Currently, I design for Papertrey Ink and also run a challenge-based eZine. When I’m not in my studio, you can find me at work (yep, gotta day job), photographing a wedding, surfing the Internet, or watching a Lifetime movie. I’m really honored that Andrea wanted me to guest design for Paper Crafter’s Library! I hope you enjoy my cards!
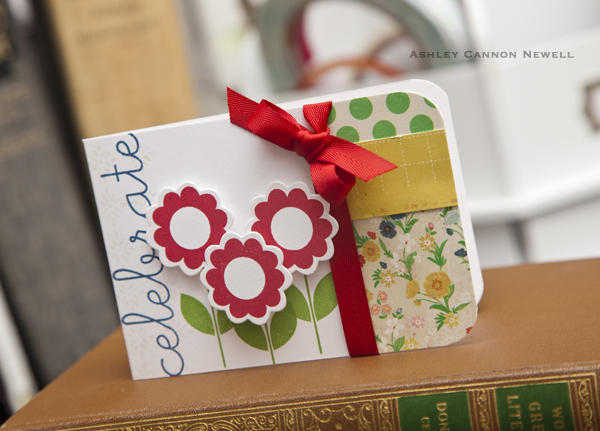
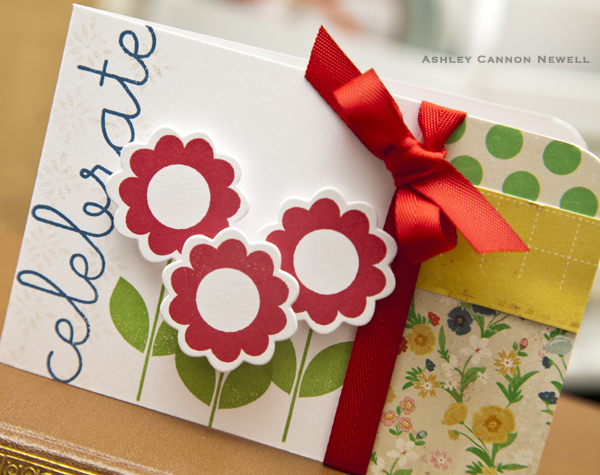
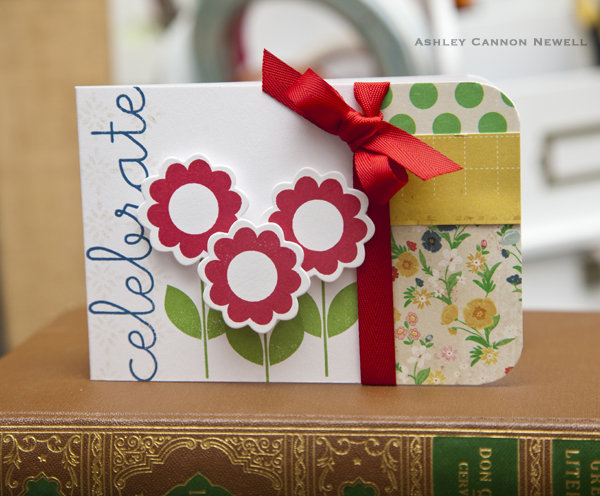
Celebrate Cards
For the first card, I used patterned paper and stamps to come up with a design.
Instead of putting away all of my supplies, I thought it would be a good time to challenge myself to use the same materials to generate another card with a different design.
So, I made the second card with the scraps from the patterned paper (you can see in the video) and just about all the same stamps and inks and paper. I think this is a great way to make multiple cards in one sitting and will definitely challenge myself to do it again in the future!
If you are more of a visual person, you can view the video below to help you create the Celebrate card above. I hope you enjoy it!
Please take a minute to check out Ashley’s Blog and follow her on Facebook to find out more about her and see her wonderful creations!
Welcome to the Makeover Monday challenge. Every Monday, as part of our project ideas newsletter we’re going to make over one of our own older cards, showing you how easy it is to use existing designs (your own OR someone else’s) as inspiration. This week, Paper Crafter’s Library Senior Educator/Designer Tracy Wegener has designed this “Pink With Gratitude” card.
Your challenge – as with our previous Makeover Monday Challenges – is to use our piece as inspiration and make it into a card, scrapbook page, or other project. You can use the layout, the colors, an element you like…it can look like our piece, or nothing at all like our piece. We want to see where YOU take this. This challenge is strictly a “work from your stash” challenge.
As a newsletter subscriber you will have received a link to a private web page, from which you can watch the video tutorial. If you didn’t receive the video tutorial link then please be sure to email us at customerservice@papercrafterslibrary.com. In order to ensure you don’t miss any more of our Makeover Monday Challenge video tutorials, please be sure you sign up for our FREE email newsletter from the top right sidebar of this blog. Please note that the video tutorial will be available for general viewing for one week only – and then will be moved into our library for our members only
Every Monday, here on the blog, we’re going to post the original picture, and the made over picture. You will have ONE week to upload your challenge piece. Instead of a weekly prize though, we’re going to award a prize monthly. So for each week you participate and each project you submit – you will get one entry into our monthly draw. On the first Monday of each month – we will announce one challenge winner, who will be featured as a guest designer on the Paper Crafter’s Library blog as well as our Facebook page. As a guest designer, we’ll feature your biography, some of your favorite paper crafting projects and we’ll link to your blog.
Our inspiration piece, shown below, is an archived project from the Andrea Walford blog.
Here are the details on how you can participate in the Makeover Monday Challenge:
A new Makeover Monday Challenge video tutorial will be emailed out to newsletter subscribers every Monday (so make sure you are signed up). Then, here on the blog, we will post a picture of our inspiration piece and made-over project along with an Inlinkz button for you to enter your project. Here are the details:
Work from your own stash to create a project based on the inspiration project provided – you can use any products you would like, and make any type of project you like – card, scrapbook page, album, 3D item etc.
Post your project on your blog, in your gallery or on any other photo-hosting site (such as photobucket or flickr).
Click on our inLinkz button below to add a link to your project for our challenge
You will have until 7am, Monday, June 11th to add your link to the list to be eligible to win. And you can enter as many times as you like.
For each project you submit, your name will be entered into our monthly draw. The winner will be announced on Monday, July 2nd.
Good luck to everyone and we look forward to seeing your projects!
Before I announce the Makeover Monday winner for May, I would encourage you to check out all this months entries. You can click on the links below to be taken to the direct posts.
Can you believe it’s Friday already and Maya Road week is over? We’ve found that this week has just flown by! It’s been an amazing experience working with Maya Road and their talented Design Team. We hope you’ve enjoyed this week as well and the projects that have been showcased. If you haven’t already I encourage you to check out the Maya Road Blog for ongoing Maya Road inspiration as they always have wonderful projects posted. We’d like to extend a warm thank you to Maya Road for providing us with the products we’ve used in the creation of all these projects, as well as for their generous give-away! We’d also like to extend a thank you to the Maya Road design team for their gorgeous projects. It’s so nice to see different creative styles!
Winner of Maya Road Prize Pack #1:
Winner of Maya Road Prize Pack #2:
Please email us at customerservice@papercrafterslibrary.com to claim your prize. Be sure to put Maya Road Winner in the subject line, and the in the body of the email please include your full shipping address and phone number.
We hope you’ve enjoyed this week as much as we have, and be sure to come back next week as we have Ashely Cannon Newell as a Guest Designer on Monday, our Trendy Tuesday spotlight, Alberto Juarez from Graphic 45’s Design Team on Wednesday, and then Thursday and Friday we’re spotlighting American Crafts and have a great prize pack from them as well.