Free Project of the Week – Wonderful Birthday Card – 04 05 2013

This week for our Free Project of the Week we`re featuring a masculine birthday card which uses the Fancy Pants Swagger Collection that we featured a few weeks ago.  It`s such a fun collection to work with because there are a multitude of elements that you can mix and match to create.  For the base of the card I chose a lined patterned paper that already had hats printed along the bottom.  I then layered strips of a variety of different patterns from the collection (all papers were from the 6 x 6 paper pad).   I cut a notch into a couple of them, die cut along the top of the woodgrain pattern and then kept one piece simply as a strip.  I used nice bold greeting from Artistique Designs – a new stamp line  which has not yet been released (these the pre-production samples). 

WonderfulBirthday-04052013-550W

You can download the pdf handout here

You can watch the video below:

If you enjoyed today’s project, you enjoy our style of teaching and would like to learn even more I encourage you to check out the benefits of becoming a Paper Crafter’s Library member.

andreasiggypcl

Featured Designer: Lynn Mangan

Today on the Paper Crafter’s Library blog, we’re continuing our weekly featured designer/artist spotlight whereby each week we spotlight a different artist/designer in the paper crafting & mixed media world and introduce you to their fabulous work.

Today we’re thrilled to welcome – Lynn Mangan

Before we show you her fabulous projects, let’s get to know her a little bit more…

lynnmanganheadshotI am extremely blessed to be married to my high school sweetheart, Patrick, for just over twenty years. We have four beautiful boys, Ryan, Jonathon, Collin and Marcel; thus…the name of my blog, The Mango Boys and Me. The boys are the light of my life, keeping me busy and constantly entertained.  I love to make cards, scrapbook a bit and share what’s happening with our family on my blog.

I absolutely love making cards. I find it super relaxing and love to give my cards to others.  Making connections with people, letting them know I’m thinking of them if they’re going through a difficult time, celebrating a special occasion or saying thank you to me is the best part about paper crafting.  You can visit my blog here: www.themangoboysandme.blogspot.com


My Card Today

For my card today, I used some of my favorite colors and stamps/dies.  Stampin’ Ups Regal Rose and Lucky Limeade are two of my favorite colors in the SU line up of colors.
lynnmanganproject
I used a Simon Says Circle Borders craft die to create the negative die on the white panel.  For the die cut, I used the PaperSmooches Reflections stamps and matching dies. I think the negative die with the flowers and leaves looks like the flowers are growing from a lattice fence.   To finish off the card, I added a sentiment from Verve’s Treasured Words.  I hope you like the end result!

Thanks so much for stopping by and checking out my card today and big huge thanks to Paper Crafter’s Library for inviting me to post today!


We hope you have enjoyed today’s projects courtesy of Lynn Mangan. Also, be sure to stop by Lynn’s blog to see even more of her beautiful work (and let her know we sent you).


Featured Company: Faber-Castell Design Memory Craft

DMC_Newlogo_RegMark_2012
I’m so excited to bring you to this week’s Featured Company: Faber-Castell Design Memory Craft!   In today’s spotlight you’ll learn more about Faber-Castell, see a fantastic project by one of their designers and have the opportunity to win a collection their Paper Crafter Crayons shown below (details at the end of this post).

April2013giveaway

About Faber-Castell Design Memory Craft

Founded in 1761, Faber-Castell Design Memory Craft is a leading manufacturer in high quality crafting supplies. count

The 8th generation behind Faber-Castell Design Memory Craft: Count Anton Wolfgang von Faber-Castell.
2011 was a milestone year for Faber-Castell USA as we celebrate the 250th Anniversary of Faber-Castell.  We are proud of our longevity and what it represents – consistent delivery of a quality experience in all areas of business. In keeping with Lothar von Faber’s quote, “to rise to the highest rank by making the best that can be made in the whole world” Faber-Castell USA is committed to staying true to this vision of quality, tradition, and innovation now and in the future.

 Product:  Paper Crafter Crayons ™  are highly pigmented wax crayons that can be used on all types of crafting surfaces such as cardstock, chipboard, canvas, embossed paper and wood.  The unique twist-up design also allows you to sharpen the crayons.  Available in 24 brilliant colors.


Special Faber-Castell Design Memory Craft Guest Designer

Today we also have a special Faber-Castell Guest Designer. Vivian Keh is part of the 2013 Faber-Castell Design Team.  You can leave a comment below the post telling us what you like about her project for a chance to win a set of the Paper Crafter Crayons pictured above.viviankehheadshot
You can see Vivian’s fabulous project below, but first, here is a little more about Vivian:

Vivian Keh is a papercrafter, mixed media artist, enthusiastic student of watercolor, and produced writer.

Outside of these passions, she enjoys just hangin’ with her husband, frolicking with her dogs, and all things which keep her present, including occasional pretty drinks.


Designer Project:

Hello friends!  Vivian here today with an easy tutorial showing how to create these pretty, frilly, delicate blossoms using Paper Crafter Crayons from Faber-Castell Design Memory Craft. I hope you’ll take a break from your day to watch the video below tahe project!

kehproject1
kehproject2
kehproject3
“This video shares paper distressing techniques used in conjunction with Paper Crafter Crayons from Faber-Castell Design Memory Craft.  This easy technique results in luminous, organic patterns that possess a soft waxy sheen.  The papers you customize in this way are then ready to use in your choice of papercrafted projects.  The dimensional card in the video was inspired by hydrangeas and how beautifully they illuminate shady nooks of the garden.  In this instance, the papercrafting technique was employed to create the individual flowers that make up the spectacular panicles we encounter in the garden.”

We hope you have enjoyed today’s feature. We want to extend a sincere thank you to Vivian Keh for her fabulous project and Faber-Castell  Design Memory Craft for sharing their company with us. Be sure to visit Faber-Castell to see more of their great products.

Paper Crafter’s Library Projects Using Faber-Castell Design Memory Craft Paper Crafter Crayons

Faber-Castell was generous enough to send us some of the paper crafters crayons for our designers to work with, so I thought I’d share a few more projects with you which showcase some additional ways to use the crayons.  The first project is this Birthday Melted Crayon card.  For this card I started by coating my script patterned paper with some matte gel medium to keep the crayon from sinking into the paper.  I then used a heat tool to melt a puddle of crayon at the top of my patterend paper for each of three different colors.  I then tipped the paper so that it was upright to allow the crayon to drip.
BirthdayMeltedCrayonCard_550W
For this second project I first stamped the circular background image onto a piece of book text patterned paper using Ranger Jet Black Archival ink.  I started by once again coating my patterned paper on both sides with my matte gel medium. Using my heat tool I heat to heat the paper, I then chose four different colors of crayons to outline the circles – as the paper was hot, the crayon melted as I applied it.  Applying the crayon with a light touch gives a more transluscent look to it while applying the crayon with more pressure gives a more opaque look.
ForYouCrayonCard_550W
The final project I wanted to share with you is this Canvas Resist card – a fantastic technique which can be used in any mixed media or art journaling project which uses fabric. I used my Blazonry Crafter’s Workshop Templates to trace my actual pattern onto some sticky back canvas.  I then laid my canvas piece onto a small hot plate which I purchased at the thrift store. Using three different colors of Paper Crafter Crayons (two blues and a yellow) I colored in my images.  The crayon melted into the canvas. I then spritzed my entire canvas with some water and ink spray.  Any areas of the colored images where the crayon did not seep in stained yellow, whereas the colored crayon resisted the spray and maintained their color.
HiCrayonCard_550W
Next week  we will be releasing a series of video tutorials for Paper Crafter’s Library members using the Faber-Castell Design Memory Craft Paper Crafter Crayons which will include tutorials on each of the cards shown above as well as a few more ideas.
So now, details on the give-away:

In order to enter the give-away to win the set of the Paper Crafter Crayons shown above, please leave us a comment in the comments section of this post. Winner will be announced next Wednesday on the Paper Crafter’s Library blog!

Trendy Tuesday – Paint Effects

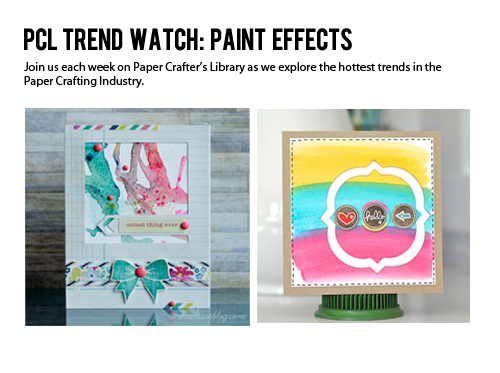
 Trendy Tuesday – Paint Effects: Color Wash, Splatters, Drips and More
by Katherine Elliot

No doubt, paper crafts are an artistic outlet.  Each project is a small canvas, presenting an opportunity to express a mood or feeling, and create an attractive design that is all your own.    Today”s paper craft artisans share their skills through the blogosphere so we may be inspired to create our own small works of modern art.  Creative techniques including color wash, ink splatters, and other abstract or modern art effects and very cool indeed, and are trending now.

Card by Tiffany Johnson, image source I Heart Art

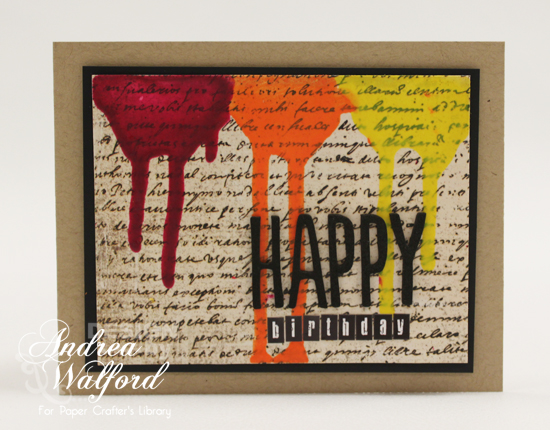
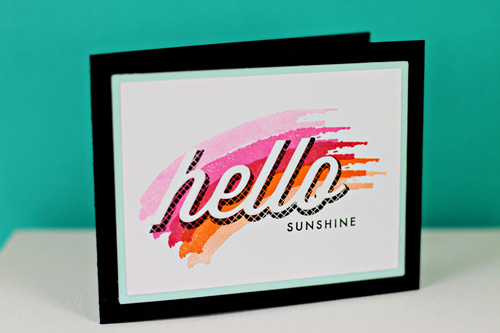
Try to drip, splatter, or swipe your ink or color mist  to create some of the cool effects shown on these projects.   Other tools like a paint brush, drinking straw, mister bottle, or aqua painter may also help you achieve these results.  Tiffany Johnson created a great video to explain some of the techniques, so check it out then check out these fantastic creations…

 Flair Watercolor Card

Flair Watercolor Card by Charlene Austin, image source Technique Tuesday

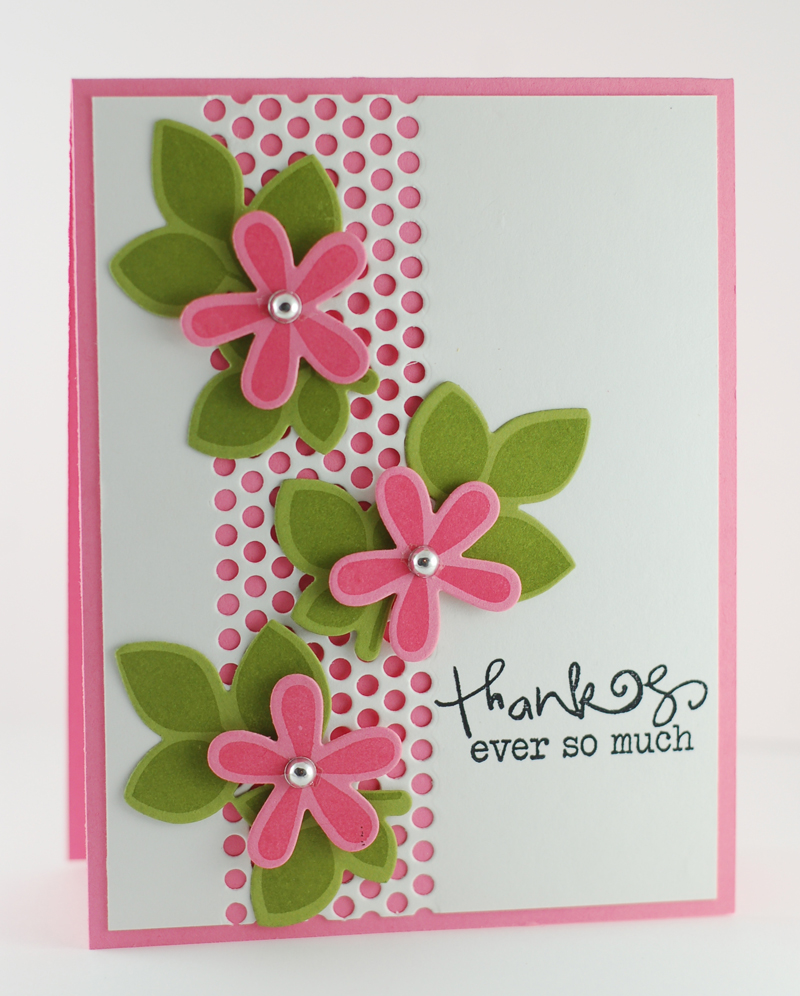
Combine these techniques with familiar die cuts, stamps and other embellishments and see how easily some of the designs come together.   Card by Lisa Henke, image source My Little Creative Escape

Of course several companies make it even easier to achieve artistic results by providing tools to mimic the same patterns and effects.   Stamps can help you create this look, and possibly do so with a lot less mess.

Splatter It 1

Splatter It stamp from Unity Stamp Company

Card by Lisa Arana including Splatter It stamp from Unity Stamp Company, image source Unity Stamp Company blog

Stamps intended to help you create these patterns allow you to recreate them uniformly and control the effect.  Use stamps subtly in the background like in Lisa Arana”s card above, or more boldly as part of the design as seen in Erin Lincoln”s card below.  It is completely up to you.

Card by Erin Lincoln featuring Watercolor Wonder stamps from Papertrey Ink, image source Procrastination Station

 It certainly is easier to clean up after a “splatter” effect when all it requires is for you to clean off your stamps…

*Tim Holtz Cling Rubber Stamps SPILLS & SPLATTERS And Stampers Anonymous

Tim Holtz Spills and Splatters stamp, image source Simon Says Stamp

Steampunk card by Mandy C, image source That”s Blogging Crafty

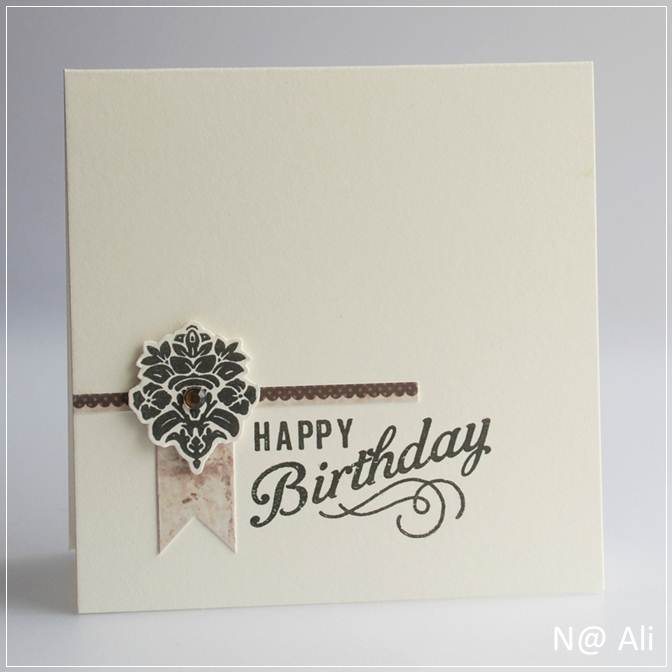
 Happy Birthday card by Dawn Olchefske, featuring French Foliage stamp set from Stampin” Up!, image source DO Stamping with Dawn

        The recent Mixability splatter challenge at Splitcoast Stampers made finding inspirational projects quite easy. The artists chose different techniques on their cards to make these extremely creative designs.

Splatter card by Far North, image source Splitcoast Stampers

 Splatter card by Korin Sutherland, image source Rejoicing Every Moment

You may want to check on-line for even more instructions on some techniques to get you started.   See super simple instructions for Easy Splatter Paint from Little Art Monkeys (don”t worry, instructions shown on their site are for ages 3 and up, so I know you can handle it!).   An easy watercolor effect can be created with watercolor pencils as well, as described in this post at Papercrafts Connection.  Tim Holtz also has some videos to assist you with different ink & paint techniques.

Card by Jeanne Streiff, image source Inky Paws

 The Jackson Pollock feel to this next card looks like it was a lot of fun to create!
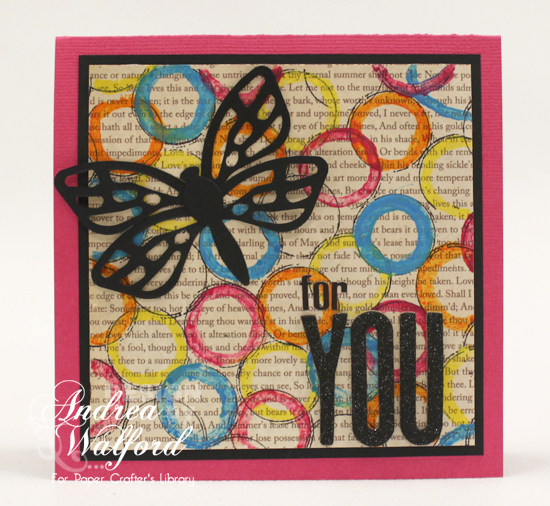
photo (65)Love You card by Tobi Crawford, image source Tobi”s Place

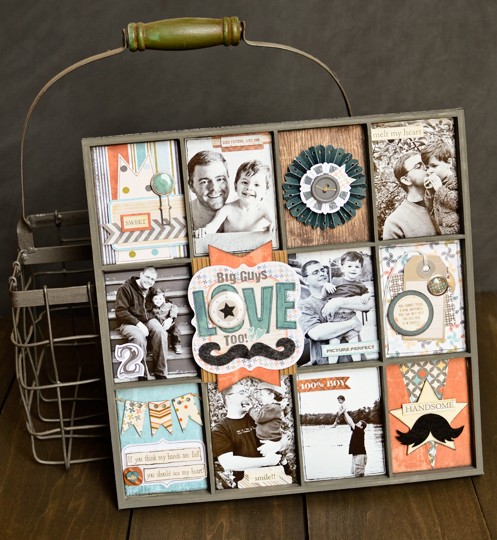
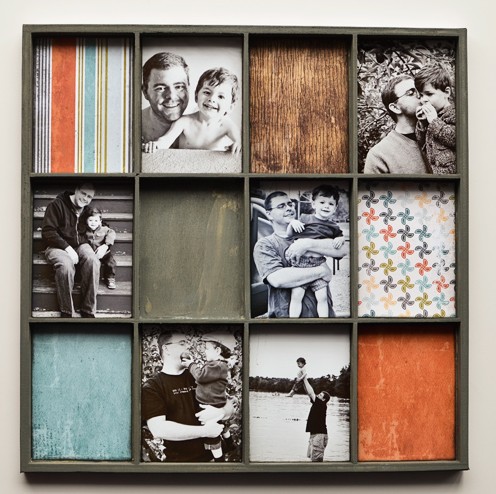
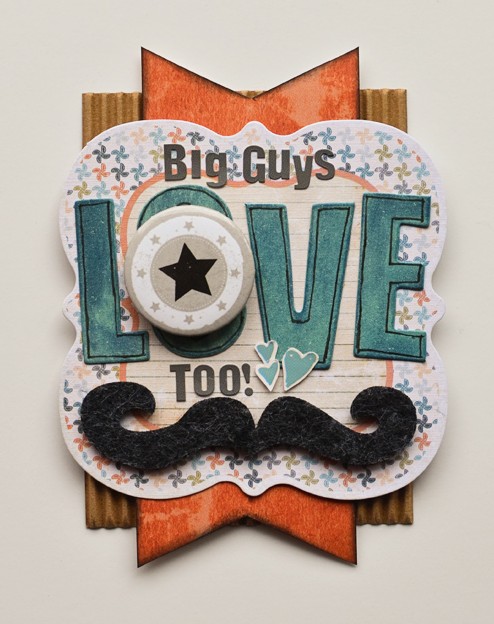
 Cards are not the only projects that are enhanced by these effects.  Paint effects added to a scrapbook project can transform any page into a modern masterpiece. A collage of embellishments, images and paint create truly unique designs.

Scrapbook page with instructions by Melanie Bauer, image source Basic Grey blog

20 Scrapbook page by Kasia Kryzminska, image source Prima Marketing Inc.

The scrapbook pages above look much like paper versions of other mixed media projects that are growing in popularity.  It”s not unusual for a paper crafter to cross over to this other art form.  Many mixed media projects incorporate similar tools and images used in paper crafts.

Canvas1

Mixed Media Canvas by Tobi Crawford, image source Tobi”s Place

  Whether your medium is canvas or paper, you can find freedom using these techniques.  Escape from any inclination to perfectly align an image or straighten a layer… just let it go & have fun.

Mixed Media canvas by Sue Sykes, image source My Sweet Earth

  Happy Crafting, everyone!

Featured Designer: N@ Ali

Today on the Paper Crafter’s Library blog, we’re continuing our weekly featured artist spotlight whereby each week we spotlight a different artist/designer in the paper crafting & mixed media world and introduce you to their fabulous work.

Today we’re thrilled to welcome –  N@ Ali

Before we show you her fabulous projects, let’s get to know her a little bit more…

n@aliheadshotHi Everyone, I’m Nathalie from the island of Mauritius, online I go by the name N@ Ali. I am so over the moon excited to be the Featured Artist on Paper Crafters Library today!

I am the proud mother of a nearly four year old little princess and twin boys aged 16 months. I enjoy reading fictions and following TV series, but my first go-to interest stays crafting. I have loved paper ever since I can remember and the story goes that I was using a pair of metal scissors before my second birthday.

I was lucky enough to work in a Scrapbooking shop for a few years and got to scap regularly. Unfortunately with the twin’s birth everything got a bit out of hand; but I was glad to switch to card making, enjoying the smaller scale. I hold a blog (just cards) and have been participating in various challenges since January 2012. I am blessed to be part of two design teams at the moment. I’d like to push my passion further and would love to be sponsored one day (I think receiving free crafting goodies and HAVE to use them must be the closest place to paradise).

Card Projects
My style is clean and graphic; I keep anything crafty and enjoy recycling on my cards.  For example, I used the bottom strip of a pattern paper from My Mind’s Eye on this card.

N@Ali-1

N@Ali-2

The paper inside the heart is from a Hero Arts catalogue.

N@Ali-3

Thank you for having me here and reading so far, hoping to see you around some time ; )


We hope you have enjoyed today’s projects courtesy of N@ Ali.  Also, be sure to stop by N@ Ali’s blog to see even more of her beautiful work (and let her know we sent you).


Winner of Spring Garden from Claudine Hellmuth

hellmuthclaudine_CHA_cropped
I’d like to extend a HUGE thank you to Claudine Hellmuth for sharing such wonderful projects and for her generous give-away of her Spring Garden Stamp sheet pictured below.
hellmuthspring_garden_stamps

And now, the moment you’ve all been waiting for…….the winner is……Corina Thorne!

winnerspringstampsheethellmuth

Congratulations Corina. Be sure to email us at customerservice@papercrafterslibrary.com to claim your prize. Please be sure to put “Claudine Hellmuth giveaway” in the subject line of the email, and then in the email itself, be sure to include your full mailing address and phone number.

For those of you that didn’t win, each week on PCL we feature a different company, and each of those companies generously sponsors a prize. We will be back next week when we’ll be featuring – Faber Castell.

andreasiggypcl

Winner of Fancy Pants Give-Away

FancypantssquarelogoNEWSMALL

I’d like to extend a HUGE thank you to Fancy Pants Designs and their designer Jess Mutty for sharing such a wonderful project and for their generous give-away of their Swagger Collection pictured below.

SwaggerCollectiongiveaway32013

And now, the moment you’ve all been waiting for…….the winner is……Kelly Massman!

327winner

Congratulations Kelly. Be sure to email us at customerservice@papercrafterslibrary.com to claim your prize. Please be sure to put “Fancy Pants Designs Swagger Winner” in the subject line of the email, and then in the email itself, be sure to include your full mailing address and phone number.

For those of you that didn’t win, each week on PCL we feature a different company, and each of those companies generously sponsors a prize.  We will be back next week when we’ll be featuring – Faber Castell.

andreasiggypcl

Trendy Tuesday – Owls, What a Hoot!

Trendy Tuesday – Owls, What a Hoot!
by Katherine Elliot

Owls are popular birds on paper crafts today and it”s easy to see why.  Owls can be cute, distinctive, and it”s hard to escape those big eyes!  Dress them up for any occasion to create a fun image for your project.

Card by Carolyn King, featuring Birthday Hoot stamp duo from Gina K Designs, image source My Blog by Cammie

Card by Debby Hughes, featuring You”re a Hoot stamp from Clearly Besotted Stamps, image source Lime Doodle

Hootenany card by Melissa Haas featuring digital stamp by Fun “n Flair Stamps, image source Doxie Mel Designs

I”m always a fan of stamp sets that include coordinating sentiments, and these sets from Unity Stamp Company and Sweet “n Sassy stamps are just a couple of examples with great sayings to pair with a wise cracking owl.

Feelin

Feelin” Owl-y stamp set from Unity Stamp Company

FEELIN-OWLY

Feelin” Owl-y Thank You card by Stephanie Muzzulin, image source Unity Stamp Company

Owl Be There stamp set from Sweet “n Sassy Stamps

Card by Korin Sutherland featuring stamps from Sweet “n Sassy Stamps, image source Splitcoast Stampers

Looking for a more realistic, classic owl image for a project?  The Literary Owl stamp from Stampendous may suit your needs for the more serious or studious person in your life.   It may also go well for a project with a Harry Potter theme, don”t you think?Literary Owl stamp from Stampendous

       Literary Owl card, image source Stampendous.com

Besides stamps, there are other tools and embellishments that are well suited to owl projects.  The Owl builder punch from Stampin” Up! has many different uses.  Just do a search for “punch art” and you are sure to find this punch used in many different ways to create different animals (penguins, bats, just to name a couple).  Of course, the owl image you can create with it is fun and versatile as is.

Owl Wedding card by Julie Olivier featuring Stampin” Up Owl Builder punch, image source Made with Paper

Owl Punch - by StampinOwl Punch from Stampin” Up!

An electronic cutter can also come in handy to create an owl shaped card.  The body type of the Silhouette Graduation Owl closely resembles the Stampin” Up! Owl punch.  On a larger scale, the owl looks like a lot of fun to create and decorate.

Graduation Owl shaped card by Michelle Kovack, featuring Just Rite stamps and , image source Thoughts of a Cardmaking Scrapbooker

Hunting for some smaller owl embellishments for your projects?  Check out these trendy wood die cuts from Prima Marketing or stickers from Jolee”s Boutique.

Wood Icons in a Box, Birds and Owls from Prima Marketing Inc.

Jolee”s Boutique Steampunk Owl stickers, image source eksuccess.com

Steampunk Owl Canvases by Beverly G, image source Gott Art

 The scrapbook page below includes some different owl images incorporating some digital images as well as a beautiful feather.  This project with the delicate feather embellishment would have fit in nicely with our previous Feather trend article, too.

owls-dawn5Scrapbook page by Dawn Inskip, featuring digital images from the Owl Kingdom Collection, image source Studio Girls Scrapbookgraphics

It”s delightful to discover other craft projects when researching our trend articles for Paper Crafters Library.  The owl is a popular bird for other crafty pursuits, too, so enjoy a few more images including some felt and fabric projects that look like fun to try…

Owl decoration by Erin Bassett featuring Basically Bare Stack-a-Bellies Chipboard & Felt Owl, image source Basically Bare Design Blog

Basically Bare Stack-a-Bellies, image source Scrapbook.com

Fabric Owl Bag, image source FiskarCrafts.com

AudreyPettitThermOWebOwlPhoneCozy Feathery Owl HeatnBond phone case by Audrey Pettit, image source therm.o.web.com

I hope you enjoyed today”s post.  Owl be on the look out for more trendy inspiration for next week, so wish me good hunting!   Happy crafting, everyone.

Free Project of the Week – Birthday Butterfly Card

This week I wanted to share a card with you that incorporates a variety of different mediums.  I started by creating the tag and reinforcer and then cutting it out with my Silhouette Cameo (I have provided the file for you below in SVG format).  I then sprayed the tag with Pure Sunshine Dylusions Ink Spray and my Mini Chickenwire stencil from The Crafter’s Workshop.  While it dried, I took one of my butterflies from Pink Paislee’s Artisan Wings and sprayed it with Bubblegum Dylusions Ink Spray and Cotton Candy Chalkboard Glimmer Mist.  When it was dry, I splattered it with Bombay India Ink and then brushed gesso along the edges of the wings. The sentiment was created using one of my favourite tools -my Dymo labeller.

BirthdayButterflyCard-03202013-550W


You can download the pdf handout HERE

You can download the SVG file for the tag here

You can watch the video below:

If you enjoyed today’s project, you enjoy our style of teaching and would like to learn even more I encourage you to check out the benefits of becoming a Paper Crafter’s Library member.

andreasiggypcl

Featured Company: Fancy Pants Designs

FancypantssquarelogoNEWSMALL

I’m so excited to bring you to this week’s Featured Company which is also a returning company: Fancy Pants Designs!   At CHA 2013 in Anaheim, as I was walking the aisles keeping my eyes open for great companies and products to spotlight, I was immediately drawn in by the gorgeous products in the Fancy Pants booth. Which is why I was thrilled that Jodi (one of the owners) accepted our invitation! In today’s spotlight you’ll learn more about Fancy Pants Designs, see a fantastic project by one of their designers and have the opportunity to win the Swagger Collection shown below (details at the end of this post).


SwaggerCollectiongiveaway32013

About Fancy Pants Designs

With their combined knowledge, Jodi {the creative person} and Jared {the business person} took a chance on a dream and founded their own unique company.

jodiandjared

Fancy Pants Designs premiered their first collections to the craft and hobby industry in the Winter of 2005. What started as a home-based business quickly flourished into an exciting opportunity of bringing creative ideas to life in many different mediums.

We are proud to offer high quality designs for a variety of industries through the production and licensing of original artwork. With a group of creative directors, talented designers and experienced staff, Fancy Pants Designs continues to provide the latest and greatest designs to crafters worldwide.

Be sure to visit us at our many “Fancy” locations online! We’ve always got something going on everywhere, so don’t miss out!

Special Fancy Pants Guest Designer

Today we also have a special Fancy Pants Designs Guest Designer. Jess Mutty is part of the 2013 Fancy Pants Design Team. Jess is new to our list of past guest designers and we are so excited to have her showcase her work today on Paper Crafter’s Library. You can leave a comment below the post telling us what you like about her project for a chance to win a the package of Fancy Pants Designs Swagger Collection.

You can see Jess’ fabulous project below, but first, here is a little more about Jess:

jessheadshotI’m Jess and I am a stay at home mom to my toddler extraordinaire, Owen, and my beautiful baby girl, Lily, who was born in July 2012. We live just West of Boston with three crazy orange cats and a lot of dust bunnies!
Before staying at home I worked as a theatrical costume designer. I love to cook, bake (especially cupcakes), travel, sew, entertain, and read young adult fiction. Scrapping saves my sanity and I love nothing more than just sitting down to play with colors and texture. You can see my work in Scrapstreet Magazine, Scrapbook News and Review, Scrapbook Trends, Simply Handmade, CARDS, several Create books, PaperHaus, and Creating Keepsakes. I am thrilled to be designing for Fancy Pants Designs!

Shadowbox Project

swaggershadowbox
1. Begin by painting the  shadowbox with gray paint.  Cut four 1/2″ x 12″ strips of the Mustache  Fever paper and adhere them around the outside edges.  Print six 2.75″ x  3.75″ photos and ink the edges with black ink.  Cut five 2.75″ x 3.75″  paper mats and ink them in black.
swaggershadowboxbase
2.  Adhere all the paper mats and photos inside the boxes.  You can see that I  left one box blank for the title block, which we will get to later.
swaggershadowboxinserts
3. Add layers and embellishments to each box:Box 1 – Cut the banner from the Humourous paper and outline  it in black pen. Mat the moustache lined journaling tag with teal paper, add the  chevron sticker, and the metal clip and use foam tape to adhere it on top of the  banner.  Mat the “sweet” sticker with orange and use foam tape to adhere it  on top.
Box 2 – Outline the photo in black pen.  Adhere the  layered stickers to the top.
Box 3 – Cut a 1.5″ x 12″ strip of Gallant  paper, border punch one side and score it every 1/4″.  Accordion fold the  strip, adhere the ends to form a circle and flatten it onto a scrap of paper  using a strong adhesive.  Layer the dart board die cut, small pennant  sticker, and a twine tied button on top.
Box 4 – Add the “melt my heart”  sticker.
Box 5 – Use foam tape to adhere the “2”.
Box 6 – Leave  empty for now!
Box 7 – Mat the “picture perfect” sticker with teal paper  and adhere it to the photo with foam tape.
Box 8 – Outline the paper  with black pen.  Cut a 2″ square piece of the Powerful paper and use the  metal clip to attach it behind the tag.  Punch and ink a circle to mat the  circle quote sticker and use foam tape to adhere it on top of the tag.
Box 9 – String the three chipboard pennants with twine and adhere them  with foam tape.  Cut the long quote sticker in half, trim the hearts off  (save them for later!) and outline the strips.  Us foam tape to adhere them  on top of the bracket die cut.  Add the die cut to the box and add two  stacked and tied buttons.
Box 10 – Add the layered stickers to the  bottom of the photo.
Box 11 – Outline the photo in black pen.  Use  foam tape to adhere the “100% boy” tag.
Box 12 – Outline the pennant in  black pen.  Ink the edges of the manilla star and add it to the box with  foam tape.  Adhere the “handsome” sticker with more foam tape and add the  felt moustache below it.
4. Cut a 3″ x 4″ piece of kraft  corrugated paper and adhere it on top of the box edges.  Cut two 2″ wide  pieces of orange paper, notch the ends, and ink them.  Adhere the  orange pieces to the top and bottom of the large bracket die cut and layer on  top of the kraft as shown.  Ink and/or spray the manilla  “love” letters and outline them in black pen.  Add them to the center  of the block, use tiny letter stickers to complete your title, and adhere the  felt moustache below.  Adhere the star flair in the center of the  “O”. Finally, cut around those tiny hearts we saved from Box 9 and add  them.
swaggershadowboxtitle
swaggershadowboxdetail1
swaggershadowboxdetail2


ETA: Winner of Swagger collection announced here: https://blog.papercrafterslibrary.com/winner-of-fancy-pants-give-away/

We hope you have enjoyed today’s feature. We want to extend a sincere thank you to Jess Mutty for her fabulous project and Fancy Pants Designs for sharing their company with us. Be sure to visit Fancy Pants Designs to see more of their great products.


In order to enter the give-away to win the Swagger collection shown above, please leave us a comment in the comments section of this post. Winner will be announced next Wednesday on the Paper Crafter’s Library blog!