Featured Artist/Designer: Laura Williams

Welcome to another Featured Artist/Designer Spotlight. Today we’re thrilled to welcome Laura Williams.  Before we show you Laura’s project, let’s get to know her a little bit more…

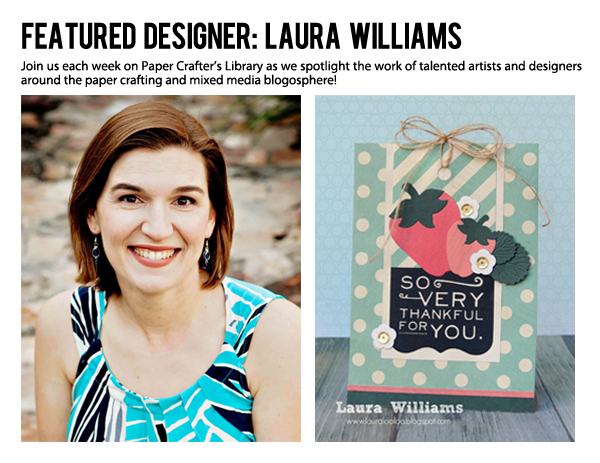
LauraWilliamsProfilePic-04232015-250WHello crafty friends! My name is Laura Williams and I’m happy to be here at Paper Crafter’s Library today! I have been crafting in some way for as long as I can remember. My aunt gave me a fabulous set of alphabet stamps and colored pencils when I was a little girl – so maybe that was the start of my crafty obsession, because I’ve been creating art ever since!


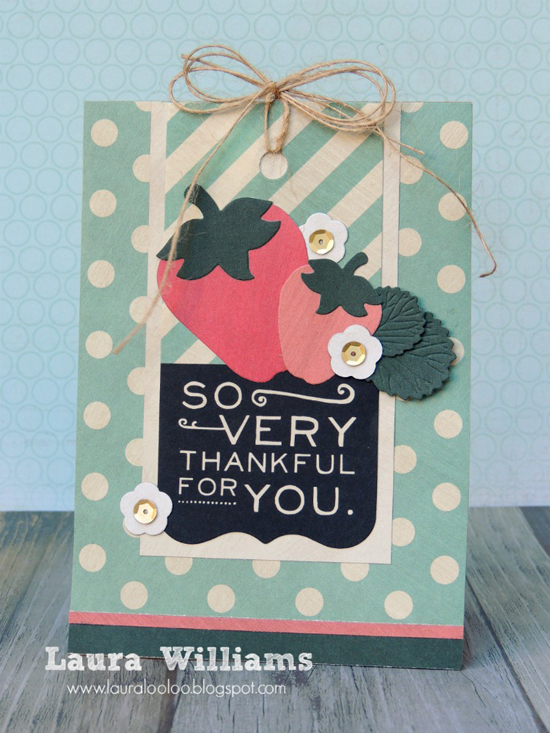
So Very Thankful Card

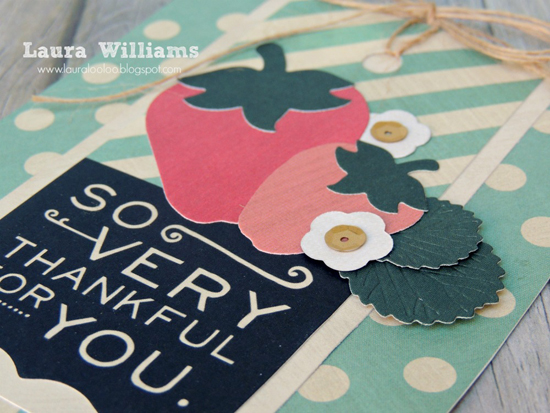
I have a fun springtime card to share with you today. Living in Florida, my family looks forward to springtime because it means strawberry season! There are even strawberry festivals here, to celebrate this delicious fruit. Strawberries also make the perfect image for springtime cards. I used a strawberry die set from The Stamps of Life to create my berries, leaves and flowers. (I love the embossed texture on those leaves!) I paired them with papers and a tag from Fancy Pants Designs Burlap & Bouquets collection. The finishing touch? My favorite burlap string from May Arts.

LauraWilliams1-04232015-550W

LauraWilliams2-04232015-550W

Thanks so much for visiting with me here at Paper Crafter’s Library!

Supplies
berry dies – The Stamps of Life
paper and tag – Fancy Pants Burlap & Bouquets
burlap string – May Arts

We hope you have enjoyed today’s project courtesy of Laura Williams.  Be sure to stop by Laura’s blog to see even more of her beautiful work (and let her know we sent you). You can also find Laura on Facebook, Instagram and Pinterest.

Happy Crafting!

Featured Company: Clearly Besotted Stamps 04 22 2014

Clearly Besotted

We are happy to bring you this week’s Featured Company: Clearly Besotted Stamps and they are generously giving away a Clearly Besotted Stamps gift card valued at US$45.00.  (Details at the end of the post.)

Gift Card 550W

Clearly Besotted Stamps Owner – Stephanie Wincott

Today we welcome Stephanie Wincott. We are so excited to have her showcase her work today on Paper Crafter’s Library. You can see Stephanie’s fabulous project below, but first, here is a little more about her:


StephanieWincottProfilePic-250W-04222015

I’m a stay at home mother of 2 who loves to stamp and in my spare time I run Clearly Besotted, a tiny little stamp company based in the UK.

You can see the gorgeous card that Stephanie created below:


Delightful

StephanieWincott2-550W-04222015

StephanieWincott1-550W-04222015

 Project Instructions:

  • Stamp, color and die cut roses, attach twine;
  • Adhere paper doily to kraft card, mat onto peach card and then the pattern paper;
  • Stamp Sentiment onto thin strip of green and assemble.

Supplies

Lawn Fawn Polka Mon Amie 6×6 paper pad,
Clearly Besotted ‘Delightful Day’ stamp set
Dies (new – to be released May 5th)
Copic Sketch Markers

We hope you have enjoyed today’s feature. We want to extend a sincere thank you to Stephanie Wincott for her fabulous project and Clearly Besotted Stamps for sharing their company with us. Be sure to visit Clearly Besotted Stamps to see more of their products and their blog, facebook, twitter and instagram for some inspiration!

In order to enter the give-away to win the prize shown above, please leave us a comment in the comments section of this post. The winner will be announced next Wednesday.

Happy Crafting!

Trend Watch – Floral Focal Focus

It could be because Spring has finally sprung here in MN and I am actually seeing my bulbs pop out finally, but I am finding flower cards everywhere.

For this post  I am going to focus on the floral beauties that are so gorgeous, they are big and bold and get front and center attention on these paper creations.

Many of the examples I am going to show you today are beautifully colored like this first one from Isha.  The flower itself is gorgeous and full and rather sweet, but the way Isha chose to embellish the background with color just sets this card apart.  It is beautiful all around.  Isha used Chameleon pens to color the flower.  Gorgeous results.


water lily

card by Isha Gupta photo courtesy of Split Coast Stampers

Blue flowers always remind me fondly of my grandmother who grew the most beautiful blue hydrangea.  The coloring of the flowers is just beautiful and the shadowing around the edge of the flowers is just perfect.

blue orchid

card by Sharon Hashimoto photo courtesy of As the Ink Dries

I think the way Lindsey chose to use her flowers in the middle of the card and yet tucked into the wave is so clever.  She used a Copic pen at the lip of the flowers to give them extra punch.  They have so much dimension.  They look great.

congratulations petals

card by Lindsey Amrhein photo courtesy of Note to Self

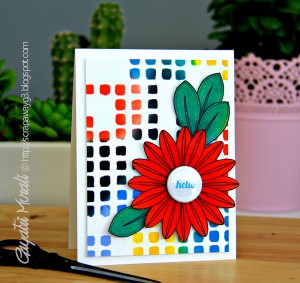
I love the edgy take Gayatri used for this card.  Flowers are usually very soft and frilly but this background gives her bold red flower a fun, funky edge.

hello flower flair

card by Gayatri Murali photo courtesy of Handmade by G3

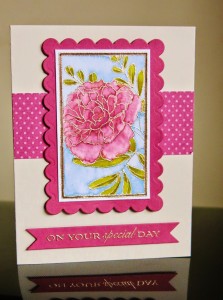
Kathryn used ink pads as water colors to create the beautiful look to this peony.  The pink on pink is just beautiful.

on your special day

card by Kathryn A. photo courtesy of Kathryn’s Cards

This group of flowers makes a really pretty statement in pastel.  Anja used a technique called ghost stamping and the effect is really cool.

sbd_papersmooches_botanicals2

card by Anja photo courtesy of Little Butterfly Creations

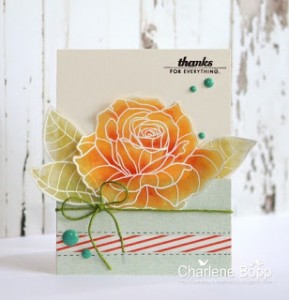
I am totally crazy for all things vellum right now. I just love how cool this flower looks on the semi opaque paper.

summer orange card

card by Charlene B. photo courtesy of Charlene’s Studio Ink

I was trying to guess how Isha made this card but I got it wrong.  She used a chalkboard effect on the vines of the flowers and added white pen as a highlight.  On the flowers themselves she stamped in color then daubed in more color from a coordinating ink pad in the middle for dimension.  I must try some of these cool techniques to give my flowers that extra something.

black and pink

card by Isha Gupta photo courtesy of New Ideas by Isha Gupta

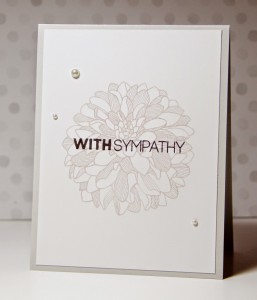
After all of the wonderful color we have seen this monochromatic mum is just so striking and perfect for a sympathy sentiment.

CTS_118 Michelle

card by Michelle photo courtesy of Amusing Michelle

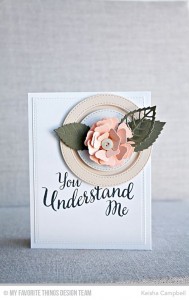
If you don’t have stamps, you can use dies to create dynamic flowers.  This dimensional flower is so beautiful.  The color possibilities are endless with this technique and you can get the fullness of the flower multi-dimensionally.

you understand me

card by Keisha Campble photo courtesy of A Bit East Coast

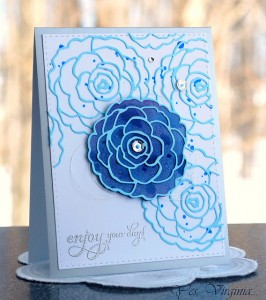
Virginia used an outline die and highlighted the flower in the center with a cool water colored center.  This creates a lovely masked look around the other die cuts.

Camelia

card by Virginia Lu photo courtesy of Yes, Virginia

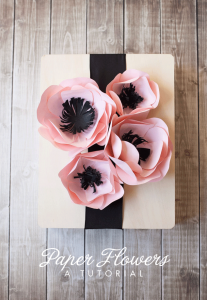
No stamps or dies?  No worries; make your own.  You can click on the link below to see the tutorial on how to make these fun flowers.  Quite the statement for a package or gift to give to someone.

paper flower tutorial

package by Paula Biggs photo courtesy of Frog Prince Paperie

Flowers will be the center of my world very soon.  As I am waiting, I am inspired to create my own flower garden in paper and give them to loved ones.  I hope you saw something today to provide you with some inspiration until you get to smell the real ones this summer.

So go ahead… make something pretty.

Below are a few products I found that might inspire you a little more.

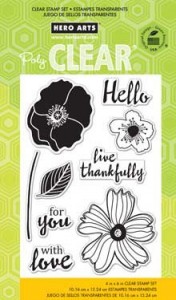
hero arts

Hello Flowers stamp set by Hero Arts from Scrapbook.com

Sizzix

Sizzix English Garden die set  from Scrapbook.com

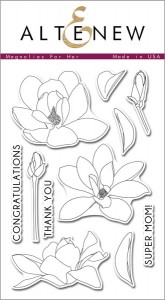
magnolias_for_her_-1_grande

Magnolia for Her stamp set from AlteNew

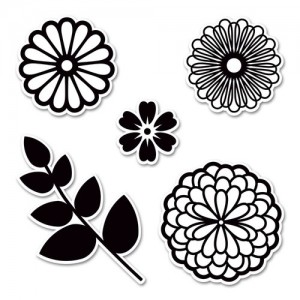
petals and stems

Petal and Stem stamp set from Avery Elle

Winner of the Cut @ Home Give Away! 04 03 2015

CutAtHomeLogo-12052014-550W

I’d like to extend a HUGE thank you to Cut @ Home’s designer Polly Zastawnik.for sharing a Spread Your Wings Mini Album video tutorial and to  Cut@Home for their generous give-away which includes: 34 piece Gelatos Gift Set from Faber-Castell, 6 piece Essential Tools from Faber-Castell, Arianna Hummingbird stamp set form Heartfelt Creations and 4 ¼” Round Acrylic Stamping Block with Finger Grips and Guide Lines from Apple Pie Memories.

Total value is $65.00!!! *Please note this give-away is only open to residents of continental USA*

PriceCut@Home

And now, the moment you’ve all been waiting for…….the winner is……Carla Hundley!

WinnerCut@Home-04032015

Congratulations Carla Hundley! Be sure to email us at customerservice@papercrafterslibrary.com to claim your prize. Please be sure to put “Cut @ Home Winner” in the subject line of the email, and then in the email itself, be sure to include your full mailing address and phone number.

Happy Crafting!

Featured Artist/Designer: Karolyn Loncon 04 16 2015

Welcome to another Featured Artist/Designer Spotlight. Today we’re thrilled to welcome Karolyn Loncon. Before we show you  Karolyn’s project, let’s get to know her a little bit more…

KarolynLonconProfilePic-250W-04162015Hello! My name is Karolyn Loncon.  I’m a retired Legal Assistant, married to Garry since 1980, and mom to Amy and Ashley, who’s married to Blake and the mother to Brecken, Brenner and Brynley.  I’m blessed to live in Issaquah, Washington in the summer, and Chandler, Arizona in the winter.

I love most paper crafts, but especially stamping and card-making.  The name of my blog is Paper Therapy.  I love to laugh, travel and play BINGO (don’t judge – LOL)!

I started paper crafting in 2002 when my older daughter “abandoned” me to go to college.  I scrapbooked as my therapy.  Shortly thereafter, a friend invited me to a Stampin’ Up! party, and the rest is history.  Once I discovered stamping and card making, my need for instant gratification took over.  I haven’t touched a scrapbook since!  Ha!

I would say that my style is mostly clean and simple, although I throw in some fun and cute every now and then.  I’ve been fortunate to have many of my projects published in paper crafting magazines.  I also currently design projects for Avery Elle Stamps and Runway Inspired Challenge, and have recently enjoyed participating as one of the Guest Artists for the Online Card Classes.  So much fun!!

It’s always fun to be invited by Andrea to share a couple of projects with you all, so let’s get started, shall we?

Puppy Love
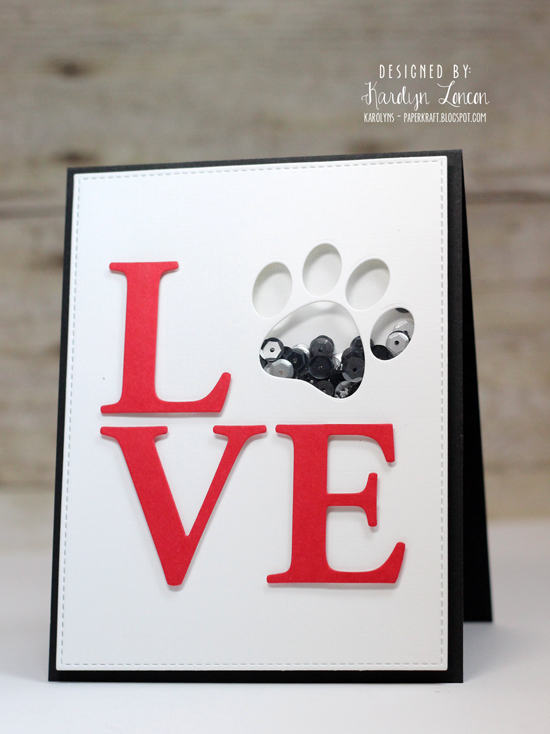
KarolynLoncon1-550W-04162015

I’m an animal lover, and am really enjoying the cat and dog trend that I’m seeing in so many areas of our little crafty world!  So both of the projects I’m sharing today have a dog theme to them.  My first project is a fun little shaker card that I created using some recently released My Favorite Things products.  It’s actually very simple to create.  Here’s how I did it:

1. Trim an A2 top folding card base from black cardstock; score and fold at 5.5; press crease with Teflon Bone Folder.
2. Die cut image panel from white cardstock using the stitched rectangle die from the Blueprints 13 Die-Namics set.
3. Die cut the letters from red cardstock using the LOVE Centerpiece Die-Namic.  Using the negative of the die cut as a guide, adhere the letters to the image panel with foam tape.
4. Position the large paw print die (from the Pet Accents Die-Namics) next to the L, and run through die cut machine.
5. Trim out a piece of acrylic cardstock to cover the negative of the die cut paw print; adhere to the back of the image panel with adhesive tape runner.
6. Layer two thicknesses of foam tape around the outside of the paw print to provide an area for the sequins and shaker materials.  You’ll also need to  add two layers of foam tape around the outside of the image panel back. Sprinkle sequins and microbeads inside the shaker area.  Trim a piece of white cardstock slightly smaller than the image panel.  Remove the foam tape release tape and adhere the smaller panel to the back to seal off the shaker.
7. Adhere assembled shaker front to the card base with adhesive tape runner.

Here’s a close up of the shaker card:

KArolynLoncon2-550W-04162015

My mom’s dog recently passed away, so I think I’ll send this to her.  It’s clean, simple and pretty straight forward.  And it’s kind of fun to have that shaker aspect to it, don’t you think?

Supplies

PAPER:  Red Hot, Black Licorice cardstock and Acrylic cardstock (My Favorite Things); White Linen cardstock (Ellen Hutson Essentials)
OTHER:  LOVE Centerpiece Die-Namic, Pet Accents Die-Namics and Blueprints 13 Die-Namics (My Favorite Things); Midnight Blend Sequins (Avery Elle), Black, Silver and Clear Microbeads (POP/American Crafts)

Fire Hydrant

Okay, so my second card is another fun one.  If you know me at all, you know I love to laugh.  And when I saw one of the sentiments from the You Make My Tail Wag stamp set from My Favorite Things, I laughed out loud and just HAD to make a card with it!
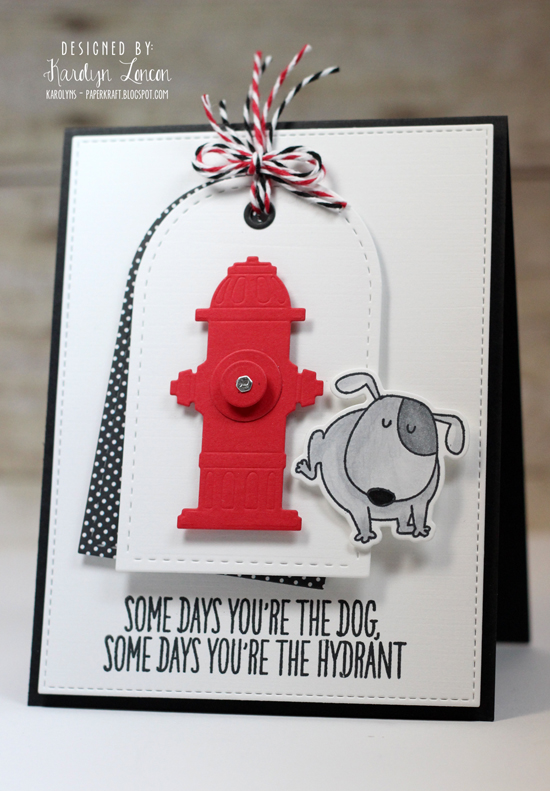
KarolynLoncon3-550W-04162015

Hilarious, right?!!  Hopefully you’re not offended, because I think it’s pretty darned funny.

Here’s how I made it:

1. Trim an A2 top folding card base from black cardstock; score at 5.5” and crease with Teflon Bone Folder.
2. Die cut image panel from white cardstock using the stitched rectangle included in the Blueprints 13 Die-Namics set.
3. Stamp sentiment from You Make My Tail Wag using black dye ink; adhere image panel to card base with foam squares.
4. Die cut tag from white cardstock and black polka dot paper using the Anytime Tags Dies; adhere the two together, tilting the back tag just slightly to the left, using foam squares; thread red/white and black/white baker’s twine through the tag hole and tie into a bow; trim ends of baker’s twine.  Adhere tags to the image panel with foam squares.
5. Die cut the fire hydrant from red and silver foil cardstock using the (Fire Hydrant Die from Memory Box), and assemble.  Adhere to the tag with foam squares.
6. Stamp and die cut the dog from the You Make My Tail Wag stamp set (and coordinating dies) using Tuxedo Black ink; color with Copic Markers; adhere to image panel with foam squares.

KarolynLoncon4-550W-04162015

There you have it, super easy and sure to bring a smile to any dog-lover’s face, right?!!

Supplies

STAMPS:  You Make My Tail Wag (My Favorite Things)
INK:  Black Licorice Hybrid Dye Ink (My Favorite Things); Tuxedo Black Ink (Memento)
PAPER:  Red Hot and Black Licorice cardstock (My Favorite Things); Black and White Polka Dot Paper (Simple Stories); Silver Foil cardstock (Die Cuts With a Vew)
OTHER:  Anytime Tags Dies (Lil Inker Designs), Fire Hydrant Die (Memory Box), You Make My Tail Wag Die-Namics and Blueprints 13 Die-Namics (My Favorite Things), Maraschino and Charcoal Baker’s Twine (The Twinery), Copic Markers

That’s it for me today, friends!  Thanks so much for dropping by to see my projects!  And thank you to the sweet folks at Papercrafter’s Library for inviting me back – I love sharing with you all!!

We hope you have enjoyed today’s project courtesy of Karolyn Loncon. Be sure to stop by Karolyn’s blog to see even more of her beautiful work (and let her know we sent you).

Happy Crafting!

Featured Company: Graphic 45 – 04 15 2015


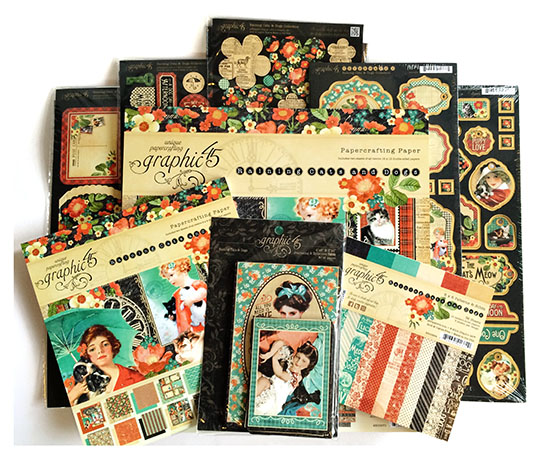
We are happy to bring you this week’s Featured Company: Graphic 45. We are so excited to be featuring them regularly on Paper Crafter’s Library! And this week Graphic 45 is giving away a “Raining Cats and Dogs” collection prize package give-away valued at $71. Details will be at the end of this post.

Graphic45PrizePack-01212015-550W

Graphic 45 Designer -Romy Veul

Our Graphic 45 Guest Designer for this week is Romy Veul who is part of the 2014/2015 Graphic 45 Design Team. You can see Romy’s fabulous project below, but first, here is a little more about her.

RomyVeulProfile Pic-250W- 04152015

My name is Romy and I am a 21-year old paper crafter from the Netherlands. I study Linguistics at University by day, but love to spend time in my craft room at night. I started scrapbooking more than 9 years ago and was hooked to this wonderful creative outlet immediately.

I think scrapbooking is a perfect combination of my passion for photography and journaling and my need to be creative. I consider myself both a scrapbooker and a card maker, as I make both projects a lot.

I also like to try new things, such as altered items or mini albums, every once in a while. You could best describe my style as layered, detailed and romantic. I usually work with lots of layers on all of my projects and am most of all a paper girl, who loves working with different kinds of papers.

Blog: www.scrapstuffandmore.blogspot.com

Let’s hear from Romy:

Vintage Look Scrapbook Page

Hi and welcome to the Paper Crafter’s Library blog today!

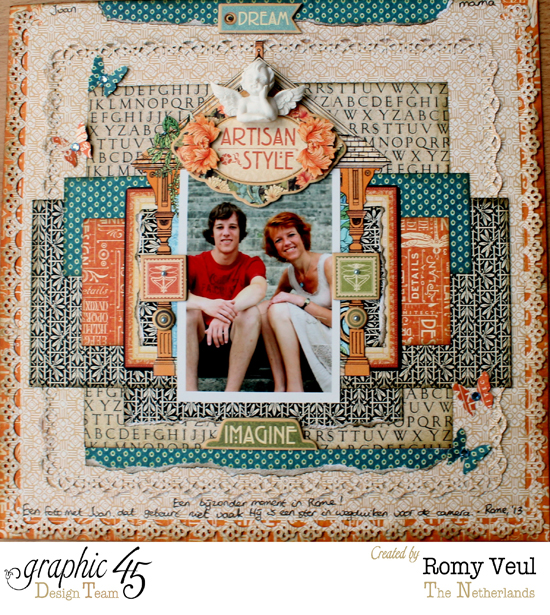
Today I would like to show you a lay-out that I made as a proud DT member for Graphic 45. I used their gorgeous new ‘Artisan Style’ collection, which is just the perfect mix of vintage and colourful. I used it to make a vintage-inspired lay-out about my brother and mother.

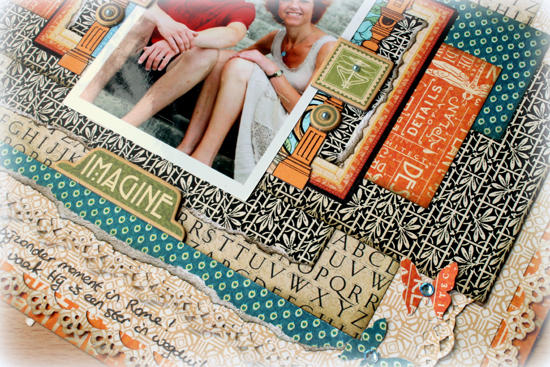
It happens only rarely that my brother allows me to take a photo of him, so this photo is very precious to me. I decided to frame it with the house that is printed on one of the Artisan Style papers. I fussy cut it from the papers and attached my photo in the center of it. After that, I cut out several strips of paper to create a base with multiple layers of paper behind my photo. I also tore the edges of some of the papers to make them suit the vintage look of my lay-out.

Artisan_Graphic_45_Romy_Veul_Layout1-550W-04152015

Artisan_Graphic_45_Romy_Veul_Layout2-550W-04152015

I hope you liked my blogpost.
Thank you so much for stopping by!

Supplies

Artisan Style patterned papers: Artisan Style, Creative Ideal, Craftmanship, The Old House
Artisan Style 8×8 Pad
Artisan Style Decorative Chipboard

We hope you have enjoyed today’s feature. We want to extend a sincere thank you to Romy Veul for her fabulous project and Graphic 45 for sharing their company with us. Be sure to visit Graphic 45 to see more of their products and their blog for some inspiration!

In order to enter the give-away to win the prize shown above, please leave us a comment in the comments section of this post. The winner will be announced next Wednesday.

Happy Crafting!

Trend Watch – Inlaid Dies

A trend that has been popping up all over the place in paper crafting lately is inlaid dies. Projects that feature inlaid dies do anything but “pop up,” though! Images are die cut and then the die cut space is filled with a second die cut to create a smooth surface, accenting your favorite dies! We’ll take a look at some of the great inlaid die projects that are out there today.

Sarah’s card is a great Clean & Simple design that features butterfly outlines. I also love how the sentiment adds to the whimsy of the card.

Butterfly Hello by Sarah Gray

Butterfly Hello by Sarah Gray, courtesy Funky Fossil Designs

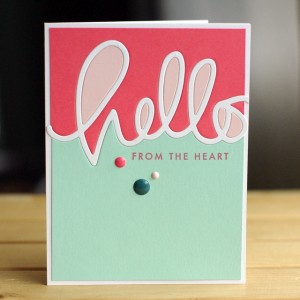
This card takes advantage of a die to create a border between the two color panels. Leigh selected some fun colors to accent the scripty “hello”.

Hello by Leigh Penner

Hello by Leigh Penner, courtesy to the full

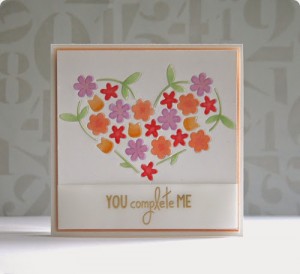
Miriam took on the idea of filling a shape with small stamps and used small dies instead of stamps. The colored flowers look gorgeous within the design. They really “pop,” even though they’re flush with the card front!

You Complete Me by Miriam Pranter

You Complete Me by Miriam Pranter, courtesy taylored expressions

JJ used a church die to produce the inlaid die effect on this wedding card, but then turned the rest of the die-cut openings into windows with shaker glitter behind them! The glitter really gives the windows a stained glass look.

Now and Forever by JJ Bolton

Now and Forever by JJ Bolton, courtesy handmade cards by jj bolton

Maile’s card is so fun and cheery. I absolutely love the die she used from Papertrey Ink, which was just perfect for the inlaid die effect! I like how she filled the balloons but left the rest of the shape open; which left the delicate balloon strings on their own – they stand out so much more this way.

Let's Party by Maile Belles

Let’s Party by Maile Belles, courtesy simply stamped by maile belles

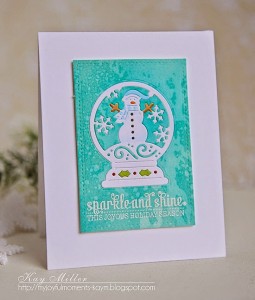
Kay created the gorgeous background on this card with distress ink and then cut out the snow globe and reinserted a white version. It really allows the globe and snowflakes to stand out from the background.

Sparkle and Shine by Kay Miller

Sparkle and Shine by Kay Miller, courtesy My Joyful MOMENTS

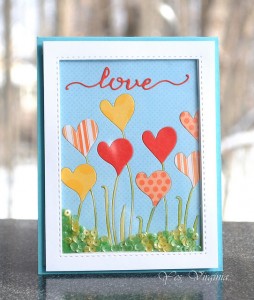
This card by Virginia has an inlaid die background with a sequin shaker panel in front of it! There are so many great things going on in this card. I love the various “heart flowers” in the background.

Love by Virginia Lu

Love by Virginia Lu, courtesy Yes, Virginia

This card by Betsy is SO fantastic. The inlaid die effect was perfect for this die! The colorful buildings are gorgeous, as are the lanterns above the street!

Celebrate Today by Betsy Veldman

Celebrate Today by Betsy Veldman, courtesy Paper, Scissors, SuperHeroes

Here are a couple of the dies you’ve seen used in this post:

Memory Box Floating Butterflies

Memory Box Floating Butterflies Die

Let's Party by Papertrey Ink

Papertrey Ink Text Block: Party Time Die

Chinatown Die by Papertrey Ink

Papertrey Ink Cover Plate: Chinatown Die

I challenge you to explore the dies already in your stash and just see what kinds of gorgeous inlaid die projects you can produce!

Winner of the Altenew Give-Away 04 01 2015

altenew

I’d like to extend a HUGE thank you to Altenew’s guest designer Jennifer Rzasa for sharing such a wonderful project and to Altenew for their generous give-away of their collection shown below.

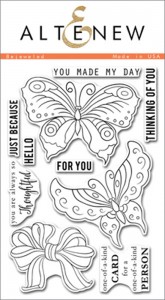
Bejeweled and Striped Florals Sets:

Bejeweled_grandePrizeStriped_Florals_grandePrize

And now, the moment you’ve all been waiting for…….the winner is……Indy!

WinnerAltenew-04012015

Congratulations Indy! Be sure to email us at customerservice@papercrafterslibrary.com within 3 weeks of todays date (by May 1) in order to claim your prize. Please be sure to put “Altenew Winner” in the subject line of the email, and then in the email itself, be sure to include your full mailing address and phone number.

Join us next week when we feature another great company!

Featured Artist/Designer: Jessica Pascarella 04 09 2015

Welcome to another Featured Artist/Designer Spotlight. Today we’re thrilled to welcome Jessica Pascarella. Before we show you Jessica’s project, let’s get to know her a little bit more…

JessicaPascarellProfilePic-250W-04092015Hello, there!  I’m Jessica Pascarella from Pearland, Texas.  My husband, Michael, and I have three amazing kids (Brayden-8, Daniel – 7, and Adelynn-5).  We enjoy spending our time together traveling, having family movie night, or even playing a few rounds of flashlight Hide-n-Seek! When I manage to have a few moments alone, I enjoy curling up with a good book.

My passion of cardmaking was introduced by my grandmother several years ago. It was with her creativity that encouraged me to make my own wedding invitations. With that project (almost 12 years ago), my paper  and stamp addiction was born.

I would classify myself as a CAS cardmaker. However, I enjoy challenging myself with new styles and techniques.  I am currently on Little Tangles Challenge, DCWV, and Pink & Main Stamps design teams.

You can see more of my creations on my blog—Kissin’ Krafts.

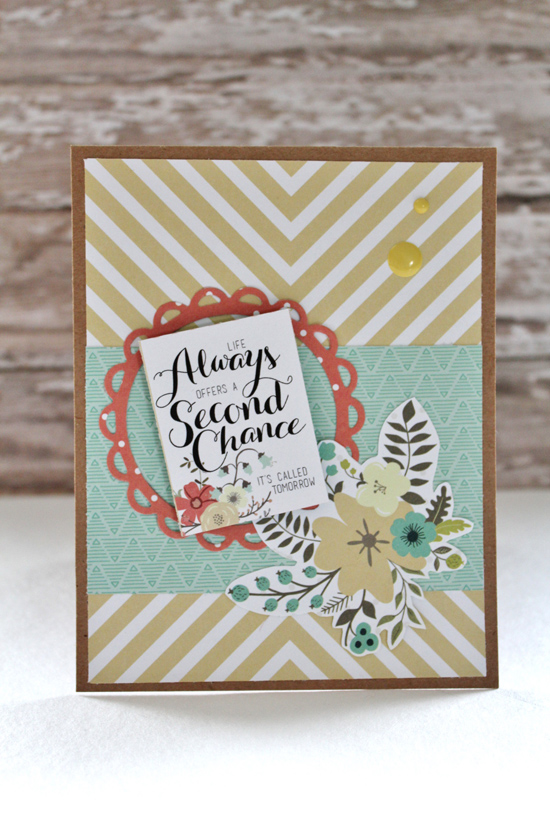
Life Always

JessicaPascarella1-550W-04092015

As I mentioned earlier, I am addicted to papers. Today’s card uses a variety of patterns from one collection.  Instead of stamping a sentiment, I used a decorative quote also included in the same collection.

JessicaPascarella2-550W-04092015

To highlight the quote, I used a foam dot to make the quote “pop” off the card. Sometimes I like a lot of white space on a card and other times I feel the need to add an little embellishment. With this card, I added a couple enamel dots.

I want say a big THANK YOU to Paper Crafter’s Library for the opportunity to be a Feature Designer!

Supplies

Cardstock: Neenah Bright White
Paper: Teresa Collins Nine & Co Paper Pad
Dies: Spellbinders Scallop Circle and Circle Dies
Embellishments: My Mind’s Eye Market Street Enamel Dots
Other: Foam Dots, Scotch Tape Runner

We hope you have enjoyed today’s project courtesy of Jessica Pascarella . Be sure to stop by Jessica’s blog to see even more of her beautiful work (and let her know we sent you). You can also find Jessica on Facebook, Pinterest, and Instagram.

Happy Crafting!

Featured Company: Simple Stories 04 08 2015

SimpleStories_LogosCS4

We are thrilled to bring you this week’s Featured Company: Simple Stories.

Simple Stories has put together a fabulous prize pack including the  I AM… Collection Pack, a 12×12 Black SN@P! Faux Leather Album, and a 12×12 SN@P! Pocket Page Variety Pack. (Details on entering the give-away at the end of the post.)

SimpleStories-iam-giveaway

Simple Stories  Designer – Wendy Antenucci

Our Simple Stories designer is Wendy Antenucci – we are thrilled to have her showcase her work today on Paper Crafter’s Library. You can see Wendy’s fabulous project below, but first, here is a little more about her:

WendyAntenucciProfilePic-250W-04082015Hi my name is Wendy Antenucci and I am from sunny FL.  I am married to my wonderful hubby of 15 years and we have 6 kids, ranging from 12-1.

I started scrapbooking shortly after my first child was born in 2002.  I am a SAHM and homeschooler so I tend to scrap during my kids rest time as it helps clear my mind and get me through the rest of the day.  My style is simple, but I love to layer and look for the perfect way to embellish my pages that connect with the memory I am telling.

I design for Simple Stories, Hip Kit Club, Anna Griffin, and CREATE magazine.  I have been published in Creating Keepsakes, Cards, Create, Scrapbook Trends, Scrapbook & Cards Today, PaperCrafts & Scrapbooking, Scrap365, and various online publications.

Everyday

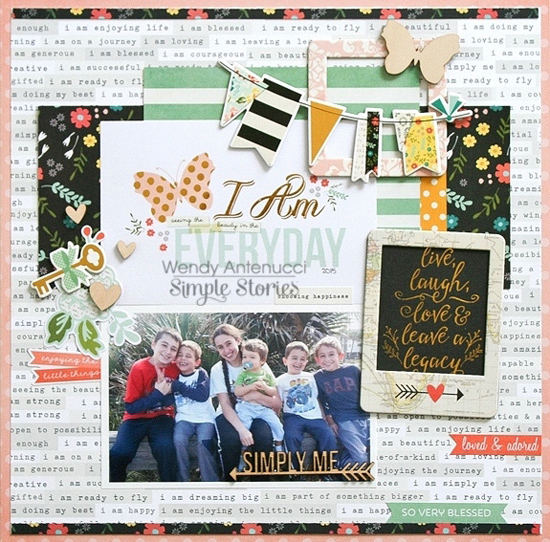
Today I want share a layout using the new Simple Stories I AM collection.  When I begin my layouts I look for some sort of item that really catches my eye, for me that would be the I AM Everyday Sn@p! card.  I used a few more Sn@p cards to create this “easy” layout.

WendyAntenucci1-550W-04082015

If you were pressed for time this would be a great place to stop and just add some journaling, or maybe you’d like to try a few more pieces to create a “medium” layout.  For this step, I added in some layers using the frames.  I took the backing off the peach color frame to allow the frame to be layered behind the banner piece.  I also added in some small frames with more pictures.

WendyAntenucci6-550W-04082015

Again, a relatively easy layout using mainly the Sn@p! cards and chipboard pieces so far.  A lot of times I will stop and look at my layouts at this point to decide how I can further dress up my layout while using items that support my theme.

So, I switched out my Sn@p! card and added in a black border making a visual triangle of black.  I also matted my layout on a coral color paper for added interest.  A few Bits & Pieces were scattered around to add pops of color and tell about my story.  A chipboard key added in a visual triangle of chipboard items.  And a few of the new wood veneer pieces finished my page to create a “detailed” page.

WendyAntenucci5-550W-04082015

Here are a few close-ups of the details I added:

WendyAntenucci2-550W-04082015

WendyAntenucci3-550W-04082015

WendyAntenucci4-550W-04082015

While the details are nice, remember the most important thing is to tell your story.  So have fun and get the story in your books for the future!

Supplies

4523  I AM Sn@p! Cards
4528  I AM Chipboard
4529  I AM Bits & Pieces
4532  I AM Stickers
4506  I AM Thankful
4521  I AM Fabulous
4541  I AM Wood Veneer
4538  I AM Frames

We hope you have enjoyed today’s feature. We want to extend a sincere thank you to Wendy Antenucci for her fabulous project and Simple Stories for sharing their company with us. Be sure to visit Simple Stories to see more of their products and their blog for some inspiration!

Here are the websites and social media links where you can find Simple Stories:
Website – simplestories.com
Blog – simplestories.com/blog
Facebook – Facebook.com/simplestories
Instagram – instagram.com/simplestories_
Pinterest – pinterest.com/simplestories
Twitter – twitter.com/SimpleStories
You Tube – youtube.com/SimpleStoriesTV

To know and see more of Wendy Antenucci’s fabulous arts and designs visit her here:
My blog:  http://antenucci.blogspot.com
My Facebook:  https://www.facebook.com/wendyantenucci
My Pinterest:  http://pinterest.com/antenucci
My Instagram: http://instagram.com/wantenucci

In order to enter the give-away to win the fabulous prize shown below (and at the beginning of this post), please leave us a comment in the comments section of this post. One lucky winner will be announced next Friday and will have 3 weeks to claim their prize.

SimpleStories-iam-giveaway

Happy Crafting!