Featured Company: Simon Says Stamp! 05 13 2015

SimonSaysLogo-500W
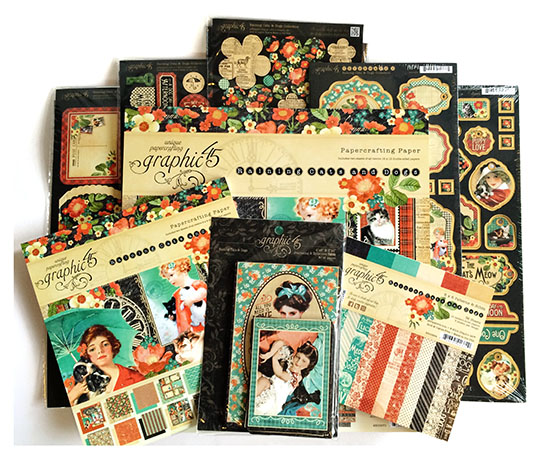
We are happy to bring back this week’s Featured Company: Simon Says Stamp!. Not only are they one of our favorite online stores to shop at, but they have an awesome line of products of their own branded under their name – Simon Says Stamp.

 And this week we are giving away a $25 US Gift Certificate to Simon Says Stamp.  (Details at the end of the post.)
SimonSaysStampGiftVoucher-550W
Simon Says Stamp Designer – Laura Bassen

Today we welcome Laura Bassen. We are so excited to have her showcase her work today on Paper Crafter’s Library. You can see Laura’s fabulous project below, but first, here is a little more about her:

LauraBassenProfilePic-250W-05132015


Laura, or better known as Laurafadora, as her family calls her, has been a paper addict, stamp lover and card maker for nearly her entire life. After graduating with a degree in graphic design, she went to a few Stampin’ Up parties, and the rest is history! She started her blog, Doublestick Heaven, in 2008. She lives in central Illinois with her husband & five busy kids. Her down to earth and witty videos will hopefully leave you inspired and with a smile on your face.


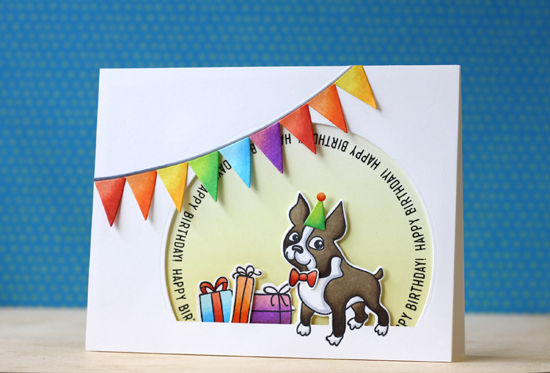
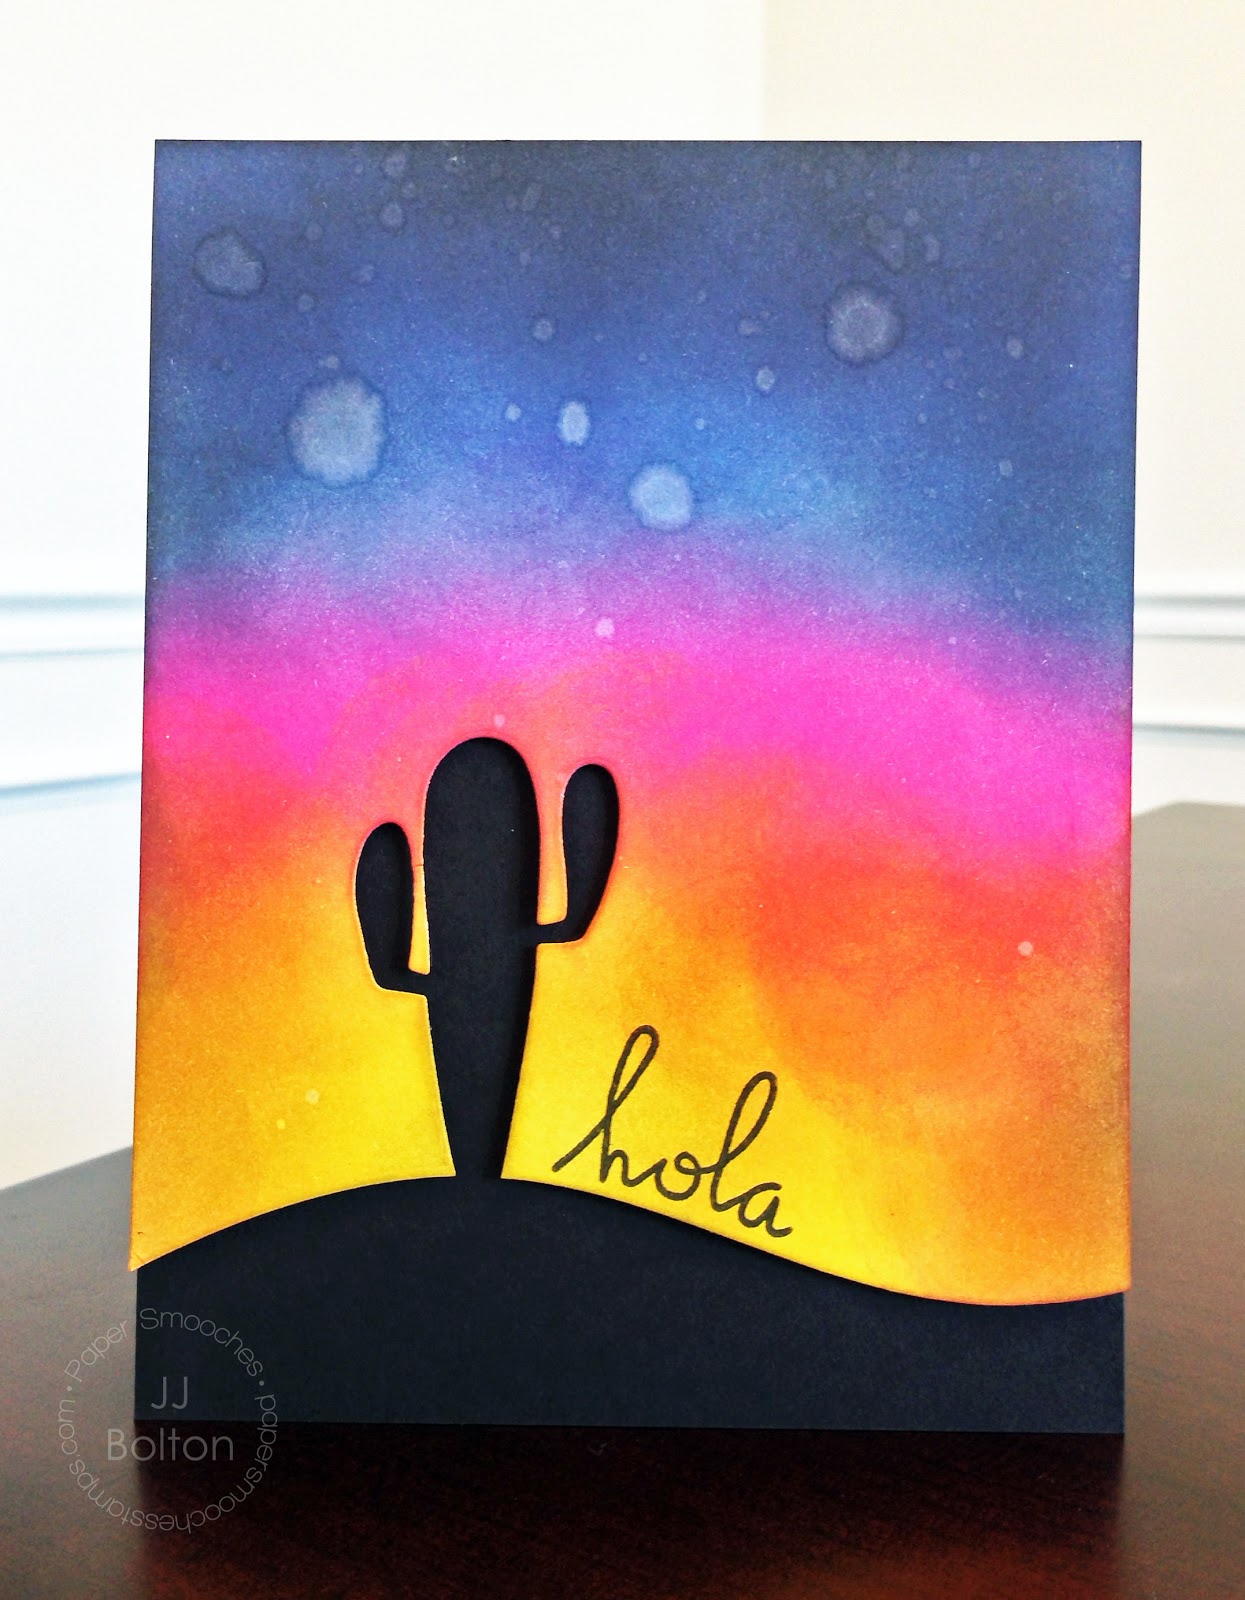
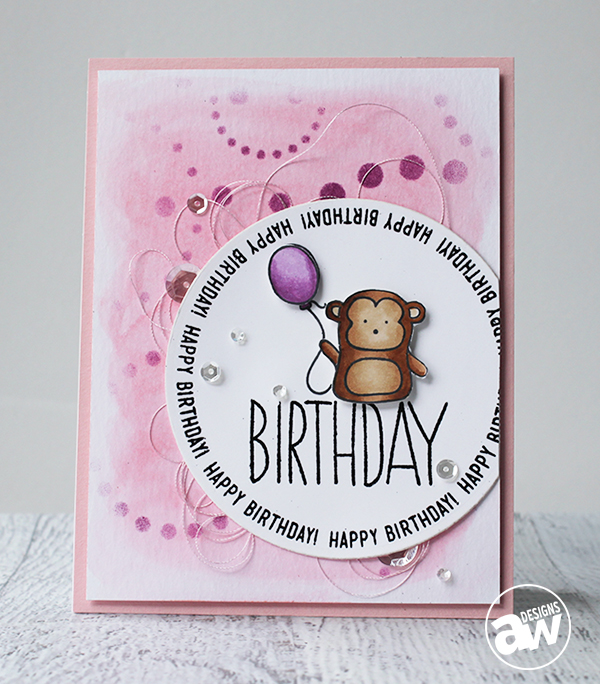
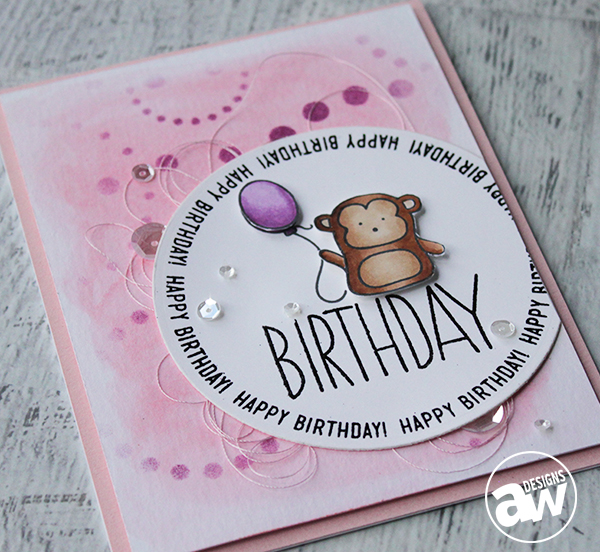
Party Banner Birthday Card

LauraBassen-550W-05132015

LauraBassen2-550W-05132015

Project Description

To create my card I partially die cut one of the larger circles from the Nested Circles as well as partially die cut the Simon die onto a 4.25″ x 5.5″ front panel. Then I blended in some Lemon Chiffon ink onto the card base so that it would show through the front panel window.

I cut the large birthday sentiment from Circle Sayings so that it could be manipulated to fit perfectly inside the large circle window and stamped it in Versafine Onyx Black ink. Then I stamped the Simon dog image in Memento Tuxedo Black ink as well as the birthday presents from Baby Party Animals that were cut using the coordinating dies and colored everything with Copics.

I die cut the banner using the Party Banner dies, colored them in with Copics and adhered with Multi Matte Medium glue. The tiny little banner from Party Banner dies was also used as a party hat for Simon. I added the teeny tiny dot on top of the hat from a scrap that fell out of my 1/8″ hole punch.

Supplies

Neenah 80lb.
Baby Party Animals
Stylish Simon
Sentimental Circles
Baby Animals
Simon
Party Banner
Memento Tuxedo Black
Lemon Chiffon
Mini Ink Blender
Big ShotCopic: R05, R08, R30, YR00, YR04, YR07, Y11, Y15, Y17, YG01, YG06, YG09, B000, B02, B04, R81, V04, V06, C1, C3, C5

We hope you have enjoyed today’s feature. We want to extend a sincere thank you to Laura Bassen for her fabulous project and Simon Says Stamp! for sharing their company with us. Be sure to visit Simon Says Stamp! to see more of their products and their blog for some inspiration!

In order to enter the give-away to win the prize shown above, please leave us a comment in the comments section of this post. The winner will be announced next Wednesday.

Happy Crafting!

Trend Watch – Envelopes

The great thing about handmade cards is that the recipient receives exciting snail mail in their mailbox! In today’s world of electronic mail, it can be awfully nice to receive a cheery card in that mailbox that often only contains junk or bills. Most of the cards we create get sent off in the mail, (which can be a nerve wracking experience all on its own – Recently I about died when the post office worker started mashing the envelope containing one of my slightly bulgy handmade cards that I was mailing abroad. Didn’t she know I had a work of art in there!? Has anyone else had this experience?).

Sending a card in the mail requires the use of envelopes, which is the topic of today’s Trend Report. We’re going to look at cute envelopes ON cards and cute envelopes to put your cards IN!

I love how Becky made envelopes the theme of her card. The envelope stamp is just great, and I love the bright colors she chose.

Good Wishes by Becky Roberts

Good Wishes by Becky Roberts, courtesy Inking Idaho

Virginia’s card is a great reminder of how happy mail can be! Her mailbox with the envelopes and flag that’s up would make anyone smile. The textures on the card are awesome.

Happy Mail by Virginia Lu

Happy Mail by Virginia Lu, courtesy Yes, Virginia…

The little envelope on Lori’s card with the heart seal is a great focal point for the card. I like her red, white, and blue theme that coordinates with the colors of air mail or the USPS.

Hello by Lori Tecler

Hello by Lori Tecler, courtesy inking aloud

Cheiron added a tiny 3D envelope with little notebook paper that is adorable! The scripty sentiment and tiny pink hearts are a great addition and coordinate so well with the envelope.

Sending Happy Mail by Cheiron Brandon

Sending Happy Mail by Cheiron Brandon, courtesy Cheiron Brandon: my crafty life

This card from Nicole has so many neat elements. The Lawn Fawn Gleeful Gardens set is adorable (look at that little snail delivering mail!) She also used that cute mail stripe border that adds a lot to the card, and if you look closely, you can see little slime trails behind her snails!

Snail Mail by Nicole Gavaldon

Snail Mail by Nicole Gavaldon, courtesy Lawn Fawn

Melissa’s clean and simple card is just perfect. I love the little hearts around the mail zooming out of the mailbox. It’s just so cute!

CAS Mail by Melissa Chipperfield

CAS Mail by Melissa Chipperfield, courtesy Oh, Smudge!

Let’s take a minute and also address (pun intended!) the envelopes that we use to deliver our paper creations. Jennifer McGuire highlighted this pale pink envelope with the cherry blossom flowers that she stamped on her card. How exciting for the recipient to get a hint of the pretty card that’s about to come out of that envelope!

Just a Note and Matching Envelope by Jennifer McGuire

Just a Note and matching envelope by Jennifer McGuire, courtesy Jennifer McGuire ink

Mary used Stampin’ Up’s Envelope Liners die to cut out the cute green polka dot liner that fit inside her envelope and coordinates so well with her card. It really finishes off her project well.

Good Wishes and Matching Envelope by Mary Fish

Good Wishes and matching envelope by Mary Fish, courtesy Stampin’ Pretty

You can find a few product links near the cards that feature them above. Simon Says Stamp also has some great projects to create or enhance envelopes.

These sentiments by Simon Says Stamp would be a great way to start enhancing your envelopes.

Simon Says Clear Stamp Envelope Sentiments

Envelope Sentiments by Simon Says Stamp

If you want to add a tiny envelope to your card, consider this die – you could use any kind of paper you want to coordinate with your card!

Simon Says Stamp Tiny Rectangle Envelope Die

Tiny Rectangle Envelope Die by Simon Says Stamp

My Partner-In-Crafting-Crime says this envelope punch board is a must-have. (Guilty admission: mine hasn’t made it out of the package yet!) She makes fun envelopes out of patterned paper that coordinate with the cards she sends, and they make the mail so bright and cheery!

Envelope Punch Board

Envelope Punch Board at Simon Says Stamp

I hope you’ve been inspired to add a few envelopes to your cards, or to dress up the envelopes your cards are being sent in! I’m going to go see about getting that envelope punch board out of its package!

Featured Company: Pretty Pink Posh 05 06, 2015

PPPLogo

We are happy to bring you this week’s Featured Company: Pretty Pink Posh.

Founded in December 2013, Pretty Pink Posh is dedicated to providing tips, ideas and products for arts and craft lovers everywhere. Here’s how owner Paulina Nakamura describes her company:

What began as a blog about life and crafts has grown into a fun-sized business, including my very own shop where you can find inspiration and products to make your next crafting project pop with perfect blend of trendy, colorful and pretty bling.

Whether you’re adding sequins to a handmade card or wrapping a brown paper package with baker’s twine, Pretty Pink Posh is your one-stop shop for an assortment of crafting embellishments and versatile, unique steel die cuts.

This week we are giving away : Stitched Borders 1 die cuts, Stitched Banner Duo 2 die cuts, 6mm Sparkling Clear sequins, 6mm Marigold sequins, 6mm Espresso sequins, 6mm Mossy Green sequins, 6mm Pink Peonies sequins, Silver Confetti, Silver Star Confetti. (Details at the end of the post.)

PrettyPinkPosh-Giveaway

Pretty Pink Posh Designer – Paulina Nakamura

PaulinaNakamuraProfilePic-250W-05062015Today we welcome Paulina Nakamura. We are so excited to have her showcase her work today on Paper Crafter’s Library. You can see Paulina’s fabulous project below, but first, here is a little more about her:

Owner of Pretty Pink Posh- a one woman, small business based in Seattle, WA. Crafter. Blogger. Social Media Addict. Dreamer of big dreams.

Thanks Shaker Card

One of my very favorite cards to create are shaker cards. It’s like a mini party when they open the envelope! For this card I wanted to go with a neutral color palette and let the sequins take the spotlight. Lately I’ve been obsessing over the mini sequin flowers and I thought they looked perfect with this wreath!

PaulinaNakamura1-550W-05062015

PaulinaNakamura2-550W-05062015

Supplies

Lawn Fawn Polka Mon Amie 6×6 paper pad
Winnie & Walter Happy Christmas set
Mama Elephant Just Hatched & Cosmic Stars sets
PPP Stitched Borders 1 die cuts
PPP Stitched Banner Duo 2 die cuts
Pretty Pink Posh sequins; Sparkling Clear, Marigold, Espresso, Mossy Green, Spring Flowers
Copic Sketch Markers

We hope you have enjoyed today’s feature. We want to extend a sincere thank you to Paulina Nakamura for her fabulous project and Pretty Pink Posh for sharing their company with us. To see more of their products and some inspiration you can find them through the following links:

Website: http://prettypinkposh.com
Blog: http://prettypinkposh.com/blog
Facebook: https://www.facebook.com/prettypinkposh
Instagram: http://instagram.com/prettypinkposh
Twitter: http://twitter.com/prettypinkposh
Pinterest: http://pinterest.com/prettypinkposh
YouTube: http://www.youtube.com/prettypinkposh

In order to enter the give-away to win the prize shown above (and below), please leave us a comment in the comments section of this post. The winner will be announced next Wednesday.

Pretty Pink Posh Paper Crafter's Library Give-away

Happy Crafting!

Trend Watch – A prickly subject

My next trend watch is a bit of a prickly subject.  Yet, it can be succulent too.  Because this trend report is about cacti and succulent plants!  Right now the stamp sets are crazy with options you can experiment with.  I have even seen a few folks carve their own cactus and succulent stamps out of rubber.  As with all of our subjects, there are so many ways paper crafters use the same stimulus that looking at a small sample can send your creativity soaring.  So you can create lovely cards and pages of your own.

This first set of cards uses watercolor techniques.  Because all cacti are capable of blooming at some point in their long life with the proper conditions;  when they do, they are even lovlier to color.  The contrast in the hot pink and the the green shadowing of the cactus and flower is just gorgeous.

blooming cactus - Copy

card by Dina Kowal photo courtesy of Mama Dini’s Stamparia

Another sample of Dina’s coloring skills gives us this wonderful card below.  I love how she creates her own background paper for each of her stamps so that they coordinate and add another level to her cactus.

blooming cactus2 - Copy

card by Dina Kowal photo courtesy of Mama Dini’s Stamparia

In this next card, Debby shares a cool no edge water color technique with her potted beauties.  She uses white embossing powder and water colors to give the cool washed look.  She created a video for this technique that she share here.

Debby1

card by Debby Hughes photo courtesy of Lime Doodle Design

Of course you can use traditional stamping as well for a cool effect.  Cacti and succulents come in some of the most fantastic colors.  Dawn captured a few of the lovely mint and ice blue colors in her card.

colorful cactus

card by Dawn McVey photo courtesy of Raspberry Suite

With cactus stamps it is so natural to create a scene showing them at different dimensions.  I love the sunset look and the sweet stamped flowers on Donna’s card.

howdycactus - Copy

card by Donna Bowman photo courtesy of Donna’s Crafty Place

I thought Isha’s treatment of her cactus plants was so clever.  Most of the stamp sets I have seen have the cacti and pots separate so you can add dimension with your pots.  Isha takes it one step further by overlaying her die cut negative over her inset stamped images.  Very pretty.

inset cacti - Copy

card by Isha Gupta photo courtesy of New Ideas by Isha Gupta

JJ used her cactus as a shadow for her bold and rich sky treatment.  She used a die cut and this look is so nice.

jjbolton_deserticons2

card by JJ Bolton photo courtesy of Handmade Cards by JJ Bolton

Lysa created a different look by using kraft colored paper and Copic markers for the succulents and the tea cup.  These colors capture the soft look of the plants I love.

succulents in a cup

card by Lysa Rohrer photo courtesy of Lysa’s Crafty Creations

I fell in love with this next card because the colors are just so awesome.  There are actually colors in nature this lovely too.  It is captured so well with this card.

wfc-2015-01-02-succulent-moved-card

card by Nina Yang photo courtesy of Waffle Flower Blog

Paper Smooches also has a stamp set of Southwest images and it includes faces.  Jocelyn created a fiesta girl animated cactus with margarita in tow.  This is a super fun card.

yee haw


card by Jocelyn Olson photo courtesy of Red Balloon Cards

You may have noticed by now that I love a good pun.  I couldn’t resist adding one to this post.  Misty’s so stuck on you cactus is such a cute love card and punny too.

stuck on you

card by Misty Buck photo courtesy of Lil Buck’s Creations

I am totally digging the texture of my final card this week.  I think adding the felt die cuts with stitching for the thorns is just great and adds a lot to the card.  The baker’s twine is awesome too.

stitched card

card by Chari Moss photo courtesy of MossyMade

Cactus stamping doesn’t need to be prickly, you can start with succulents!  Seriously though, I hope you have seen something that inspires you to try this fun stamping trend.    I am showing a few of the stamp sets the creative ladies I have featured used in case you would like to expand your collection.  I would also love to see your finished product if you try stamp carving a succulent or two as well.

So go ahead… make something pretty.

sss set

Simon Says succulents and saucers stamp set on Simon Says Stamp

hero arts set

Hero Arts Your own succulents stamp set at Simon Says Stamp

mama elephant

Mama Elephant Potted Pretties Stamp set at Simon Says Stamp

Basic RGB

Planted Stamp set at Waffle Flower

Basic RGB

Potted Plant stamp set at Waffle Flower

Featured Artist/Designer: Maria Fischer 04 30 2015

Welcome to another Featured Artist/Designer Spotlight. Today we’re thrilled to welcome Maria Fischer. Before we show you Maria’s project, let’s get to know her a little bit more…

MariaFischerProfilePic-250W-04302015

Guten tag! I’m Maria Fischer, although you may know me as maria f. or rieslingmama, which is the name of  my blog , my Pinterest and my flickr gallery. You can also find me designing at Simply Create Too, STAMPlorations, and The Mixed Media Card Challenge.

I’m a daughter, wife of 20+ years and mother of two. I’m a SAHM with a previous life as a financial analyst and an English teacher. Been in Germany for half my life – came for a job, stayed for a guy – but I’m a Michigan girl at heart.  If I’m not creating, you can find me in the garden, at a workout class or strolling blogland, most likely avoiding housework.

I got the cardmaking bug after buying a scrapbooking magazine in 2009. I made a birthday card based on one of the layouts with some paper scraps, which led to the need for more striped paper, which led to the Internet and the revelation that there was a whole wonderful world of cardmaking and cardmakers out there! My cardmaking journey (and the purchases) haven’t stopped since, however I’ve yet to create a scrapbook page.

I prefer CAS cards, but tend to be all over the board with my own creations. Techniques are my fave and that’s what I’d like to share with you here today at Paper Crafter’s.

Hello

Today I have two cards for you created with the “ghost stamping” technique – which basically means stamping an image with white pigment ink (which sits on top of the paper) before stamping over it with dye ink (which absorbs into the paper). It’s such a fun way to add a little something to your card.

My first card, which became a card for a boy:

MariaFischer1-550W-04302015

My second card, which became a card for a girl:

MariaFischer2-550W-04302015

And both together:

MariaFischer3-550W-04302015

Instructions:
Stamp dots BG with white pigment ink onto white CS. When dry, stamp stripes with dye inks. It was at this point that I noticed so much ink left on my stamp after stamping the first stripe (I forgot to mention that I am a practical, or should I say frugal, crafter), that instead of cleaning it, I gave it a spritz of water and stamped it onto a second piece of white CS, giving birth to the pastel version!

Did you notice, the dark blue stripe with the word “hello” in it turned into a lovely lilac when spritzed and stamped on the pastel version? Did you also notice that I did not try to stamp all the stripes evenly. I purposely angled a couple to add to the playful feel of the design.

So, to continue with the card instructions. Trim panel and adhere to cardbase.  To embellish the boy card add a “you” (I chose a portion of a die cut negative) and a few buttons. For the girl card heat emboss the butterfly on vellum and fussy cut it. Stamp “hello” with black pigment ink and heat emboss it with clear powder, then punch. I find it easier to stamp with black and emboss clear than to heat emboss with black powder. It usually yields a much cleaner result. Adhere the butterfly with glue dots, the sentiment with dimensional adhesive and a few sequins. Voila!

Supplies

Cardstock: white and kraft cardbases, Neenah Solar White, vellum
Stamps: (Big Dots BG) Kars, (On the Strip, On the Strip 2 and Everyday Circles) Neat and Tangled, (Butterflies) Impression Obsession
Ink: (white pigment) Hero Arts, (dye inks) Adirondack and Simon Says Stamp, (black) Versafine, Versamark

Tools

(Heart in a Box with Love die) Simon Says Stamp, EKS circle punch

Other: Stampendous white and efco clear embossing powder, sequins, buttons

It’s a wrap! Thanks for stopping by and thanks again for having me, Paper Crafter’s.

We hope you have enjoyed today’s project courtesy of Maria Fischer. Be sure to stop by Maria’s blog , Pinterest, and flicker to see even more of her beautiful work (and let her know we sent you).

Happy Crafting!

Featured Company: Graphic 45 – 04 29 2015


This week we’ve got a great project to share with you from one of our favourite regular featured companies  Graphic 45

Graphic 45 Designer – Solange Marques

Our Graphic 45 Guest Designer for this week is Solange Marques who is part of the 2014/2015 Graphic 45 Design Team. You can see Solange’s fabulous project below, but first, here is a little more about her.

SolangeMarquesProfilePic-250W-04292015Hi, my name is Solange Marques and I’m happy to be here at Paper Crafter’s Library today!

I live in Curitiba and I have been in love with a scrapbooking since 2004. I am married to John for over 31 years and have five children: Camila (30),  Alexandre (28), Bruno (25), Gabriela (20) and Miguel (14). We also have a granddaughter: Clara (6) and one grandson, Samuel (4), they are always present in my creations.

I graduated in Architecture and Fine Arts (perhaps that explains my huge passion for paint and their constant presence in my projects. I have been working in a bank as a jewelry appraiser for 26 years.

In a scrapbook layout I love mixing techniques, mainly involving paints and textures (watercolor, acrylic paint, modeling paste and a lot of mediums). I consider myself a mixed media artist and I love the artsy style!

My Blog:
http://solangescrap.blogspot.com.br/
Youtube Chanel:
https://www.youtube.com/channel/UCojJi58Z7xfYtp3UGGoNHNA
My gallery:
http://www.scrapbook.com/myplace/index.php?mod=galleries&u=461507

Altered Clipboard

For my project today I created an altered clipboard.  You can see some close up photos below.

SolangeMarques1-550W-04292015

SolangeMarques2-550W-04292015

SolangeMarques3-550W-04292015

SolangeMarques4-550W-04292015

Project instructions:
– Cover the clipboard with G45 papers.
– Apply a layer of Acrylic Gesso and remove the excess using  baby wipes.
– Cut out some elements of G45 ABC Primer collection and glue them on the clipboard.
– Using a brush, outline the figures shadowing them to get more depth.

Supplies

G45 ABC Primer Deluxe Collector’s Edition Papers
G45 ABC Primer Deluxe Collector’s Edition Stickers
G45 ABC Primer Deluxe Collector’s Edition Chipboards
Acrylic Gesso
Mini clipboard
Baby Wipes

***********

Thank you Solange!

We hope you have enjoyed today’s feature. We want to extend a sincere thank you to Solange Marques  for her fabulous project and Graphic 45 for sharing their company with us. Be sure to visit Graphic 45 to see more of their products and their blog for some inspiration!

Happy Crafting!

Trend Watch – Planners

I’m not really a planner girl. Most of the time I’ll just forget to take it with me. And that’s not so useful when you need to make an appointment. So for me the digital planners on your phone are a great solution. I’ve got it with me and I can sync it with my computer etc.

I have to admit though, that lately… I’ve been thinking about getting a ‘paper planner’ again. I’m finding myself so drawn to all those amazingly beautiful planners that are out these days, with so much room for personalization.

So today I’m going to take a look at some of the latest planner trends. In comparison with these planners, my digital one seems so boring.

You might know Christy Tomlinson for her amazing mixed media work, but she has some beautiful planner ideas too. She adds lovely colorful images that just brighten up the planner.

christytomlinson
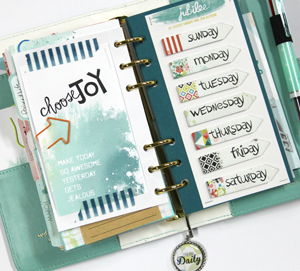
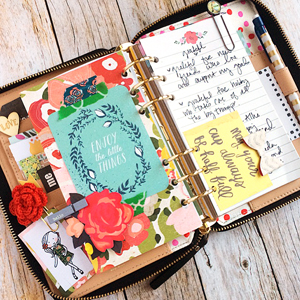
Planner inserts, image source Christy Tomlinson

Planners are becoming a way to document your life. You can incorporate your personal memories next to your appointments. And… never a dull moment when you have so much inspiration at hand ;).

Papertrey ink has a really extensive planner with lots of extra’s. Like pages to keep your goals and activities. With great colorful details.

freshlynoted-PTIPlanner from Papertrey Ink, image source
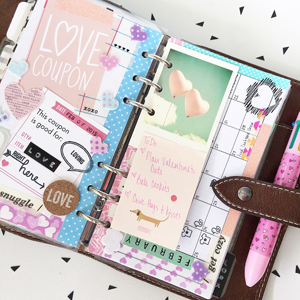
 Freshly Noted

Teddi made a ‘love’ themed page next to her february schedule.

studiol2eLove themed page by Teddi, image source StudioL2e

They are a great place to add journaling cards (another great way to use project life cards)

simplestories-nancyPage by Nancy Damiano, image source Simple Stories

Or add motivational quotes, like Filoeyecandi did on this page. (She has an awesome Instagram account too).

cocoadaisy-filoeyecandy-74Page by Candi, image source Cocoa Daisy

There are a lot of new stamp sets with the most important tasks already on the stamps and of course beautiful tags and icons.

SSSfoodplanner1
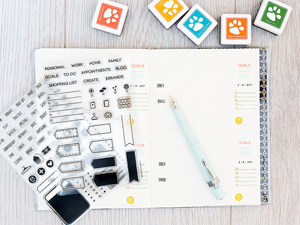
Planner stamps, image source Lime Doodle Designs

And of course I’ve made a little selection of products to share with you!

simon-1_319903_ZM
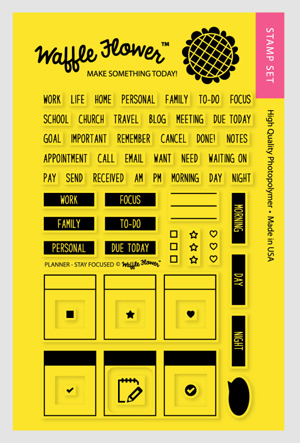
Life planning stamp set by Simon Says Stamp

studiol2e-plan_it_00-700x700
Plan it stamp set by Studio L2e

waffleflower271017-Planner-Stay-Focused
Stay focused stamp set by Waffle Flower

simon-1_319895_ZM
Small ink cubes by Simon Says Stamp

Or check out the beautiful planner kits from Cocoa Daisy with lots of planner goodies.

cocoa-990840e7d39e0990cc0642c0cdb3e16e.image.964x600
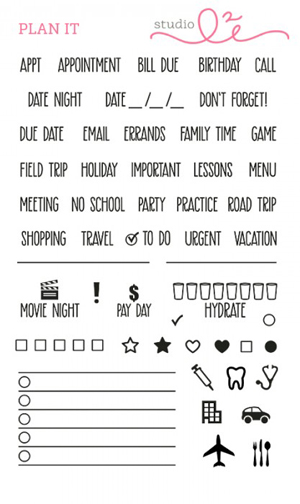
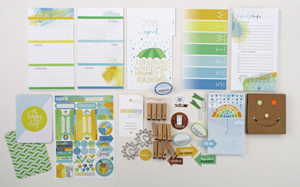
April planner kit by Cocoa Daisy

I hope these beautiful products can reduce the stress level of planning 😉
– Lucinde

Winner of the Graphic 45 Give-Away 04 15 2015

I’d like to extend a HUGE thank you to Graphic 45’s guest designer  Romy Veul for sharing such a wonderful project and to  Graphic 45 for their generous give-away: a “Raining Cats and Dogs” collection prize package  give-away valued at $71.

Graphic45PrizePack-01212015-550W


And now, the moment you’ve all been waiting for…….the winner is……Shel Anderson!

Graphic45-04152015


Congratulations Shel Anderson! Be sure to email us at customerservice@papercrafterslibrary.com to claim your prize. Please be sure to put “Graphic 45 Winner” in the subject line of the email, and then in the email itself, be sure to include your full mailing address and phone number.

Be sure to check out this week’s great company Graphic 45!

Winner of the Simple Stories Give-Away 04 08 2015

SimpleStories_LogosCS4

I’d like to extend a HUGE thank you to Altenew’s guest designer Wendy Antenucci for sharing such a wonderful project and to Simple Stories for their generous give-away including the  I AM  Collection Pack: a 12×12 Black SN@P! Faux Leather Album, and a 12×12 SN@P! Pocket Page Variety Pack.

SimpleStories-iam-giveaway

And now, the moment you’ve all been waiting for…….the winner is……Sharon!!!

WinnerSimpleStories-04082015


Congratulations Sharon!  Be sure to email us at customerservice@papercrafterslibrary.com within 3 weeks of todays date in order to claim your prize. Please be sure to put “Simple StoriesWinner” in the subject line of the email, and then in the email itself, be sure to include your full mailing address and phone number.

Join us next week when we feature another great company!