As PCL members may have noticed, I am on a new shadow box kick! I started creating them when I realized that just using my homemade action wobbles or dimensional foam was not enough to build the scenes which I wanted to create. I wanted layers…..lots of them. I wanted dimensions and I wanted to create small windows into little worlds of my creation. The perfect solution was a shadow box. Each shadow box is created with internal pieces which allows me to evenly create layers in my work. Each card is meant to be a little work of art which can be kept on a mantel or desk like a picture. Each design can easily be placed in a shadow box frame, singly or in multiples to create a scene. All in all, I love the effect which I get with each of them.
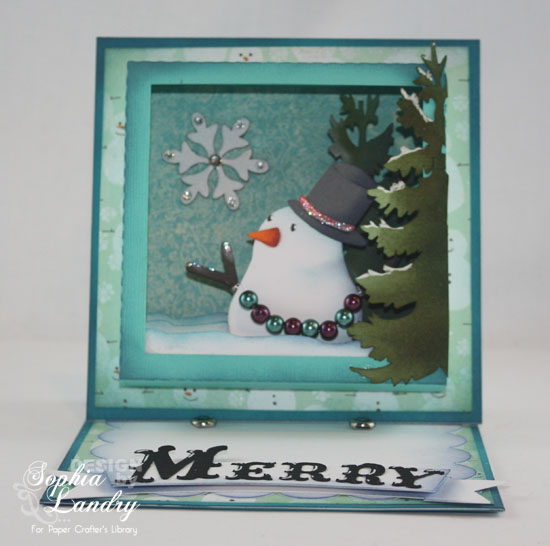
The first card is my snowman in a square shadow box. He is what started my “craze”. All images in this scene were cut using my Silhouette Cameo. The great thing with the software for this machine is that you don’t have to have a machine to get access to the shapes. You can simply purchase the individual shapes and hand cut them. Lifters (a little thing I designed in my triptych photo project) add stability and support to my snowman. The snowman himself was constructed extra sturdy so that he had the ability to hold the litte beads which I had purchased at Michael’s. Careful shading was added to each and every layer. The end result is a snow-scape in a forest. Beautiful papers (Basic Grey), grace every surface of this easel card which was also specialy designed to support the weight of this card. In the end, it will only be given to a very special person lol.
The second card was meant to highlight some of the adorable snail stamps from LeLo Designs. I am in love with all her snail images (and own the majority of them). She is a stamp designer based out of Germany. Her prices for un-mounted stamps is fair and the shipping reasonable. I love/hate ? how easy it is to shop on her site! So with this card, you get the bonus feature of seeing how the snail is colored. I used my real watercolors for him, but it is easily adapted to coloring with any other medium which you might have. The snail was designed to be multi-layered (hence plenty of fussy cutting) but you can easily omit that portion. The back-drop was designed using my Silhouette Studio digital cuts, but again, you can purchase and cut by hand if you don’t have a machine. There was also a bit of hand cutting for the rolling hills. Careful attention was payed to the shading of each piece with inks and chalks and Copic markers were used to add details to some of the cut pieces. The card features gorgeous designer papers (Basic Grey) and cardstock on all surfaces, and every detail carefully thought through. The way I see it, if you spend that much time on the front image, you better make the rest look as good lol. I love the end result, and could not wait to show my daughter. Her response …….. ” I would die before the fireman snail could save me, he would be late!” Aren’t children precious?
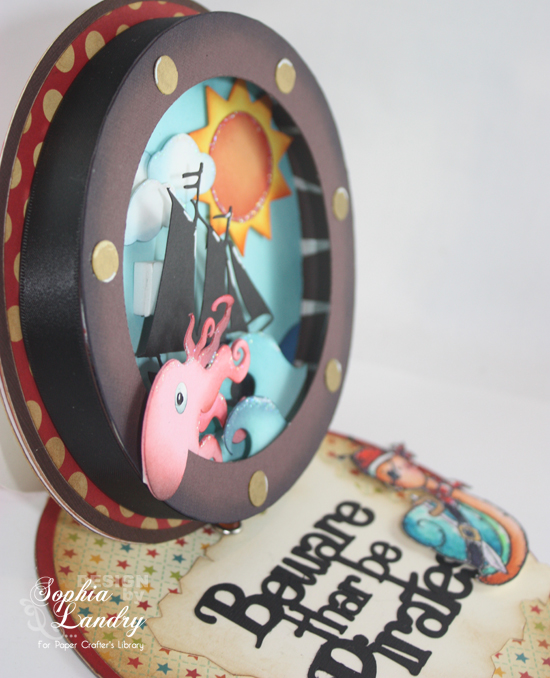
The final card is my Pirate Snail in a circular shadow box. Once again he is from LeLo Designs. He is my little plunderer of the Seven Snail Seas (and once again my daughter found the thought of a pirate snail to be less than terrifying). The snail is once again watercolored with my paints, layered with fussy cutting, and placed along the bottom portion of the card. I did not want him to block out the scene of his little world. The scene was created with plenty of Silhouette Studio cuts, lots of shading ( surprised? ), and little dollops of stickles to add the necessary bling. The circular shadow box was designed to look like a port-hole on a ship with the little studs colored in gold. The card was again covered thouroughly in beautiful designer papers (Cosmo Cricket) and every detail placed with thought and consideration!
Well I hope you love these as much as I do! I can guarantee that they were created with plenty of love! Each template is available in PCL along with all the instructions for creating every aspect of this card! I promise these cards are not hard to make, just that they do have a bit of a time commitment lol. Each card has a place to write your message, which will not be seen when using it for display. Each one is designed to last a long time and to be very sturdy! Finally, each one will be treasured by the person to whom it is given. Make sure you give it wisely 🙂
Cheers,


Leave it to you to add an extra dimension to an easel card. 😉 You NEVER fail to astound me with your creations. It’s hard to pick a favorite. I have an unnatural phobia about slugs and snails, but even your snail card made me chuckle. Loved your daughter’s response, too.
Love your shadow box creations, and have enjoyed the videos on all three. Your daughters responses to the snail are so cute! Thank you again for sharing all the details on making these projects. 🙂
I love these cards, especially the octopus that is placed both in and out of the frame!!!!! I’m so glad I’m not the only paper artist that appreciates and uses paper piecing…I think the use of colored papers just adds so much dimension to the entire creation. I sometimes use colored pencils to add more depth in the shadows. I’m definitely going to check out those snails…why? Because I have been stamping snails on the outside of my envelopes every time I use the US Postal Service. All of my letter friends love to receive my cute envelopes. Thanks for the link to this cute stamp line. Looking forward to receiving more of your card designs. I enjoy using an easel card base because of the built in display feature of the design. I like that the inside of the card is just as displayed as the outside. LOVE your cards!
Wow, so fantastisch….es freut mich seeehr die Schnecken zu sehen :o)
Hugs
Nancy
Sophie,
These are amazing. I would love to learn how to do this. Being a Christmas person (12 months of the year if it were acceptable), I love the little snowman Easel Card. You are amazing. The way it all “pops” out is amazing. Thank you for sharing your creations.