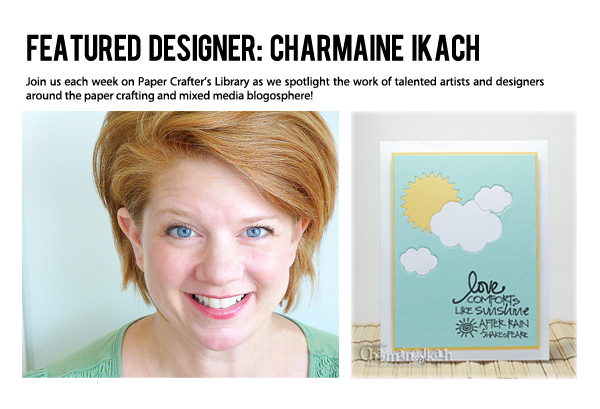
Today on the Paper Crafter’s Library blog, we’re continuing our weekly featured artist spotlight whereby each week we spotlight a different artist/designer in the paper crafting & mixed media world and introduce you to their fabulous work. Today we’re thrilled to welcome Charmaine Ikach.
Before we show you Charmaine’s project, let’s get to know her a little bit more…
 Charmaine lives in Pittsburgh, PA with her husband and four children…Savannah, 10, Arwen, 7, Isaac, 6, and Isabelle, 4. She spent her life as a musical theater performer, which is how she met her husband of 12 years. They met while performing in a show together, though she hasn’t done much performing since having children. She does keep active in the field through choreographing, teaching dance and singing locally from time to time. Stamping has filled that creative void. Charmaine currently designs for Taylored Expressions and Verve Stamps and absolutely LOVES it. She loves being able to share her work on her blog Oodabug Alley and is thrilled and grateful for the opportunity to share her work with you here at The Paper Crafter’s Library.
Love Comforts Like Sunshine Card
I have been loving the “inlaid” die cut look lately, so my card uses that technique. I created the card using a sentiment from Verve Stamps along with some dies from Papertrey Ink.

Once I decided on my layout, I started by die cutting the sun first since it would be the furthest back in the scene. I die cut the sun again out of yellow cardstock and nestled it into the sun die cut from the blue cardstock. Next, I worked on the clouds by placing the largest cloud die over a bit of the sun and die cutting it from the blue cardstock, then again from white cardstock and nestling the white cloud into the blue die cut space. I die cut the two small clouds the same way. I stamped the sentiment and then matted the blue cardstock onto yellow cardstock and finally attached the whole panel to the card base with foam tape.

Supplies:
Stamps: Stronger Love (Verve Stamps)
Ink: Onyx Black VersaFine ink (Tsukineko)
Paper: Aqua Mist, Harvest Gold (Papertrey Ink); Choice Snow White (Taylored Expressions)
Dies: Heart to Heart #6 (Papertrey Ink)
Thanks for stopping by today and thank you, Paper Crafter’s Library for inviting me to be here today!!
We hope you have enjoyed today’s projects courtesy of Charmaine. Also, be sure to stop by Charmaine’s blog to see even more of her beautiful work (and let her know we sent you). You can also find Charmaine on Pinterest and Twitter.