Featured Company: Faber-Castell Design Memory Craft

DMC_Newlogo_RegMark_2012

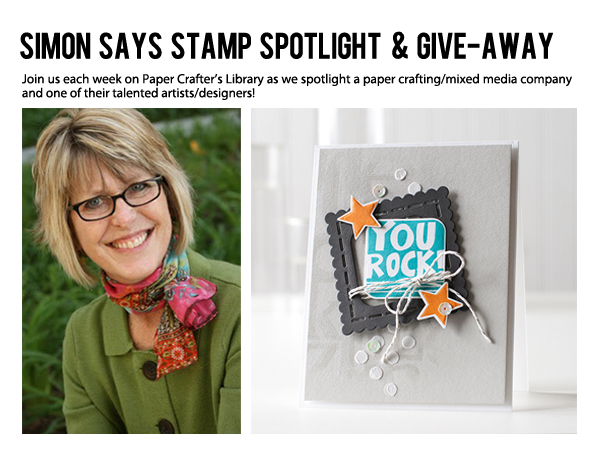
This week we are thrilled to welcome back Faber-Castell! In today’s spotlight you’ll learn more about Faber-Castell, see a fantastic project by Margie Higuchi and have the opportunity to win a jar of Glass Bead Glitter Gel, Gesso and the Metallic Gelatos – Gold and Silver (details at the end of this post).

FaberCastellPrizePack-09032014-550W

About Faber-Castell

Founded in 1761, Faber-Castell Design Memory Craft is a leading manufacturer in high quality crafting supplies.  2011 was a milestone year for Faber-Castell USA as we celebrate the 250th Anniversary of Faber-Castell. We are proud of our longevity and what it represents – consistent delivery of a quality experience in all areas of business. In keeping with Lothar von Faber’s quote, “to rise to the highest rank by making the best that can be made in the whole world” Faber-Castell USA is committed to staying true to this vision of quality, tradition, and innovation now and in the future.

countThe 8th generation behind Faber-Castell Design Memory Craft: Count Anton Wolfgang von Faber-Castell

Faber-Castell Designer – Margie Higuchi

Today we welcome Margie Higuchi. We are so excited to have her showcase her work today on Paper Crafter’s Library. You can see Margie’s fabulous project below, but first, here is a little more about her:

OLYMPUS DIGITAL CAMERAResiding in the northwestern suburbs of Chicago with my husband and our two sons, I enjoy different types and styles of paper crafting from creating scrapbook pages to making cards to dabbling in mix media! I was fortunate to have been a product designer for a line of chipboard and acrylic products, a design team member on several craft manufacturers and scrapbook retailer teams, published artwork and articles in several online and print magazines in the U.S. and overseas. I am thrilled to be a part of the Faber-Castell® Design Memory Crafts® Guest Design Team! The Design Memory Craft colors are amazing and their textural accent mediums are fabulous. It makes showcasing them SO EASY!


Peace Card

Today I am SUPER EXCITED to showcase Faber-Castell® Design Memory Craft® amazing Textural Accents Glass Bead Glitter Gel! It sparkles like no other and it doesn’t flake when dry. In a one word description = WOW!

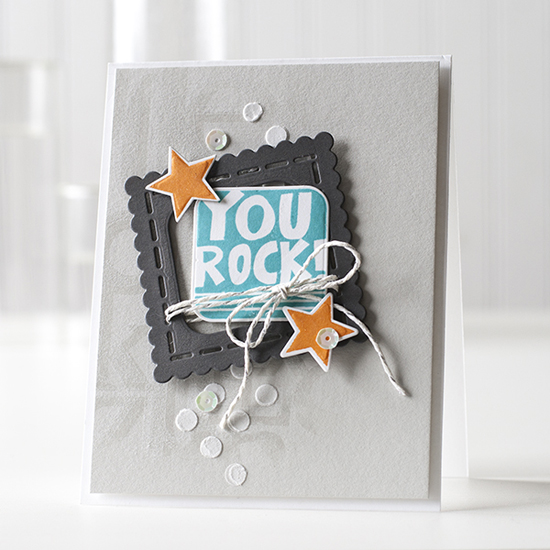
Using Glass Bead Glitter Gel in three different ways, I created this sparkly holiday card. It not only has wonderful texture, it: 1) highlights the stamped image underneath; 2) gives chipboard die cut an extra “something” and 3) stays on hard surfaces like the trinket pins!

MargieHiguchi11-09032014-550W

I started by cutting chipboard with Spellbinders® Die D-Lites™ S2-120 Peace Sentiment holiday die template.

MargieHiguchi1-09032014-550W

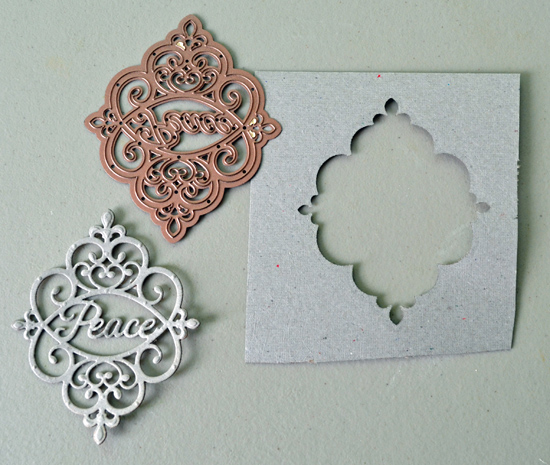
To prime the die cut for some fun, I covered it with Textural Accents Gesso – two coats with dry time between coats.

MargieHiguchi2-09032014-550W

When dried, I colored the die cut with Design Memory Craft® Silver Ice Gelatos® stick and blended with my fingers to completely cover the edges. This amazing acid-free pigment stick glide on a creamy brilliant shimmering color that blends beautifully with or without water. Add another color or textural accent medium for a WOW! factor like I did below.

MargieHiguchi3-09032014-550W

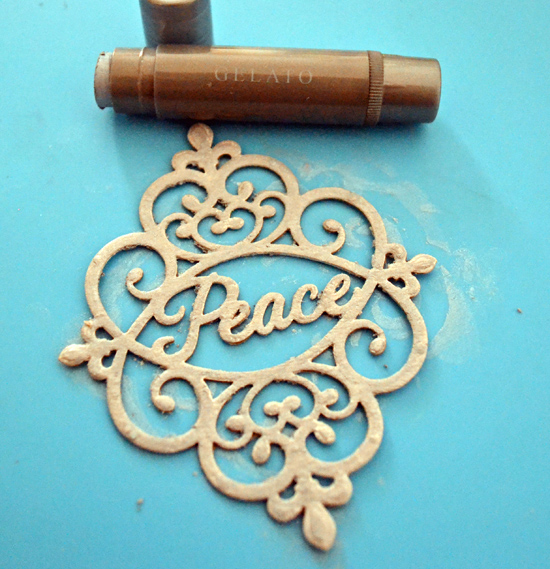
Lastly, I spread Glass Bead Glitter Gel over the die cut with my fingers to control the coat. Make sure it doesn’t get in between the letters so it dries crisp words.

MargieHiguchi4-09032014-550W

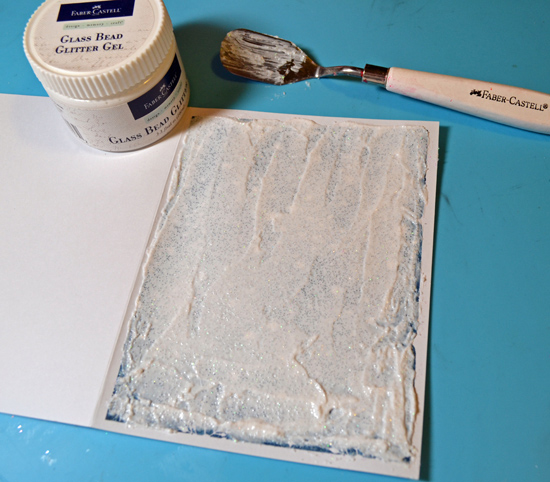
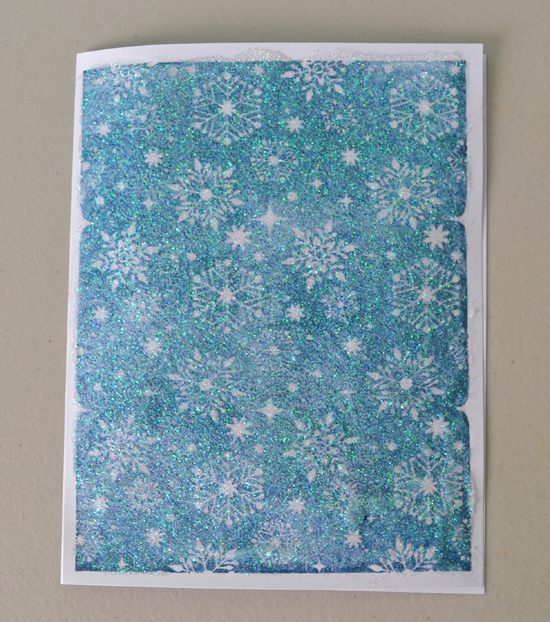
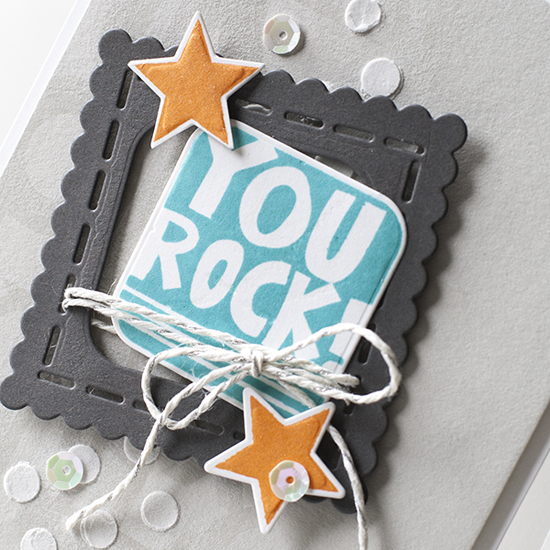
Set the die cut aside to dry and work on the card front. I stamped JustRite Papercraft’s Winter Wonder Cling Background Stamp with Nautical Blue ink. Let dry or use a heating tool to dry.

MargieHiguchi5-09032014-550W

Once dried, I spread Glass Bead Glitter Gel over the stamped image. Depending on how thick you apply the gel, dry time varies so I left mine overnight to dry. Below are images to show the before and after…note: do not use a heating tool to dry – the texture will bubble.

MargieHiguchi6-09032014-550W

MargieHiguchi7-09032014-550W

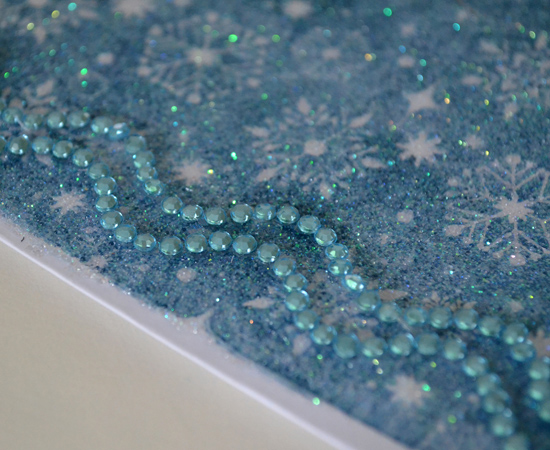
To embellish more, I added self-adhesive rhinestones to the card front and die cut. Even textured, the stones stuck with no issues. Love the solid surface the gel becomes when dried. The sparkle from the glitter is stunning…

MargieHiguchi8-09032014-550W

MargieHiguchi9-09032014-550W

OK….so I had to add more embellishment! It’s the holidays! LOL! I dipped these trinket pins into the Glass Bead Glitter Gel jar and then scraped the excess off. Let dry for an hour and both turned out amazing!!

MargieHiguchi10-09032014-550W

I tied a white organza ribbon bow on the side of the card front over the rhinestone border, added the pins into the bow, adhered the die cut and it’s ready to send! Here’s a second look at the finished card…

MargieHiguchi11-09032014-550W

Supplies

Faber-Castell Design Memory Craft – Glass Bead Glitter Gel, Gesso and Design Memory Craft® Silver Ice Gelatos®
JustRite Papercraft Stamps – Winter Wonder Cling Background Stamp
Spellbinders® Creative Arts – S2-120 Peace Sentiment
Ink – IMAGINE Craft®/TSUKINEKO® (Memento Luxe – Nautical Blue)
Cardstock – Darice
Bling – Want2Scrap©
Trinket Pins – Maya Road
Adhesives – ScraPerfect (Best Glue Ever) and SCRAPBOOK ADHESIVES BY 3L® (Dodz™ medium)
Other – Chipboard; White Organza Ribbon

We hope you have enjoyed today’s feature. We want to extend a sincere thank you to Margie Higuchi for her fabulous project and Faber-Castell for sharing their company with us. Be sure to visit Faber-Castell to see more of their products and their blog for some inspiration!

In order to enter the give-away to win the prize shown above, please leave us a comment in the comments section of this post. One winner will be announced next Wednesday on the Paper Crafter’s Library blog!

Karen

Winner of the Simon Says Stamp Give Away!

SimonSaysLogo-500W

I’d like to extend a HUGE thank you to Simon Says Stamp’s guest designer Shari Carroll for sharing such a wonderful project and to Simon Says Stamp for their generous give-away of a $25 US Gift Certificate shown below.

SimonSaysStampGiftVoucher-550W

And now, the moment you’ve all been waiting for…….the winner is……Shirley!

SimonSaysStampWinner

Congratulations Shirley! Be sure to email us at customerservice@papercrafterslibrary.com to claim your prize. Please be sure to put “Simon Says Stamp Winner” in the subject line of the email, and then in the email itself, be sure to include your full mailing address and phone number.

Join us next week when we feature another great company.

Karen

Trend Watch – Using Up Your Secret Stash of Scraps

I know I am not the only one.  I am a bit of a paper hoarder, okay I am a full fledged paper hoarder. Whenever I have a little extra paper form a project I hear my mother in my head “you can use that!”  So I keep them.  The problem is I  have bags and bags of scraps and sometimes I need inspiration to use some of them up.  This week is all about cleaning out each of our secret stashes of scraps and making beautiful things with them.

I love metal dies – they are so versatile and make projects look awesome.  You don’t even have to throw away your negatives.  If you cut your image out of the center, you can lay paper scraps behind it for a custom designer paper look.  And look bonus, you can run a strip of tape down the side and lay on paper scraps to make  cool edge like this card.

balloon in die

card by Jana Millen photo courtesy of This little card of mine

You don’t even need large pieces of paper scraps.  Look at what the ever-so-talented Teri create with her scraps: a mini collage with embellishments, just awesome.

blog_lf_ilikeu_teri

card by Teri Anderson photo courtesy of Studio Calico blog

Strips of paper with banner flags cut into them create a multi-texture background in this colorful card by Aly.  There is so much happening in this happy card. Think of all the scrap paper you could use up in this one.

  Hello capture life

card by Aly Dosdall photo courtesy of Echo Park Paper co. blog

I’m a sucker for a pretty banner and I just love this one down the side of the card that Shannon created.  And just look at her envelope liner.   It is so pretty and is such an inspiration for what scraps can do in the inside of envelopes too.

its your birthday

card by Shannon Jaramillo photo courtesy of EZ Peasy Cards 

 You can use coordinating paper scraps to make adorable flowers.  These were made with metal dies but you could also cut circles yourself and make a lovely paper garden.

mod flower thank you

card by Lisa photo courtesy of I’m in Haven

In addition to adhering them to your projects directly, you can also color, distress and paint them to create cool looks like this one.

RCbirthdayhop_aks

card by Amy Sheffer photo courtesy of Pickled Paper Designs

Polaroid frames are so hot right now  Give them a custom color look with paper strips as a background. 

smile in frame

card by Teri Anderson photo courtesy of A bit of this.  A bit of that

 I just adore how this page turned out by sewing and folding paper squares.  You can punch the squares out of any leftover paper without a project home.

swimming pool dip page

page by Paige Evans photo courtesy of Studio Calico blog

The cups that Lisa created have so much personality.  They’re simple and very sweet. 

teacups 1

card by Lisa photo courtesy of I’m in Haven

Vicki made this card with washi tape but I thought repeating scrap paper strips and lifting a die cut negative over the top of it would look just as cool as her happy creation.

Washi Birthday - Vicki Wizniuk

card by Vicki Wizniuk photo courtesy of Wizard’s Hangout

Jen found some previously water colored paper and cut them in squares and glued them to a black background.  It looks so striking, I just love it.

watercolor inchies

card by Jen Martin photo courtesy of My Paper Epiphany

So instead of having guilt and obligation about your paper hording eco friendly practice of saving scraps, I hope I have inspired you to use them (by marcy).  I’d love to hear how you use your scraps.

So go ahead… make something pretty.

I found a few dies and washi tapes that might look great with some of your awesome scraps

balloon dies

flower dies           stars  washi tape

Featured Artist/Designer: Judy Marino

Today we’re thrilled to welcome Judy Marino. Before we show you Judy’s projects, let’s get to know her a little bit more…

JudyMarinoProfilePic-08282014-250WHello, friends!  My name is Judy Marino and I am married to my high school sweetheart, mom to four awesome kids (ages 15, 14, 12 and 9), and employed as a school psychologist.  While making cards is my favorite hobby, I also enjoy singing, gardening, reading, and occasional scrapbooking.   Life here in New Jersey is very busy and very fun!   I was introduced to rubber stamping over ten years ago when my best friend sent me a hand-made Christmas card, and I have been hooked ever since.  I love clean and simple cards, and I am thrilled to be a member of the CASology design team.  I also love patterned papers and enjoy making cards with some layers, too.  I am so flattered to be featured here today at Paper Crafter’s Library…thank you so much for this honor!

I made two cards using a fun technique currently trending in the card-making world: die cutting with metallic paper.  For both cards, I adhered silver metallic paper to heavy white cardstock, then die cut my sentiments to give them some stability.  For my “Thanks” card I adhered the sentiment on top of the patterned paper base, while I inlaid the “Hugs” sentiment on the other card.  The flowers, gems and butterfly add some interest while still maintaining a flat card for mailing.

JudyMarino2-08282014-550W

JudyMarino1-08282014-550W

Supplies:

Papers: Add a Little Dazzle silver metallic paper; Crate Papers “Pretty Party” 6×6 pad; kraft cardstock
Dies: Simon Says Stamp “Hugs” and “Thanks;”  Lil’ Inker Designs “Stitched Rectangles;” Martha Stewart butterfly punch
Embellishments: Queen & Co. red Jellies and silver pearls; Prima flowers
Adhesives: Inkssentials “Glossy Accents;” Scotch double-sided adhesive roller

We hope you have enjoyed today’s project courtesy of Judy Marino.  Be sure to stop by Judy’s blog to see even more of her beautiful work (and let her know we sent you). You can also find Judy on Flickr, Pinterest, Twitter and Facebook.

Have a great day!

Karen

Featured Company: Simon Says Stamp

SimonSaysLogo-500W

This week we are thrilled to welcome back Simon Says Stamp! In today’s spotlight you’ll learn more about Simon Says Stamp, see a fantastic project by Shari Carroll and have the opportunity to win a $25 US Gift Certificate to Simon Says Stamp.

SimonSaysStampGiftVoucher-550W

About Simon Says Stamp

We want to be your ONE STOP SHOP! At Simon Says Stamp, we care about our customers and pride ourselves on going the extra mile to make customers happy. Offering quality products that you want to use in your projects is our priority. Our whole team is passionate about crafting & the power of sharing stories. We want to share that passion with you by getting you inspired! Please visit our blog that is updated daily and 2 weekly challenge blogs on Monday and Wednesday! Have a “click” and stay awhile!

Shari Carroll

Today we welcome Shari Carroll. We are so excited to have her showcase her work today on Paper Crafter’s Library. You can see Shari’s fabulous project below, but first, here is a little more about her:

ShariCarrollProfilePic-08272014-250WShari has been a professional stamper/cardmaker for nearly a quarter of a century (that’s a long time) starting with Hero Arts in 1989. She began as a replication artist creating display boards for retail stores, which lead to demonstrations and catalog work.

Over the years Shari has been published in numerous magazines including Somerset Studio, The Gallery, Stampers Sampler, Take Ten, Creating Keepsakes, Better Homes and Gardens, Paper Crafts and more. Shari has also contributed to several Design Original Books along with the Autumn Leaves Designing With series. In 2006, Shari was asked to write her own book for Northlight Publications called Layers.

In June of 2013, Shari resigned from her position with Hero Arts to join the Simon Says Stamp family where she holds the title of Creative Director and Product Manager. Shari’s stamps, dies, stencil and flair designs can be found in the Simon Says Stamp exclusive line of products.

Shari resides in a small farm community outside of Chicago with her husband Tom, sons Brooks (nearby) and Scooter, plus her tortoise Chester. Her love for nature is evident in her photography and instagram shots of her friendly squirrels.

You Rock!

ShariCarroll1-08272014-550W

I started out doing ghost stamping on Simon Says Stamp Fog cardstock. I partially inked the Alphabet background stamp with Fog ink and stamped it onto the cardstock. I cleaned the stamp, inked with White Unicorn ink and stamped again but offset it just a bit  to create a drop shadow look.

ShariCarroll3-08272014-550W

I applied Texture Paste through the Medium Dot stencil to create texture and I created a frame by die cutting Slate cardstock using the Scallop frame and rounded corner die as an insert.  The “You Rock” was stamped using Audrey Blue ink and die cut with the coordinating die.   The stars are stamped with Orange Peel ink, die cut and lightly coated with Wink of Stella clear glitter.   I wrapped silver twine through the frame and secured with a bow. Everything was assembled onto a top folding Neenah card using foam squares.

ShariCarroll2-08272014-550W

Supplies

Simon Says Stamp Lunch Box Notes stamps
Simon Says Stamp Lunch Box Notes craft dies
Simon Says Stamp Alphabet cling stamp
Simon Says Stamp Medium Dots stencil
Simon Says Stamp Fog cardstock
Simon Says Stamp Fog ink
Simon Says Stamp Orange Peel ink
Simon Says Stamp Chantilly Crème sequins
Lawn Fawn Silver Twine
Ranger Texture Paste
Ranger Palette Knife
Tombow Mono Adhesive
Foam Squares
Paper Trimmer
Score Board
Big Shot
Metal Adapter

We hope you have enjoyed today’s feature. We want to extend a sincere thank you to Shari Carroll for her fabulous project and Simon Says Stamp for sharing their company with us. Be sure to visit Simon Says Stamp to see more of their products and their blog for some inspiration!

In order to enter the give-away to win the gift certificate shown above, please leave us a comment in the comments section of this post. One winner will be announced next Wednesday on the Paper Crafter’s Library blog!

Karen


Winner of the Graphic 45 Give Away!

I’d like to extend a HUGE thank you to Graphic 45’s guest designer Annette Green for sharing such a wonderful project and to Graphic 45 for their generous give-away of their Time to Celebrate collection shown below.

Graphic45GiveAway-08202014-550W

And now, the moment you’ve all been waiting for…….the winner is……Barbara!

WinnerOfGraphic45GiveAway

Congratulations Barbara! Be sure to email us at customerservice@papercrafterslibrary.com to claim your prize. Please be sure to put “Graphic 45 Winner” in the subject line of the email, and then in the email itself, be sure to include your full mailing address and phone number.

Join us next week when we feature another great company.

Karen

Trend Watch – Wood Veneer

They’ve been around for a little while but the last time you can see lots of different variations: wood veneer. I love the natural look they give to your work, but you can also use them in very colorful ways. You can stamp on them, give them color with your markers or find another way to make them the perfect match for your project. I’ve found some great inspiration for you all with different ways to use wood veneer!

Let’s start with this lovely layout from Sam for Elle’s studio. She stapled the wood veneer to her layout which gives it a sturdy look.

sam-So-Fun
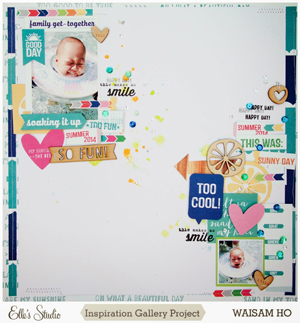
So Fun by Sam, image source Happie Scrappie

Paige Evans used a large woud veneer heart background. This matches all the other hearts in the layout perfect without being too overwhelming.

paige-evans-heartHistory/heritage by Paige Evans, image source Chris and Paige

On this layout from Cassandra there’s not only shaped wood veneer but also a piece of wood veneer with a sentiment on it. The branch she made around it gives it even a more natural feeling.

cassandra-wood-veneer-sentimentThe Best is yet to Come by Cassandra, image source Scrappy Savvy Creations

The wood veneer can be used on cards too, there are a lot of different small shapes which work great on cards. You can see some pretty little hearts on the card from Gerdine. I also love the combination of the wood veneer with the little bit of twine.

gerdine-wood-veneer-card
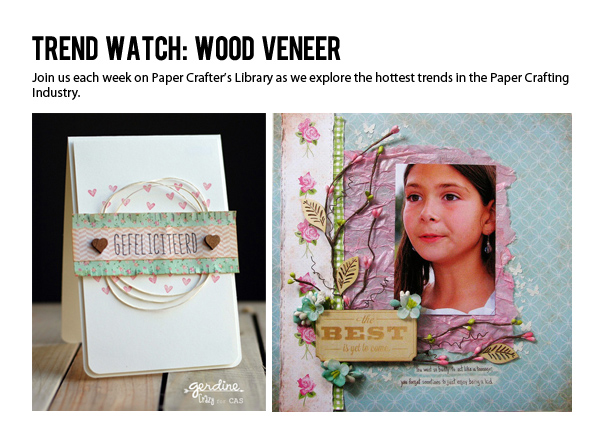
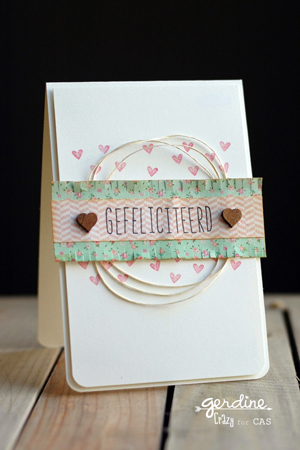
Congratulations card by Gerdine, image source Studio Saar en Pien

If you are looking for a little bit more color you could use some of the shapes from Pink Fresh Studio. Their screen printed wood embellishments are available in several colors. Ashley Fowler used some pretty embellishments with a little touch of pink.

ashley-fowler-pink-veneer
Sister love by Ashley Fowler, image source Pinkfresh Studio

You can also find more colorful embellishments at Jillibean Soup, their wood sprinkles wood sprinkles are available in different colors. You can see some of them on this layout from Leanne Allinson.

LeanneAllinson-JillibeanSoup_mywholeheart
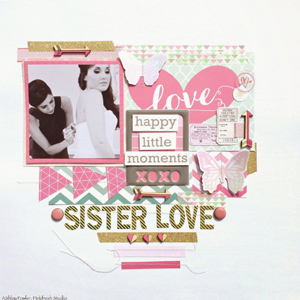
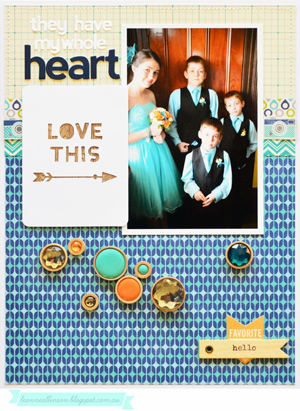
My whole heart by Leanne Allinson, image source …Our little family…

I want to finish with another way to use wood veneer, you can make your own stamps with them! Nicole Samuels has some pretty examples. They don’t stamp really smooth but they keep having the rustic feeling that the wood veneer gives.

wood-veneer-stamp
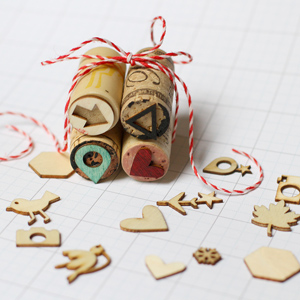
DIY stamps by Nicole Samuels, image source Nicole Samuels

And, of course, you would like to know where you could find some great wood veneer items. Here’s a short list!

SC-woodveneer-animals2Studio Calico, South of market wood veneer animals

FF_wordwoodchips2
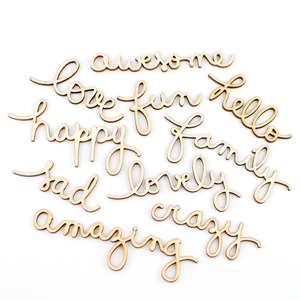
Freckled Fawn, wood chips words

PFS-colored-chips
Pinkfresh Studio, Everyday sayings screen printed wood

Dear-Lizzy-heart
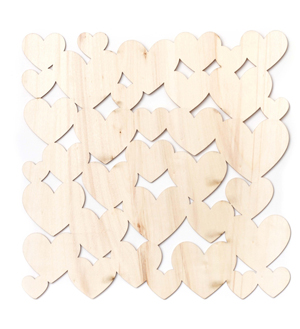
American Crafts, Dear Lizzy, wood veneer hearts

jb_WoodSprinkles_Life
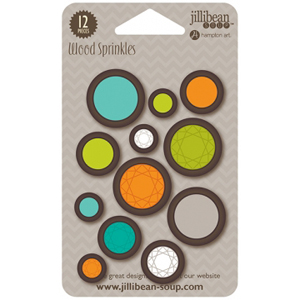
Jillibean Soup, life wood sprinkles

BGBB-gold
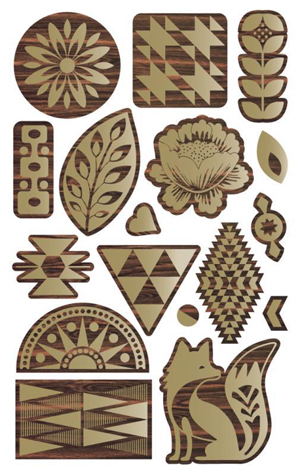
Basic Grey Grand Bazaar, wood die cuts with gold screenprint

Cosmo-cricket
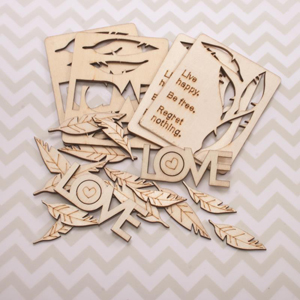
Cosmo Cricket wood charms, feathers

I hope you’ll have some time to get crafty! — Lucinde

PCL Membership Highlights August 11 – August 22

Today we wanted to show you a behind-the-scenes sneak peek of some of the projects that were released to our members these past two weeks. So the sneak peek you see below is a snapshot of some of the video tutorials & pdf handouts our members received for the weeks of August 11, 2014 – August 22, 2014.

08252014MemberHighlights

Each week at Paper Crafter’s Library our monthly members can expect to receive access to a minimum of 5 exclusive videos each week – totaling around 20 videos each month. In planning for our projects we ensure that we cover a range of project types so that there is something for everyone whatever their interest or preference – whether it be card making, stamping, scrapbooking, altered art, mixed media, 3D items, templates, techniques etc. Projects range in difficulty level – so there will always be projects in library for whatever your paper crafting “level” whether you are a beginning paper crafter, or a more advanced paper crafter.

Other highlights these two weeks:

  • A Scrapbook page with hidden journaling
  • Embossing Paste Resist Technique
  • Die cutting with Washi Tape
  • Some cards from our Flower Patch 2 Creative Inspiration Collection
  • Some cards from our Flower Patch 3 Creative Inspiration Collection

Read about all the perks of being a Paper Crafter’s Library member you can visit our Benefits of Membership page HERE.

BecomeAMemberGreen

Art Journal Express: “Free To Be Me” Video Tutorial

ArtJournalExpressLogo-550W Welcome to another edition of Art Journal Express brought to you by Andrea from her personal blog Andrea Walford Designs.

Art Journal Express is a video tutorial series she created for her personal blog Andrea Walford Designs. In each video, you will see how she created one of her art journal pages from start to finish. Because a typical art journal page takes between 20 minutes to an hour for her to create – which makes for a super long video to upload to You Tube, and for you to watch – the video clips are sped up, rather than having you watch what she’s doing in real time – hence the word “express” in Art Journal Express. However, what makes these video tutorials different from most of the “sped up” art journaling video tutorials out there is that Andrea narrates for you exactly what she’s doing and what she’s using – that way, even though you’re watching a “fast forward” version, you don’t miss a single detail.

The videos are hosted on a You Tube Channel that is separate from the Paper Crafter’s Library You Tube Channel, so if you don’t want to miss a single edition of Art Journal Express please subscribe to that You Tube Channel (you can do so from the video tutorial page from today’s post).

Today’s page is called “Free To Be Me” – shown below. You can watch a video tutorial HERE.

FreeToBeMeCloseUpBlog-550W

Featured Artist/Designer: Kimberly Wiener

Today we’re thrilled to welcome Kimberly Wiener.  Before we show you Kimberly’s project, let’s get to know her a little bit more…

KimberlyWienerProfilePic-08212014-250WHello!  I am Kimberly Wiener and I am thrilled to be able to share a few of my creations with you at Paper Crafter’s Library!

I have always loved paper crafting and have been making cards for as long as I can remember. I am very happily “honeymooning” with my husband in Kirkland, Washington as we raise a wonderful boy that we are crazy about. We love living in the Pacific Northwest surrounded by all of the wonderful greenery.  I love color, paper, being bold and thinking outside of the box.  I have a huge passion to experiment every day using new and interesting products.

Currently I am on a few design teams; Casology, FUSION, and The Challenge (located on Lesley Croghan’s Blog Always Playing with Paper).

I have little time juggling my full time career and homelife to craft, however I craft as much as I can fit it in. I love entering and supporting a wide variety of Card Challenges and am thrilled and excited when I am able to inspire others.  The card crafting community is the best and I am blessed to have met some of the most wonderful people that I have connected with and call close friends.

My current love is sponging with distressed inks and markers, with embossing or using stencils.  My projects today showcase many of the lovely Tim Holtz Distress Inks and some very bold and remarkable stamps by Fred B. Mullett.

KimberlyWiener1-08212014-550W

Here’s an individual photo of each of my cards.

KimberlyWiener2-08212014-550W

KimberlyWiener3-08212014-550W

KimberlyWiener4-08212014-550W

Supplies:

Fred B. Mullett Stamps: Mark Stick, Magnolia Sticks, and Willow Spots
Impression Obesession, Inc. Amazing
Tsukineko Tuxedo Black Ink, Versamark Watermark Ink
Judikins Opaque White Embossing Powder
Tim Holtz Ranger Distress Inks: Mustard Seed, Ripe Persimmon, Squeezed Lemonade, Salty Ocean, Barn Door, Peacock Feathers, Spiced Marmalade, Festive Berries, Wild Honey
Tim Holtz Ranger Distress Markers: Seedless Preserves, Picked Raspberry, Stormy Sky
Judikins Kromekote Postcard Paper
Neenah Solar White Cardstock
Basic Black Cardstock
Ulta Sponge Wedges

Thank you for having me today, and I hope you are inspired to play with distress inks.  I would also love it if you visited me at my blog as well at http://wienerhoneymooners.blogspot.com/