
It’s Day 3 of Maya Road week on the Paper Crafter’s Library blog! We’re thrilled to be partnering with Maya Road for a week filled with fantastic project ideas featuring Maya Road Products. Since discovering the Maya Road booth at CHA, we’ve been absolute Maya Road Junkies – or to use Maya Road terminology – “Roadies”. They have such a fantastic array of products which can act as building blocks to just about any project you can think of – they’ve got tons of chipboards, albums, trims, trinkets, Mists, stamps, rub-ons…..and that doesn’t even scratch the surface!
Every day this week we’ll be featuring projects both from Maya Road Design Team members as well as some of our Paper Crafter’s Library Designers/Educators. As part of this week’s projects we – and the Maya Road Design Team challenged ourselves to create as many different projects as we could with the collection of Maya Road products shown below. Our goal was to show you how incredibly versatile these products are and how many different looks you can achieve with them. I have to tell you, I was blown away in seeing every one’s projects and what a different spin everyone puts on those same products. So as the week progresses, you’re going to see these products appearing over and over again in the projects. For ongoing inspiration using Maya Road products be sure to visit the Maya Road blog or the Maya Road Facebook page.
Maya Road Prize Pack
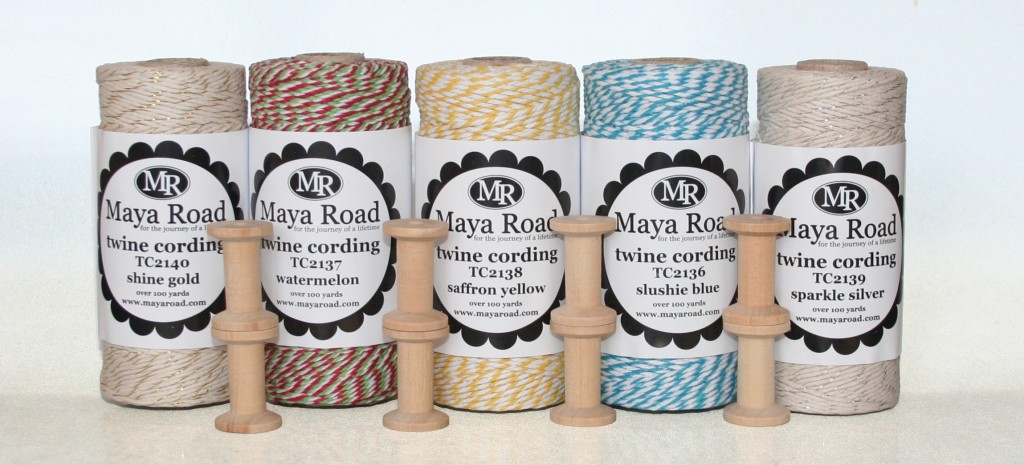
As with our other manufacturer spotlights, at the end of this week two lucky winners will receive a Maya Road prize pack. Winners will be drawn from all the comments left here on the Paper Crafter’s Library blog or the Paper Crafter’s Library Facebook page. Remember, each comment you leave is one entry, so be sure to visit every day not only for the great project ideas, but also to enter your name into our give-away. One winner will receive the goodies shown below which includes 5 rolls of May Road’s awesome twine cording each with over 100 yards, and 8 of their wooden spools. The second winner will receive the prize pictured below that, which is an assortment of the same products we used in our projects throughout the week along with a few different trims.
About Maya Road
Maya Road was born in 2003. Two sisters, Deborah and Caroline, were spending the weekend together, and went shopping for all of the latest scrapbooking supplies. As they browsed the aisles, they were struck by how difficult it was to find unique scrapbooking products and how expensive products were. They started chatting about products they wanted to see, and they brainstormed how they could combine their business knowledge and design skills to produce the unique products for scrapbooking. Thus, Maya Road was formed.
After much soul-searching, they decided to launch Maya Road nationally with 38 unique products at HIA (the prior name for CHA Tradeshow) in 2004. Since then Maya Road has added over 2000 new products to their line. Creative items include such as chipboard, trims, twines, metals, Maya Mists, embellishments and more.
Maya Road was founded on a belief in each person’s creative ability and on the commitment to making high quality scrapbooking products available and affordable to everyone. Maya Road believes that scrapbooking and memory keeping should be an everyday event available to everyone.
Our signature products are carried in over 1000 scrapbooking stores in the US, Australia, Canada, the UK and beyond. People often ask where the term “Maya Road” comes from. Maya is actually a combination of nicknames, Caroline and Deborah, had as kids. They looked up “Maya” and realized it meant “The Art of Creation” and thus, Maya Road was born.
Follow Maya Road on Twitter, Facebook, Pinterest, YouTube and on their Design Team Blog
Twitter: http://twitter.com/#!
Facebook: https://www.
Pinterest: http://pinterest.
YouTube: http://www.youtube.
DT blog: http://mayaroad.typepad.
Maya Road Designer Project
 Our next Maya Road Designer is Sarah Moore. You can see her beautiful project below, but first, here is a bit more about Sarah:
Hi I am Sarah Moore from Townsville, in north Queensland Australia. I am married to Steve, a Australian Army Officer so we are always on the move!!. We have been married for nearly 15 years We have 3 kids Aimee 20, Alex 15 and James 13, and two cats called Latte and Lucy. I am a self confessed Maya Road junkie. I have been scrapbooking since 2003 and have enjoyed every minute of it. It’s also been a great way to meet people all over the world. I feel honoured to be asked to be on the Maya Road Design Team and look forward to making some fantastic projects to share. I have been lucky enough to have had some of my work published in several magazines here in Australia and in Scrapbook Trends, 2 Memory Makers idea books and Creating Keepsake.
Scallop Basic Album Project
Hi Roadies, Sarah here from Sunny Townsville. I am excited to share my challenge project with you all. It was a great challenge with fantastic items!
So this is my creation :

I used the Scallop Basic Album, which I love, as it has both chipboard pages and craft.

These are the 10 items we had to use:
the ten items you’ll be getting are:
1. love hangers
2. canvas triangle banners
3. mini kraft tags
4. turquoise twine
5. coffee brown mini gingham trim
6. leaf zipper trim
7. turquoise and yellow ruffle flowers
8. jonathan alpha chipboard
9. Ornate Vintage Butterflies stamp
10. Vintage Lace Mums – Apple

I used the zipper trim to create leaves, i used the same principles used in the Zipper Trim Mini Butterfly Tutorial below, They turned out great!

I have a secret love of mini kraft tags…..LOVE THEM!!! I wanted to try something a little different so I thought it would look fantastic all layered over each other.
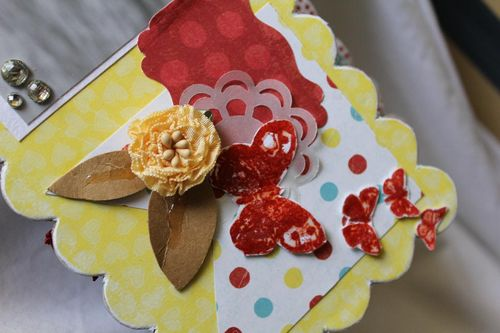
Above I have used the stamp, blossom flower and kraft tag (which I have cut to form a leaf. The stamped Butterflies also have extra ink and glossy accent.
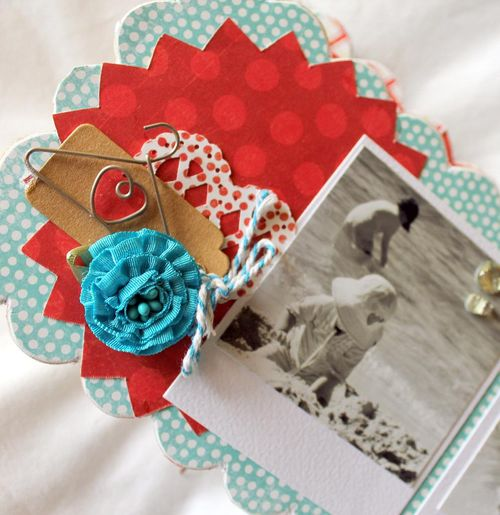
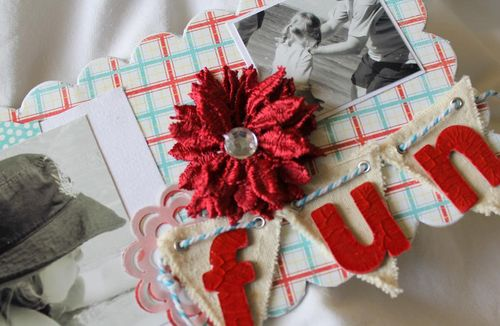
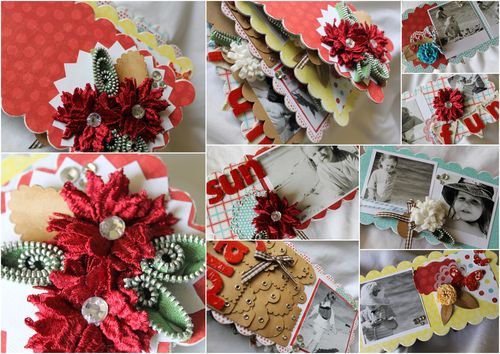
And below is a collage of all the pages I created
Paper Crafter’s Library Designer Projects
As some of you know, my 91 year old grandfather lives with my family. In fact he’s been living with us since 2008. He and my grandma moved in with us about 2 months after our 5th child was born. Unfortunately, about 4 months later my grandmother passed away unexpectedly. Despite being part of the hustle and bustle of our family, it was really difficult for my grandpa. About a year ago, knowing how much he loved animals, we decided to buy a little dog that could keep him company during the day while we were working and the older kids were at school. Enter our little pom-poo “Ginger”. Papa (the name we call my grandpa), absolutely adores Ginger, that’s why I thought it would be nice to create an altered frame for him, about him and Ginger.
I purchased the frame from the dollar store. Because I like to add dimension to my wall art, instead of spending the extra money on a shadow box, I built my collage of elements on top of the glass of the frame. I incorporated a wide array of Maya Road products – including the chipboard letters, the tags, the flowers, the zipper trim and the twine. I also added in a few additional Maya Road Trims, and used some sewing pins as trinket pins. I do have a free video tutorial for you all which you can watch below.
My second project for today is this 5″ x 7″ thank you card I created which once again incorporated many of the Maya Road products we were sent, along with some Echo Park Papers.
There is a video tutorial and handout for this project available to our Paper Crafter’s Library members.
So there you have it! Day 3 of our celebration of Maya Road! I hope you have enjoyed all the projects that our design team and the Maya Road design team have created for you.
A Bit About Paper Crafter’s Library
The world of paper crafting is HUGE! Whether you are a beginner, or you’ve been creating for years, the sheer number of different products, tools, techniques and project ideas can be overwhelming. After spending 6 years helping thousands of paper crafters around the world become more successful in the creative space through her series of kits, digital tutorials and online classes, Andrea Walford began looking for a new approach to education. In 2011 she launched Paper Crafter’s Library – the first, and still to this day, only website that provides an all-in-one learning solution for paper crafters. With almost 800 videos currently in their library and 4-5 new videos added each week, Paper Crafter’s Library offers comprehensive training on products, tools, techniques, and project ideas. From beginner through to advanced, whether your interest is in stamping, card making, scrapbooking, creating 3D items or altered art – you’ll find all the resources you need to navigate the world of paper crafting in ONE place, organized and indexed so that it’s quick and easy to find.
Be sure to sign up for our free email newsletter which features weekly video tutorials. For more information about Paper Crafter’s Library and how we can help you take your paper crafting to the next level, check out the Benefits of Becoming a Member.
Maya Road Give-Away
To enter to win one of the Maya Road prize packs please leave your comment below. Winners will be drawn from all the comments left either here on the Paper Crafter’s Library blog or the Paper Crafter’s Library Facebook page. For ongoing inspiration using Maya Road products be sure to visit the Maya Road blog or the Maya Road Facebook page. Be sure to take a minute to stop by Julia Stainton’s blog and say hi as well, and of course check out all of her gorgeous creations.



The projects today are all so wonderful. I love the products of Maya Road.
Hugs, Uta
Wow, I love the textures incorporated into this beautiful project–stunning.
That frame of ginger and papa is so lovely! I really like the sentiment of it!
i think the colours were perfect for the photo 🙂
Another wonderful project….a friend of mine shared some of her maya road stash with me and we will have to get together and craft something nice……….soon My birthday is coming up.
Great stuff! I love that tag book with all the tags 🙂
Wow…every time I think Maya Rd. can’t come up with anything better….I come across a tutorial that shows me that they HAVE…thanks much, these are wonderful!! Can’t wait to get started on my own!
These are amazing projects. The mini is so full of life! Andrea, your altered frame project is very inspiring. I love all the textural details. Great use of Maya Road products! Time to try my version of this project!
I love that mini album!! Fantastic!
I loved how Papa was honoured in the photo—so classy!! Maya Road makes great embellishments.
ooh the products are wonderful and the projects so sweet. I love the zipper leaves and the kraft tags layered all over!
Fabulous creations–I really like the use of zipper trim.
Wow! Fabulous projects – thanks for the tutorials too!
I’m liking all the projects as well as the zipper trim and the canvas banners!!
What fantastic projects I am seeing made with these Maya road stash. Loving these embellishments. Beautiful projects all the way around.
I love your use of the scalloped tags all lined up, and love that you used kraft. What a great look. sharon dot gullikson at gmail dot com
Another day filled with inspiration and tutorials! Thank you so much for all these wonderful ideas ~ I especially love how you used the zipper trim!
Also, thank you very much for a chance to win some Maya Road products…it’s so nice of you!!!
OMG! I love the frame. That zipper trim is awesome!
Fabulous! The album is SO cute!
Another great collection of projects. Love that zipper trim. I never would have known what to do with that!
i love the lace flower the color apple is awesome! Thanx for the insperation.
Okay, THIS is why I come to PCL everyday, I would NEVER have thought to use the zipper embellishments the way Sarah did – how stinkin’ cute is that!!! An Andrea’s tribute to her grandpa and Ginger – LOVE it!! BTW, our first dog when I was growing up was named Ginger too and she was the sweetest dog ever!!
Thanks so much for all the inspiration!
A lovely use of Maya Road products and a nice tribute to your grandpa! Thanks for the chance to win some new products.
Loved Sarah’s unique uses of the Maya Road products, I would never have thought to use the zipper or tags the way she did! Also loved the sweet photo frame Andrea made of Papa and Ginger as well as the great Thank You card, I am really enjoying Maya Road week!!
That twine is divine! I really like Maya Road products. They’re funky and fresh. Thanks for sharing!
Andrea!! THe altered frame is soooo special!!! You are so precious to have given/allowed him to have a pet, too!! My dad is 90 years old and would benefit greatly from a pup, but my mom is a bit fearful of it putting more stress on her to take care of it and all. i love how you shared the technique to created the color of kraft on the chipboard with the embossing powder AND the Faber Castelle marker:) And the trims are super cute:) Thank you so very much for sharing and for all that you do:)
Sarah!!! Thank you so very much for your mini project:) It’s super cute I love the ‘fun’ banner and the Maya road flowers with zipper leaves!!! you have inspired us today!! be blessed
~Beyond Measure
Tammy
http://www.urbeyondmeasure.com
Very pretty. I love the layered mini tags!
What can I say, I loved it all. The mini the flowers, the use of tags, I’m amazed. The talent on here is awesome and I thank you for sharing it with us.
kim
k1i2m3@cox.net
Wow, I love all the mini pages and all the detail on the frame and card. Great job using all the embellishments,
Fabulous! I love the “zipper leaves”…. great embellishment to those lovely flowers!
DeniseB
Awesome creations ladies. The kraft tags are great, and I really like the layered look with the scalloped edges. Using them for letter mats is always a good choice too. And the flowers again – they are so versatile. It’s terrific to be able to use them for not-so-girly applications!!
This challenge to use all the same MR products is outstanding and so full of ideas on using items in completely unexpected ways. Love the kraft album and I’m sure Papa will love his perpetual reminder of his good buddy Ginger. Such sweet faces on both of them!
Once again, such wonderful project! Thanks for sharing them and thank you so much for providing tutorials! They are invaluable!
Beautiful projects! Love the zipper!!
Everything is so bright and cheerful with the red used in the projects. I have to try the zipper trim. It looks so nice in the projects.
Lovely framed pic of Ginger and Papa! I am sooo fascinated with the uses for those zippers! Just amazing!
The Photo art page with Ginger and Grandpa is adorable, I love to see scrap-art, I’m trying to do those type of things for some bridal showers I am attending this summer! And the Mini is adorable! I never would have thought of using tags layered to create a page embellishment. Thanks for sharing!
Love these projects!! I really love the mini kraft tags!!
Love, love, love the project (and the tutorial)!
The tutorials are wonderful! I love that scalloped mini, and the framed photo is very sweet. What a special way to remember a loved one! jgarber5@cox.net
Great tutorials and projects as usual, Thanks so much for sharing and for the chance to win.
Loly Borda
I loved how Papa was honoured in the photo—so classy!! Maya Road makes great embellishments.
Love love love the zippered leaves!!!
Wow, love the album created – the way the zipper was used and the small kraft tags – perfect
thank you again for a wonderful week and the wonderful projects, Maya Road projects are so versatile love the zippers
Great projects today. IN LOVE with all the tags on that one page in the mini and such a sweet way to display that photo. I’m loving these zippers!
What amazing textures. It really makes all the projects SO interesting!
TY for the zipper mini tutorial. I’ve learnt sth new!
Oh my! Is it possible to use so many tags in one project? Love it!
Love the zipper embellishments.
The textures and layers on the cards are beautiful! Awesome tutorial.
The “zippy” butterflies are awesome!
So cool! Thanks for sharing