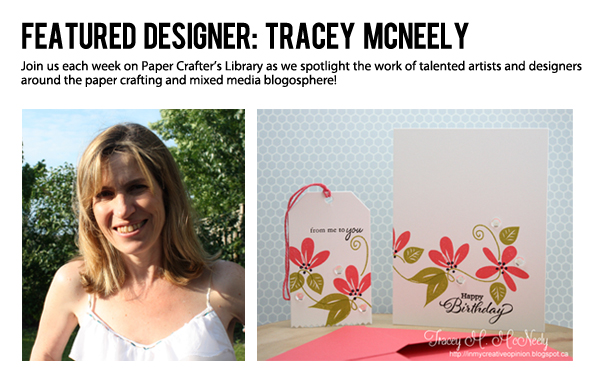
Welcome to another Featured Artist/Designer Spotlight. Today we’re thrilled to welcome Tracey McNeely. Before we show you Tracey’s project, let’s get to know her a little bit more…
 Hi, I’m Tracey McNeely. Playing with paper, stamps and ink is definitely my favorite creative outlet but I do love to read, cook and more recently do Pilates. I have been making cards and scrapbooking since my teens, but now making cards has become my main focus. Currently I am on the design team at CASology, The Curtain Call, The Card Concept, CAS-ual Fridays and Tag You’re It. I love to inspire and share my love of this craft with others. I find that I am happiest in my studio, creating projects that are clean and simple.
I live in Ontario, Canada just outside of Toronto. I am married to my high school sweetheart and we just celebrated our 24th wedding anniversary. We have two fabulous kids, Ben who is 19 and in his second year of University and Brooklyn, who is 17 and in her senior year of high school. I was a high school Computer Science and Special Education teacher for nearly 17 years during which time I found out that I had MS. I left my job 5 years ago when I was no longer able to manage my illness along with working.
Today I have a co-ordinated card ensemble to share with you.

When I make a card that is going along with a gift I like to do something else to make it extra special. I started by stamping the card and I continued the pattern on the front of the card around to the back. Cristina Kowalczyk discussed doing this recently on her blog. Doing a technique like this you should start at the end! I decided where I wanted my LAST flower to be and that is where I started stamping.

Then I worked my way backwards past the midpoint and carried the vine to the back. I went back in and filled the design with leaves and more vines until I liked the look of it and then added a few sequins. Once I was done I scored the card in half.
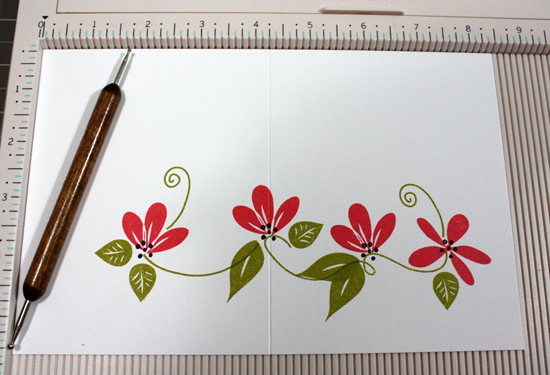
Here’s what the card looks like on the front and back once it has been scored.

Here’s the front of the card.

To complete the ensemble I created a matching envelope with my envelope punch board and finally a matching tag to put on the gift bag.

Here’s another look at the ensemble.
Supplies:
Stamps: Flower Garden, Friendly Flowers, Everyday Button Bits (Papertrey Ink)
Ink: Simply Chartreuse, Berry Sorbet (Papertrey Ink) and VeraFine Onyx Blakc (Tsukineko)
Cardstock: white (Recollections)
Other: silver sequins, bakers twine
We hope you have enjoyed today’s project courtesy of Tracey. Be sure to stop by Tracey’s blog to see even more of her beautiful work (and let her know we sent you). You can also find Tracey on Facebook, Pinterest, Flickr and Twitter.
Have a great day!
Karen
Beautiful card and tag Tracey. I love how you continued the card on the back.
This is lovely
Blown-away by how stunning this is, Tracey! An absolutely gorgeous gift ensemble, and your tutorial is awesome.
~c
Congratulations on being the Featured Designer over here! What a beautiful set you’ve created to share!
Sweet…love this idea. Thanks 4 sharing.
Tracey is amazing and it totally shows.. these are gorgeous.. congrats on guest designing Tracey.. yay
Love the crisp, clean look and the vivid colors.
pretty tracey!
Can’t wait to make a few cards using this wrap around technique. While I don’t usually make modern, clean and simple cards, I can see myself doing this. Thanks so much for this posting!
Congrats, Tracey, on being featured this week! Your card and tag are beautiful — love the wrap-around design!
Such simpleness is so beautiful. Just jumps out !
Beautiful card and tag. Love your wrap around technique it looks beautiful. Your colors are
gorgeous.
Absolutely stunning! So simple and yet so elegant…
So very beautiful, Tracey! I am over-the-moon happy to see you in the spotlight!! You are so deserving of it, you talented, wonderful friend, you!
=] M
What a fabulous card! I’ve never thought about taking the image around to the back side of the card – what a great idea! Thanks for sharing!
Very nice. Just sets it off when you carry to the back. Thanks for sharing.
Your card and tag are beautiful! Everything looks so fresh and beautiful.I love the idea of carrying the design to the back. I’m going to have to try that! Thank you for sharing.
Just gorgeous! Such a great idea to have the design carry on to the back of the card! I just love Tracey’s crisp and clean style!
Love seeing Tracey featured here today!! This is another of her pretty designs. The vine gently flowing to the back of her card is wonderful and the matching tag so sweet!
Tracey is the consummate CAS card artist. I wish I had half her creative design and execution abilities!! Thank you for sharing this how-to!! Hugs, Darnell
Thank you for showing such a simple but beautiful card!
Love that you carried the design to the back of the card. It looks fantastic!
The card is absolutely BEAUTIFUL! I love those flowers and the way you stamped them all the way across the card, front and back. Beautiful colors, too!
AMAZING, Tracey! Love them all!
WOW !!! Awesome card Tracey, glad to see that CASology DT so heavily featured!!!!!!! PROUD!
Thank you Paper Crafter’s Library for doing the feature on me! I had so much fun sharing.
Belated congrats! Tracey is one talented card-maker with a big heart! So happy to see her guest spotlight here!
Just came across this post on Pinterest. What a wonderful clean and simple design with high-impact results!
i just found your card on Pinterest and adore it! I was hoping to try something similar, but honestly can’t figure out how you got the first curled vine in that direction…..mine goes the opposite way. Was there some special technique you used?
Thanks!