Welcome to another Featured Artist/Designer Spotlight. Today we’re thrilled to welcome Kelly Griglione. Before we show you Kelly’s project, let’s get to know her a little bit more…
 Hi! I’m Kelly, and like many of us, crafting has always been a large part of my life. I have such fond memories of time spent with my Grandma at her kitchen table learning every type of craft imaginable.
I’m passionate about paper, both collecting it (19th century valentines/postcards/
I currently love pushing the boundaries in card making, and I get such a thrill figuring out how to make something work the way I want it to. Find me at www.notablenest.blogspot.com. I’d absolutely love to see you there!
Hugs
I always love incorporating texture in my projects, and one medium that has a heck of a lot of texture is burlap. It’s something I reach for when I’m stuck on how to add more interest to a project. The challenge for me has been how to use burlap without the loose weave fraying and falling apart right away. I’d like to show you an easy way to work with burlap and even run it through your die cutting machine
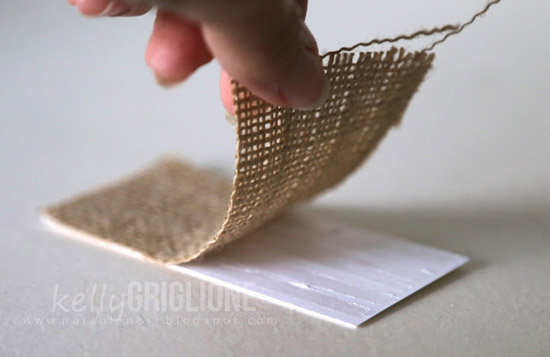
Adhere a thin piece of cardstock to the burlap. Paper adhesive works just fine. You don’t need it to be a permanent bond.

Run it though a die-cutting machine. Since we’re working with fibers, I recommend using a metal adaptor pate underneath to help cut through the layers.
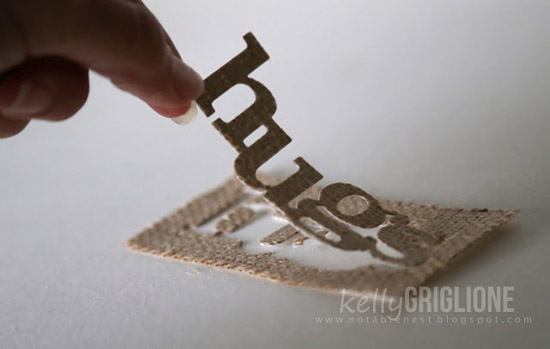
Amazingly, the die cut pulls away just like if it was paper.

The cut is very smooth!

The textured sentiment is perfect for a very simple card like this. The monochromatic, layered panels give some dimension, and then the sentiment can take center stage. My inclination is to touch the burlap since the cuts are so clean … it just seems like that’s not possible.
Deb
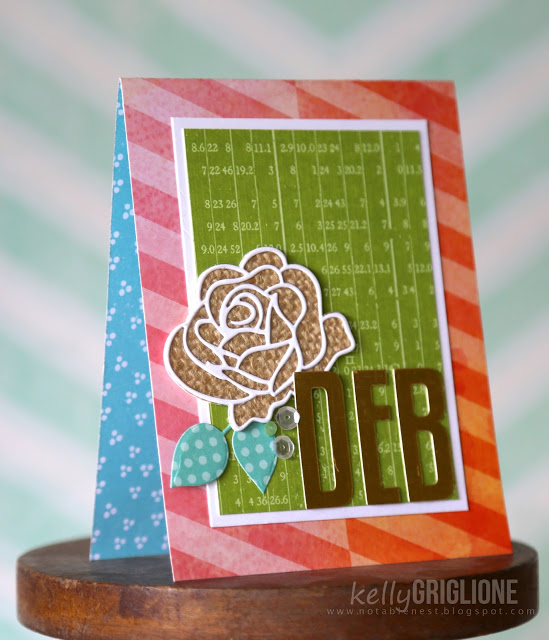
Here’s another card using die cut burlap. This one is going to my sister-in-law, whose name is Deb (as you might have guessed!) Putting the recipient’s name on a card is a super easy way to personalize it.
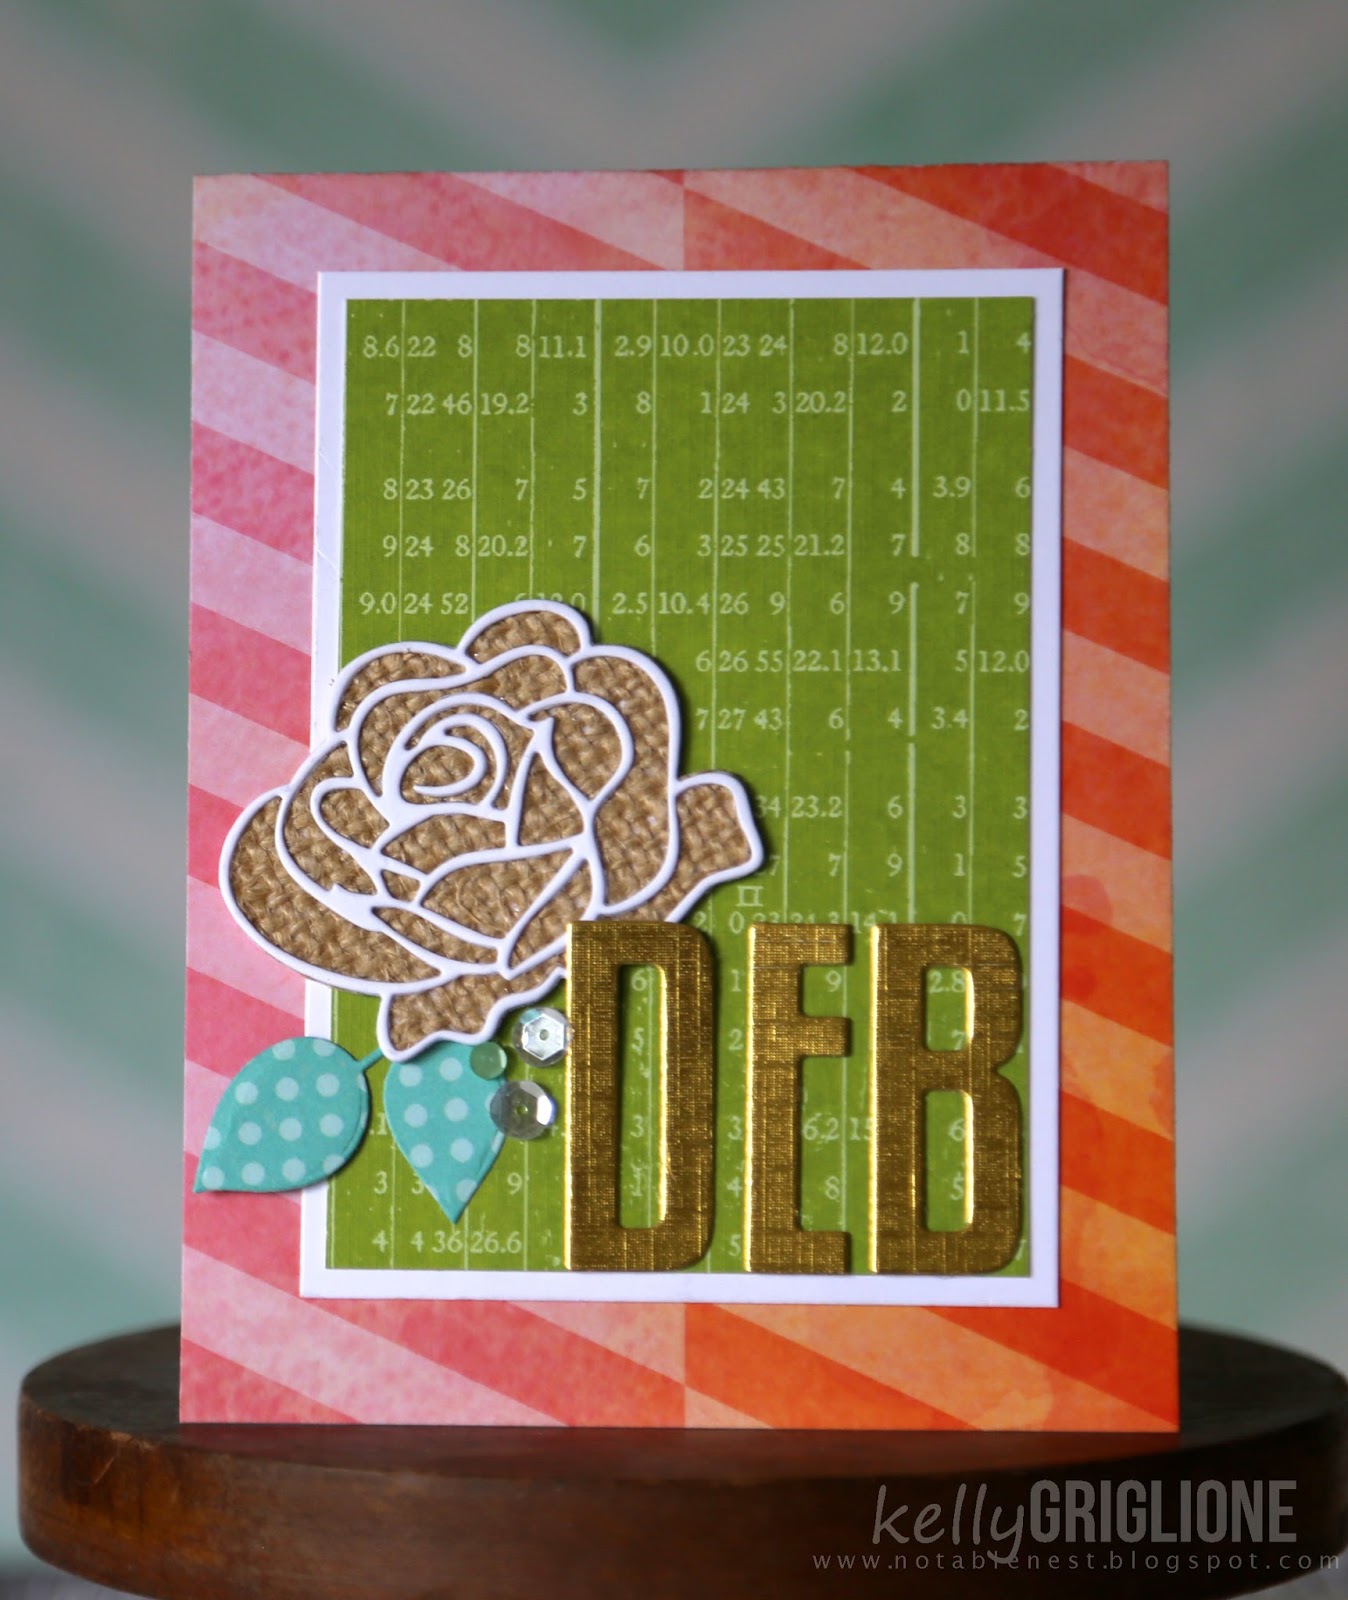
This two-layer die cut has the advantage of texture from the bottom, solid layer, and detail from the top, thinly cut layer. A paper adhesive is all it took to attach the cardstock to the burlap.

It’s fun to combine different finishes (burlap, sequins and gold foil) and patterns (text, stripes, dots).
Thanks so much for looking! I hope you have a chance to play around with burlap on your own.
Supplies
We hope you have enjoyed today’s project courtesy of Kelly Griglione. Be sure to stop by Kelly’s blog to see even more of her beautiful work (and let her know we sent you).
Happy Crafting!
Such wonderful cards and inspiration!
Wonderful cards! Love the texture of the burlap and how you paired it with that gorgeous elegant flower, something a little unexpected but wonderfully beautiful!
Both are lovely Kelly, I really like the burlap rose! Thanks for the info!
Beautiful cards, Kelly! Thanks for the awesome tip!
Congrats on the feature, Kelly! I love your take with burlap on both cards-beautiful and inspiring!
Both your cards are just fabulous and i totally loved your tutorial ..Thank you so much for sharing 🙂
I love how you used the burlap Kelly. I will give this a try.
Oh Kelly! This is a fantastic how-to! On my wish list!
=] Michele
Love the look of the first card!! Elegant yet rustic! TFS!
I have a couple of Father’s Day cards to make…definitely will give this burlap technique a try. Thanks for this interesting technique!
Fabulous!
I have to try this. I like to use burlap but it’s finicky.
thanks for the tip.
Excellent Idea!!!!
wow–beautifully done!
What fabulous use of hessian, Kelly! Gorgeous cards! 🙂
Beautiful cards my dear!!!! I have also added lightweight card stock to fabric with good die cutting results. Love this technique and the wonderful texture of the burlap!
What a wonderful give away. I loved to have a chance to win it. TFS.
Dianne Bell – Sewpro02@aol.com
Kelly love that you push the boundaries and teach me something new every time! Great feature!