Was anyone else super excited when Martha Stewart’s fringe scissors first came out? I couldn’t wait to buy them to make my shredding easier. I thought I would make scenes and have realistic looking grass and so many other projects that required little pieces of the same size. I thought they would be a great time saver. They turned out to do all I hoped, but I didn’t do much with them beyond making a few grass-based scenes. Maybe I just didn’t have my mojo set right. But I have noticed more manufacturers are making fringe dies and punches and I found so many fun things you can do to them and with them, that I am inspired again to try some projects with fringe and the fun it can create. So come along with me and get inspired. You can even break out your scissors if you don’t have a die cutting machine.
This first project is a great example with a tutorial on how to make your own 3D flowers out of paper. Ann uses quilling paper to create the look of these beauties. These are so cute, I would wear them in my hair!

flowers by Ann Martin photo courtesy of All Things Paper
Clever Mayuri created a flower focal point with the fringe pieces. Notice how she rounded the edges of the petals. She die cut the fringe die cuts with an oval die cut! I forget sometimes that you can alter a shape even after you die cut it to suit your needs. This opens up even more possibilities.
Card by Mayuri photo courtesy of Candles in the Garden
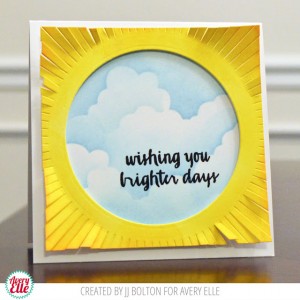
JJ also used a die to create this look and cut off the edges to make it more resemble sun rays. I just love how hopeful this card looks.
card by JJ Bolton photo courtesy of Handmade Card by JJ Bolton
Can’t get enough of rainbows and need a new way to create this iconic color blend? Try this cool fringe look by Valerie.
Card by Valerie Moody photo courtesy of Stamping with Val
How awesome is this explosion box card by Becky? There is a serious celebration happening in this card. She wrapped the fringes to create the look of a party noise maker.
card by Becky Roberts photo courtesy of Idaho Inking One Stamp at a Time
Angie created a tassel look at the end of some pencils and pens with washi tape. These are so fun. I am very tactile and I would love to make a pencil with these tassels on them to play with when I am thinking of what to write next.
pencils by Angie Juda photo courtesy of Chic n’ Scratch
Diane gives us another take on a flower with this cool award ribbon look. Layering the fringe a little off centered can make the flower look fuller.
Card by Diane Payne photo courtesy of Color Me Happy
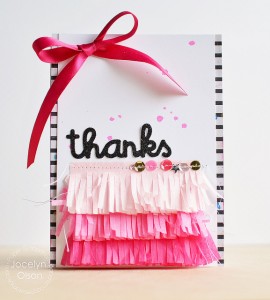
I’m totally in love with the ombre look Jocelyn created with tissue paper. The edge she sewed on with sequins finishes off the card so well.
Card by Jocelyn Olson photo courtesy of Red Balloon Cards
The party continues on with Kimberly’s number 2, pinata-look card She layered paper bottom to top also with an excellent ombre effect.
Card by Kimberly Crawford photo courtesy of For the Love of Paper
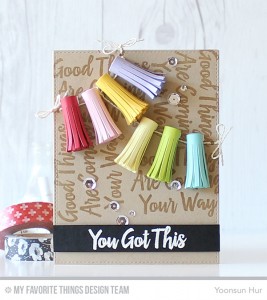
Tassels are ever so hot right now and you can make your own a few different ways. Yoonsun used such awesome colors and wound her tassels so thick, they look a little like lanterns. Very pretty.
Card by Yoonsun Hur photo courtesy of Rejoicing Crafts
And the party is still rockin with this fabulous tassel card. Kathy used a different die and created a flat tassel perfect for mailing on a card.
card by Kathy Martin photo courtesy of Card Blanc
So what I have learned is that yes, you can make awesome grass in no time, but there are so many more possibilities. So use scissors you already have, a time saving pair from Martha Stewart or any of the brand new dies, punches or machines and see what type of party you can create with fringe. Grass not necessarily included.
So go ahead… make something pretty.
I found a few product starters to help you in your creative discovery.
My Favorite Things Metal Fringe die from My Favorite Things
Paper Smooches Metal Fringe die from Paper Smooches
Martha Stewart Crafts Fringe Scissors from Michael’s Stores
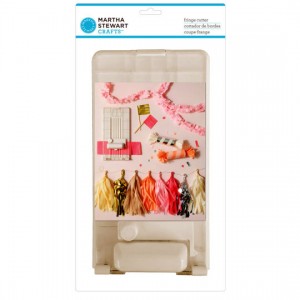
Martha Stewart Crafts Fringe Maker from Michael’s Stores
Little B Fringe Punch from Scrapbook.com
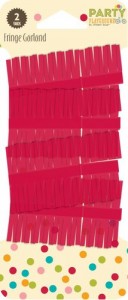
Jillibean Soup Party Garland from Scrapbook.com







I’m loving the different types of fringe–so clever!! This trend is so much fun. 🙂 Thanks for sharing my card!