Today on the Paper Crafter’s Library blog, we’re continuing our weekly featured artist spotlight whereby each week we spotlight a different artist/designer in the paper crafting & mixed media world and introduce you to their fabulous work.
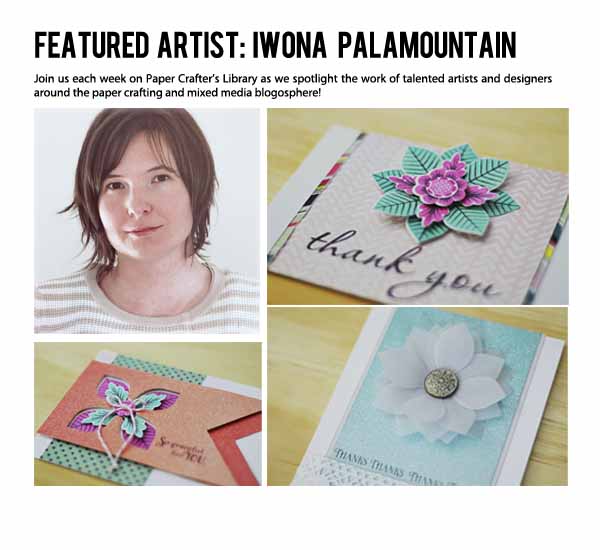
Today we’re thrilled to welcome back a past featured artist – Iwona Palamountain. We are so happy to be featuring her again.
Before we show you Iwona’s fabulous projects she has to share with us today, let’s get to know her a little bit more…
Hello, my name is Iwona Palamountain, but I’m also known in the blogland by my nickname Chupa. I live near Melbourne, Australia but I’m a born & bred Pole. I’ve got a loving and supportive husband, and two amazing daughters.
I’ve been paper crafting actively since I was pregnant with my first girl and although my hobby keeps me busy, I never looked back since. I love experimenting with many styles, and enjoy the versatility that both stamps and patterned papers give me. I dabble mostly in card-making, with an occasional 3-D project or scrapbooking layout. I aim to continuously learn and evolve as a paper crafter, and bring my readers a constant reason to keep coming back for more 🙂
I’m thrilled to be the Featured Designer here in Paper Crafters Library, and I hope you’ll enjoy what I prepared for you today.
Featured Projects
Hello! I’m happy to be back with more inspiration today, thanks for having me again 🙂
If you’re an avid card maker and stamper like myself, you’ve probably got in your stash quite a few stamp sets with coordinating dies. It seems to be a to-do thing these days, with the companies doing their very best not to force us to fussy cut any more. I don’t mind fussy cutting but I do LOVE my dies!
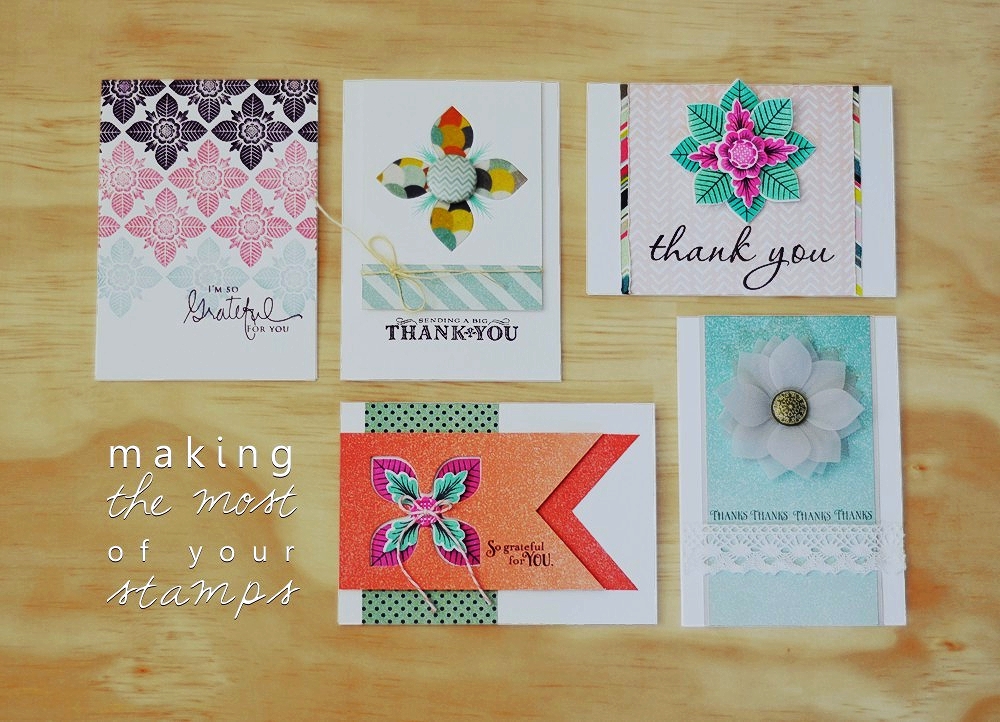
The trouble is, with the convenience come additional costs and being a budget-conscious crafter I like my dies to be versatile. I enjoy discovering the many ways I can combine them with stamps or use separately. Today I’d like to show you some of the simple tricks for making the most of a single stamp + die set, and my choice fell on Lovely Layers from Papertrey Ink.
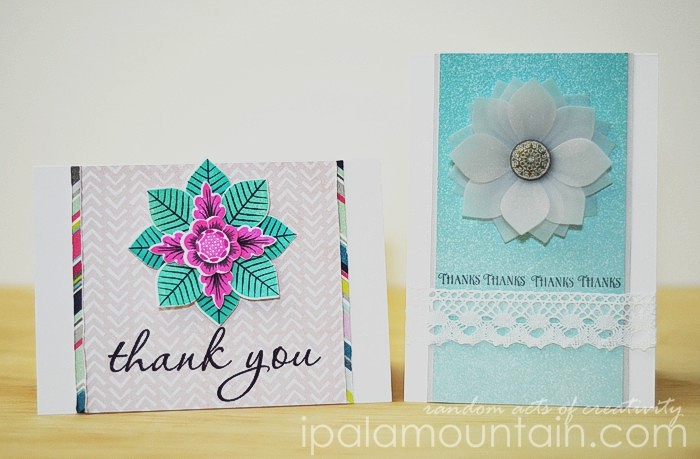
Let’s start with the traditional approach. Cut and stamp, assemble. Boring? Not at all. Think of all the colour combinations, have you tried them all? Think about using different media for cutting: felt, cork, fabric. How about some vellum?
On the photo above, the card on the left is what we’d normally do with this set. For the card on the right, I decided to make a flower by cutting many shapes from vellum and stacking them together. I added dimension to both, using foam tape to attach the layers in the first example, and gently curling the ‘petals’ upwards on the other card.
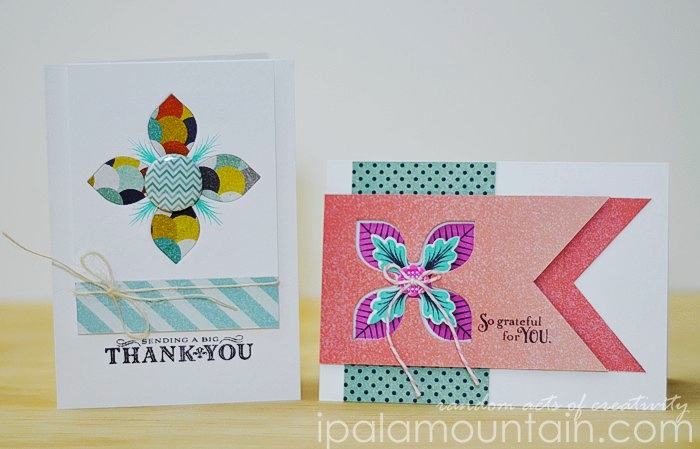
Now, let’s talk negative space. That’s what’s left when you take your die cut out of the piece of paper.
On the card to the left, I firstly cut the shape in white cardstock and disposed of the inside, then cut again from a piece of patterned paper and saved the shape only. Then I pieced them together and secured at the back so that they fit snugly. This technique is often addressed as “inset”.
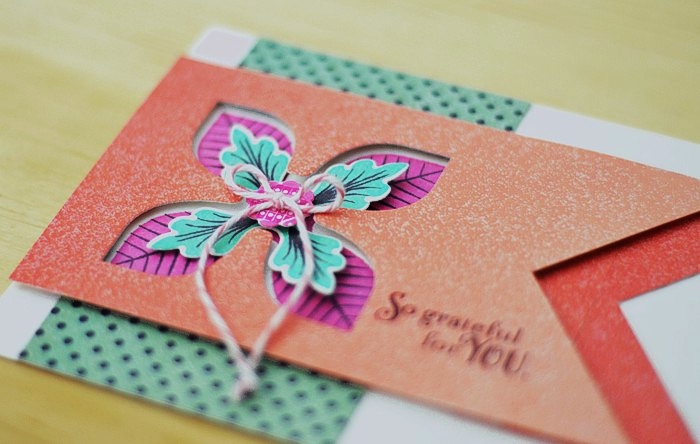
The card to the right emphasizes the negative space, by raising the panel from the card’s surface and giving the focal point dimension. To achieve such effect, you need to stick the panel with the negative cut to the card front, using removable adhesive, and stamp right through it. Then you’re free to mount it up and add extra touches like an additional die cut shapes.
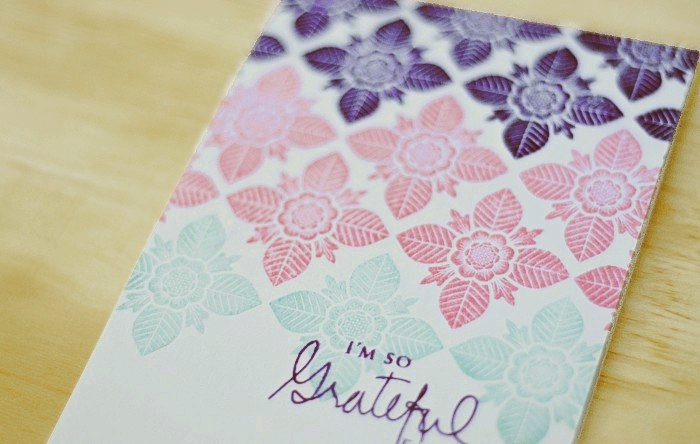
Lastly, let’s not forget that the stamps alone can give stunning results. I love creating backgrounds with smaller stamps and try out different colour combos while doing so.
Thanks for joining me today! I hope I encouraged you to try and make the most of your stash 🙂
Supply list:
Traditional Die Cutting / Thank You card
Cardstock: textured white
Paper: Presh “Noted” Record & Adorbs “Loved” Devoted paper from Cut & Paste collection (My Mind’s Eye)
Stamps: Lovely Layers (with matching dies), Think Big Favorites #5 (Papertrey Ink)
Ink: Memento Elderberry, Lilac Posies (Tsukineko), Bubble Gum, Tide Pool (Hero Arts)
Tools: foam squares, double-sided tape, Grand Calibur die cutting machine
Vellum / Thanks card
Cardstock: textured white, light grey, vellum (Papertrey Ink)
Paper: Flair “Forever” Always paper from Cut & Paste collection (My Mind’s Eye)
Sstamps: Lovely Layers (with matching dies) (Papertrey Ink)
Ink: Memento Gray Flannel (Tsukineko)
Embellishments: brad (Stampin’ Up!), lace trim
Tools: double-sided tape, glue dots, Grand Calibur die cutting machine
Inset / A Big Thank You card
Cardstock: textured white
Paper: Flair “Forever” Splendor paper from Cut & Paste collection (My Mind’s Eye)
Stamps: Lovely Layers (with matching dies), A Big Thank You (Papertrey Ink)
Ink: Memento Elderberry (Tsukineko)
Embellishments: twine, flair button
Tools: double-sided tape, glue dots, mounting tape, Grand Calibur die cutting machine
Negative Die Cutting / So Grateful For You card
Cardstock: textured white
Paper: Flair “Small” Point, Charm “Carefree” Mellow paper from Cut & Paste collection (My Mind’s Eye)
Stamps: Lovely Layers (with matching dies) (Papertrey Ink)
Ink: Memento Elderberry, Lilac Posies (Tsukineko), Bubble Gum, Tide Pool (Hero Arts)
Embellishments: baker’s twine
Tools: double-sided tape, glue dots, mounting tape, Grand Calibur die cutting machine
Stamping / I’m So Grateful For You card
Cardstock: textured white
Stamps: Lovely Layers, Signature Greetings (Papertrey Ink)
Ink: Plum Pudding, Lavender Moon (Papertrey Ink), Lake House (WPlus9)
We hope you have enjoyed today’s projects courtesy of Iwona Palamountain. Also, be sure to stop by Iwona’s blog to see even more of her beautiful work (and let her know we sent you).






Love, love, love Chupa! Beautiful projects and great tips! So much talent in one pretty lady…thanks for sharing with us~ ♥
Such beautiful cards. I make a lot of thank you cards and am always looking for new ideas! Thank you for the inspiration!
Amazing cards! I love them all. Thanks for the inspiration.
Love Chupa, love Chupa’s creations! Fabulous inspiration! 🙂
Absolutely FABULOUS, Iwona! I love every single card here. 🙂
I love the way you think outside the box. so many ideas are now churning around in my creative brain.
thanks for sharing , you are a talented lady.
beautiful cards, thanks for sharing
Wonderful post Chupa..I HAVE THIS SET OF STAMPS AND DIES…SADLY THEY DO NOT SEE MUCH LOVE FROM ME.
THANKS FOR THE PUSH TO USE THEM IN DIFFERENT WAYS.
The vellum flower is so delicate and luscious. I’m going to make one shortly. 🙂
Such powerful effects with the way you stamped through the negative cut of the diecut.
What a bonus of being able to use the negative rather than throwing it away! Bless you for sharing your awesome creativity..
Your are very talented and creative
I love all your cards