Happy Wednesday everyone! Today I would like to share with you another card in the “Technique Talk” series of videos. The purpose of this feature is to spotlight a variety of different stamping and card making techniques and demonstrate how to incorporate one or more of them into a finished card.
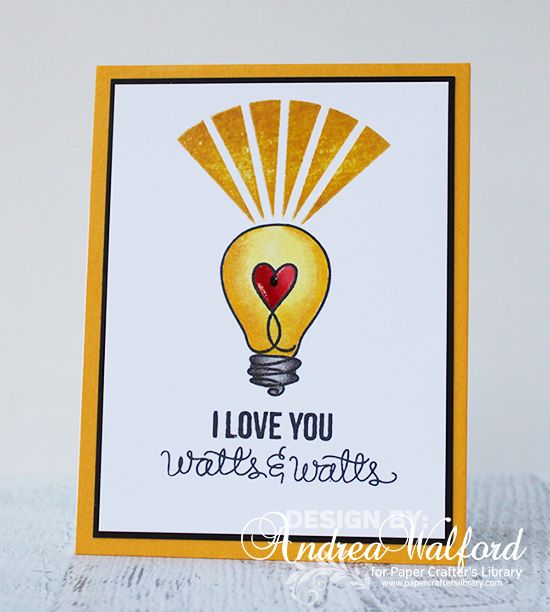
Today’s “I Love You Watts & Watts” card is once again jam-packed with techniques! Here’s an overview of the techniques I incorporated into this card:
Using a MISTI
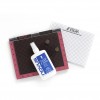
For those of you that are not familiar with the tool called MISTI – it stands for the “Most Incredible Stamping Tool Invented” – a stamp positioning tool invented by My Sweet Petunia – and it is indeed incredible. However you do pay for that as it is not an inexpensive tool. That said, if you stamp a lot and struggle with stamp alignment, or if you have issues with fine motor skills etc it’s a worthwhile investment.
Double Embossing over Dye Inks
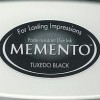
The beauty of working with dye based inks for stamping is that they are quick drying. The downside is that because they dry so quickly you can not heat emboss with dye inks. To solve this problem I stamped the light ray image first in dye ink, and then stamped over it again using VersaMark ink (a watermark ink that is slow drying and ideal for embossing) and then heat embossed it with clear embossing powder. The MISTI was critical for helping me achieve perfect placement when stamping the second image directly over top of the first.
Coloring with Copic Markers
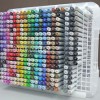
Of all the alcohol markers on the market, Copics are still my favorite by far. I like that you can buy them in individual colors, they already come with a brush time (Spectrum Noir do not – you have to buy the brush tip separately), and they don’t dry out. I have had my Copic markers for 10 years and I have never had a marker dry out. I bought the Spectrum Noir markers, never used them (other than to try out the colors) and when I went to use them a year later – they were completely dry! So in my opinion, it’s worth the extra to but the Copics.
In the video you’ll hear me talk about how I like to color with Copics – from dark to light. There is no right or wrong way – a lot of people like coloring light to dark. I just find that with dark to light you use less ink (hence less seepage through the cardstock) and your colors don’t darken as quickly. What do I mean by that? With each layer of color you apply, it deepens the orginal colors slightly. When you color from light to dark, you tend to apply more layers.
Adding Glitter with Wink of Stella
In order to complement the gloss from the heat embossed rays without embossing over the image (which I could have) I decided to brush on some glitter using my clear Wink of Stella glitter brush pen.
Highlighting an Image with Clear Lacquer
So as I mentioned above – I added some shine to the card with heat embossing and the Wink of Stella. The final way I wanted to jazz up my card was to make the heart glossy. For this I used a clear crystal lacquer (clear drying glue that dries with dimension). I used a new product from Stampin’ Up! for this which comes in a needle tip applicator – awesome! I just loved it. It made precision application super easy, and the tip is no clog. There are companies that make precision tips and sell them separately so that you can add them to your own clear drying glues – which means you don’t have to buy the exact one I did.
So now that I have given you an overview of the techniques incorporated into this card, here is a video tutorial for those of you that are visual learners and like to see it demonstrated.
Please leave me a comment letting me know what you though of today’s “Technique Talk” Feature – would you like to see more? If yes, what types of techniques would you like to see?
Here is a list of the main supplies I used:








Whatever you teach is inspiring and informative, Thankyou
Very nicely done. Hope your recovery is going well and wishes for good health ongoing.
Hi Andrea. I was wondering how you were doing all summer and so glad you are well and healthy! Good to see you back with such electricity. Love your videos and your well chosen words describing the techniques. Well done. Keep up the good work. BTW, it is so refreshing to hear someone speak well of their hubby, he is a lucky man. These days men seem to be under attack when mostly all they really want to do is take care of us and be appreciated for that. You’re a good wife and Mom.
Love your card, glad you are feeling better. Thank you for sharing. Love your projects and videos.
I always learn from your video tutorials. I’ve been paper crafting for more than a few years and have many techniques at my finger tips. Your narrative always adds something new to my chest of tips paper tricks. Thanks!
Great video, Andrea. I would like a few tips on using gelatos on cards and water coloring. I didn’t know you had surgery, but I’m glad you’re back and hopefully recovered. Thanks for these technique videos. I always learn something new from them:)
P.S. Today is Tuesday 🙂
Really enjoyed this video. Yes, yes, YES, please do more! I would like to see tips on how to die cut an image and then lay the bits and pieces into it in a different color.malsomshaker cards, gelatos, and water colors. Thank you 🙂
Great talk–would like to see more. I like to know about the products you like to use with these techniques.
Glad you are doing well and are back! I love everything you do!!!!!
Great post!! I would love to see talks on different ways to add glitter, using daubers to add ink (many are not sure how to do this), demo a tool and then show 1-2 ways that you can create the same effect with items you already have. ie,.,.daubers as the tool, use makeup sponges instead as one of the alternatives.
I love reading your posts and look forward to them each week!
Glad your recovery is going well . This has been a great tutorial and I like how you explain the different techniques used to achieve the look . thank you for the inspiration .
Great video and easy to follow. I’d really like to see more videos of other techniques. Thank you. Edna Burgess
Great video. I have the misti and continue to be amazed at how helpful it is.
Thank you for the nice video! Sweet card.
Great card. Love your technique videos. Would like to see some fun fold cards.
I love watching your videos!!! I am so glad you are recovered!!
Welcome back. Glad you’re recovering. A card that says I appreciate and love you can be done any time of the year, not just for Valentine’s. I look forward to your technique videos. I always learn something. This video is helping me to make a decision about the MISTI.
Thanks for sharing a sweet card.
So glad to know you are on the road to recovery! You have been missed and your video on the Misti could not have come at a better time! Mine just arrived and now I can not wait to try it out!!!?
You truly are a wonderful teacher.
So glad you are doing OK. I had major surgery in Feb. also. I love the MISTI and loved the video. Your cards are amazing – thank you so much for sharing. B