Today on the Paper Crafter’s Library blog, we’re continuing our weekly featured artist spotlight whereby each week we spotlight a different artist/designer in the paper crafting & mixed media world and introduce you to their fabulous work.
Today we’re thrilled to welcome – Jean Martin
Before we show you her fabulous projects, let’s get to know her a little bit more…
 Hi! My name is Jean Martin and I live in New York with my husband Ren and our 3 cats. I tried my hand at Scrapbooking in 2009 but did not keep at it for long. In 2010, I discovered card making and blogging. I fell in love with the craft as well as the wonderful people in blogland. I haven’t looked back since and have been very fortunate to be a part of a few amazing design teams. My style is a combination of different styles. In fact, I don’t think there’s a category for it. Lol. It’s been evolving on me ever since I started card making. Lately though, I’ve been calling my style Clean and Simple Shabby Chic. I love to stamp and make my own background papers. I also love to make layered cards. Recently, I’ve been trying out 3D projects. I’m learning and growing in this craft every single day and I hope my readers enjoy what I put out there. I was thrilled to be invited as a Featured Guest Designer here in Paper Crafters Library. I have a card and a tutorial for you today. I hope you’ll enjoy it!
Blog: http://stampin-scrapper.blogspot.com/
Card Project
I have a card for you today and I would like to take you through a small tutorial on how I create my cards. I love cards with a lot of layers and soft pretty colors. This one has a whole lot of those in store. So sit back and I hope you enjoy this.
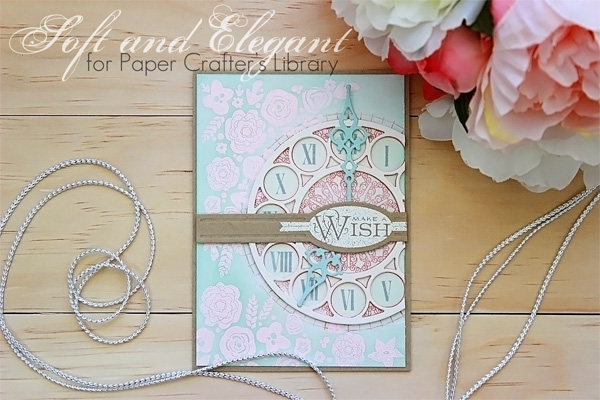
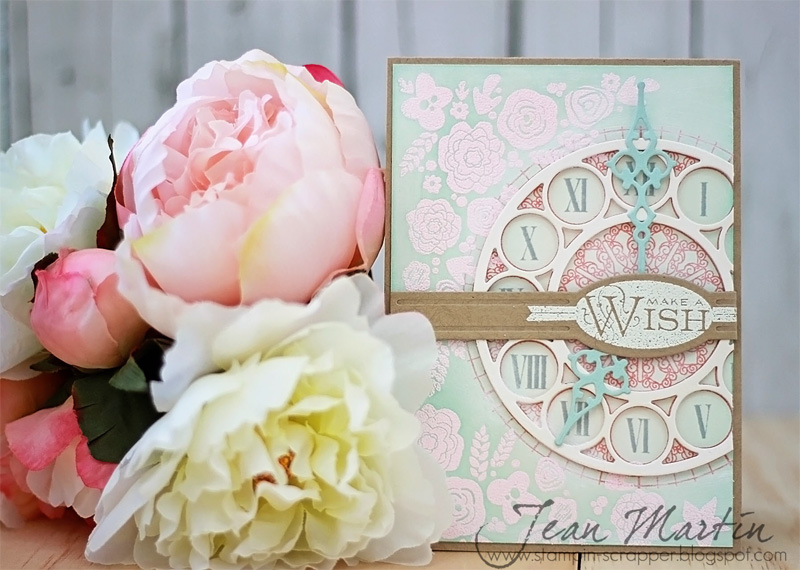
Here’s a close up of my card to give you a sense of how many layers I used and what basic steps I took to create it.
{1} Stamp floral image from PTI’s Mini Blooms Stamp Set with Versamark Ink.
{2} Heat emboss with pink embossing powder.
{3} Ink edges with Hero Arts Soft Pool Ink.
{4} Stamp the clock face image from PTI’s Hands of Time Stamp Set in Melon Berry.
{5} Stamp the numbers in Hero Arts Soft Granite. Dab some white acrylic paint around the clock face.
{6} Die cut the clock face with PTI’s Clock Face Die and attach with foam tape.
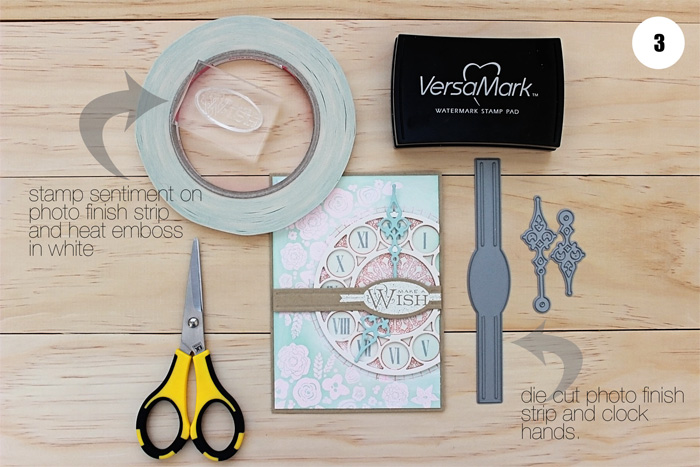
{7} Die cut the clock hands from PTI’s Hands of Time Die and the belly band from PTI’s Photofinish Strips Die Collection

{8} Stamp the sentiment Make a Wish from PTI’s Everyday Photofinishers Stamp Set in Versamark Ink and heat emboss with white embossing powder.
{9} Adhere the clock hands with some foam tape and the belly band with a strip of adhesive.
{10} Adhere the decorated panel onto main card base.
Here’s a close up of my card and all the little details in it. I know there are a lot of steps that went into making it. But in the end, I think that a card that has a lot of details and was lovingly put together will really be appreciated by its recipient.
I hope this has inspired you to try making more “layered” cards. All the effort is totally worth it in the end. Besides, it allows you to spend more crafty time in your craft room!
Supplies (All supplies are from PTI unless otherwise noted)
Cardstock – Kraft, Vintage Cream
Stamps – Mini Blooms, Hands of Time, Everyday Photofinishers
Dies – Hands of Time, Everyday Photofinishers
Inks – Berry Sorbet, Soft Pool, Soft Granite (Hero Arts Shadow Inks), Versamark
Others – pink, white embossing powder (Stampendous), white acrylic paint dabber (Ranger)
We hope you have enjoyed today’s projects courtesy of Jean Martin. Also, be sure to stop by Jean’s blog to see even more of her beautiful work (and let her know we sent you).


Love it. So delicate and refined.
Jean’s cards are works of art, I loved seeing how this came together. Just stunning!
I’d frame Jean’s card. It’s that lovely. Thanks for continuing to showcase card makers we may not have known about. I know Jean now and will be checking out her other work. I’m glad she chose to go the card making route; she’s a natural.
I have been eyeballing this clock ensemble for a while now on the PTI website. Love clocks for masculine birthdays, anniversary and retirement cards. The very feminine twist on your card is so sweet. Now I know I will be purchasing these sets. Thank you for the great card idea.
Elegant and beautiful! Love reading about you!
I love layers also and love all the different mediums used to create this beautiful card — Thank you Jean for sharing your art!!
I love your card! Colors and design are fabulous. TFS
There is a beautiful delicacy to this card. The tutorial was excellent. Thanks so much.
Wow, this is such a beautiful card. No, stunning! Thank you so much for the inspiration. Take care. 🙂
Gorgeous!!
This is such a beautiful card and fantastic tutorial!
So inspiring!
AMAZING Tutorial for your First one!! =) LOVE LOVE LOVE this card!! THANKS for sharing and have a FABULOUS WEEK!! =)