
Today on the Paper Crafter’s Library blog, we’re continuing our weekly featured artist spotlight whereby each week we spotlight a different artist/designer in the paper crafting & mixed media world and introduce you to their fabulous work.
Today we’re thrilled to welcome – Christina Maclaren
Before we show you Christina’s fabulous projects, let’s get to know her a little bit more…
 I’m a biology lab instructor and research assistant at a small college near Boston, but I’m originally from Indiana. My husband and I have two wonderful kids, ages 7 and 5, who keep us busy with sports and activities.
I’ve dabbled in various crafts since I was a young girl, from crochet to sewing and quilting, but my passion for the last 3 years has been stamping and card making. I’ve been fortunate to have several cards published in Paper Crafts magazine, and I have served on a number of design teams, including my current position with the Curtain Call Inspiration Challenge.
It’s an honor to be featured at Paper Crafter’s Library, and I hope you’ll visit me at my blog, Sea Glass Papercrafts, or follow me on Facebook for more stamping inspiration.
Projects and Instructions

I’m a stamper at heart, but when I want to add texture and dimension to my clean and simple cards, I turn to my well-loved die cut machine and collection of basic dies. Die cutting allows you to add embellishments in any color of cardstock or patterned paper to perfectly coordinate with your designs, and many stamp companies now offer inexpensive metal dies in a huge variety of shapes and styles.
Today I’m sharing 3 cards using variations of the basic die cutting technique and a simple set of cloud dies. The first uses the die cut clouds inset into a negative space. This simple technique adds a fun detail, but keeps your card flat for mailing.

First, I die cut the clouds from white cardstock and set them aside. Next, I cut the same shapes from a turquoise cardstock panel and discarded the clouds, leaving the negative spaces. For my design, I placed the cloud dies off the edge of the turquoise cardstock for added interest.
To assemble the card, I placed the white clouds into the negative spaces like puzzle pieces, popping up the clouds and turquoise panel with foam tape for added dimension.
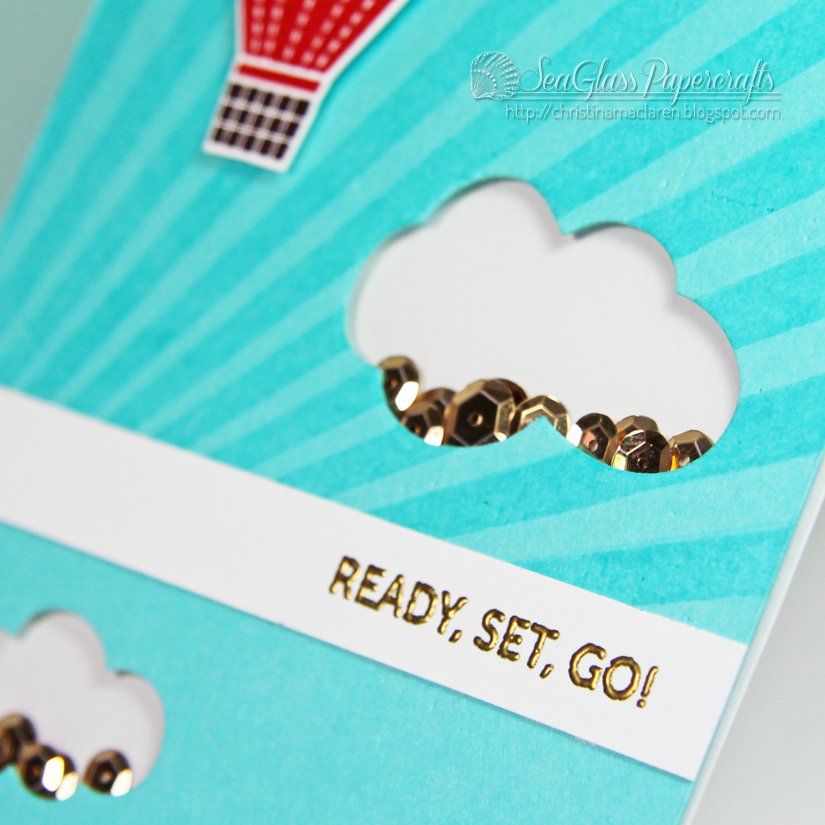
My next card shows how you can use just the negative space from a die cut as a design element. This is a technique that has become very popular, and it is one of my favorite ways to add dimension to a simple card design.

On this card, I went a step further and created a shaker card, filling the clouds with gold sequins. To do this, I die cut the clouds from a turquoise cardstock panel and attached clear acetate to the back. Next, I placed strips of foam tape all around the outside of each cloud, sprinkled gold sequins in the middle, and attached the entire panel to a white card base to encase the sequins. You could use patterned paper or any color of cardstock as a backing for a fun twist.
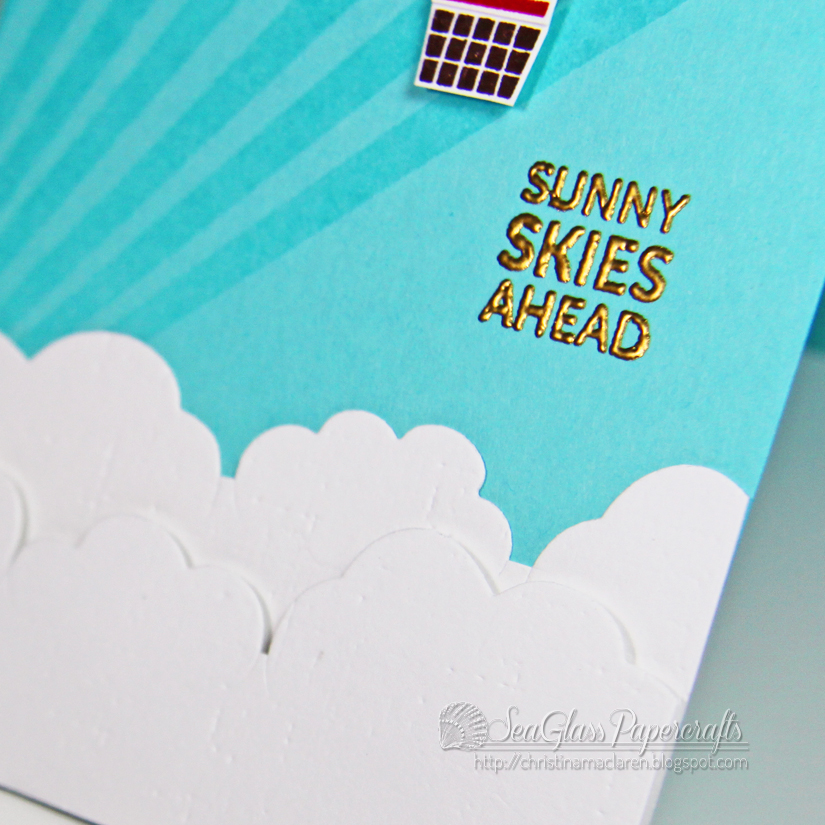
My final card shows how you can use partial die cutting to get even more use out of simple die shapes. I used the same pair of cloud dies to cut decorative borders, which I layered to create a cloudy sky.

This technique is actually very simple. The trick is to line up the cardstock and die so that part of the die lies outside of the die cut “sandwich”. When you crank the sandwich through the machine, only the portion of cardstock that is between the plates will be cut. You can then trim any small strips that remain attached to create a border.

I ran the dies through several times to create two borders, which were trimmed and layered with foam tape at the bottom of the card. I also like to add texture to the cut border with an embossing folder or impression plate to disguise the small lines left by the dies along the cut edge.
I hope these projects will inspire you to use your dies in new and creative ways!
We hope you have enjoyed today’s projects courtesy of Christina Maclaren. Also, be sure to stop by Christina’s blog to see even more of her beautiful work (and let her know we sent you).

Now there’s some completely new and entirely innovative techniques that have made for some stunning cards. I love clouds, so was thrilled just because of that. What you did with them on the cards blew me away. LOVE ’em!
How cute! Love these ideas!
Christina is such a talent! LOVE seeing the cloud dies in so many ways…very cool!
I am always so blown away by Christina’s talent!! Thanks for featuring this amazing card-maker!
Yay Christina congrats of being Guest Designer! You were the very first blog that I started following you know. Love your card and great tutorial!
I really appreciate these creative ideas! Can’t wait to try them!
Christina, thanks for sharing your incredible talent with us!
I love Christina’s work. So fun to see a tutorial from her.
Wow , love all of these Christina! Thanks for sharing how you die cut the clouds.