Today on the Paper Crafter’s Library blog, we’re continuing our all new weekly featured artist whereby each week we spotlight a different artist/designer in the paper crafting & mixed media world and introducing you to their fabulous work.
Today we’re thrilled to welcome – Andrea Ewen!
Before we show you her fabulous project, let’s get to know her a little bit more…
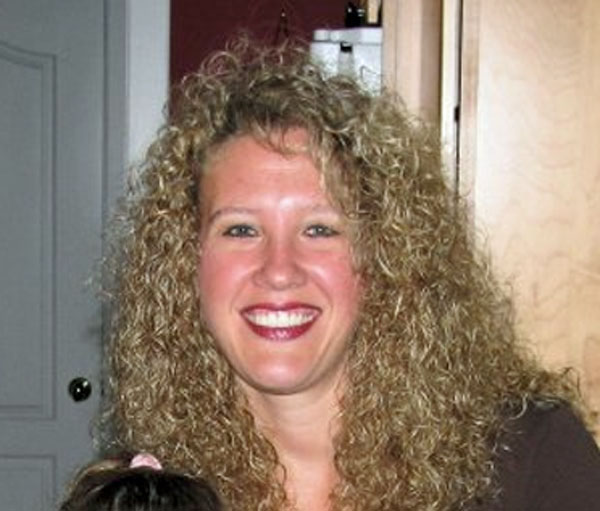 Hello crafty friends! My name is Andrea Ewen and I’ve been married to my high school sweet heart for almost 18 years (together for 27!). We have two children together, a 15 year old son and a 13 year old daughter. I live in New Jersey near the beautiful shore and work full time in a small pharmacy that is 2 blocks from the ocean. Crafting has always been a passion of mine…in high school I funded my extra curricular activities by sewing hair ‘scrunchies’ (remember those?) and making Christmas wreaths out of pinecones. One fateful day in 2002 I went to a Stampin’ Up! party and about blew my life savings on paper crafting supplies. I was so hooked! I have to say though, card making initially looked a lot easier than it was…for me. I made many ‘interesting’ cards in the following years but seemed to have found my stride 8 years later when I started my blog, EwenStyle. Maybe starting my blog gave me more confidence, or maybe more accountability, not sure…but either way I have learned immense lessons from this experience. For example, I’ve learned that there are blue-ish browns and red-ish browns. I’ve learned that more is not always better. I’ve learned that I REALLY love flowers and anything girly. And most importantly, I’ve learned that I still really have a lot to learn! I try to concentrate on absorbing as much as I can and experimenting as much as possible. I adore “paper manipulating” whether it be in the form of die cuts, border punches or flower making. I love to use lots of vintage and feminine items like ribbons, lace, pearls and flowers. My style has been evolving over the years, but I’ve seemed to have settled into the comfy chair of Vintage/Shabby Chic/Antique designs. I currently design for Verve Stamps, Zva Creative, Maja Design Vintage Papers, Paper Sweeties Stamps and 3 challenge blogs…the Ribbon Carousel, CASE Study and Vintage Card Cafe challenge.
Card Project Description:
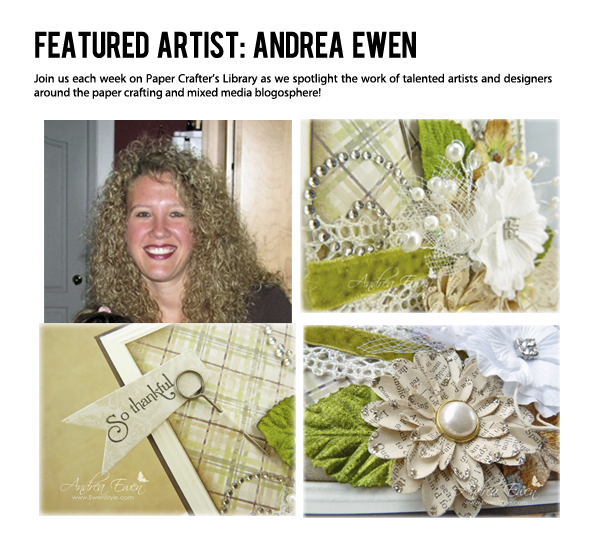
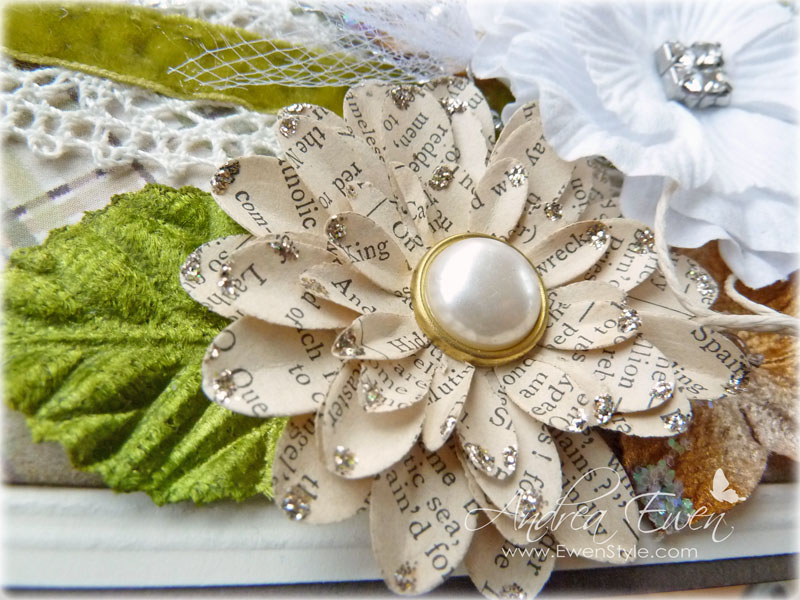
I made this card with the above mentioned girly elements. I started off by cutting a 4″ X 5 1/4″ piece of cream card stock and scoring at 1/8″ and 1/4″ around the perimeter. Next I added a panel of patterned paper and sponged the perimeter with Walnut Stain distress ink. I have a method of ‘flower stacking’ on my cards…first the crocheted ribbon is adhered. I then start off with the largest flower (the white one) and fill in around it. After white came the homemade newsprint flower, followed by the smaller velvet hydrangea petals. The leaves get tucked under {strategically} as do the pearl and tulle accents. I like to add different types of textures so in addition to the round and square flowers, I’ve added a small hemp bow and Zva Creative crystal flourishes…all tucked in at the end.
The sentiment is stamped on Verve’s ‘Flag-It’ die and attached with a Tim Holtz Memo pin. The whole card is adhered to a 4 1/4″ X 5 1/2″ base of Early Espresso card stock.
Additional Instruction:
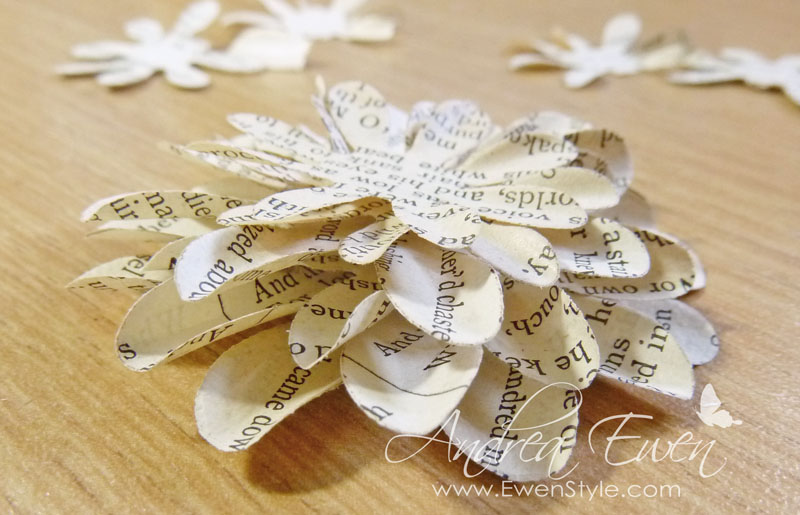
Here are some photos of the newsprint flower making method:
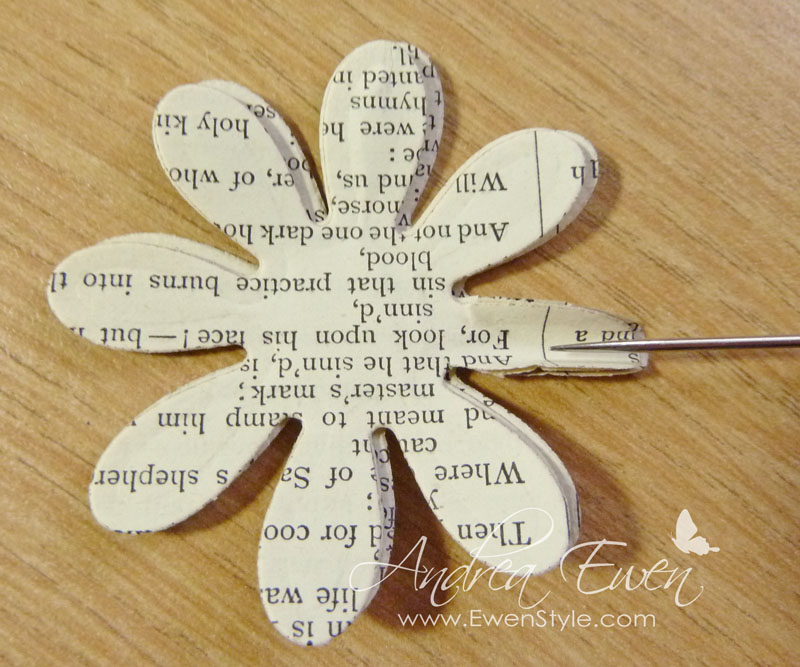
I started off with a {very} old book (so sorry, Lord Tennyson!). I ripped out 8 pages and laid them over top of 3 different size Posy dies. After running that through my Big Kick, I carefully removed them from the die, but left the pages stuck together. At this point I want to curl up the ‘petals’ so that the whole flower will have dimension.
I take a paper piercer and place the tip right in the middle of each petal, parallel to them. I then {carefully!} pull up the edges around the needle and crimp. I did this for all three sizes. I then pull apart the pages and start stacking.
Two large staggered, 2 medium staggered and two small staggered, layered but NOT glued.
Pierce a hole through the middle of the stack and add pearl brad. Lastly add a bit of Platinum Stickles to the tips and fluff. Liquid Pearls also produce a nice look.
Supply list:
Amazing Wishes stamp (Verve Stamps)
Ingefärsparon (back side) patterned paper (Maja Design)
Early Espresso, Very Vanilla card stock (Stampin’ Up!)
Cocoa dye ink (Close To My Heart)
Walnut Stain Distress ink (Ranger)
Pierott A fabric flower (Prima Marketing)
Chantilly Collection Velvet Hydrangeas-Blue (Petaloo)
Flourish Smoke-Crystal CRB-05CB-115 (Zva Creative)
Pearl stamens & Tulle/Pearl accents (Celebrate It)
Ivory Pearl Seals (Gartner Studios)
Memo Pin (Tim Holtz Idea-ology)
Flag It Die set (Verve~A Cut Above dies)
Scoring board (Martha Stewart)
Scoring tool
Paper piercer
Self-healing mat
Tacky glue (Aleene’s)
Crochet Edge/Velvet Center ribbon-Olive, Hemp (Ribbon Carousel)
Dauber
We hope you have enjoyed today’s projects courtesy of Andrea Ewen. Also, be sure to stop by Andrea’s blog to see even more of her beautiful work (and let her know we sent you).





well designed card andrea… love the color tones
Beautiful as always, Andrea!! I think you could make a case for being a very thrifty paper crafter, as well. Over time I have observed that you don’t waste much and you make the most elegant cards without resorting to the most expensive embellishments!! Ahhh… to be more like you. My DH would really appreciate it!!
You might pass along for me the fact that I always have a hard time commenting on this site because the “comment” section is so different than almost every other website. The spot to click for a comment is at the top of the article rather than the bottom and, then, when you click on the word “comment” you get nothing!! I had to click on the number of comments (in parenthesis after the word “comment”) to get to a spot where I could offer my heartfelt praises for your lovely creation. There have been times in the past where I gave up but, since it was you, I persevered!! You deserve it!!
Andrea’s artistic voice is an important one in the papercrafting community. She brings her own style and sensibility to paper and embellishments and concocts beauty. I believe she will evolve into “one of the finest.”
Andrea’s is a new name and blog to me. I enjoyed her bio and love the project, so will be checking out her blog. I really appreciate PCL sharing the spotlight with different artists. I’ve gotten to “know” many through the spotlights. I have some of those memo pins salvaged from my father’s office stash. I don’t know why it never occurred to me to use them as sentiment flags. Maybe because they’re pointy and sharp? 😉 I’ll just bury that part in the lovely paper flower.
Beautiful card. Thanks for the tutorial.
I like how you used several different colors of flowers. The light ones tone down the dark, and the dark give interest to the light.
Another of Andrea’s beautiful creations! The layered blooms, sparkle and special little sentiment banner all add up to fabulousness!
Wow, love the card. Can’t wait to try out making the flowers that way. A little bling and sparkle really make the card.
Your card is fabulous Andrea! Thanks for the tutorial, I love those flowers.
What a beautiful card. I would make this for Mother’s Day..it’s that special. Thanks for sharing.
It’s a beautiful card!! I love the flowers, especially the homemade flower. Thanks for sharing.
What a gorgeous card. Your style is so beautiful and thanks so much for the tutorial on how you made it. Great job.