What an awesome year 2015 was! And after all the good things and a few not so good things, I get to do the 2015 round up of paper crafting awesomeness we all experienced and participated in this year.
This is a pretty daunting job. I have never been one to be brief when I could include everything. There are so many fun trends that began this year and some that have resurged from the past or spilled over from last year.
As a disclaimer I often get the pull back from my husband when we have a party. I always want to do something special and have signature dishes that I know will appeal to my friends and family. That means that we have tables full of food that everyone can’t possible eat in one day. But I love to show the people I love how much I care.
I’d like to show you how much it has meant to me to be on the the Trendy Tuesday reporter team for over a year now. I have loved that it was my ‘job’ to troll Pinterest and find cool things to share with you. I appreciate the comments you have left me and your patience as I break out yet another bad pun. You all have been wonderful. So as my Christmas gift to you, enjoy the awesomeness that 2015 brought to us!
The trends I thought were the most fun or intriguing this year are: Layered Flowers, Planners, DIY Backgrounds, Foiling, Food Treats, Tags, Die Cuts, Messy Watercolor, Wreaths, and Coffee. Not in any particular order
Now most normal people would showcase a few cards from each of these areas. But I though it might be fun to show cards that combine a few or multiple techniques and trends in one card. This is part of the over the top thing I can’t help but do but hey, it is fun! So here we go.
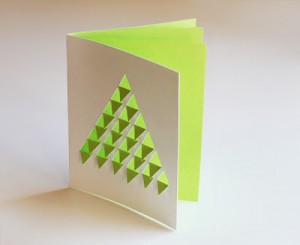
The first card is just so awesome. I love it in so many ways. Die cuts just went crazy this year. If you could die cut it, there was a die for that. From image dies, to word dies to cover dies, we saw so many fun things that give paper crafts such a nice finished look. Look at the effect Amy gets by die cutting the balloon image multiple times and using it as background. Seriously cool. And she used the word die and distress inks to give herself the perfect color for her message. The combination is very striking.

card by Amy Rysavy photo courtesy of Prairie Paper and Ink
While I didn’t note it in this article, have you all noticed the white on white background trend with die cuts? It looks so swank. Yoonsun also layered several hello die cuts together in several colors to make the sentiment pop.

card by Yoonsun Hur photo courtesy of Rejoicing Crafts
Tags were super hot this year. And when coupled with a steamy hot cup o’ joe you have one smoking hot paper craft. This one is adorable.

tag by Erin photo courtesy of Homemade Cards by Erin
We saw several wreaths this year as well. There are great stamping techniques you can use to create your own wreath as well. I love the open look of this wreath. And also check out the background color that Maria created to finish this cool wreath off.

card by Maria F. photo courtesy of Rieslingmama
The background on Isha’s card is simply stunning! I love the shiny goodness and the texture that the paste provides. I love the big script die cut word too.
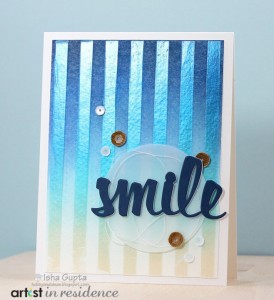
card by Isha Gupta photo courtesy of Imagine Crafts
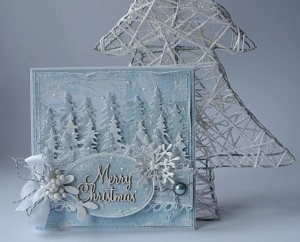
So this card combines awesome foiling and a trendy wreath. I saw so much foiling this year but didn’t quite get around to getting a machine. I know there are several ways to achieve the foil look too. So many techniques, not enough time. The contrast that Heather gets between the white and the silver is very classy.

card by Heather Pulvirenti photo courtesy of Witty Title Here
I love the idea of just taking a blank page and using several techniques and coming up with something that is as awesome as this. Wow. This card has it all: messy watercolor, repeat stamping and if you look closely, you can see the word joy sticking out in the middle. Super clever and very beautiful.

card by Isha Gupta photo courtesy of New Ideas by Isha Gupta
In my mind, alcohol counts as a treat. Am I wrong? I chose this card to inspire you for the new year and its super saturated gold foil color. Also it is a treat I hope you will enjoy at the end of the month.

card by Rachel Tessman photo courtesy of Stamp Your Art Out
Cupcakes are definitely a treat and I just love this tag. Combined with the scripty happy lettering, it fits several of our trends for the year.
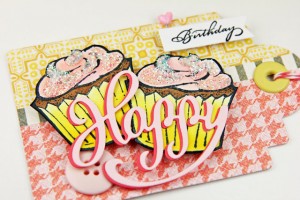
tag by Jeanne Jachna photo courtesy of A Kept Life
Again, I like the wine treats too. Plus anything that makes you giggle is just a good idea. This chicken is so cute and I love the expression. This tag would be the perfect accessory for a hostess gift over the holidays.
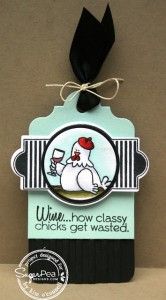
tag by Kim O’Connell photo courtesy of Paper Perfect Designs
I’m in love with shaped cards too and I like the variety of having a wreath actually on a door. The punched leaves are so pretty and petite. Super cute.
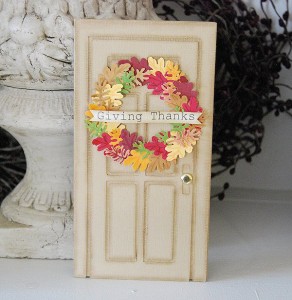
card by Kristen Swan photo courtesy of Creative Me Inspired You
Have you purchased any of the flower sets where you build a stamped flower with shading and contrast and everything just by stamping a different image? They are so lovely and the cards they make look like art. Check out this beautiful one from Iwona.
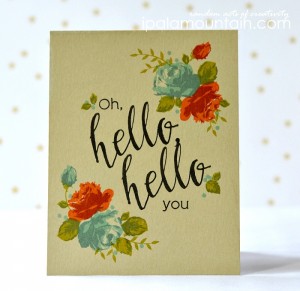
card by Iwona Palamountain photo courtesy of Random Acts of Creativity
Do you see what I mean? This is art! How gorgeous is this wedding card from Laura. It looks like wrapping paper. The colors are perfect too.

card by Laura Jane photo courtesy of After Hours Ink and Flowers
So if I count alcohol as a treat, do I have to count coffee too? I’m not a coffee drinker but it seems like the world has discovered that it is not only delicious to smell and drink but it is great to craft with. There are several stamp sets with coffee cups and punny little expressions. This one combines a sweet treat with the famous brew.
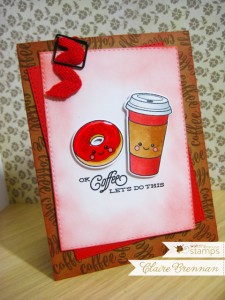
card by Claire Brennan photo courtesy of Waltzing Mouse Makes: Hope it Tickles
I am not quite organized enough to have a planner but I can appreciate how pretty they look. There are several stamps you can buy and systems that you can use. I also appreciate people who get in there and make something that works for them. WaiSam made her own tabs and if you use the link below she has a how to.

journal tabs by WaiSam photo courtesy of Happie Scrappie
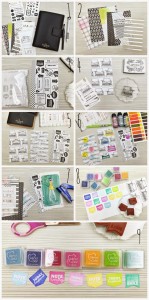
journal tabs by WaiSam photo courtesy of Happie Scrappie
Jennifer is partial to her favorite journaling system but look how completely she can transform a page with stickers and washi tape and the cutest bow clip ever.
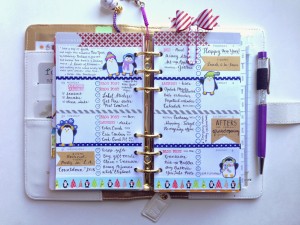
journal page by Jennifer photo courtesy of My Purpley Life
Are you still crushing on donuts? I kind of want one right now. Plus they are just ripe for a pun which I am always interested in hearing. This one is as delicious as it is punny.

card by Amy Sheffer photo courtesy of Pickled Paper Designs
I am still in love with the shaker but I included this beautiful tag because of the wreath, ever so pretty, and because it is a tag. I am not sure if I’d want to give this one away.

tag by Jocelyn Olson photo courtesy of Red Balloon Cards
So I know I have shown you a lot and I appreciate your patience. Do you have a favorite of the trends for this year? Are there any you think I have missed?
I would like to wish you and yours the happiest of holiday seasons and a bright, brand new year.
I hope you craft a great one. So go ahead… make something pretty.